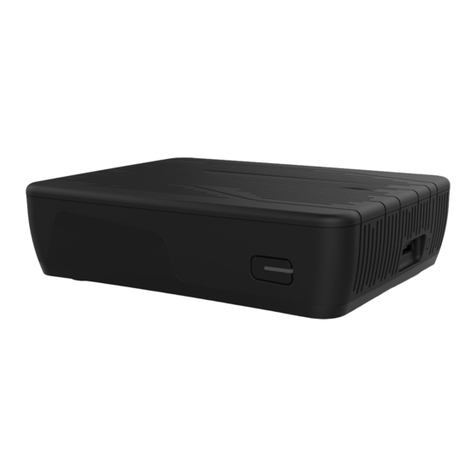
Allbox Lucky User manual

www.allbox.com.tr
Satellite Receiver & IPTV Box

E
N
G
L
I
S
H
2www.allbox.com.tr
TABLE OF CONTENTS
Safety Instructions .......................................................................................................................... 3
Remote Control Unit.........................................................................................................................4
Installation........................................................................................................................................... 5
1.1 Antenna setting......................................................................................................................6
1.2 Satellite list .............................................................................................................................6
1.3 Transponder list......................................................................................................................7
1.4 Motor Setting ..........................................................................................................................7
1.5 Limit Setup ...............................................................................................................................7
Channel..................................................................................................................................................8
2.1 Channel Manager..................................................................................................................8
2.2 Favorite List............................................................................................................................ 9
Setting ...................................................................................................................................................9
3.1 System Setting......................................................................................................................9
3.2 OSD Setting........................................................................................................................... 9
3.3 Child Lock.................................................................................................................................9
3.4 Timers...................................................................................................................................... 10
3.5 PVR Config............................................................................................................................. 10
3.6 Version .................................................................................................................................... 10
3.7 Remote control.................................................................................................................... 10
Network ............................................................................................................................................... 10
4.1 Vanllia Activation................................................................................................................. 10
4.2 Ethernet Config.................................................................................................................... 11
4.3 CA Menu..................................................................................................................................12
4.4 Patch Menu............................................................................................................................12
4.5 Server Setting......................................................................................................................12
4.6 Upgrade...................................................................................................................................12
4.7 Factory Reset ........................................................................................................................12
Multimedia ..........................................................................................................................................13
5.1 Network Apps........................................................................................................................ 13
5.2 Movie........................................................................................................................................ 14
5.3 Music........................................................................................................................................ 14
5.4 Photo ....................................................................................................................................... 14
5.5 Record Manager.................................................................................................................. 14
5.6 EBook....................................................................................................................................... 14
5.7 Game ........................................................................................................................................ 14
5.8 Disk Manager ....................................................................................................................... 14
Game......................................................................................................................................................15
Specification.......................................................................................................................................16

E
N
G
L
I
S
H
3
www.allbox.com.tr
Safety Instructions
This STB has been manufactured to satisfy the international safety standards.
Please read the following safety precautions carefully.
1.MAIN SUPPLY
AC 100-240V, 50/60Hz, 25W.
2.OVERLOADING
Do not overload a wall outlet, extension cord or adapter as this may result in
fire or electric shock.
Ensure that the power source (socket) is easily accessible.
3.CLEANING
Disconnect the STB from the main supply before cleaning. Do not use any kind
of solvents to clean the STB, only use a soft-dry cloth.
4.VENTILATION
Ensure a minimum distance of 5cm around the apparatus for sufficient
ventilation.
Ensure that the ventilation is not impeded by covering the ventilation openings
with items such as newspapers, table-cloths, curtains, etc.
Do not stand the STB on soft furnishings or carpets.
5.ATTACHMENTS
Do not use any un-recommended attachments as these may cause hazard or
damage to the STB.
6.CONNECTION TO THE SATELLITE DISH LNB
Disconnect the STB from the main supply before connecting or disconnecting
the cable from the satellite dish.
FAILURE TO DO SO CAN DAMAGE THE LNB.
7.CONNECTION TO THE TV
Disconnect the STB from the main supply before connecting or disconnecting
the cable from TV.
FAILURE TO DO SO CAN DAMAGE THE TV.
8.EARTHING
The LNB cable MUST BE EARTHED to the system earth for the satellite dish.
9.LOCATION
Place the STB indoor in order not to expose to lightening rain or Sunlight.
Use the apparatus only in moderate climates (not in tropical climates).
10.Battery handling
Batteries may contain toxic agents that are hazardous to the environment.
Therefore, dispose of the batteries immediately according to the prevailing
statutory regulations. Never throw the batteries in normal household waste.

E
N
G
L
I
S
H
4www.allbox.com.tr
Remote Control Unit

E
N
G
L
I
S
H
5
www.allbox.com.tr
Power Power ON/OFF the receiver.
Mute Turns sound on or off.
0-9 Choose a channel directly.
TV/RA Switch between TV and Radio mode.
INFO Show information about the current program.
Up/Down Switch program or to move the cursor in a menu.
Left/Right Change the volume or to change an option in a menu.
P +/- Page up、Page down
VOL +/- Increases or decreases volume.
OK Show channel list and to select an item.
MENU To display the main menu.
EXIT Escape from present menu.
TXT Show Teletext.
SUBT Display the subtitle.
EPG Display the Electronic Program Guide.
AUDIO Choose soundtrack,audio format and audio language.
USB Display the Device list
FILM Enter Multimedia.
RECALL To return to the previous channel or station.
FAV Display the favorites list and to select a favorite.
SAT Display satellite list.
IPTV To IPTV.
DREAM To DreamTv.
Back forward/Fast forward.
Previous/Next.
To record.
Playing or Pause.
To nd.
To stop.
Installation
Plug in the STB. Press “Menu” button, the Main Menu will appear as shown in the
picture on the following. The Main Menu displays various functions of the STB or you
can select with “ ” buttons on the remote control. To proceed to the next stage,
press “OK” button on the remote control.
Place the cursor at “Installation” item, Press “ ” to select menu items among
Antenna Setting, Satellite List, Transponder List, Motor Setting, Limit Setting, then
press “OK” button to enter the selected item, then input password you set (The
initial password is “0000”).

E
N
G
L
I
S
H
6www.allbox.com.tr
1.1 Antenna setting
After entering “Antenna Setting”,
the menu will appear as shown in
the picture like beside.
You can set all the figures such as
Satellite; LNB type; LNB Frequency,
22KHz; LNB Power; Tone Burst
Mode; DiSEqC Mode and so on.
Then press “Blue” button to start
scanning.
1.2 Satellite list
When you enter “Satellite List” menu
,you will see the picture like beside.
In this menu, you can scan, edit, delete
the satellite you selected, and add a
satellite by using different color buttons.
Also you can press INFO button to jump
to “Antenna Setting” window.
1.3 Transponder list

E
N
G
L
I
S
H
7
www.allbox.com.tr
When you enter “Transponder List”
menu you can see a window like the
one beside:
Press different buttons to add-
delete-edit and scan transponder.
1.4 Motor Setting
To set up the auto Satellite Dish and
generate the positioned system.
Select USALS or DiSEqC1.2 by Motor
Setting.
1.4.1 USALS Setup
To set up the USALS system onto
your STB.
If you have a USALS motorized
system, you must set your position
(latitude and
longitude) in order to calculate
all motor positions for viewable
satellites. You should refer to the
motor’s manual.
1.4.2 DiSEqC1.2
Set motor setting as DiSEqC1.2 by
left or right buttons. If you have a
DiSEqC1.2 device, please connect it
with your STB, then enter this menu
to set your position.
1.5 Limit Setup
To set up your motor.
Channel

E
N
G
L
I
S
H
8www.allbox.com.tr
After entering channel mane, you
can see the window like beside.
In this menu you can select menu
items among channel manager,
favorite list, and delete all channels
by up/down buttons, then press
“OK” button to enter.
2.1 Channel Manager
You can easily access to any
TV and Radio programs by the
variable functions available from
this STB, and enjoy your digital
entertainment TV fun.
1. SAT: Pres “SAT” button to select
a satellite, and the channels
belong with the sat will be filtered.
The default channel list is a list of
all satellites channel.
2. Lock: Press “Red” button to
lock or unlock(if it has locked) the
channel. If you want to watch a
channel that is locked, you need
input password first.
3. Move: Press “Yellow” button
to move a channel to another
position.
4. Delete: Press “Green” button to
delete a channel.
5. Edit: Press “Blue” button then a
new window pop up, here you can
sort the channel list, find channels,
skip a channel and rename the
channel name.
2.2 Favorite List

E
N
G
L
I
S
H
9
www.allbox.com.tr
The favorite list menu is like beside.
You can add your favorite channel
to the favorite list. Here are total
8 groups Favorite list, and you can
press “Red” button to edit Favor
name.
Set Favorite
Press “1-8” number button to set
Favor to FAV1-FAV2-etc...
Select FAV group
Press the “Blue” button on remote
control to change the FAV group.
Setting
When you enter “Setting” menu,
a window like the one beside will
be opened. In this menu, you can
select menu items among System
Setting, OSD Setting, Child Lock,
Times, PVR Config, Version, Ts
Delay ,Remote control. Press “OK”
button to enter.
3.1 System Setting
To set OSD Language, OSD
Transparency, 1st and 2nd
Preferred subtitle Language, Hard
hearing, 1st and 2nd Preferred
Audio Language, Auto Standby,
Info Bar Display Time.
3.2 OSD Setting

E
N
G
L
I
S
H
10 www.allbox.com.tr
To set the basic specifications of your STB.
3.3 Child Lock
Type the initial password to set your own code.
System Lock:
On: Need password to enter some menu.
Off: Don’t need password
Parental Rating: Lock a channel according to rating
Change Pin Code: You can also change the password by numeric key.
3.4 Timers
From 1 to 9, you can set total 27 different Timers.
3.5 PVR Config
To set PVR file format and file size. Select on of the timeshift ring buffer and
chose the percent of the ring buffer size, you can burn another program which
is not broadcasting for watching later.
3.6 Version
To view the software version and release time of this STB.
3.7 Remote control
On the android mobile phone to install a software, then you can use mobile
remote control STB, its function is as a remote control unit.
Network
When you enter “Network” menu,
a window like the one beside will
be opened. In this menu, you can
select menu items among Vanllia,
1Ethernet Config,, CA Menu, Path
Menu, Server Setting, Upgrade ,
Factory Reset . Press “OK” button
to enter.
4.1 Vanllia Activation
To active vanllia server.
4.2 Ethernet Config

E
N
G
L
I
S
H
11
www.allbox.com.tr
To select the type of link: Wire Network, Wifi Network and 3G Network.
Wire Network: Connect your STB with the Internet-Router via the Ethernet
Cable(RJ45).
The STB will automatically get IP address, so it will automatically connect to
the network.
If you want to config your STB IP address, please move the cursor to “config”
item, press “OK” to enter.
wifi Network: Insert a USB wifi. “Link Type” change to “Wifi Network”, enter
“Config” menu to set your wifi network. Select “Auto link”, STB will automatically
connect to the Internet when STB power on.
3G Network: Insert your 3G dongle. “Link Type” change to “3G Network”. Enter

E
N
G
L
I
S
H
12 www.allbox.com.tr
“Config” menu to set proper Mode, Area, Operator, APN, then press “Blue”
button to link.
Select “Auto link” ,STB will automatically connect to the Internet when you
turn on the STB every time.
4.3
CA Menu
To show ca info menu.
4.4 Patch Menu
To show patch menu.
4.5 Server Setting
To set server.
4.6 Upgrade
4.6.1 USB Upgrade
Insert your USB then select your software to upgrade.
4.6.2 Net Upgrade
Upgrade your software from FTP server.
4.6.3 DB Upgrade
Insert your USB then upgrade&save your database.
4.6.4 Key Upgrade
Insert your USB then select your key file to upgrade.
4.6.5 Server Upgrade
Insert your USB then upgrade&save your servers.
4.6.6 Read CCcam.cfg From USB
Insert your USB then select your *.cfg file to upgrade.
4.6.7 Read Newcamd.cfg From USB
Insert your USB then select your *.cfg file to upgrade.
4.7 Factory Reset
Restore STB to default.

E
N
G
L
I
S
H
13
www.allbox.com.tr
Multimedia
When you enter to “Multimedia”
menu , you will see a window like
beside.
5.1 Network Apps
When you enter to “Network Apps”
menu, you will see a window like
beside.
To enjoy the function on the
Internet to watch Youtube-
DreamTv-IPTV-VOD and TREAM-play
games, scan photo and DLNA.
5.1.1 FREE IPTV
Select the IPTV,Press ok button
to enter the IPTV directly. After
entering the IPTV will load the
program list. Press ok key, the
upper left small window will
broadcast the currently selected
program. Then press FAV will full
screen broadcast the program.
5.1.2 XTREAM
Select the XTREAM,Press red button to Login the XTREAM,In login menu you can
input the URL,Port,User Name and Password,also you can load the Account with
USB.

E
N
G
L
I
S
H
14 www.allbox.com.tr
5.1.3 YouTube
YouTube is the world's largest
video Website.Select the YouTube,
Press ok button to enter the
YouTube directly Classification list
is on the left, list on the right is
the video program, press OK key
to normal play.
5.1.4 dlna
Is the full name of DLNA DIGITAL
LIVING NETWORK ALLIANCE
(DIGITAL LIVING NETWORK
ALLIANCE), its purpose is to Enjoy
your music, photos and videos,
anywhere anytime.It contains
the DMP, DMR, DMS.
5.2 Movie
Play the movie file that locate in USB device.
5.3 Music
Play the ISO file that locate in USB device.
5.4 Photo
Copy the Photo from Internet and display it on the screen from USB device.
5.5 Record Manager
To play recorded video, also you can manage these files like delete or rename.
5.6 EBook
Copy the ebook from Internet and read it on the screen.
5.7 Game
The receiver only supports the format for the game of SMF suffix.
You can download the game from the site:http://www.native32.com/ by your
computer and copy it to USB device then insert the USB device to your receive
to play.
5.8 Disk Manager
To manage your files,you can move or copy the file, change file format, check
device information.

E
N
G
L
I
S
H
15
www.allbox.com.tr
Game
When you enter to “Game” menu, you will see a window like beside.

E
N
G
L
I
S
H
16 www.allbox.com.tr
Specification
Item Specification
Tuner
Frequency Range 950MHz to 2150MHz
Input Impedance 75Ohms unbalanced
Signal Input Level -65 ~ -25dBm
Symbol Rate 2-45Mbps
LNB Power 13/18V,Max 350mA
Demodulation Demodulator QPSK/8PSK
FEC 1/2,2/3,3/4,5/6,7/8,8/9,9/10
Connections
LNB IN F connector
LAN Used to connect the network
USB USB 2.0
RS232 For data transport
DV_OUT Connects to DV_OUT in device.
AV4 CVBS, AUDIO L/R, SPDIF
Power Input AC100-240V ~ 50/60Hz
Consumption Max 18W
Display
Resolution 720X576(PAL),720X480(NTSC),720P,
480i, 480P,576i,576P,1080i ,1080P
Decoder Module PAL,NTSC
Aspect Rate 4:3(Letterbox, Pan& Scan)16:9
MPEG4 AVC/H.264 HP@L4
Audio MPEG2 Audio Layer I&II
Others Compliance ETSI/EN 300421 DVB-S compliant
Sound Mode Right, Left, Stereo

Benutzerhandbuch

18 www.allbox.com.tr
D
E
U
T
S
C
H
INHALTSVERZEICHNIS
Sicherheitsanleitungen................................................................................................................ 19
Fernbedienung..................................................................................................................................20
Aufstellung..........................................................................................................................................21
1.1 Antenneneinstellungen.....................................................................................................22
1.2 SAT-Liste.................................................................................................................................22
1.3 Transponderliste..................................................................................................................23
1.4 Motor Einstellungen.........................................................................................................23
1.5 Limiteinstellungen..............................................................................................................23
Kanalbearbeitung............................................................................................................................24
2.1 Channel-Manager............................................................................................................... 24
2.2 Favoritenliste .......................................................................................................................25
Einstellungen.....................................................................................................................................25
3.1 Systemeinstellungen ........................................................................................................25
3.2 OSD Einstellungen ........................................................................................................... 26
3.3 Kindersicherung..................................................................................................................26
3.4 Timer........................................................................................................................................26
3.5 PVR-Konfiguration..............................................................................................................26
3.6 Versiyon..................................................................................................................................26
3.7 Smart-Remote. ....................................................................................................................26
Netzwerkeinstellungen .................................................................................................................26
4.1 Vanllia Aktivation ................................................................................................................26
4.2 Ethernet-Konfiguration ...................................................................................................27
4.3 Kartenmenü......................................................................................................................... 28
4.4 Patch-Menü ......................................................................................................................... 28
4.5 Server Einstellungen ....................................................................................................... 28
4.6 Aktualisierung..................................................................................................................... 28
4.7 Werkseinstellungen...........................................................................................................29
Multimedia .........................................................................................................................................29
5.1 Netzwerkanwendungen ...................................................................................................29
5.2 Film .......................................................................................................................................... 30
5.3 Musik....................................................................................................................................... 30
5.4 Fotos....................................................................................................................................... 30
5.5 Aufzeichungsmanager .................................................................................................... 30
5.6 E Book..................................................................................................................................... 30
5.7 Spiele ...................................................................................................................................... 30
5.8 Festplattenmanager......................................................................................................... 31
Spiele.....................................................................................................................................................31
Spezifikation......................................................................................................................................32

19
www.allbox.com.tr
D
E
U
T
S
C
H
Sicherheitsanleitungen
Dieser STB wurde nach internationalen Sicherheitsstandards hergestellt.
Bitte lesen Sie die folgenden Sicherheitsvorkehrungen sorgfältig durch.
1. HAUPTANWEISUNGEN
AC 100-240V, 50/60Hz, 25W.
2. ÜBERLASTUNG
Wenn Sie das Netzkabel eingesteckt lassen, kann dies einen Brand oder Stromschlag
verursachen. Überlasten Sie das Verlängerungskabel oder den Adapter nicht.
Stellen Sie sicher, dass das Netzteil (Steckdose) leicht zugänglich ist.
3. REINIGUNG
Trennen Sie die Settopbox vor der Reinigung vom Stromnetz. Verwenden Sie
zum Reinigen der Settopbox kein Lösungsmittel, sondern nur ein weiches
trockenes Tuch.
4. BELÜFTUNG
Stellen Sie für eine ausreichende Belüftung sicher, dass sich um das Gerät ein
Mindestabstand von 5 cm befindet.
Stellen Sie sicher, dass die Lüftungsöffnungen nicht durch Gegenstände wie
Zeitungen, Zeitschriften, Tischdecken, Vorhänge usw. blockiert werden. Stellen
Sie die Settopbox nicht auf weiche Möbel oder Teppiche.
5. ZUBEHÖR
Verwenden Sie kein Zubehör, die nicht empfohlen werden. Diese können die
Settopbox beschädigen.
6. SATELLITENSCHÜSSEL-LNB-ANSCHLUSS
Trennen Sie die Settopbox vom Stromnetz, bevor Sie das Kabel an die
Satellitenschüssel anschließen oder das Kabel abziehen.
ANDERNFALLS KANN DER LNB BESCHÄDIGT WERDEN.
7. TV-ANSCHLUSS
Trennen Sie die Settopbox vom Stromnetz, bevor Sie das Kabel an den TV
anschließen oder das Kabel abziehen.
ANDERFALLS KANN DER FERNSEHER BESCHÄDIGT WERDEN.
8. ERDUNG
Das LNB-Kabel für die Satellitenschüssel muss geerdet sein.
9. STANDORT
Stellen Sie die Settopbox in geschlossenen Räumen auf, um Blitzschlag, Regen
oder Sonnenlicht zu vermeiden.
Verwenden Sie das Gerät nur in gemäßigten Klimazonen (nicht in tropischen
Klimazonen).
10. Batterieverbrauch
Batterien können giftige Substanzen enthalten, die die Umwelt schädigen.
Entsorgen Sie Batterien daher unverzüglich gemäß den geltenden gesetzlichen
Bestimmungen. Entsorgen Sie Batterien niemals im normalen Hausmüll.

20 www.allbox.com.tr
D
E
U
T
S
C
H
Fernbedienung
Table of contents
Languages:
