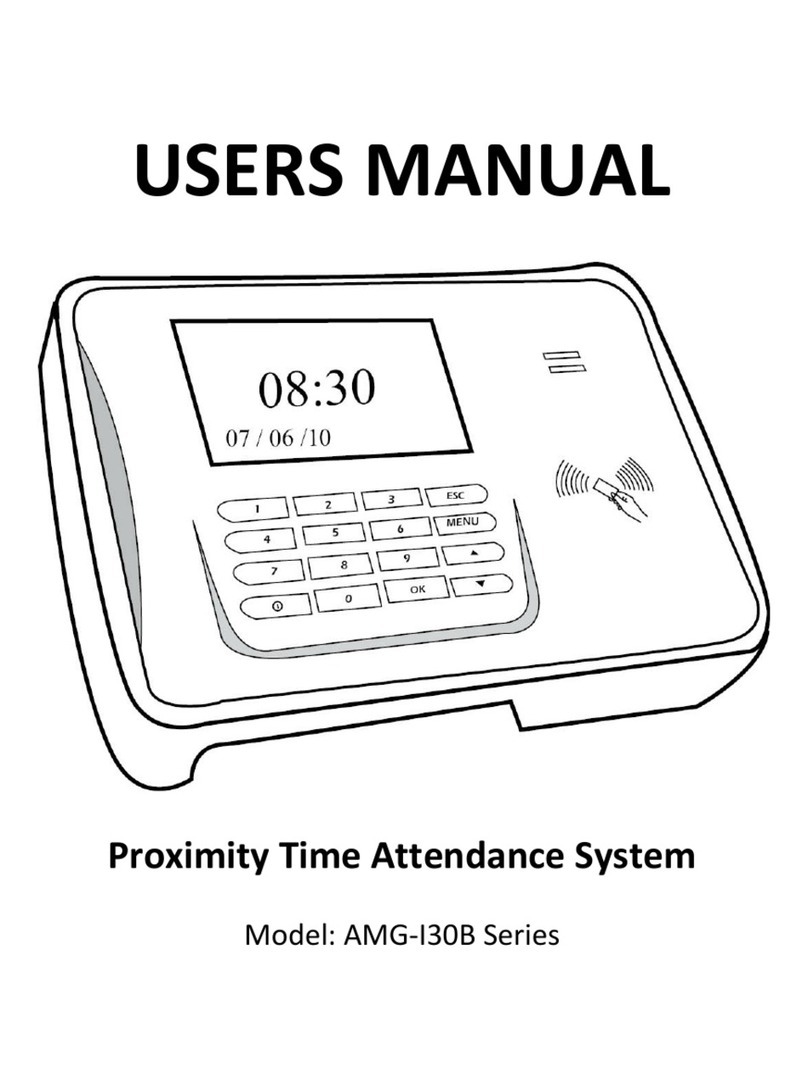
Allday Time Systems AD-200N User manual

2
Table of Contents
Setting the year.........................................................................................
3
Setting the date........................................................................................
3
Setting the time........................................................................................
3
Setting the day change time......................................................................
4
Setting the print position............................................................................
4
Setting the auto detect feature for monthly cards.........................................
5
Setting the hour mode (12/24hr)................................................................
5
Setting the card format..............................................................................
5
Setting the daylight saving time..................................................................
6
Setting the print format..............................................................................
Setting the pay period end date..................................................................
6
7
Setting the print colour..............................................................................
7
Setting the music output............................................................................
7
Setting the auto column shift.....................................................................
8
Important information...............................................................................
9
Clock specifications...................................................................................
9

3
Open the lid and move the ‘Setup’ button to the left to enter the setting mode.
1. SETTING THE YEAR
(1) Move the setting button to the left to enter the setting
mode. Press the +/-buttons to choose setting number 01.
(2) Press the ENTER button to enter the year setting.
(3) Press the +/-buttons to select the correct year.
(4) Press the ENTER button to confirm the setting and the
setting number will change to setting 02.
(5) Slide the setting button to the right to complete the
setting.
2. SETTING THE DATE
(1) Move the setting button to the left to enter the setting
mode. Press the +/-buttons to choose setting number
02.
(2) Press the ENTER button to enter the date setting.
(3) Press the +/-buttons to select the correct month.
(4) Press the ENTER button to confirm the setting.
(5) Press the +/-buttons to select the correct day.
(6) Press the ENTER button to confirm the setting and the
setting number will change to setting 03.
(7) Slide the setting button to the right to complete the
setting.
3. SETTING THE TIME
(1) Move the setting button to the left to enter the setting
mode. Press the +/-buttons to choose setting number 03.
(2) Press the ENTER button to enter the time setting.
(3) Press the +/-buttons to select the correct hour.
(4) Press the ENTER button to confirm the setting.
(5) Press the +/-buttons to select the correct minute.
(6) Press the ENTER button to confirm the setting and the
setting number will change to setting 04.
(7) Slide the setting button to the right to complete the
setting.

4
4. SETTING THE DAY CHANGE TIME
*This is the time the clock will change to the next day and hence print on the next line of
the card.
(1) Move the setting button to the left to enter the setting mode.
Press the +/-buttons to choose setting number 04.
(2) Press the ENTER button to enter the setting.
(3) Press the +/-buttons to select the correct hour.
(4) Press the ENTER button to confirm the setting.
(5) Press the +/-buttons to select the correct minute.
(6) Press the ENTER button to confirm the setting and the
setting number will change to setting 05.
(7) Slide the setting button to the right to complete the setting.
5. SETTING THE PRINT POSITION
(1) Move the setting button to the left to enter the setting mode.
Press the +/-buttons to choose setting number 05.
(2) Press the ENTER button to enter the setting.
(3) Press the +/-buttons to select the desired vertical print
position. The number range is between 00 and 15.
NOTE: 00 will print at the highest position.
15 will print at the lowest position.
(4) Press the ENTER button to confirm the setting.
(5) Press the +/-buttons to select the desired horizontal print
position. The number range is between 00 and 30.
NOTE: 00 will print at the leftmost position.
30 will print at the rightmost position.
(6) Press the ENTER button to enter the setting.
(7) Press the +/-buttons to select the desired print size.
The number range is between 00 and 07. The default setting is 03.
NOTE: 00 will print at the smallest size.
07 will print at the largest size.
(8) Press the ENTER button to confirm the setting and the setting number
will change to setting 06.
(9) Slide the setting button to the right to complete the setting.

5
6. SETTING THE AUTO DETECT FEATURE FOR MONTHLY TIME CARDS
(1) Move the setting button to the left to enter the setting mode. Press the +/-buttons
to choose setting number 06.
(2) Press the ENTER button to enter the setting.
(3) Press the +/-buttons to select 00 or 01.
NOTE: 00 sets the machine to auto-detect the card side.
01 turns auto card side detection off.
(4) Press the ENTER button to confirm the setting and the
setting number will change to setting 07.
(5) Slide the setting button to the right to complete the setting.
7. SETTING THE HOUR MODE (12/24HR)
(1) Move the setting button to the left to enter the setting mode. Press the +/-buttons
to choose setting number 07.
(2) Press the ENTER button to enter the setting.
(3) Press the +/-buttons to select either the 12 or 24 hour
time format.
NOTE: 12 hour would display 3.30pm as 3.30.
24 hour would display 3.30pm as 15.30.
(4) Press the ENTER button to confirm the setting and the
setting number will change to setting 08.
(5) Slide the setting button to the right to complete the
setting.
8. SETTING THE CARD FORMAT
(1) Move the setting button to the left to enter the setting mode.
Press the +/-buttons to choose setting number 08.
(2) Press the ENTER button to enter the setting.
(3) Press the +/-buttons to select 00 or 01.
HINT: 00 is when the 1st row is blank/empty on the time
card (standard).
01 is when the 16th row is blank/empty on the time
card.
(4) Press the ENTER button to confirm the setting and the setting
number will change to setting 09.
(5) Slide the setting button to the right to complete the setting.

6
9. SETTING THE DAYLIGHT SAVING TIME
(1) Move the setting button to the left to enter the setting mode.
Press the +/-buttons to choose setting number 09.
(2) Press the ENTER button to enter the setting.
(3) Press the +/-buttons to select the beginning month followed by
the ENTER button to confirm the setting.
(4) Press the +/-buttons to select the beginning day followed by the
ENTER button to confirm the setting.
(5) Press the +/-buttons to select the beginning hour followed by
the ENTER button to confirm the setting.
(6) Now the machine will switch to the second daylight change of the
year.
(7) Press the +/-buttons to select the ending month followed by the ENTER button to
confirm the setting.
(8) Press the +/-buttons to select the ending day followed by the ENTER button to
confirm the setting.
(9) Press the +/-buttons to select the ending hour followed by the ENTER button to
confirm the setting.
(10) Once you have confirmed the setting the setting number will change to 10.
(11) Slide the setting button to the right to complete the setting.
10. SETTING THE PRINT FORMAT
(1) Move the setting button to the left to enter the setting mode.
Press the +/-buttons to choose setting number 10.
(2) Press the ENTER button to enter the setting.
(3) Choose either 00 for 1/60th (normal minutes) or 01 for 1/100th of
an hour printing.
NOTE: 00 will print 08:30am as 08:30
01 will print 08:30am as 08:50 (i.e. 8.5 or 8 and a half
hours)
(4) Press the ENTER button to enter the setting.
(5) Once you have confirmed the setting the setting number will
change to 11.
(6) Slide the setting button to the right to complete the setting.

7
11. SETTING THE PAY PERIOD END DATE
(1) Move the setting button to the left to enter the setting mode.
Press the +/-buttons to choose setting number 11.
(2) Press the ENTER button to enter the setting.
(3) Press the +/-buttons to select either 00 (monthly) or 01
(weekly) pay.
(4) Press the ENTER button to enter the setting.
(5) If 01 (weekly pay) is chosen you will need to select the last day
of your working week and press ENTER. If you choose Wednesday
for example, it will take Thursday to be the start of your working
week.
(6) Slide the setting button to the right to complete the setting.
12. SETTING THE PRINT COLOUR
(1) Move the setting button to the left to enter the setting mode.
(2) Press the COLOUR button and then press the ENTER button.
(3) Press the +/-keys to select the desired hour for the first colour
change.
(4) Press the ENTER button to confirm the setting.
(5) Press the +/-keys to select the desired minute.
(6) Press the ENTER button to confirm the setting.
(7) Use the +/-buttons to select either 01 for black colour printing
or 02 for printing in red.
(8) Now you will see the individual days of the week being
highlighted. This allows you to select each day in turn and select
whether you want the colour change to apply on that day or not.
Using the +/-buttons you can change the day of the week that is
highlighted and then pressing the COLOUR button will change that
day to on or off. If you turn off the colour change for a particular
day by mistake - you can just press the COLOUR button again and it
will enable it.
(9) Press the ENTER button when you are happy with the settings
you've chosen.
(10) The setting number should now turn to 02. This is the setting
for the next colour change and you can follow the instructions above
to set it.
There are a maximum of eight colour changes
available
(11) Slide the setting button to the right to complete the setting(s).
13. SETTING THE MUSIC OUTPUT
(1) Move the setting button to the left to enter the setting mode.
(2) Press the MUSIC button and then press the ENTER button.
(3) Press the +/-keys to select the desired hour for the music
output.
(4) Press the ENTER button to confirm the setting.
(5) Press the +/-keys to select the desired minute.
(6) Press the ENTER button to confirm the setting.
(7) Press the +/-buttons to select the required duration of the

8
Music output up to a maximum of 30 seconds. The initial setting is
30 seconds.
(8) Press the ENTER button to confirm the setting.
(9) Now you will see the individual days of the week being
highlighted. This allows you to select each day in turn and select
whether you want the music output to apply on that day or not.
Using the +/-buttons you can change the day of the week that is
highlighted and then pressing the MUSIC button will change that
day to on or off. If you turn off the music output for a particular
day by mistake - you can just press the MUSIC button again
and it will enable it.
(10) The setting number should now turn to 02. This is the setting for
the next musical output (if required) and you can follow the instructions
above to set it.
The maximum number of musical output settings is eight.
(11) Slide the setting button to the right to complete the setting(s).
14. SETTING THE AUTO COLUMN SHIFT
(1) Move the setting button to the left to enter the setting mode.
(2) Press the COLUMN button and then press the ENTER button.
(3) Press the +/-keys to select the desired hour for the column
change.
(4) Press the ENTER button to confirm the setting.
(5) Press the +/-keys to select the desired minute.
(6) Press the ENTER button to confirm the setting.
(7) Press the +/-buttons to select the desired column. There
are six columns available so you can choose between 01 and 06.
Column 2 would be setting 02.
(8) Press the ENTER button to confirm the setting.
(9) Now you will see the individual days of the week being
highlighted. This allows you to select each day in turn and select
whether you want the column shift to apply on that day or not.
Using the +/-buttons you can change the day of the week that is
highlighted and then pressing the COLUMN button will change
that day to on or off. If you turn off the column shift for a
particular day by mistake - you can just press the COLUMN
button again and it will enable it.
(10) The setting number should now turn to 02. This is the
setting for the next column shift (if required) and you can follow
the instructions above to set it.
The maximum number of
column shifts is eight.
(11) Slide the setting button to the right to complete the setting(s).

9
IMPORTANT INFORMATION
Deleting settings: Press the +/-buttons to select the setting number, then press the +
and ENTER buttons at the same time for three seconds to delete that set of settings.
SPECIFICATION
Working power source
14V
Working ampere
1.0 Amps
Dimensions
18.5 x 11.5 x 21.5cm (L x W x H)
Net Weight
1.2Kg
Working temperature
0ºC ~ 40ºC
Working humidity
10% ~ 80% RH
Card size
85.4 x 186mm (W x L)
Table of contents

