Allett Liberty Classic Push 30cm User manual
F016J11384-A
Original Instructions –English 1
Cordless cylinder mower
OPERATING INSTRUCTIONS
Liberty Classic Push 30cm
Liberty Classic Self-propelled 35cm
Liberty Expert Self-propelled 43cm
F016J11384-A
Original Instructions –English 2
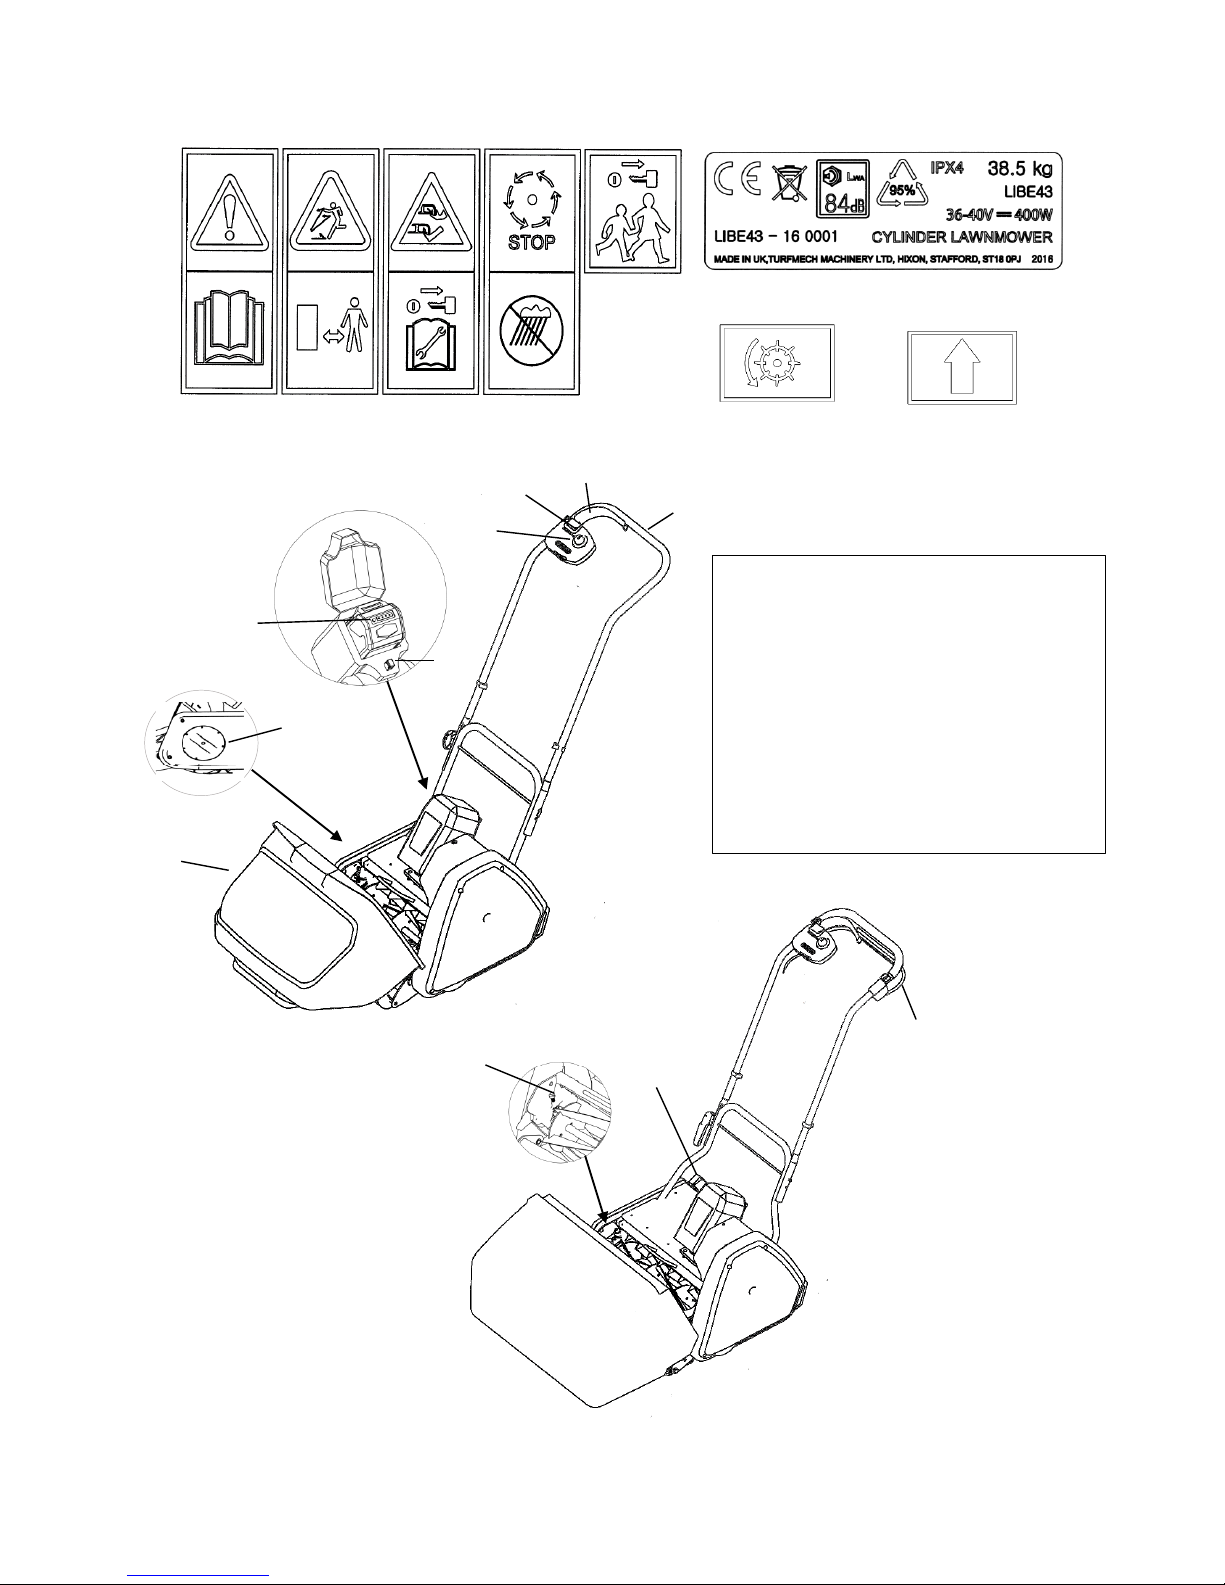
Operating controls
English (Original instructions)
⑩
⑨
1) Push switch
2) Switch lever
3) Drive control lever (Liberty 35 & 43)
4) Speed control
5) Isolation key
6) Grass box
7) Height of cut adjustment
8) Battery/battery gauge
9) Top handle
10) Cylinder to bottom blade adjusters
②
③
①
④
⑤
⑧
⑦
⑥
⑦

F016J11384-A
Original Instructions –English 3
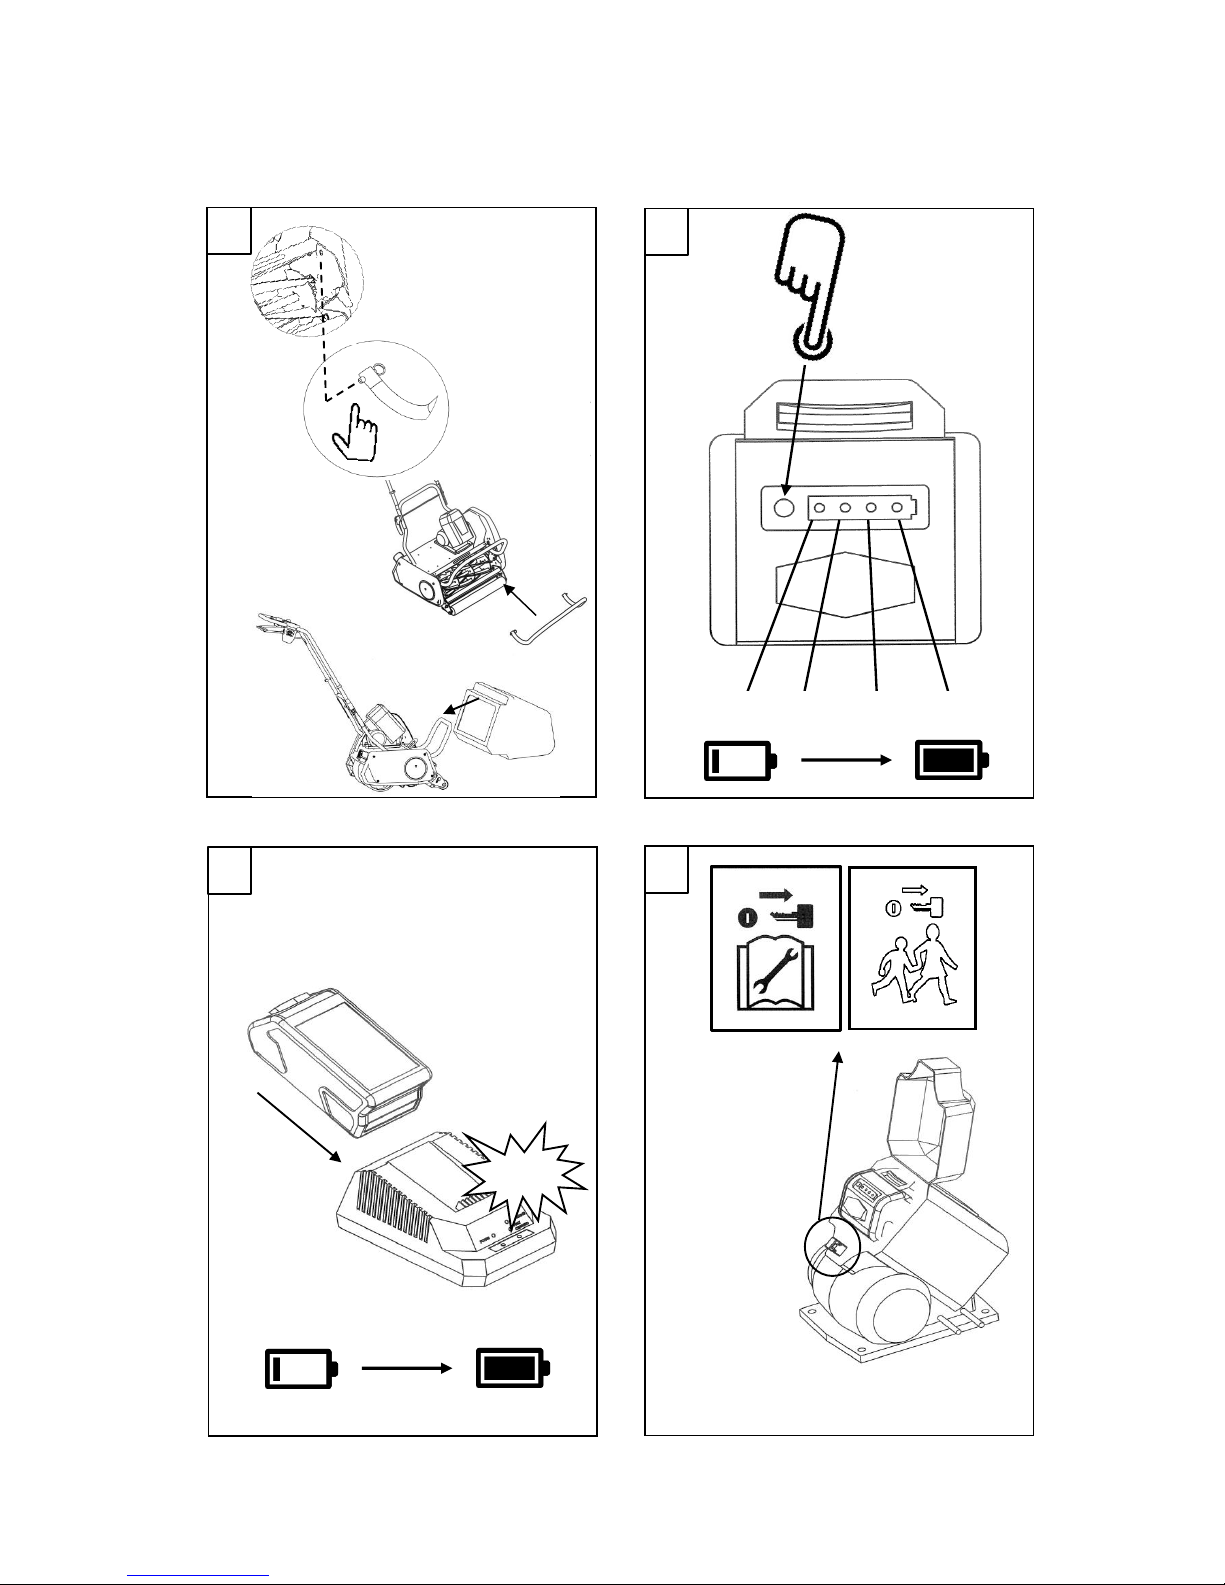
A
①
②
①
②
B
C
②
③
④
①
D
Liberty 30 & 35
F016J11384-A
Original Instructions –English 4
E
③
②
①
10%45%70% 100%
F
Click
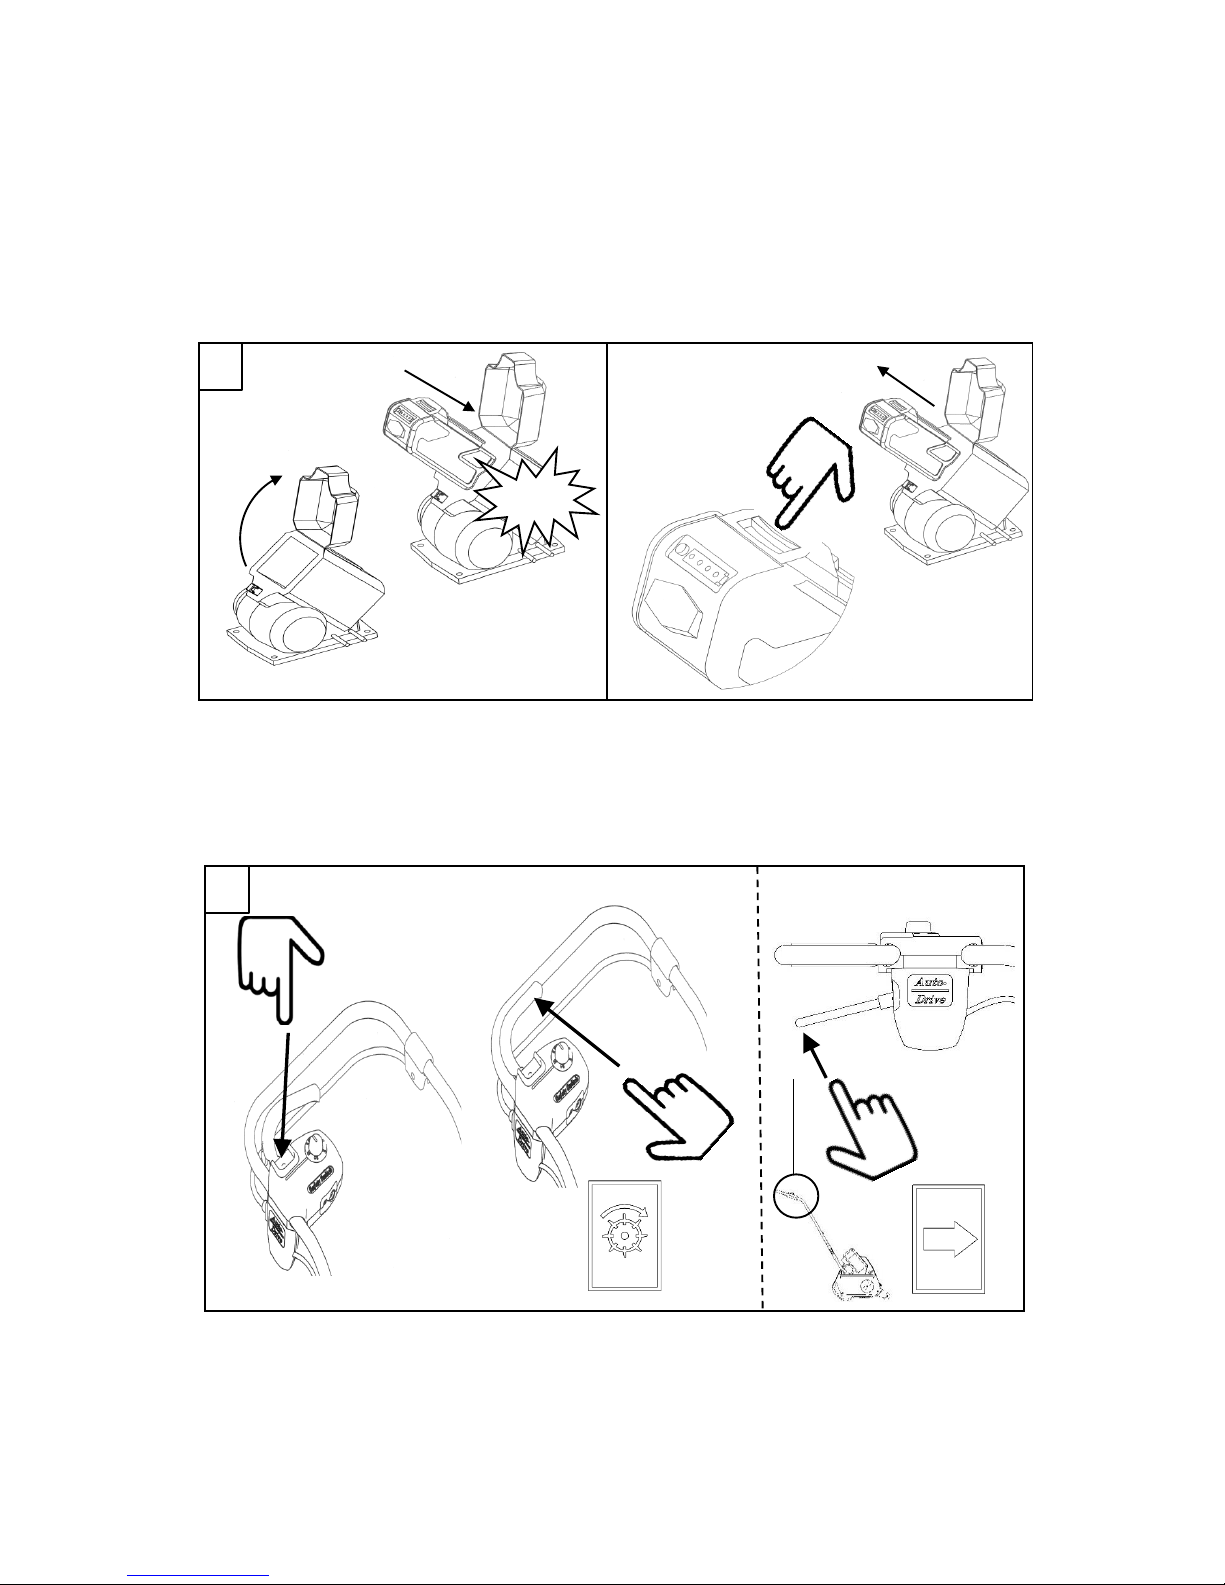
G
H
Liberty 43
F016J11384-A
Original Instructions –English 5
Click
I
②
①
J
③
Other manuals for Liberty Classic Push 30cm
1
This manual suits for next models
2
Table of contents
Other Allett Lawn Mower manuals

Allett
Allett BUCKINGHAM 20H User manual

Allett
Allett Liberty Classic Push 30cm User manual

Allett
Allett C 34 User manual

Allett
Allett Stirling 43 Aerator Cartridge User manual

Allett
Allett ELMOW 20 User manual

Allett
Allett C 34 Guide

Allett
Allett C 34 User manual

Allett
Allett Kensington 17 User manual

Allett
Allett UPLIFT86 Programming manual

Allett
Allett UltraChange Series Product manual


