Allett Liberty Classic Push 30cm User manual
F016J11384-A
1
Cordless
cylinder mower
OPERATING
INSTRUCTIONS
Liberty Classic Push 30cm - Liberty Classic Self-propelled 35cm
Liberty Expert Self-propelled 43cm
Tondeuse
hélicoïdale
sans l
MODE D’EMPLOI
Kabelloser
Spindelmäher
BEDIENUNGS-
ANLEITUNG
Cortacésped con
cilindro inalámbrico
INSTRUCCIONES DE
FUNCIONAMIENTO
Tosaerba a cilindro
senza li
ISTRUZIONI
OPERATIVE
Snoerloze
kooimaaier
BEDIENINGS-
INSTRUCTIES
Liberty Classic poussée 30 cm
Liberty Classic auto-tractée 35 cm
Liberty Expert auto-tractée 43 cm
Liberty Classic handgeführt 30 cm
Liberty Classic mit Selbstantrieb 35 cm
Liberty Expert mit Selbstantrieb 43 cm
Liberty Classic Empuje manual 30cm
Liberty Classic Autopropulsión 35cm
Liberty Expert Autopropulsión 43cm
Liberty Classic a spinta 30 cm
Liberty Classic semovente 35 cm
Liberty Expert semovente 43 cm
Liberty Classic Duwen 30 cm
Liberty Classic Zelfaangedreven 35 cm
Liberty Expert Zelfaangedreven 43 cm
Liberty Classic tlačená 30cm
Liberty Classic s pohonem 35 cm
Liberty Expert s pohonem 43 cm
Akumulátorová
vřetenová sekačka
PROVOZNÍ
INSTRUKCE

F016J11384-A
2
Operating controls 1 - Push switch
2 - Switch lever
3 - Drive control lever
(Liberty 35 & 43)
4 - Speed control
5 - Isolation key
6 - Grass box
7 - Height of cut adjustment
8 - Battery/battery gauge
9 - Top handle
10 - Cylinder to bottom blade
adjusters
en
Original instructions
2
9
1
4
5
6
7
8
3
7
10
F016J11384-A
3
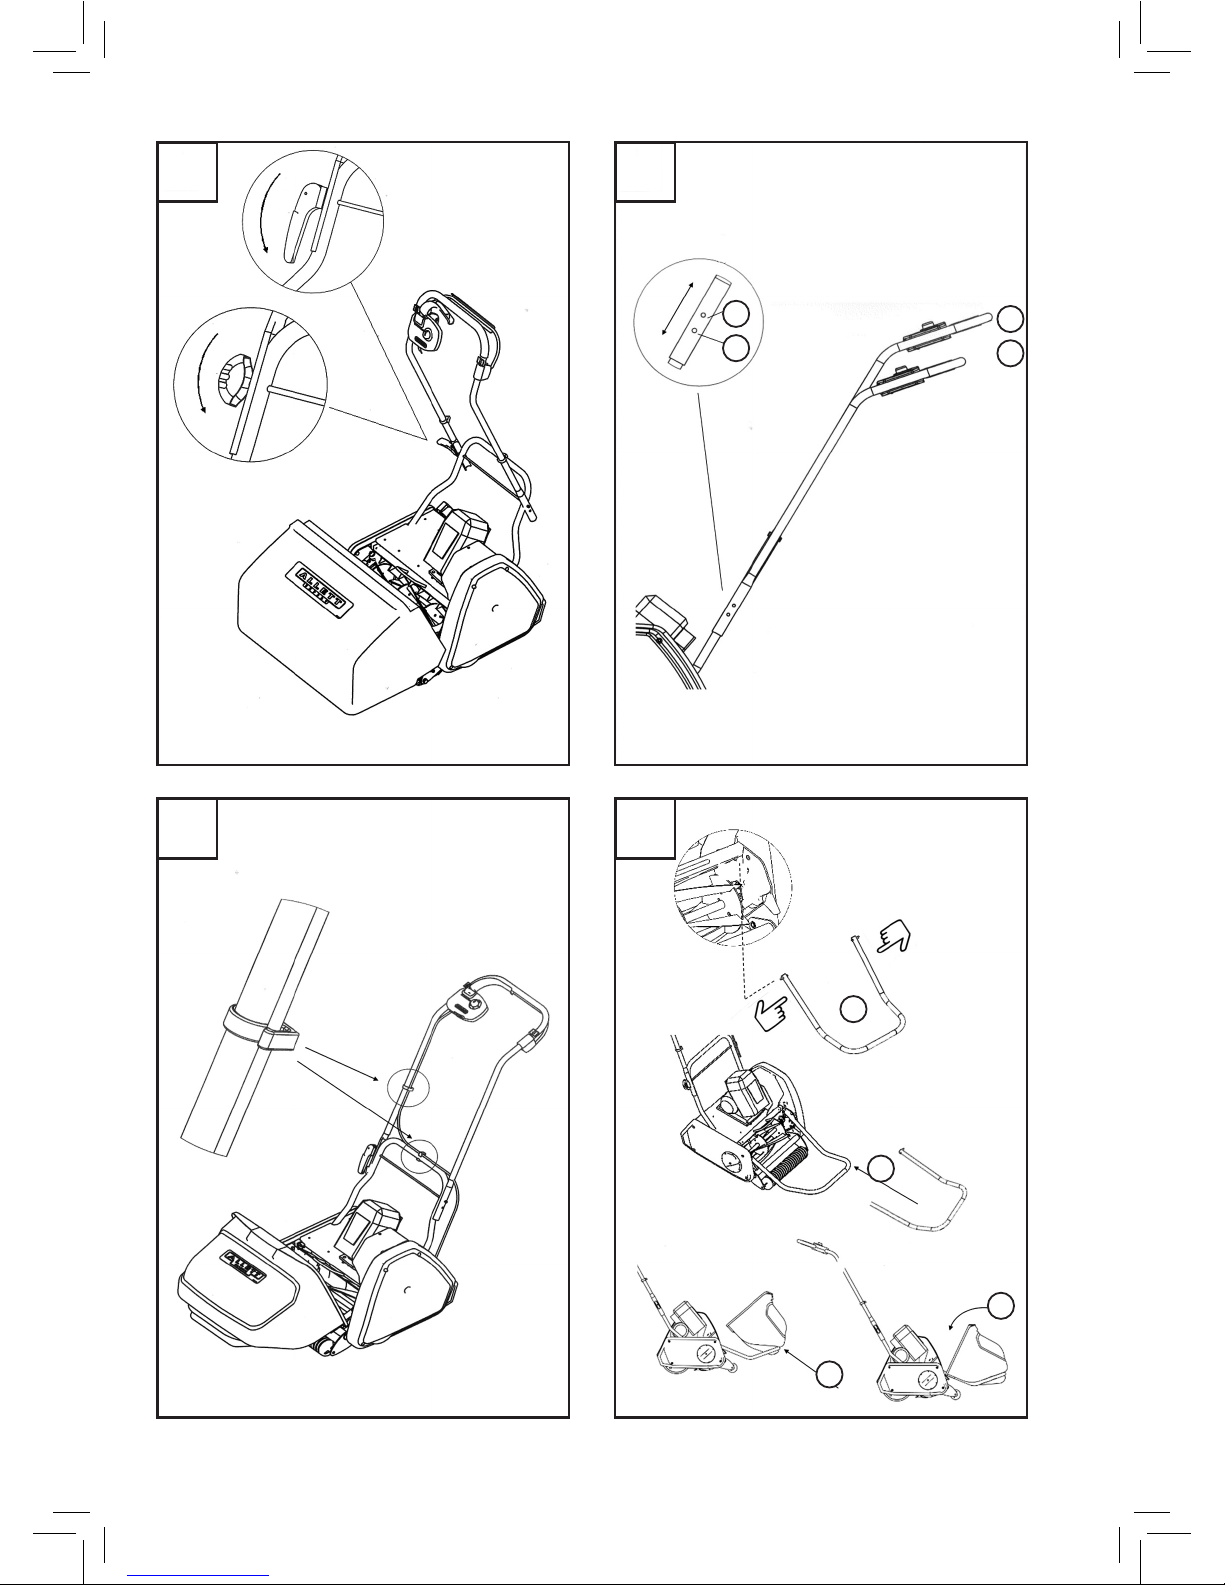
A B
C D
2
1
2
1
2
1
3
4
Original instructions
F016J11384-A
4
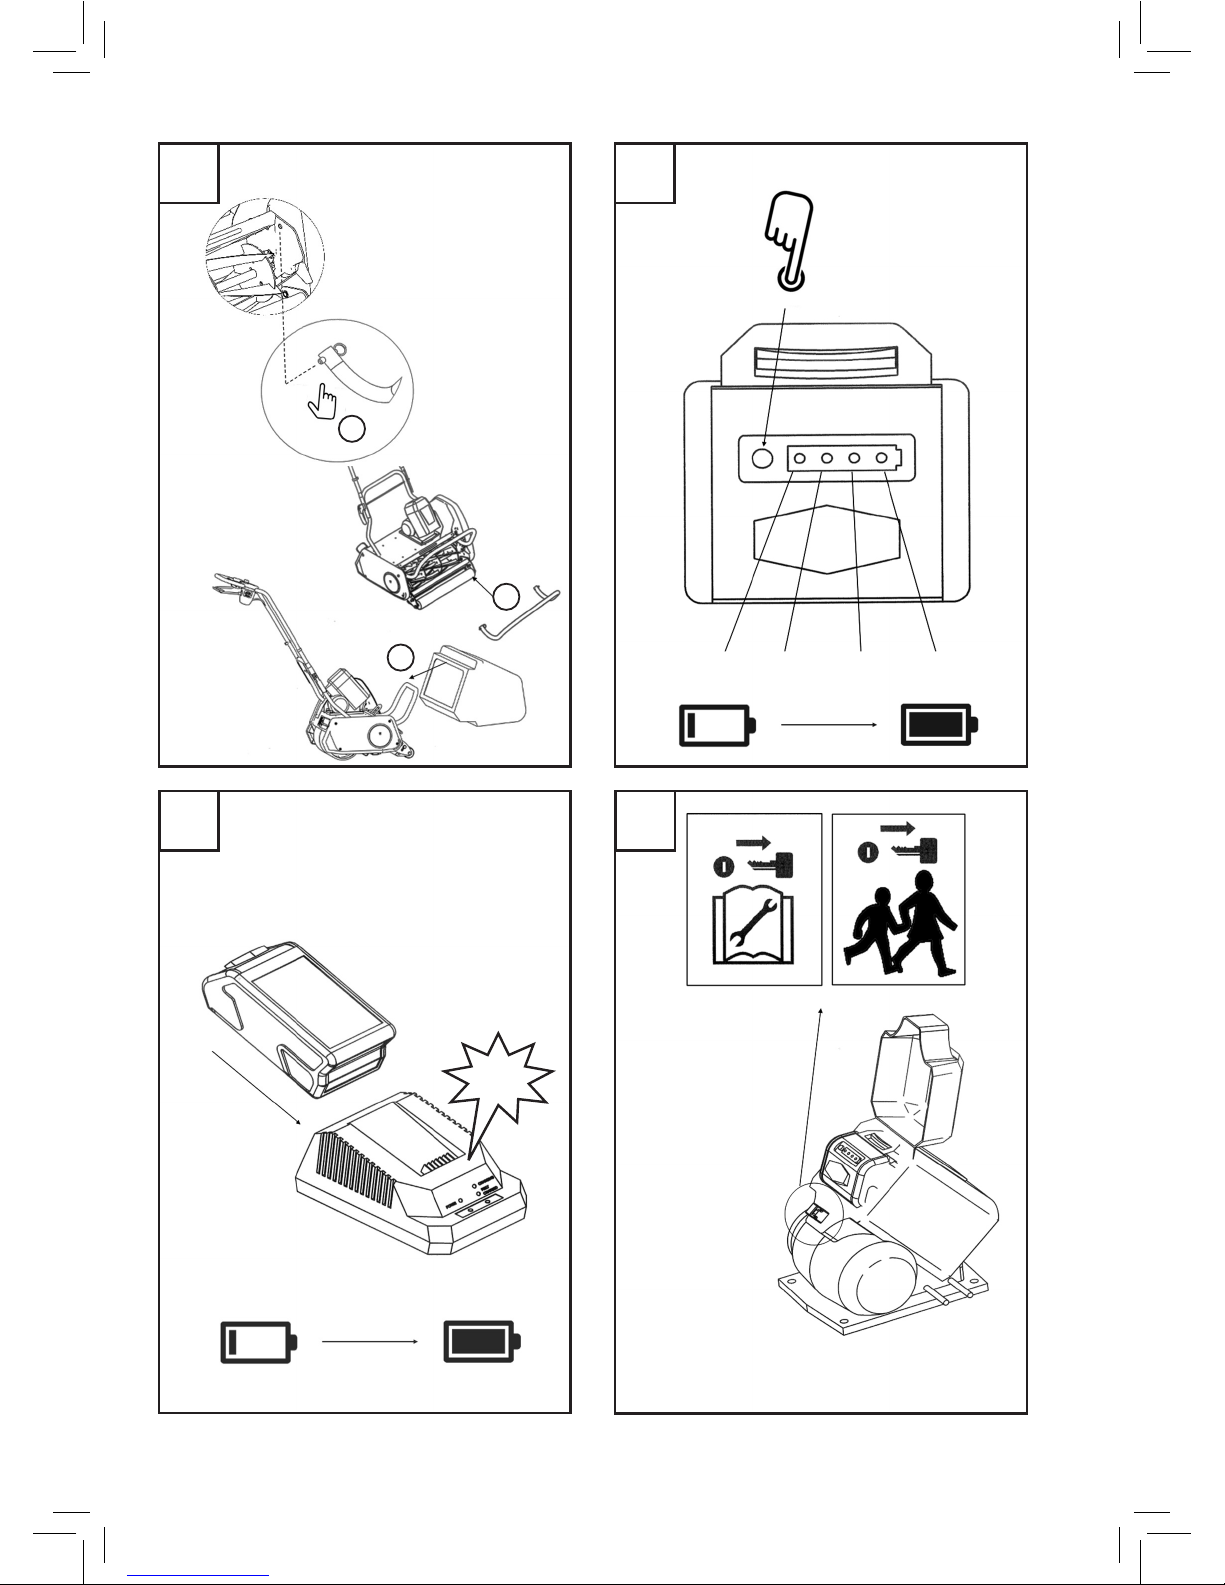
E F
G H
10% 45% 70% 100%
2
1
3
Click
Original instructions

F016J11384-A
5
Click
2
1
3
J
I
Original instructions
Other manuals for Liberty Classic Push 30cm
1
This manual suits for next models
2
Table of contents
Languages:
Other Allett Lawn Mower manuals

Allett
Allett Kensington 17 User manual

Allett
Allett C 34 Guide

Allett
Allett C 34 User manual

Allett
Allett UltraChange Series Product manual

Allett
Allett BUCKINGHAM 20H User manual

Allett
Allett BUFFALO 24" Product manual

Allett
Allett C 34 User manual

Allett
Allett UPLIFT86 Programming manual

Allett
Allett Stirling 43 Aerator Cartridge User manual

Allett
Allett Liberty Classic Push 30cm User manual


