manuals.online logo
Brands
  1. Home
  2. •
  3. Brands
  4. •
  5. Allied Vision
  6. •
  7. Security Camera
  8. •
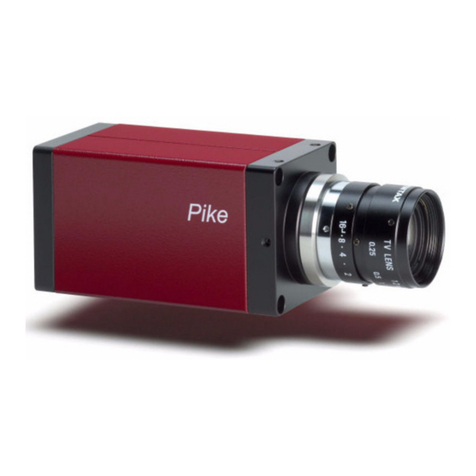
  9. Allied Vision AVT Pike Manual

Allied Vision AVT Pike Manual

PIKE Instruction Leaflet V2.0.0
2
PIKE Instruction Leaflet V2.0.0
3
PIKE Instruction Leaflet V2.0.0
4
CE conformity
Technical and ordering info
Info
L
• AVT PIKE cameras are in conformity with the CE standard and its
underlying directions.
Info
L
•Technical information:
support@alliedvisiontec.com
phone (for Germany): +49 (0)36428 677-270
phone (for USA): +1 978-225-2030
outside Germany/USA: Please check the link for your local
dealer.
http://www.alliedvisiontec.com/partner.html
•Ordering and commercial information:
customer-care@alliedvisiontec.com
phone (for Germany): +49 (0)36428 677-230
phone (for USA): +1 978-225-2030
outside Germany/USA: Please check the link for your local
dealer.
http://www.alliedvisiontec.com/partner.html
Please note order number/text given in the following tables.
Scope of delivery
Each camera package consists of the following system components:
AVT Pike camera 4.5 m 1394b cable with
screw locking
Color version:
Jenofilt 217 IR cut filter
(built-in)
B/w version:
only protection glass
(no filter)
CD with driver
and documentation
Optional:
tripod adapter
Optional:
GOF cable
Optional: HIROSE connector
for cable mount
HR10A-10P-12S
Figure 1: System components
www
Ý
For more accessories visit the AVT website at:
http://www.alliedvisiontec.com/avt-products/accessories.html
Camera I/O connector
For maximum voltage levels see Hardware Installation Guide, Chapter PIKE
input descriptions.
Figure 2: Camera I/O connector pin assignment
Pin Signal Direction Level Description
1 External GND GND for RS232 and ext.
power
External Ground for RS232
and external power
2 External Power +8...+36 V DC Power supply
3 Camera Out 4 Out Open emitter Camera Output 4
(GPOut4)
default: -
4 Camera In 1 In Uin(high) = 2 V...UinVCC
Uin(low) = 0 V...0.8 V
Camera Input 1
(GPIn1)
default: Trigger
5 Camera Out 3 Out Open emitter Camera Output 3
(GPOut3)
default: Busy
6 Camera Out 1 Out Open emitter Camera Output 1
(GPOut1)
default: IntEna
7 Camera In GND In Common GND for inputs Camera Common Input Ground
(In GND)
8 RxD RS232 In RS232 Terminal Receive Data
9 TxD RS232 Out RS232 Terminal Transmit Data
10 CameraOutPower In Common VCC for outputs
max. 36 V DC
Camera Output Power
for digital outputs (OutVCC)
11 Camera In 2 In Uin(high) = 2 V...UinVCC
Uin(low) = 0 V...0.8 V
Camera Input 2
(GPIn2)
default: -
12 Camera Out 2 Out Open emitter Camera Output 2
(GPOut2)
default: -
Table 1: Camera I/O connector pinning
1
102
9
8
7
6
12113
45
Instruction Leaflet
V2.0.0
13 August 2008
Allied Vision Technologies GmbH
Taschenweg 2a
D-07646 Stadtroda / Germany
AVT Pike
PIKE Instruction Leaflet V2.0.0
5
PIKE Instruction Leaflet V2.0.0
6
PIKE Instruction Leaflet V2.0.0
7
PIKE Instruction Leaflet V2.0.0
8
Hardware Installation
To install hardware read Hardware Installation Guide.
Software Installation
To install software read (depending on your system):
• FirePackage User Guide
• FirePackage64 User Guide
• Fire4Linux User Guide
Note
L
You will find this document in the following directory:
<CD ROM>:\products\cameras-general
• All_HardInst_Vx.y.z_en.pdf
Note
L
You will find these documents in the following directory:
<CD ROM>:\products\AVT_FirePackage_x_y_z
• FirePackage_UserGuide_Vx.y.z_en.pdf
• FirePackage_x64_UserGuide_Vx.y.z_en.pdf
<CD ROM>:\products\linux
Safety instructions
Cautions
Note
L
• There are no switches or parts inside the camera that
require adjustment. The guarantee becomes void upon
opening the camera casing.
• If the product is disassembled, reworked or repaired by
other than a recommended service person, AVT or its
suppliers will take no responsibility for the subsequent
performance or quality of the camera.
• The camera does NOT generate dangerous voltages
internally. However, because the IEEE 1394a standard
permits cable power distribution at voltages higher
than 24 V, various international safety standards apply.
Note
L
• All color models are equipped with an optical filter to
eliminate the influence of infrared light hitting the
sensor. Please be advised that, as a side effect, this fil-
ter reduces sensitivity in the visible spectrum. The opti-
cal filter is part of the back focus ring, which is
threaded into the C-Mount.
•B/w models come with a sensor protection glass
mounted in the back focus ring.
Caution
a
Hot-plug precautions
• Although FireWire devices can theoretically be hot-
plugged without powering down equipment, we
strongly recommend turning the computer power off,
before connecting a digital camera to it via a FireWire
cable.
• Static electricity or slight plug misalignment during
insertion may short-circuit and damage components.
Caution
a
Hot-plug precautions
• The physical ports may be damaged by excessive ESD
(electrostatic discharge), when connected under powered
conditions. It is good practice to ensure proper grounding
of computer case and camera case to the same ground
potential, before plugging the camera cable into the port
of the computer. This ensures that no excessive difference
of electrical potential exists between computer and cam-
era.
•Itisvery important not to exceed an inrush current of
18 mJoule in 3 ms. (This means that a device, when pow-
ered via 12 V bus power must never draw more than 1.5 A,
even not in the first 3 ms.)
•Higher inrush current may damage the physical inter-
face chip of the camera and/or the phy chip in your PC.
• Whereas inrush current is not a problem for one Pike/Stin-
gray camera, daisy chaining multiple cameras or supplying
bus power via (optional) HIROSE power out to circuitry
with unknown inrush currents needs careful design consid-
erations to be on the safe side.
Screw-lock and other precautions
• Also, all AVT 1394b camera and cables have industrial
screw-lock fasteners, to insure a tight electrical connec-
tion that is resistant to vibration and gravity.
• We strongly recommend using only 1394b adapter
cards with screw-locks.
• Make sure not to touch the shield of the camera cable
connected to a computer and the ground terminal of the
lines at the same time.
• If you are charged: before touching the shield of the cam-
era cable, make sure to discharge first (by touching the
ground terminal of the lines).
• Use only DC power supplies with insulated cases. These are
identified by having only two power connectors.
• If you feel uncomfortable with the previous advice or if
you have no knowledge about the connectivity of an
installation, we strongly recommend powering down all
systems before connecting or disconnecting a camera.
Environmental conditions
• Housing temperature (when camera in use): + 5 °C ... + 50 °C
• Ambient temperature during storage: - 10 °C ... + 60 °C
• Relative humidity: 20 % … 80 % without condensation
•Protection: IP30
Copyright
All texts, pictures and graphics are protected by copyright and other laws pro-
tecting intellectual property. It is not permitted to copy or modify them for trade
use or transfer, nor may they be used on web sites.
Allied Vision Technologies GmbH 08/2008
All rights reserved.
Managing Director: Mr. Frank Grube
Tax ID: DE 184383113
Caution
a
• Mount/dismount lenses and filters in a dust-free envi-
ronment, and do not use compressed air (which can push
dust into cameras and lenses).
• Use only optical quality tissue/cloth if you must clean a
lens or filter.
•Read Hardware Installation Guide, Chapter Cleaning
instructions.
Other Allied Vision Security Camera manuals

Allied Vision Prosilica GX1050 User manual

Allied Vision

Allied Vision Prosilica GX1050 User manual

Allied Vision Guppy User manual

Allied Vision

Allied Vision Guppy User manual

Allied Vision Goldeye CL User manual

Allied Vision

Allied Vision Goldeye CL User manual

Allied Vision MANTA User manual

Allied Vision

Allied Vision MANTA User manual

Allied Vision Manta G-031B/C User manual

Allied Vision

Allied Vision Manta G-031B/C User manual

Allied Vision Prosilica GT User manual

Allied Vision

Allied Vision Prosilica GT User manual

Allied Vision PROSILICA GC User manual

Allied Vision

Allied Vision PROSILICA GC User manual

Allied Vision Guppy PRO User manual

Allied Vision

Allied Vision Guppy PRO User manual

Allied Vision Guppy PRO User manual

Allied Vision

Allied Vision Guppy PRO User manual

Allied Vision Manta G-031B series User manual

Allied Vision

Allied Vision Manta G-031B series User manual

Allied Vision PIKE Series User manual

Allied Vision

Allied Vision PIKE Series User manual

Allied Vision Stingray User manual

Allied Vision

Allied Vision Stingray User manual

Allied Vision Marlin User manual

Allied Vision

Allied Vision Marlin User manual

Allied Vision Prosilica GT User manual

Allied Vision

Allied Vision Prosilica GT User manual

Allied Vision GT1380C User manual

Allied Vision

Allied Vision GT1380C User manual

Allied Vision MAKO G User manual

Allied Vision

Allied Vision MAKO G User manual

Allied Vision Bigeye User manual

Allied Vision

Allied Vision Bigeye User manual

Allied Vision PROSILICA GC User manual

Allied Vision

Allied Vision PROSILICA GC User manual

Allied Vision Prosilica GS User manual

Allied Vision

Allied Vision Prosilica GS User manual

Allied Vision MAKO G User manual

Allied Vision

Allied Vision MAKO G User manual

Allied Vision Prosilica GE User manual

Allied Vision

Allied Vision Prosilica GE User manual

Allied Vision Mako G series User manual

Allied Vision

Allied Vision Mako G series User manual

Allied Vision Mako G-030B/C User manual

Allied Vision

Allied Vision Mako G-030B/C User manual

Allied Vision Prosilica gc1290c User manual

Allied Vision

Allied Vision Prosilica gc1290c User manual

Popular Security Camera manuals by other brands

Axis M32-LVE Series user manual

Axis

Axis M32-LVE Series user manual

ENFORCER EV-Y2201-A2WQ manual

ENFORCER

ENFORCER EV-Y2201-A2WQ manual

GE Security UVD-XP3DNR(-P) Installation sheet

GE Security

GE Security UVD-XP3DNR(-P) Installation sheet

Honeywell HCW2S2 Quick installation guide

Honeywell

Honeywell HCW2S2 Quick installation guide

ALIBI ALI-NS4036RE Quick installation guide

ALIBI

ALIBI ALI-NS4036RE Quick installation guide

Risco VUpoint RVCM52W installation guide

Risco

Risco VUpoint RVCM52W installation guide

Vicon VC-700 instruction manual

Vicon

Vicon VC-700 instruction manual

Reolink TrackMix WiFi Operational Instruction

Reolink

Reolink TrackMix WiFi Operational Instruction

Dahua Technology IPC-HFW3841E-AS-0280B-S2 quick start guide

Dahua Technology

Dahua Technology IPC-HFW3841E-AS-0280B-S2 quick start guide

Dahua EBW8600 quick start guide

Dahua

Dahua EBW8600 quick start guide

Burg Wächter BWNC-821FBIA quick guide

Burg Wächter

Burg Wächter BWNC-821FBIA quick guide

Nokia OBSERVATION CAMERA Support guide

Nokia

Nokia OBSERVATION CAMERA Support guide

Sanyo VCC-7912P instruction manual

Sanyo

Sanyo VCC-7912P instruction manual

Security Labs SLW-163 owner's manual

Security Labs

Security Labs SLW-163 owner's manual

Cisco Wireless Service Module 2 Getting started guide

Cisco

Cisco Wireless Service Module 2 Getting started guide

Vivotek FD836B-(E)HVF2 user manual

Vivotek

Vivotek FD836B-(E)HVF2 user manual

Steren CCTV-105 quick guide

Steren

Steren CCTV-105 quick guide

iVex Indusvision IVEX-PLs-3001S user manual

iVex Indusvision

iVex Indusvision IVEX-PLs-3001S user manual

manuals.online logo
manuals.online logoBrands
  • About & Mission
  • Contact us
  • Privacy Policy
  • Terms and Conditions

Copyright 2025 Manuals.Online. All Rights Reserved.