Allied Comfort Sync Planning guide

© 2016
ALLIED AIR ENTERPRISES
215 METROPOLITAN DR.
WEST COLUMBIA, SC 29170
indoor temperature
indoor humidity is 41%
cool-to
set temp
75
heat to
72
spring ...
program
is on
outdoor
temperature
80
system is cooling
forecast
Hi 85
Lo 60
9:39 am May 23, 2013
Wi-Fi
enter
away
?
fan is
OFF
fan is
AUTO
THIS MANUAL MUST BE LEFT WITH THE HOMEOWNER
FOR FUTURE REFERENCE
NOTICE
Use this thermostat only as described in this manual.
HOMEOWNER'S MANUAL
Comfort Sync™ Thermostat
Touch-Screen Programmable Communicating Thermostat
CONTROLS
507176-01
6/2016
Supersedes 10/2014
General
Congratulations on choosing the Comfort Sync™ touch-screen,
programmable thermostat! The state-of-the-art technology built into this
device makes it easy for you to adjust your home's comfort settings while at
home or from a remote location (via Internet access)!
Help screens are just a touch away. Use this manual as an introduction to a
whole new world of home comfort.
WARNING
Do not switch system to cool if the outdoor temperature is below 45°F
(7°C). This can damage the cooling system.

507176-01 Page 2
Table of Contents
Comfort Synctthermostat 2................................
Thermostat lock-out 2.....................................
Start-up 3...............................................
User preferences quick reference chart 4.....................
Tools used to change preferences 5.........................
User feature screen and HELP 6............................
Edit programs 6..........................................
System settings 7.........................................
Display settings 8.........................................
Alerts 9.................................................
Reminders 11.............................................
Service information and HELP (?) 13..........................
Adjusting room temperature, away mode, program change,
clock and weather 14.....................................
Setting humidity controls 17.................................
Connecting to a home Wi-Fi network 18.......................
Troubleshooting Wi-Fi and server connections 20...............
Registering Comfort Synctthermostat 22......................
Secure Web Portal 24......................................
Screen-Saver 24..........................................
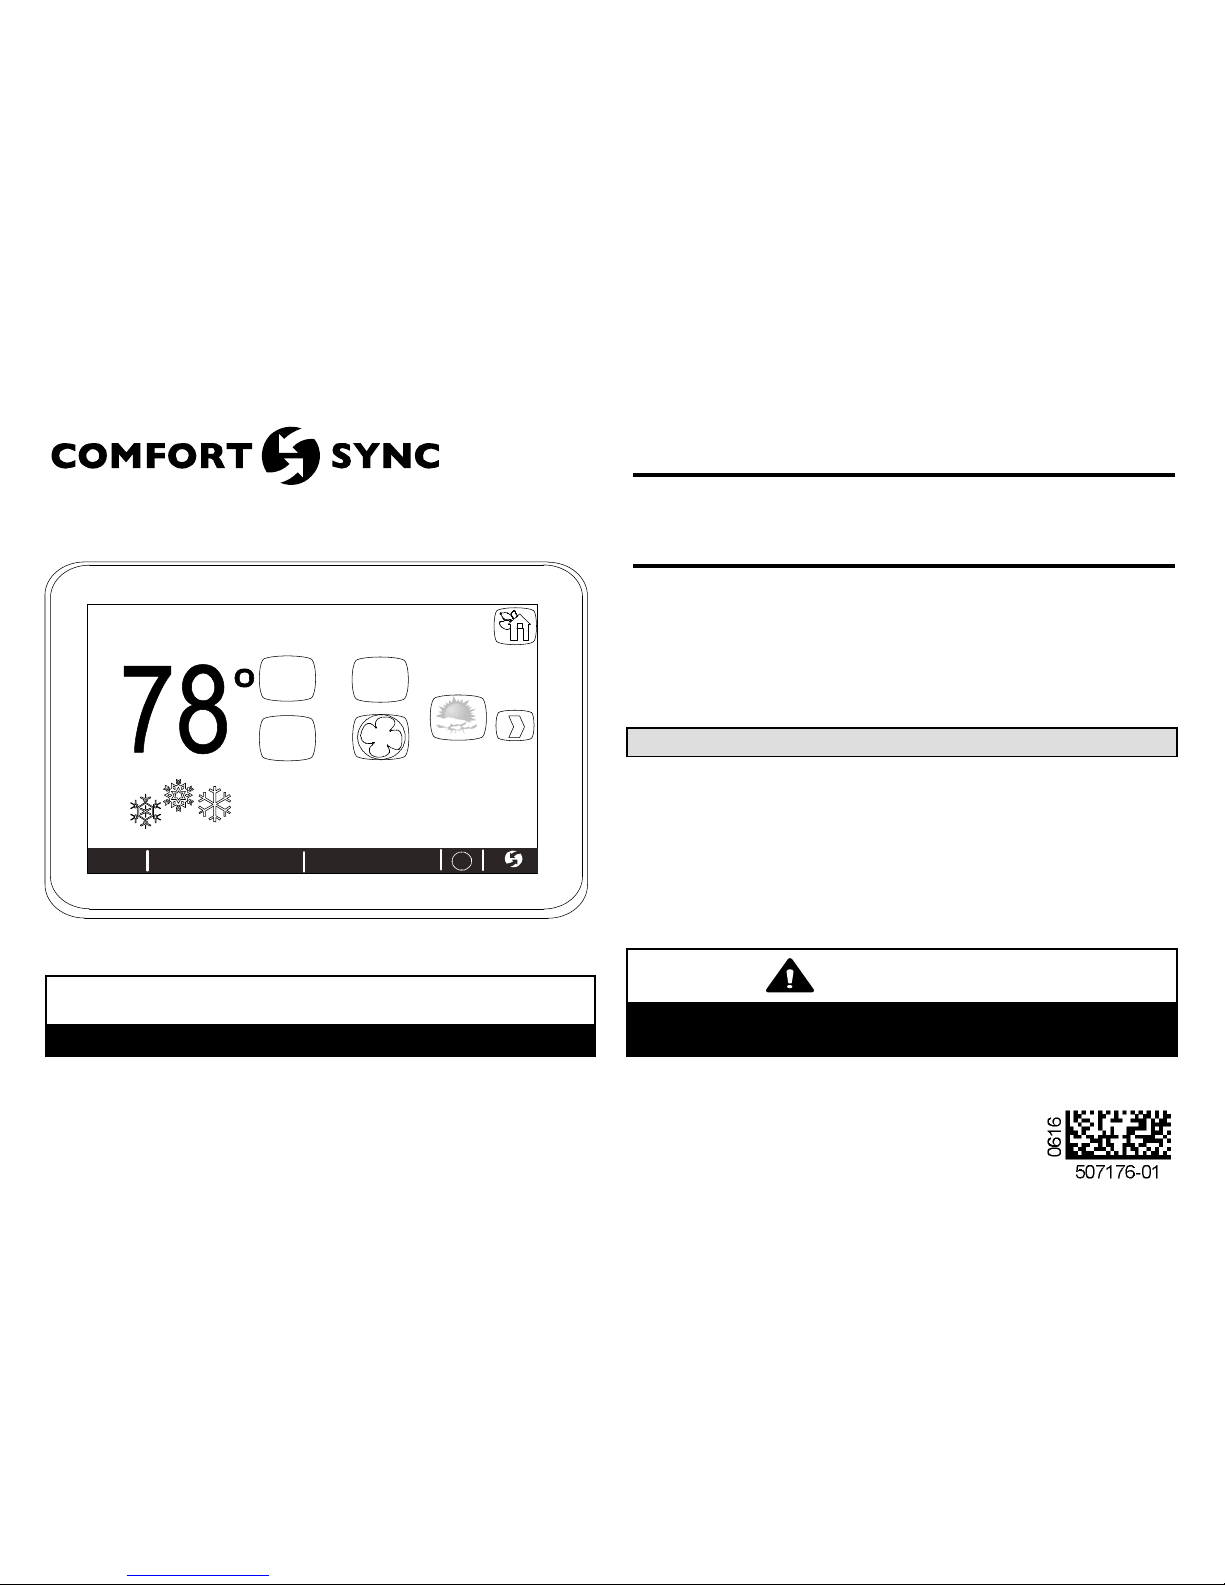
Comfort SynctThermostat
The communicating Comfort Sync thermostat is an electronic 7-day
programmable touch-screen thermostat with a color display. It also
offers enhanced capabilities which include: humidification
measurement and control, dew point adjustment control,
dehumidification measurement and control, Humiditrol®Enhanced
Dehumidification Accessory (EDA) compatibility, and equipment
maintenance reminders. The thermostat's auto-changeover mode
permits control of heating, cooling, humidification, and dehumidification
without user involvement.
The Comfort Sync thermostat can connect to the Internet using your
home's Wi-Fi access point. After online registration has been completed,
weather information is automatically sent to the thermostat. You also will
have full access to the thermostat from any remote location using an Internet
connection via computer, smart-phone, Android device, iPhone®or
iPad®.
The thermostat stores system parameters in nonvolatile memory to retain data
and settings when electrical power fails or is turned off. The thermostat also
includes on‐board help screens.
Indoor Air Quality (IAQ) accessories are supported with time‐based
maintenance notifications which remind you when to check or replace media
filters, UVC bulbs and humidifier pads.
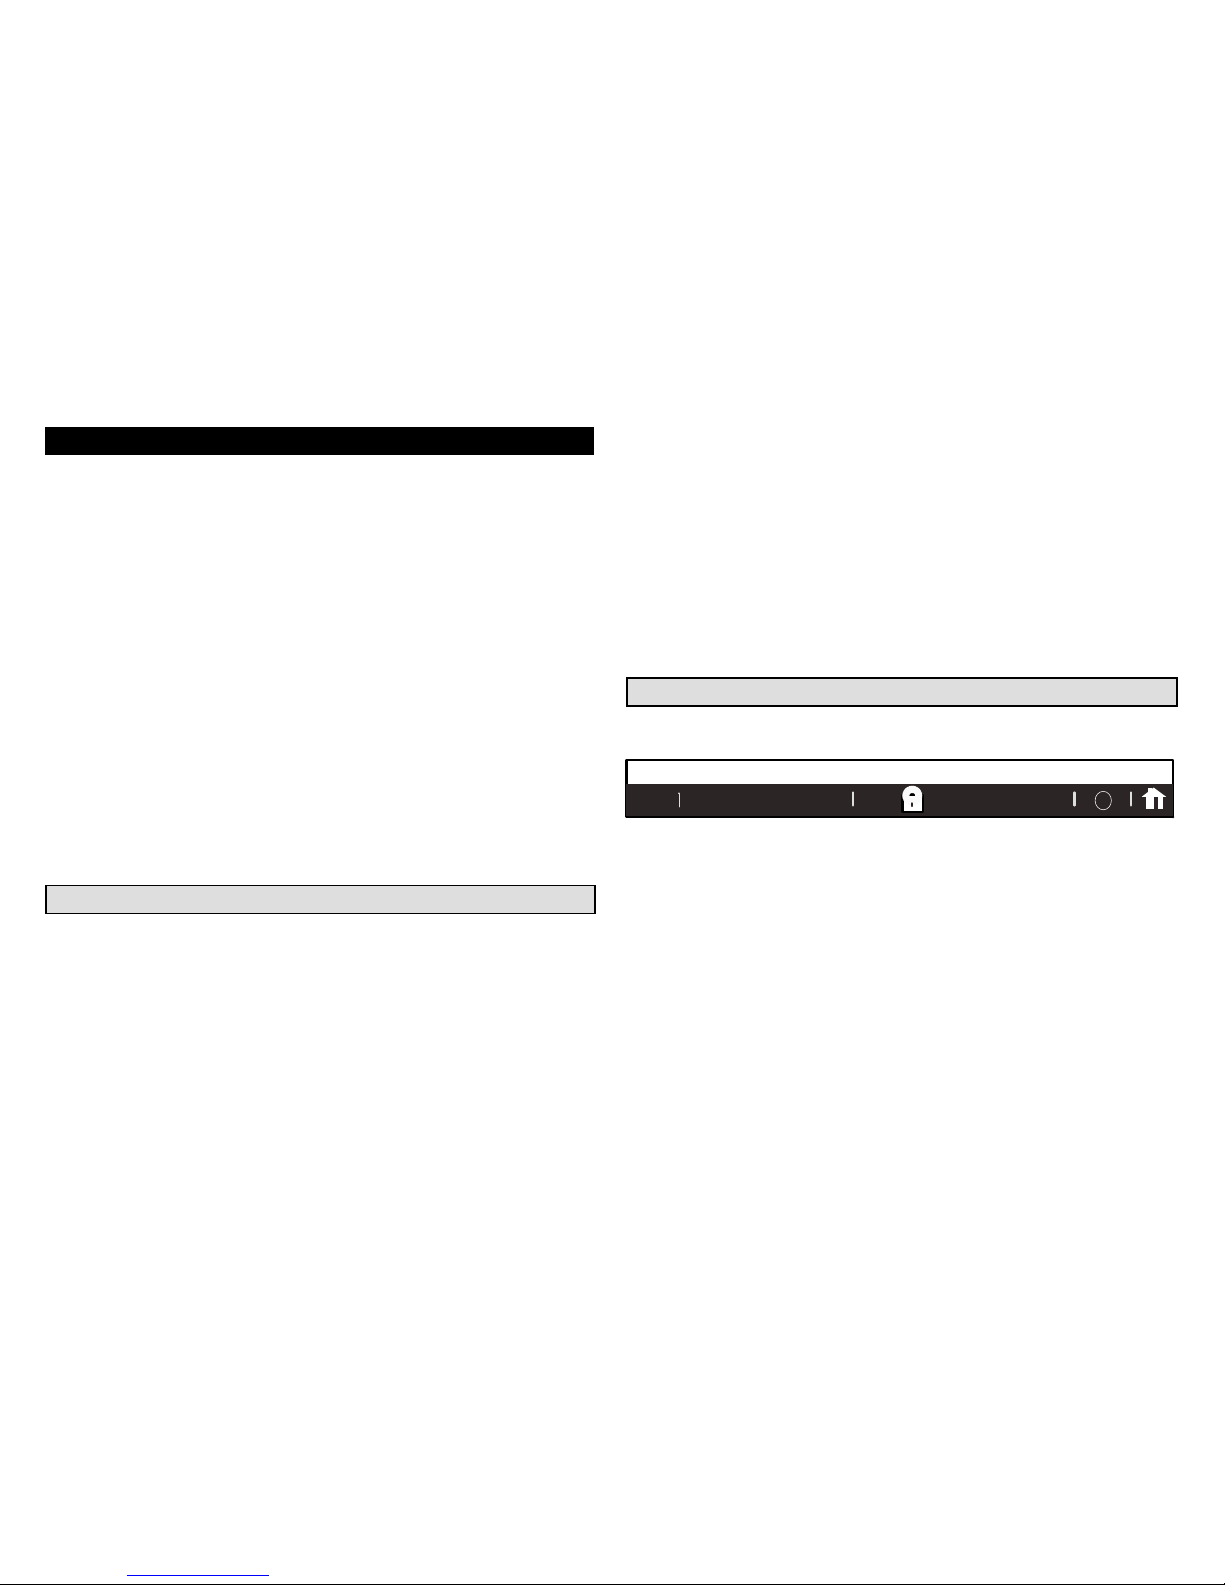
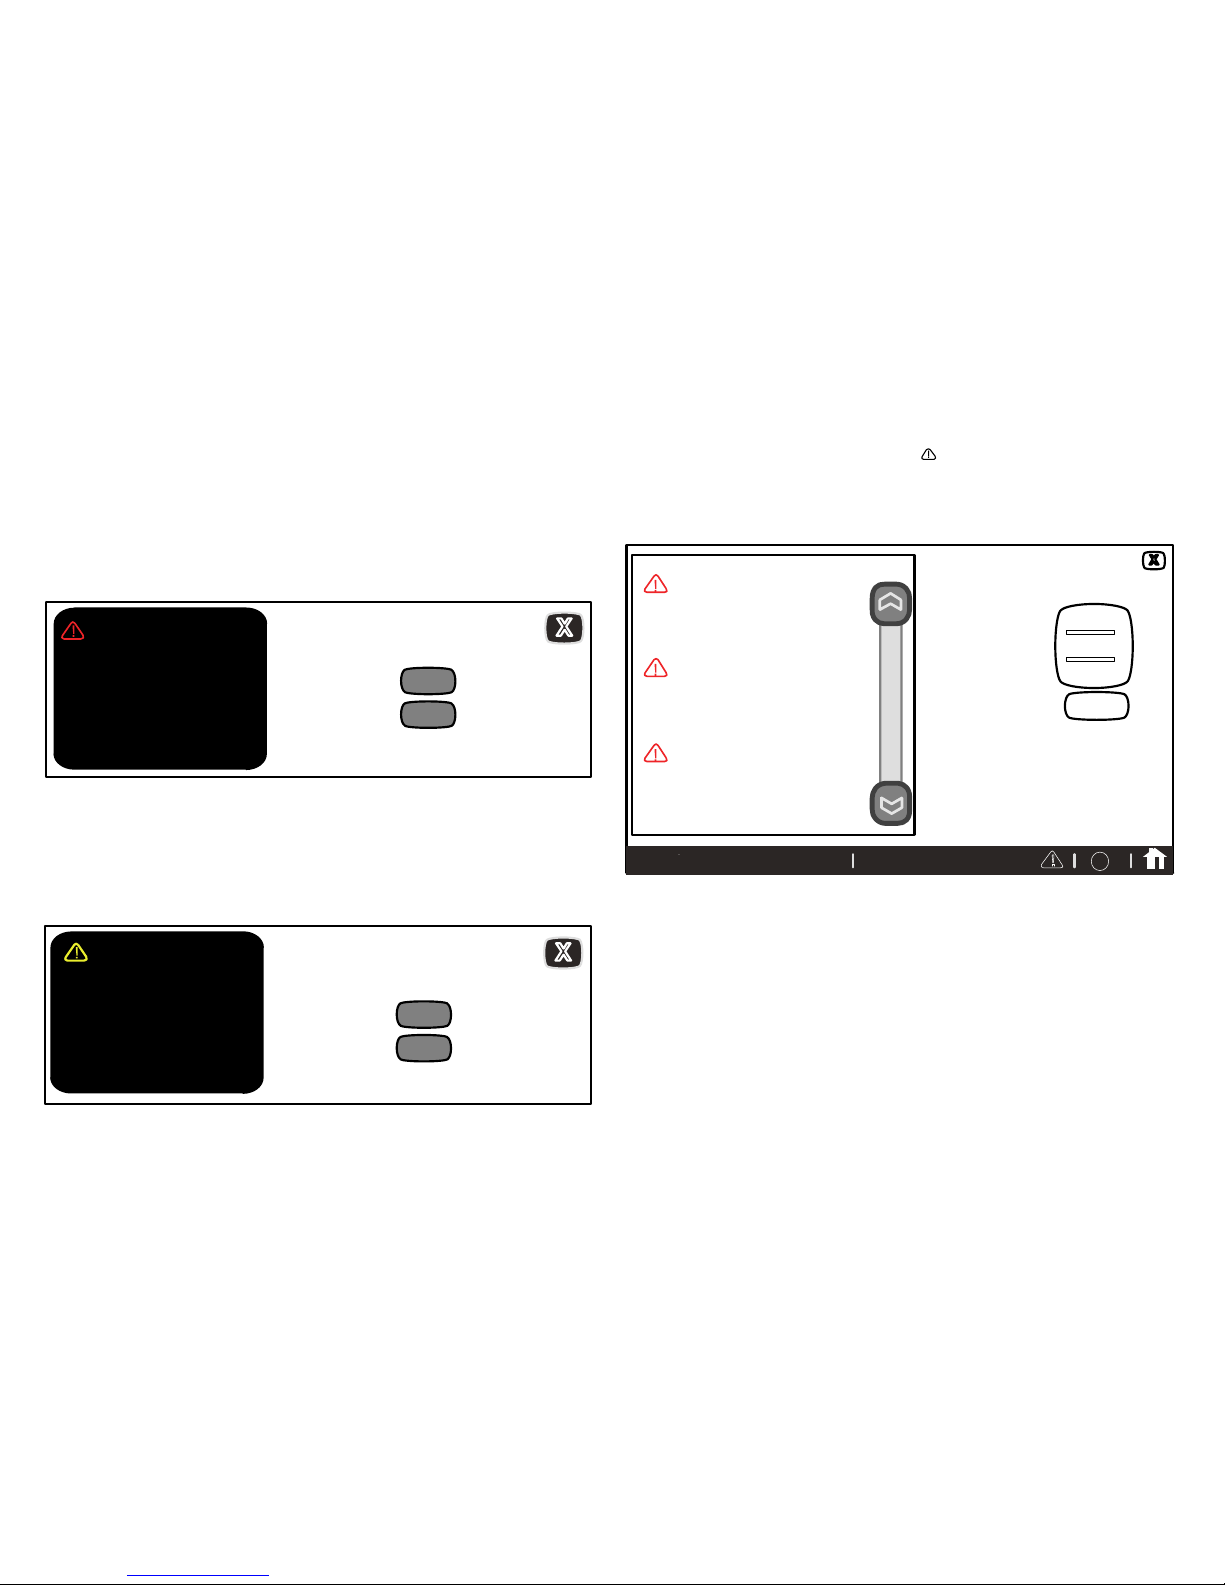
Thermostat Lock-Out
A lock icon at the bottom center of the screen (shown in the picture below),
indicates the thermostat is either partially or fully locked.
9:39 am May 23, 2013 ?
Wi-Fi
When the thermostat is partially locked, any user can adjust the temperature
up or down to hold a setting for a selectable time period. To lock the
thermostat, from the Home screen, go the FEATURES screen and touch the
display settings icon. Press the screen lockout icon and select your desired
option. More information concerning this feature is provided on page 8.
When the thermostat is fully locked, no one can make any changes to the
thermostat's settings. To unlock the thermostat, touch and hold the lock icon
for 5 to 6 seconds.

Comfort Sync™ 7-Day Programmable Communicating Thermostat
Page 3
Start -Up
In event of power failure —The thermostat will reboot after power is
restored. When the reboot is complete, the HOME screen will return.
WHAT THE HOME SCREEN TELLS YOU...
After the thermostat and the
system have been fully connected
and powered on, the Comfort Synct
thermostat's Home screen is
displayed. Figure 1 shows a
display and describes what the
thermostat is telling you.
When the system mode is set to
heat or cool, the system
is operating in manual mode;
When a particular program has
been selected, program name will
be displayed on the system mode
button (e.g., summer program is on).
OTHER INFORMATION...
The system will run until the indoor
temperature is within the range specified
by the selected cooling and heating
setpoints (70 to 75 degrees in this
example).
The “Wi-Fi” button in the bottom left corner provides access
to the Wi-Fi setting screen. Wi-Fi with a beneath it indicates
a prior connection to the server has been lost. When the Wi-Fi
connection is re-established, the triangle goes away.
Away Mode sets the thermostat for energy-saving system operation
while you are gone for an extended period of time. In this mode, the
system will only come on if the indoor temperature falls below 62 degrees (for
heating), or if the indoor temperature rises above 85 degrees (for cooling).
WHAT YOU CAN DO FROM THE HOME SCREEN...
The Home Screen provides you with convenient
access to adjust heating and cooling setpoints,
as well as humidity levels in your home.
From this screen you may:
- adjust temperature
settings
- access menus to change the
program mode
- change how the
fan operates
- access the “Features screen”
(fig. 3) by touching
- access and view active
service alerts by touching the
icon
- access help screen by
touching the “?” icon
Temperature adjustment and system mode of
operation selection are described fully
beginning on Page 14.
If the installer has activated the indoor humidity feature,
you will be able to set the desired humidity level in your home
even if no physical humidifier or dehumidifier is present.
indoor temperature
indoor humidity is 41%
cool-to
set temp
75
heat to
70
heat
or
cool
outdoor
temperature
80
press to go
to Features
use arrows
to change
temperature
indoor
temperature
indoor
humidity
outdoor
temperature
cool-to settingheat-to setting
system
mode
system
status
fan is set
to AUTO
service
alerts are
present
time, month, day, year
(press to change)
(if either feature below
is turned on)
(if feature is
turned on)
Figure 1. Home Screen (Typical)
Wi-Fi setup
button system is cooling
9:39 am May 23, 2013Wi-Fi ?
enter
away
help screen
Away Mode
fan is
OFF
fan is
AUTO forecast
Hi 85
Lo 60
Internet
weather
forecast

507176-01 Page 4
User Preference Quick Reference Chart (Use tools shown on page 5 to make changes)
User Setting Feature Button Default Page Tools Available Settings
Set up a program edit programs save energy See details page 6 —
Humidification settings system settings ON
7
toggle OFF, ON (only visible if humidifier is installed)
Dehumidification settings system settings MODERATE toggle de-humidify= Off, Medium, High
Humidity display system settings OFF toggle OFF, ON
Background theme
display settings
cobalt
16
toggle
cobalt, cotton, carbon
Temp scale is (F) (F) Fahrenheit, (C) Celsius
Screen saver ON ON, OFF
Screen lockout Unlocked menu Unlocked, partially (locked), (fully) locked
Language is English ENGLISH, FRANÇAIS, ESPAŇOL
Outdoor temp display OFF toggle Off, internet, sensor
Backlight Intensity 80% arrows 20 to 100% (in 20% increments)
Press to CLEAN SCREEN —(view only) Deactivates touchscreen for 30 seconds to allow cleaning.
Use damp cloth to clean.
Alerts alerts — See details page 9 —
Replace Filter 1 reminders Disabled See details page 11 Disabled, 3 Months, 6 Months, 12 Months, 24 Months, Custom
Replace Filter 2
reminders Disabled See details page 11 Disabled, 3 Months, 6 Months, 12 Months, 24 Months, Custom
Replace Humidifier Pad
Replace UV Bulb
Maintenance Reminder
Dealer Name
service
(These may show in
staller input data; but
owner may change by
touching setting name)
See details page 13 (keyboard)
Dealer Address
Dealer Phone
Dealer Email
Dealer Website
System Desc
thermostat info service Display only Model Number, Serial Number, Hardware Revision,
Software Revision and Wi-Fi Revision.

Comfort Sync™ 7-Day Programmable Communicating Thermostat
Page 5
keyboard tool
typical menu options
up/down arrows
network security key or passphrase
password displays here as keys touched
cool only
heat only
heat or cool
off
emerg. heat
programs
75º
set to
on
auto
circulate
SMTWTFS
January 2012
1234567
8 9 10 11 12 13 14
15 16 17 18 19 20 21
22 23 24 25 26 27 28
29 30 31 save
09 : 39 am
time and date tool
time
format
12 HR
daylight
saving
enabled
toggle tool
Figure 2. User Preference Change Tools

507176-01 Page 6
User Features and Help (?) Screens
From the Home screen, touch the button to go to the Features screen.
The Features screen (figure 3) allows you access to edit programs, system
settings, display settings, zoning settings, alerts, reminders, service and
help (?).
FEATURES
press any button for access to more features and controls
system
settings
display
settings
service
edit
programs
alerts reminders
9:39 am May 23, 2013 ?
Wi-Fi
Figure 3. User Features - Indoor Settings
EDIT PROGRAMS
Touch edit programs button (see fig. 3). Figure 4 shows the EDIT
PROGRAMS screen. Figure 5 shows pop-up menus that appear when the
selections are touched and it illustrates changes made to the program.
Edit the “season programs” to reflect your preferences. (The Save energy
program uses high-efficiency Energy Star settings to promote energy
conservation.)
select programs - Select a preset program; or touch and hold any
button to enable the keyboard to change program names to suit your
preferences.
select days - Select week/weekend, individual days, all 7 days.
time - Use up/down arrows to change time in 15 minute increments.
cool- and heat-to - Use up/down arrows to change temperature in 1
degree increments.
fan mode - Select on, auto, or circulate.
In the example in Figure 4, the evening time has been disabled by touching
and holding the time button for that time period. (Touch add setting to
re-enable that time period.) Use the restore button to restore defaults for the
preset programs. Touch ”X“ button after changing; a pop-up prompts with
back, discard and save options. Select save to save and return to the
FEATURES screen.
EDIT PROGRAMS
summer
select
programs
summer
program will follow these settings on mon-fri
winter
spring fall
save e ...
custom
06:00 am 78 70 AUTO
select
days time cool-to heat-to fan mode
85 62
08:00 am AUTO
82 62
10:00 pm AUTO
sat-sun
mon-fri
add setting
change
days
press and hold any time to enable or disable for the time period
restore
touch/hold
program
button to
rename
9:39 am May 23, 2013
Wi-Fi ?
Figure 4. EDIT PROGRAMS Screen

Comfort Sync™ 7-Day Programmable Communicating Thermostat
Page 7
EDIT PROGRAMS
summer
select
programs
winter
spring fall
save energy
my program
06:00 am 76 70 ON
select
days time cool-to heat-to fan mode
85 66
08:00 am AUTO
82 62
08:30 pm AUTO
all 7 days
mon-fri
add setting
change
days
press and hold any time to enable or disable for the time period restore
on
auto
circulate
week/weekend
individual days
all 7 days
B
my program
program will follow these settings on all 7 days
press/hold
program
button to
rename
9:39 am May 23, 2013
Wi-Fi ?
Figure 5. EDIT PROGRAMS Screen
SYSTEM SETTINGS
For more information concerning humidification and dehumidification, go to
page 17.
Touch system settings button from the FEATURES screen. Figure 6
shows the SYSTEM SETTINGS screen with its defaults. Figure 7
shows how the devices can be configured.
Touch buttons under appropriate humidification or dehumidification
setting titles to select preferences.
Humidifier display is visible on the SYSTEM SETTINGS screen and can be
changed to OFF from this screen. The resulting display shows the default
values for humidifier. Use the arrows to change either.
When humidity display is ON, text near the screen bottom shows the
current humidity. Touch the “X” button to return to FEATURES screen or
touch the Home icon to return to the Home screen.
SYSTEM SETTINGS
humidifier
is ON
de-
humidify
MEDIUM
humidity
display
is ON
humidification
settings
dehumidification
settings
(default is
MEDIUM)
(default is ON)
9:39 am May 23, 2013
Wi-Fi
40%
set to 50%
set to
current indoor humidity is 50%
?
Figure 6. SYSTEM SETTINGS Screen (Example Only) -
Communicating Indoor Unit
SYSTEM SETTINGS
current indoor humidity is 50%
humidifier
is ON de-
humidify
MEDIUM
40%
set to 50%
set to
ALL CHANGES MADE
ON THIS SCREEN ARE
INSTANTLY SAVED.
9:39 am May 23, 2013
Wi-Fi
OFF
MEDIUM
HIGH
humidifier
display
is ON
(default is ON)
humidification
settings
dehumidification
settings
?
Figure 7. SYSTEM SETTINGS Screen - Making Adjustments

507176-01 Page 8
DISPLAY SETTINGS
Touch display settings from the FEATURES screen (see figure 3). Figure 8
shows the DISPLAY SETTINGS screen and defaults.
Touch Temp scale button to toggle between ºF and ºC options.
Touch Background theme, screen saver, screen lockout,
language, outdoor temp display buttons to select options from
pop-up menus (figure 9).
Touch backlight intensity button and use up/down arrows to change
the intensity of back lighting in 20% increments.
Touch the press to CLEAN SCREEN button to enable a 30-second
touchscreen lock to allow screen cleaning. Use a damp cloth to clean the
screen.
DISPLAY SETTINGS
press any button for access to more features and controls
back-
ground
theme
COTTON
temp
scale
is ºF
screen
saver is
OFF
press
to
CLEAN
SCREEN
language
is
ENGLISH
screen
lockout
UN-
LOCKED
outdoor
temp
display
SENSOR 80%
backlight
intensity
9:39 am May 23, 2013Wi-Fi ?
Figure 8. Display Settings (defaults)
DISPLAY SETTINGS
back-
ground
theme
COTTON
temp
scale
is ºF Screen
saver is
OFF
press to
CLEAN
SCREEN
language
is
ENGLISH
screen
lockout
UN-
LOCKED
outdoor
temp
display
is ON 20%
backlight
intensity
cobalt
cotton
carbon
ENGLISH
FRANCAIS
ESPAÑOL
unlocked
partially
locked
9:39 am May 23, 2013
Wi-Fi
off
on
off
sensor
Internet
?
Figure 9. Display Settings (Adjusting)

Comfort Sync™ 7-Day Programmable Communicating Thermostat
Page 9
ALERTS
Figure 11 shows how an alert appears when it occurs after the system has
been put into operation. Use information on this screen to contact your
HVAC serviceman. Use the Xto close the alert message and return to the
previous screen.
A red alert (red icon) identifies a problem that could prevent the system from
working properly or from working at all. If the system is allowed to run after a
red alert has been issued, damage to the system may be caused. A red alert
is your signal to call for service immediately.
alerts ( 1) of ( 1)
9:39 am May 23, 2013
Service Alert Code 290
indoor unit reports:
Heat Problem
service info:
clear
remind
later
Figure 10. Typical Red Alert
A service alert (yellow icon) tells you to perform routine service, or to call the
dealer to service one or more of the following: Filters, Humidifier Pad, UV
Light, PureAirtAir Purification system and Maintenance. These alerts will
appear based on elapsed time set per the reminders. For information on
clearing a service alert or setting the alert to remind you later, see reminders
on page 11.
alerts ( 1) of ( 1)
9:39 am May 23, 2013
Service Alert Code 3000
system reports:
Replace Filter 1
service info:
clear
remind
later
Figure 11. Typical Service Alert
ACCESS ALERTS THROUGH THE FEATURES SCREEN
Touch the Home screen alert icon ( ) or the alerts button on the
FEATURES screen (see figure 3). Any alerts will appear similar to those
shown in figure 12. Touch the select alert time period for viewing button to
view alerts that occurred in the last 24 hours, last 30 days, or last 12 months.
Contact your HVAC serviceman to report the alerts and related problems.
ALERT (1) of (1)
02/23/2012 9:39 am
Service Alert Code: 292
Indoor unit reports:
Problem
ALERT (1) of (1)
02/23/2012 9:39 am
Service Alert Code: 331
Indoor unit reports:
RSBCommunication Link Problem
ALERT (1) of (1)
02/23/2012 9:39 am
Service Alert Code: 252
Indoor unit reports:
Discharge Air Temperature High
service info:
last 24
hours
select alert
time period for
viewing
last 24 hours
last 30 days
last 12 months
9:39 am May 23, 2013Wi-Fi ?
Figure 12. Alerts Viewed from FEATURES Screen Option

507176-01 Page 10
Navigate to different screens (see figure 13). You can clear alerts and set new reminders after routine service. You may also select remind later to be
reminded at a time that is more convenient for performing the service. If a red alert (red ) is present, contact the party identified under service info.
service info
reminder ( 1) of ( 4)
04/03/2012 02:39pm
Service Alert Code 3000
system reports:
replace filter 1
reminder ( 2) of ( 4)
04/03/2012 02:39pm
Service Alert Code 3001
system reports:
replace filter 2
reminder ( 3) of ( 4)
04/03/2012 02:39pm
Service Alert Code 3002
system reports:
replace humidifier pad
ALERT HISTORY
service info:
reminder ( 1) of ( 4)
04/03/2012 02:39pm
Service Alert Code 3000
system reports:
replace filter 1
reminder ( 2) of ( 4)
04/03/2012 02:39pm
Service Alert Code 3001
system reports:
replace filter 2
reminder ( 3) of ( 4)
04/03/2012 02:39pm
Service Alert Code 3002
system reports:
replace humidifier pad
ALERT HISTORY
clear
last 24
hours
remind
later
select alert
time period
for viewing
MAIN ALERT SCREEN
noyes
was action taken?
(returns main
alert screen)
clear button SCREEN
cancelset
select one
disabled
3 months
6 months
12 months
24 months
custom time
yes button SCREEN
service info
reminder ( 1) of ( 4)
04/03/2012 02:39pm
Service Alert Code 3000
system reports:
replace filter 1
reminder ( 2) of ( 4)
04/03/2012 02:39pm
Service Alert Code 3001
system reports:
replace filter 2
reminder ( 3) of ( 4)
04/03/2012 02:39pm
Service Alert Code 3002
system reports:
replace humidifier pad
ALERT HISTORY
service info:
select alert
time period
for viewing
reminder ( 1) of ( 4)
04/03/2012 02:39pm
Service Alert Code 3000
system reports:
replace filter 1
reminder ( 2) of ( 4)
04/03/2012 02:39pm
Service Alert Code 3001
system reports:
replace filter 2
reminder ( 3) of ( 4)
04/03/2012 02:39pm
Service Alert Code 3002
system reports:
replace humidifier pad
ALERT HISTORY
clear
last 24
hours
remind
later
last 24 hours
last 30 days
last 12 months
alert time period button SCREEN
9:39 am May 23, 2013
Wi-Fi 9:39 am May 23, 2013
Wi-Fi
Remind later
screen shown
in Figure 17.
??
Figure 13. Alerts

Comfort Sync™ 7-Day Programmable Communicating Thermostat
Page 11
SERVICE ALERT CODES
Number Value Number Value Number Value Number Value Number Value
3000 Filter 1 3002 Humidifier Pad 3004 Maintenance 4000 User Wi-Fi state change,
disable
4002 Image file download failed
3001 Filter 2 3003 UV Light 3005 PureAir Maintenance 4001 Firmware download failed
REMINDERS
Reminders alert you to perform routine maintenance, such as replacing filters. Access the reminders from the FEATURES screen reminders button.
SETTING REMINDERS
NOTE - A previously set service time can be changed using the “custom time” option.
Use one of the “month” reminders to be reminded when routine service is due.
Use custom to access the time/date screen (figure 15) to set an exact date and time for a reminder to appear. Use the arrows to select a month; then, select
the desired day of the month. Touch save when finished.
REMINDERS
select frequency for automatic reminders
back next
disabled 3 months 6 months 12 months 24 months custom
Replace Filter
1
Replace Filter
2
Replace Hu
midifier Pad
Replace UV
Bulb
Maintenance
Reminder
PureAir Mainte
nance Required
disabled 3 months 6 months 12 months 24 months custom
Figure 14. Set New Alert Date
SMTWTFS
July 2012
REMINDERS
1234567
8 9 10 11 12 13 14
15 16 17 18 19 20 21
22 23 24 25 26 27 28
29 30 31 save
set custom date for
PureAir
Maintenance
Figure 15. Setting Custom Time

507176-01 Page 12
service info:
set cancel
1 day
1 week
1 month
3 months
custom
9:39 am May 23, 2013
Wi-Fi
service info:
remind
later
alerts ( 1) of ( 1)
9:39 am May 23, 2013
Service Alert Code 3000
system reports:
Replace Filter 1
service info:
noyes
was action taken?
If you have performed the required maintenance, choose clear to clear the
reminder. This will prompt the question, “was action taken?” If the answer is
yes, you will be asked to set the next reminder period for this service alert.
USING REMIND LATER
If you choose remind later, a new screen will appear. Select the desired re
minder period from the list provided. Touch the set button after you have
made your selection. This will trigger the ALERT HISTORY screen. Touch X
to return to the Home screen.
Choosecustom to open the REMINDER screen, which includes a calendar
(figure15). Select a date for the reminder to reappear. When desired remind
er time is displayed, touch set.
Service reminders can be cleared or the date can be revised by using the service alert's clear and remind later buttons on the right side of the screen.
(goes to
screen
below)
(returns to
above
screen)
“X”
clears alert
temporarily;
alert will
repeat
9:39 am May 23, 2013
Wi-Fi
9:39 am May 23, 2013
Wi-Fi
clear
?
?
?
alerts ( 1) of ( 1)
9:39 am May 23, 2013
Service Alert Code 3000
system reports:
Replace Filter 1
alerts ( 1) of ( 1)
9:39 am May 23, 2013
Service Alert Code 3000
system reports:
Replace Filter 1
Figure 16. Viewing, Clearing and Changing Reminder Time

Comfort Sync™ 7-Day Programmable Communicating Thermostat
Page 13
SERVICE INFORMATION
Service information is normally completed by the installer at time of initial
installation.
Should you wish to change this information, proceed to the consumer portal.
Select My Account, then My Dealer tab and touch change dealer button.
SERVICE INFORMATION
Dealer Name Your Comfort Sync Dealer
Dealer Address
Dealer Phone 1-877-924-2677
Dealer Email
Dealer Website www.mycomfortsync.com
System Desc Comfort Sync System
press any line to edit it
thermostat info
click any line;
keyboard will
pop up to input
information
9:39 am May 23, 2013 ?
Wi-Fi
keyboard tool
System Desc
my comfortsync system
Figure 17. Service Information
HELP (?)
When you touch the help icon (?) at the bottom, right-hand corner of the
screen, an array of (?) icons are displayed on the screen. When you touch
one of these help (?) icons, a pop-up describes the function of the nearest
active button(s). Figure 18 shows an example of the HELP screen and a
pop-up.
indoor temperature
indoor humidity is 41% fan is
OFF
fan is
AUTO
cool-to
set temp
75
heat-to
70
heat
or
cool
fan is AUTO
outdoor
temperature
80
system is cooling
9:39 am May 23, 2013Wi-Fi
Change the system function to either heat
or cool (auto), heat only or cool only mode
or turn on one of the Programs. You can
also select 'edit' to enter the edit program
screen.
enter
away
?
i
Figure 18. Typical Help (?) Screen

507176-01 Page 14
Adjusting Room Temperature, Away Mode, Program Change, Clock and Weather
Adjust temperature when programming is OFF — When the
programming is OFF, the system mode button (shown in figure 19, labeled
heat or cool) indicates a manual mode (no mention of “program”). In this
mode, touch one of the two set temp buttons to change the temperature
setting. The up/down arrows appear, allowing you to adjust the “cool to” (or
“heat to”) values to the desired temperature setting.
This setting will remain until you decide to change it again. (The inset shows
an alternate configuration of button layout in non-program mode.)
use arrows
to change
temperature
?
touch
cool-to
button
indoor temperature
indoor humidity is 41%
fan is
OFF
fan is
AUTO
cool-to
set temp
75
heat to
70
heat
or
cool
fan is
AUTO
system is cooling
alternate
cool-only button
layout
(mode
button)
9:39 am May 23, 2013Wi-Fi
enter
away
cool-to
set temp
75
cool
only
fan is
AUTO
?
Figure 19. Adjusting Temperature with NO Program Running
Away Mode (Vacation) — The enter away mode button on the home
screen (upper right-hand corner) sets the system for manual operation and
allows you to set the thermostat for energy-saving operation while you are
gone for an extended period of time. In this mode, the system will only come
on if the indoor temperature falls below a set value in the heating mode (62º F
default), or if the indoor temperature rises above a set value in the cooling
mode (85º F default). You may adjust these settings as desired (see figure
20). To exit the away mode, touch cancel away mode.
indoor temperature
9:39 am May 23, 2013
cool-to
set temp
82
heat to
60
use arrows to
change
temperature
?
9:39 am May 23, 2013
Wi-Fi
cancel
away
system is currently using energy saving AWAY settings
?
Figure 20. Adjusting Temperature with Program Running
(Away Mode)
Turn Programming ON — If the programming is OFF, touch the
system mode button (shown in figure 21, labeled heat or cool) to open the
manual settings menu. Programs is the final selection in this menu. Select
programs to display the program settings menu. (The menu will disappear if
you don't make a selection within a few seconds). Select an option (e.g.
spring/fall). The system mode button will display the selected program (e.g.
spring...program is ON).
Turn Programming OFF — If the programming is ON, touch the
system mode button (e.g. spring...program is ON) to return to manual
mode. The program settings menu includes an option for manual. Select
manual to display the manual settings. Select one of the manual settings
(e.g. heat only). After the selection is made, the system mode button will
display the selected manual option (e.g. heat only).

Comfort Sync™ 7-Day Programmable Communicating Thermostat
Page 15
use arrows
to change
temperature
?
touch cool-to
button
indoor temperature
indoor humidity is 41%
fan is
OFF
fan is
AUTO
cool-to
set temp
78
heat to
70
heat
or
cool
fan is
AUTO
system is waiting
cool only
heat only
heat or cool
off
emerg. heat
programs
summer
winter
spring/fall
save energy
custom
edit programs
manual
spring...
program
is ON
(mode
button) (mode
button)
(manual
settings
menu)
(program
settings
menu)
9:39 am May 23, 2013Wi-Fi ?
Figure 21. Turning on the Program
Adjust temperature when program is ON — Program HOLD
When the program is ON, the system mode button (shown in figure 22,
labeledspring...program is ON) indicates which program is running. In this
mode, touch a set temp button to trigger the appearance of an up/down
arrow. Use the arrows to adjust the temperature setting for the “cool to” (or
“heat to”) value (see figure 22).
While changing the temperature setting, the other options menu appears
(see figure 23). This menu provides options for the length of time that you
may choose to hold a temperature setting.
use arrows
to change
temperature
?
touch
cool-to
button
indoor temperature
indoor humidity is 41%
fan is
OFF
fan is
AUTO
cool-to
set temp
78
heat to
70
heat
or
cool
fan is
AUTO
system is waiting
cool only
heat only
heat or cool
off
emerg. heat
programs
summer
winter
spring/fall
save energy
custom
edit programs
manual
spring...
program
is ON
(mode
button) (mode
button)
(manual
settings
menu)
(program
settings
menu)
9:39 am May 23, 2013Wi-Fi ?
Figure 22. Adjusting Temperature with Program Running
(cool-to and heat-to)
indoor temperature
indoor humidity is 41%
fan is
OFF
9:39 am May 23, 2013
fan is
AUTO
cool-to
set temp
75
heat to
72
program hold until next
program setting
other options include
system is cooling
use arrows to
change
temperature
?
1hr 2hr
8hr 24hr
custom
select an option or do nothing to
accept the default “Program
d”hold until next period”
Program hold until
next period cancel
(other options menu)
9:39 am May 23, 2013
Wi-Fi
enter
away
?
Figure 23. Adjusting Temperature with Program Running
(other options)

507176-01 Page 16
You may select one of the hour buttons (1, 2, 8, or 24) if desired. If you select
custom, a time/date screen appears and you have the option of setting the
hold for any length of time (see figure 24).
After a hold is set, the other options menu disappears and a message will
state when the hold expires, along with a cancel option should you choose to
revert to the original program.
If you do not choose one of the “other options” the setting will be held until the
next period (default).
S M T W T F S
January 2012
123 4 5 6 7
8 9 10 11 12 13 14
15 16 17 18 19 20 21
22 23 24 25 26 27 28
29 30 31 save
09 : 39 am
program hold
Figure 24. Adjusting Temperature with Program Running
(program hold)
CLOCK SETTINGS
1. Touch the clock display on the Home screen. Figure 25 shows the
CLOCK SETTINGS screen.
2. Use the horizontal arrows to scroll to the desired month and year.
Touch a day of the month to select it.
3. Touch time format and daylight saving to toggle these options (if
desired).
4. Use the up/down arrows to change time.
5. Touch am/pm to select morning or afternoon (am/pm does not appear
if 24HR format is selected).
CLOCK SETTINGS
SMTWTFS
January 2012
1234567
8 9 10 11 12 13 14
15 16 17 18 19 20 21
22 23 24 25 26 27 28
29 30 31 save
09 : 39 am
set current date and
time
time
format
12 HR
daylight
saving
enabled
Figure 25. Set Current Time and Date
WEATHER
1. Touch the weather icon on the Home screen to view the WEATHER
screen. Figure 26 shows a typical 5-day forecast screen.
2. Use “X” button to return to the Home screen.
WEATHER
5 day forecast for West Columbia, SC
Thursday Friday Saturday Sunday Monday
85
60
Clouds
breaking for
some sun
88
61
Sunny,
pleasant and
warmer
85
62
Partly sunny
and Hot
88
61 86
60
9:39 am May 23, 2013
Wi-Fi
Provided by AccuWeather .com
Partly sunny
and Hot
Partly sunny
and Hot
?
Figure 26. Typical Weather Screen

Comfort Sync™ 7-Day Programmable Communicating Thermostat
Page 17
Setting Humidity Controls
NOTICE
Humidifierand dehumidifier controls must be set up by the installer or
these controls will not be visible. If your system has one or both of
these features and the controls are not visible, contact your Allied
dealer for proper setup.
If the controls have been set up, they will appear and will be ON.
Humidification and Dehumidification Settings: To adjust humidification
settings, touch the button to go to the FEATURES screen; then select the
system settings button. Some systems may have a humidifier and some
may have a dehumidifier. Some systems will have both (as shown in figure
27). You can control either or both from this screen.
Humidification Settings (Settings present only if humidifier is
installed): Touch the humidifier setting button you want to adjust. If it says
humidifier is OFF, one touch will change it to ON and bring on the set-to
button. When you touch the set-to button, the arrows appear, allowing you to
change the humidity setting to the desired value.
Dehumidification Controls: Touch the humidifier setting button you want
to adjust. If it says de-humidifier OFF, one touch will display a selection for
OFF, MEDIUM and HIGH. Select MEDIUM or HIGH to bring on the set-to
button. When you touch the set-to button, the arrows appear, allowing you to
change to the desired humidity setting.
Three climate settings are available:
OFF The system supplies higher indoor airflow at all compressor
capacities. This will increase efficiency by operating at a higher
sensible-to-total ratio.
MEDIUM The system controls indoor airflow to ensure balanced
efficiency and comfort.
HIGH The system lowers the indoor airflow at all compressor
capacities. This setting improves humidity removal by operating at a
lower sensible-to total-ratio.
Remember that the humidification controls are only active while the system
is in the heating mode. The dehumidification controls are only active while in
the cooling mode.
SYSTEM SETTINGS
current indoor humidity is 50%
humidifier
is ON de-
humidifier
MEDIUM
40%
set to 50%
set to
ALL CHANGES MADE ON
THIS SCREEN ARE IN
STANTLY SAVED.
9:39 am May 23, 2013Wi-Fi
OFF
MEDIUM
HIGH
humidity
display
is ON
(default is ON)
humidification
settings
dehumidification
settings
?
Figure 27. Humidity Controls

507176-01 Page 18
Connecting to a Home Wi-Fi Network
Check the router utility program or contact service provider for help.
The Wi-Fi thermostat must be close enough to the Wi-Fi router to ensure a
good communications signal between the thermostat and the router. (Hint:
use a smart phone with Wi-Fi and Wi-Fi finder application to locate and
determine signal strength.)
NOTE - The thermostat will not be able to reliably connect to the router
if the received signal strength indicator (RSSI) shows a larger negative
number than 70 i.e. 75, etc.
Secure Connection Recommended! Verify that the router is
compatible with and set to operate in either 802.11b, 802.11g or 802.11n
wireless network modes. Check router utility program or contact
service provider for assistance.
ENABLING WI-FI
To enable the Wi-Fi feature to communicate with a wireless router
1. Touch and release “Wi-Fi” in the lower left corner of the HOME screen.
2. Touch the Wi-Fi enable button.
indoor temperature
indoor humidity is 41%
fan is
OFF
9:39 am May 23, 2013
fan is
AUTO
cool-to
set temp
75
Heat-to
72
heat
or
cool
fan is
AUTO
enter
away
outdoor
temperature
80
system is cooling
Wi-Fi
Wi-Fi ?
Figure 28. Touch Wi-FI Button
WI-FIL SETTINGS
Press to enable /
disable Wi-FI
9:39 am May 23, 2013
disable
Thermostat is not connected to the Wi-FI network
WI-FI
Wi-Fi
X
?
Figure 29. Enable Wi-FI
3. Touch next as many times as necessary; then touch accept after
reading the User Agreement.
ESTABLISHING A WI-FI CONNECTION
1. Touch the NETWORK SETTINGS button. The screen will display
available Wi-Fi networks in range which may either be OPEN or
SECURE. In addition there is a button to manually add a network.
WI-FIL SETTINGS
press to enable /
disable Wi-FI
9:39 am May 23, 2013
enabled
Thermostat is not connected to the Wi-FI network
WI-FI
Wi-Fi
X
NETWORK
SETTINGS
press to change
network settings
Must setup a network connection before registering thermostat
Wi-Fi
!?
Figure 30. Enable Wi-FI

Comfort Sync™ 7-Day Programmable Communicating Thermostat
Page 19
Open a connection which which requires no password.
Secure a connection requires Wi-Fi password (security key).
Add a network is required when the Wi-Fi identification (SSID)
is being hidden (not broadcasting). You must know the Wi-Fi
network name (SSID), security encryption type (if enabled), and
security password (if security encryption is enabled).
BS345
DS9
Open connection (no password required)
Secure connection
(lock icon is present, a password is required)
BSG Signal strength. For best results, the higher the bar
levels, the more reliable a connection.
Figure 31. Typical Connection Type and Signal Strength
2. When selecting:
an unsecured connection, a screen will appear. Touch connect
to continue.
a secured connection, a screen will appear requesting the Wi-Fi
network password (access key). Use the on-screen keyboard to
enter the password, then touch connect to continue.
NOTE - AP info provides information concerning the home Wi-fi
connection (i.e, RSSI, IP address, MAC address and wait state) all of
which may be helpful in troubleshooting network connection issues).
3. Touch connect to complete the connection. Note that the Wi-Fi
enable button on the Wi-Fi SETTINGS screen becomes Wi-Fi
disable.
CREATING A WI-FI CONNECTION TO A HIDDEN NETWORK
1. When connecting to a network that is not listed (hidden), touch the add
new network icon to continue. Enter the network name (SSID). If
security encryption is enabled, touch the security is none button.
Select either WEP, WPA or WPA2. Use the on-screen keyboard to
enter the password (access code). If the network name or password
(access code) combination is incorrect or has been incorrectly typed,
access to the specified network will fail and a message will alert you
to retry.
Press any line to edit
network name (SSID)
security is
none
none
WEP
WPA
WPA2
password
Figure 32. Network Manual Setup
2. Touch connect to complete the connection. Note that the Wi-Fi
enable button on the Wi-Fi SETTINGS screen changes to Wi-Fi
disable.

507176-01 Page 20
Troubleshooting Wi-Fi and Server Connections
The following terminology is used in this troubleshooting section:
The following wireless LAN network protocols are supported by the
thermostat:
A802.11b is a wireless networking specification that extends
throughput up to 11 Mbps using the 2.4 GHz band.
B802.11g is a wireless networking specification that extends
throughputup to 54 Mbps using the 2.4 GHz band.
C802.11n is a wireless networking specification that extends
throughput up to 54 to 600 Mbps using multi-streaming
modulationtechnique.
Internet Protocol Address (IP address). This is a numerical label
assigned to each device (e.g., computer, printer, thermostat)
participating in a computer network that uses the Internet Protocol for
communication. An IP address serves two principal functions: host or
network interface identification and location addressing.
Wi-Fi Protected Access: These are security protocols and security
certification programs along with passwords (access codes)
developed by the Wi-Fi Alliance to secure wireless computer
networks. The thermostat supports the following security protocols:
AWEP
BWPA
CWPA2
Electromagnetic Interference Affecting Connectivity
Install both the thermostat and router away from other devices that could
interfere with wireless communications. Some examples of devices that
could interfere are:
Microwave ovens
Wireless cameras
Portable phones and bases
Baby monitors
Wireless speakers
Bluetooth devices
Garage door openers
Neighbors' wireless devices.
To eliminate a possible source of interference, temporarily disable any
devices and see if Wi-Fi performance has improved.
Router Signal Strength (RSSI)
The ideal signal strength range for the thermostat is -1 to -69 RSSI. The
signal strength can be viewed from the thermostat interface. Use the
following procedure to determine signal strength.
1. Touch NETWORK SETTINGS to display your Wi-Fi connection.
WI-FIL SETTINGS
press to enable /
disable Wi-FI
9:39 am May 23, 2013
enabled
Thermostat is not connected to the Wi-FI network
WI-FI
Wi-Fi
X
NETWORK
SETTINGS
press to change
network settings
Must setup a network connection before registering thermostat
Wi-Fi
!?
Figure 33. Network Settings
Table of contents
Popular Thermostat manuals by other brands

Frontier
Frontier TH-920E(TX) manual

ICM Controls
ICM Controls SC 2300 Installation, operation & application guide

ELEKTROBOCK
ELEKTROBOCK BT22 quick start guide

Bosch Thermotechnik
Bosch Thermotechnik E.L.M. Leblanc TR 200 manual

Danfoss
Danfoss DEVIreg Touch installation guide

Shinko
Shinko DFT-700-M instruction manual

greenmomit
greenmomit momit Smart user guide

Danfoss
Danfoss TP75-RF Installation & commissioning guide

Pentair
Pentair HLTSTAT10C instruction manual

Full Gauge Controls
Full Gauge Controls Microsol BMP Advanced c-o-n-n-e-c-t manual

White Rodgers
White Rodgers 1A11-2 installation instructions

Vemer
Vemer TUO GSM VE771800 user manual