ALLSOP Soji Solar Lantern Setup guide

Allsop Home and Garden
www.allsopgarden.com
Ph: 866
-
425
-
5767 Fax: 208
-
726
-
0196 Email: garden.consumer@allsop.
com
Soji
Solar Lantern Instruction Set
Congratulations on the purchase of your Soji
Solar Lantern! Setting up your Soji
Solar Lantern is
sim
ple and can be accomplished in 4
easy steps.
Parts Included in Package:
1.)
1 Nylon Lantern
2.)
Solar Housing Compartm
ent
-
attached
to nylon lantern
a.
On/Off Power Switch
b.
Dual LED Light
c.
1 AAA Battery (included)
3.)
Metal Wire F
rame Support
4.)
Metal Wire Hanging Handle
5.)
Base
unit
accessory
(stand)
Step One:
On the bottom side of the plastic solar ho
using compartment, slide the power switch from the
Off position over to the On position. This toggle switch will activate the AAA rechargeable battery
that is already included inside of the solar housing compartment.
Rechargeable batteries are used in
con
junction with solar power to store the energy that is collected by the solar panel each day.
Leave in the
On position at all times while placed outside to collect sunlight and emit light at night.
Step Two: While the lantern is still in the flat co
llapsed position,
insert
the
circular
end of the metal wire frame support around the
Dual
LED bulb.
P
ull
the lantern up to begin to form a round shape. Then attach the notched
end
s of the
wire frame support
into the wire ring
s
located on the bottom of
th
e nylon lantern. By inserting the metal wire frame support your lantern
will pop up into a round lantern shape.
Allsop Home and Garden
www.allsopgarden.com
Ph: 866
-
425
-
5767 Fax: 208
-
726
-
0196 Email: garden.consumer@allsop.
com
Step Three
:
Attach the wire hanging handle by inserting
the curved
ends of the handle into the
raised
tabs located on the top of the
plastic
solar housing compartment. The molded tabs are designed with a small
hole through which the curved end of the wire hanging handle will easily
fit. Attach both sides of the wire hanging handle. The solar panel must
be facing upwards towards the sun
in order to be able to collect sunlight.
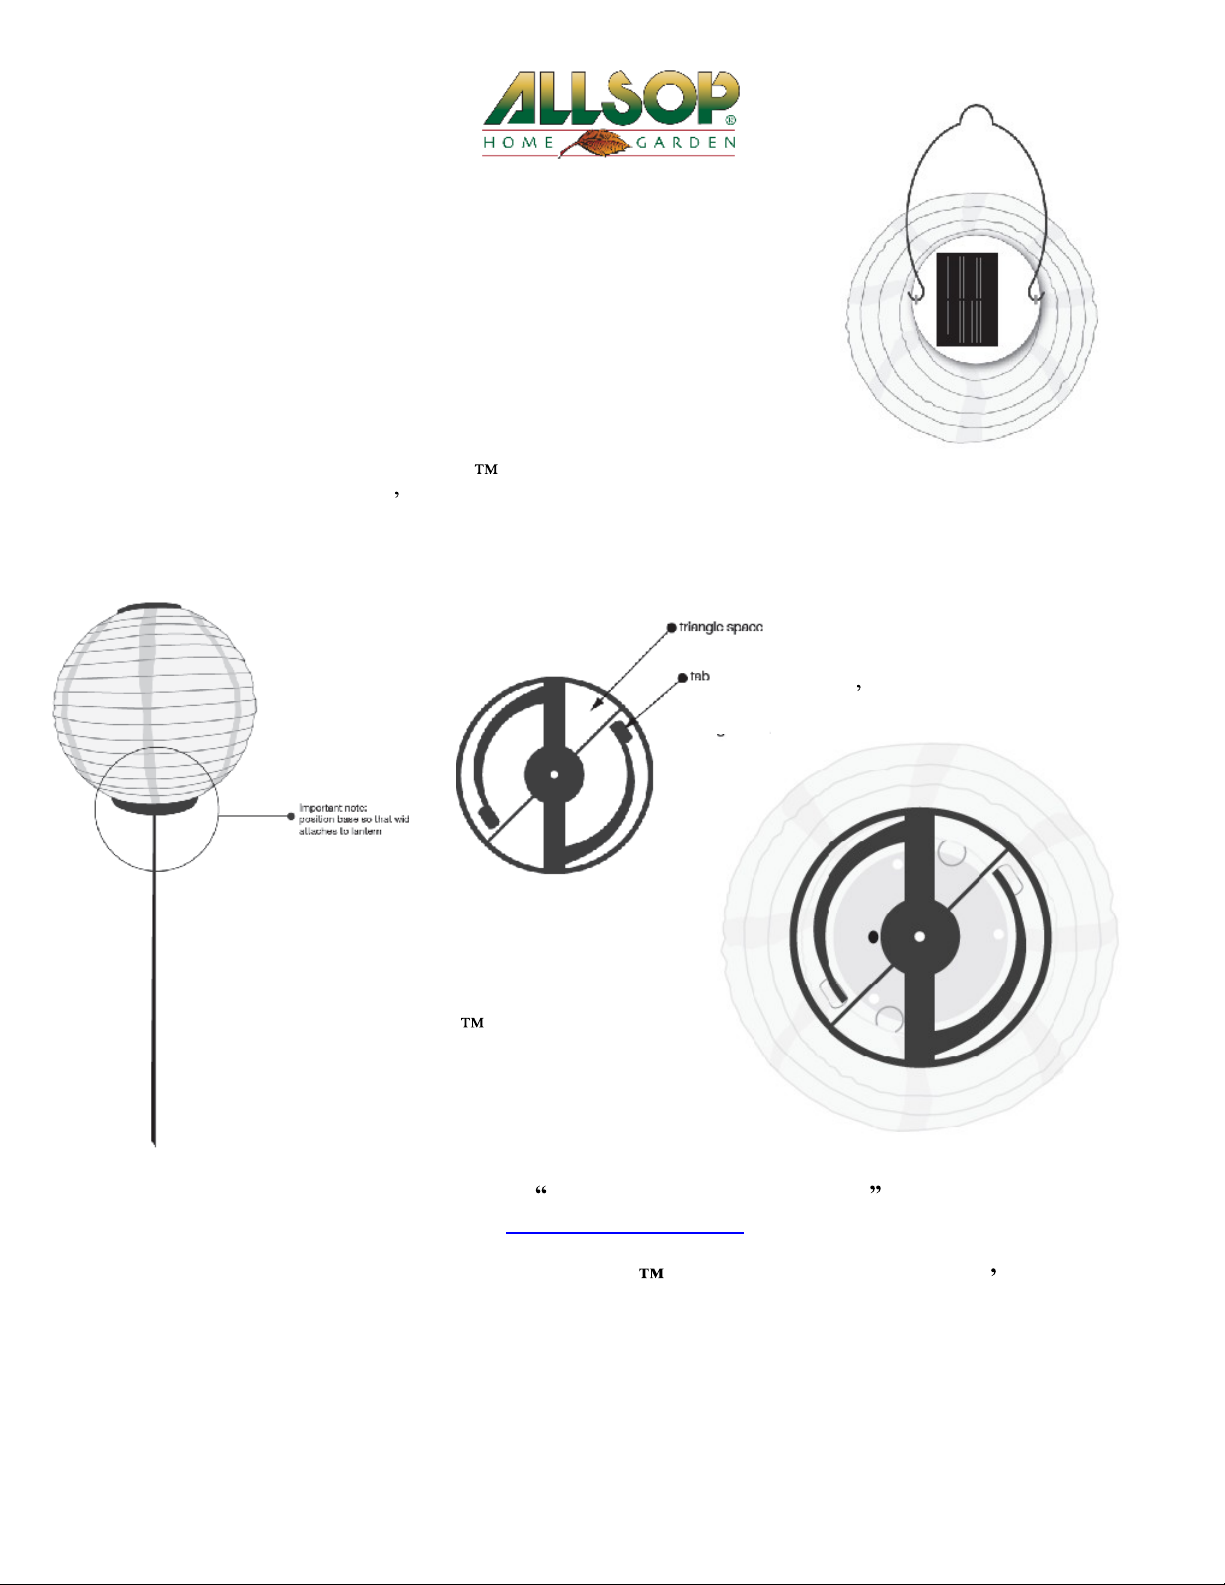
Assembling & Using the Base Unit:
Step Four:
In addition to
hanging
Soji
Solar Lantern
s y
ou can also use it with the included base unit
(stand)
for a tabletop use, here s how:
The bottom of the base
unit
is the
flat
side
that will sit
flush on
a flat surface.
To attach the base
unit line up the
empty triangle spaces with the
lantern s
wire rings
If you would like to see a
detailed
video of How-to Assemble the Base Unit
please visit our websi
te
at
www.allsopgarden.com
Additional Accessories can purchase
d
for your Soji
Lanterns
, including a shepherd s hook and
planting stake. Please view them
on our website or by calling our office.
Hook the tabs onto the inside of the lantern by
squeezing them one at a time.
*Please note that we recommend putting a
stabilizer inside of the Soji before attaching
the base unit to ensure the product will not
move with wind. A Ziploc bag filled
with sand,
rocks, rice, etc works great.
Table of contents
Other ALLSOP Outdoor Light manuals


Popular Outdoor Light manuals by other brands

Nichia
Nichia 144 Series Assembly instructions

Home Zone Security
Home Zone Security ELI0989V installation instructions

Schweizer
Schweizer MULTILIGHT Pro Instructions for use

Vista
Vista 5203 Series installation instructions

INDA
INDA A32960 Mounting instructions

B-K lighting
B-K lighting Precision 2 CO2 Series installation instructions

LIGMAN
LIGMAN POWERMISSION 2 installation manual

Secom
Secom KONAK CITY N1 Installation and assembly instructions

Home Decorators Collection
Home Decorators Collection HD19565FL Use and care guide

LIGMAN
LIGMAN FREETOWN 4 installation manual

Metz
Metz Mecablitz 44 AF-3M Operating instruction

Philips
Philips LivingColors Micro 70018/31/PH user manual


