Altronics X 7063 User manual


X 7063
Wi-Fi Home Weather Station
2
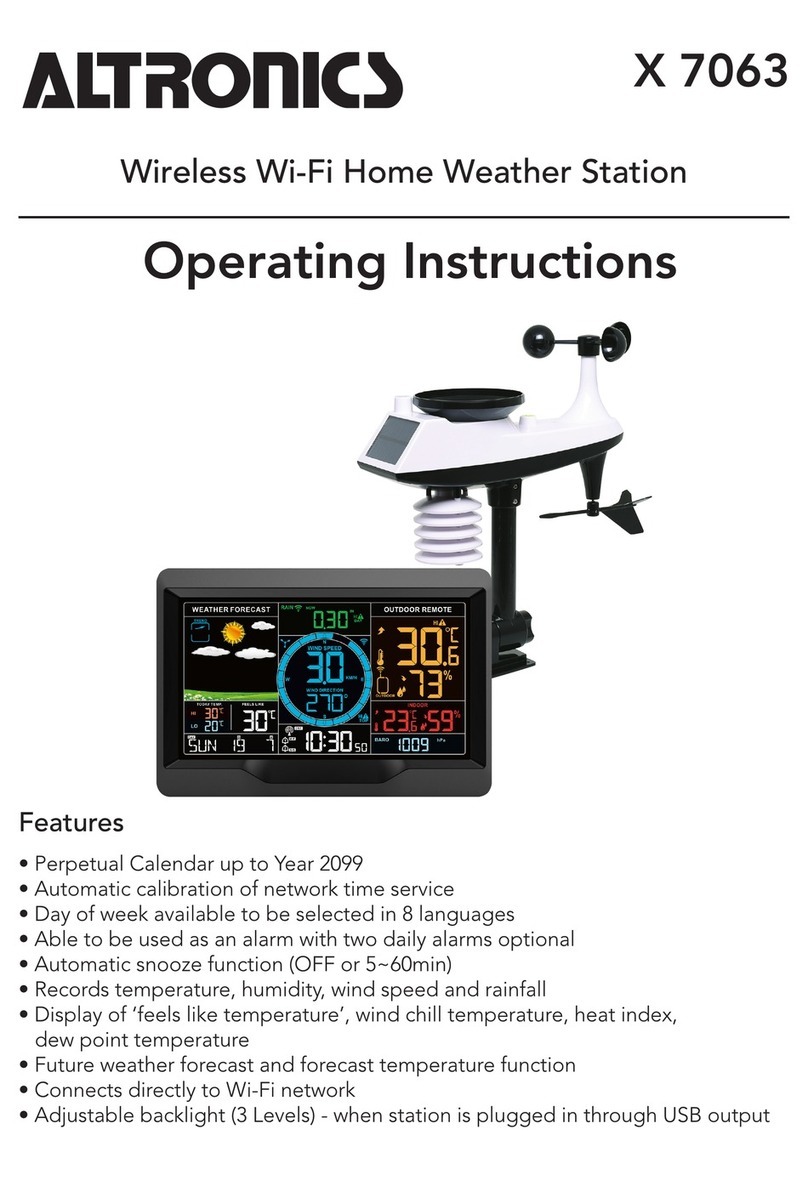
This fantastic wireless Wi-Fi home weather station contains everything you require to
monitor live weather conditions at home. The main base station displays at a glance, indoor
and outdoor temperature, humidity, barometric pressure, recent rainfall, wind speed and
direction. Plus a handy weather forecast, trend indicator, calendar and dual alarm clock. All
measurements are transmitted wirelessly from the solar powered sensors back to the main
base station inside your home. It can also connect to your home wi- allowing monitoring of
measurements via smartphone. External sensors can be located up to 100m from the main
base station.Optional temperature/humidity wireless remotes sensor
(X 7064) sold separately. Base station size: 205W130Hx32Dmm.
Powered By:
Weather station:
• Power Adapter: 5V DC 1.2A (included)
• USB cable (included)
• Battery: 2 x LR6 AA 1.5V (not included)
Multi-combination Wireless Remote Sensor:
• Battery: 3 x LR6 AA 1.5V (not included)
X 7064 - Temperature | Humidity Wireless
Remote Sensor (sold separately)
• Battery: 2 x LR6 AA 1.5V (not included)
Overview:
CAUTION: The wireless remote sensor
module can operate at temperatures
between -30 to +70. Some non-
rechargeable alkaline cells can
operate within a temperature range
of between -20 to + 60. Some lithium
cells (rechargeable or not) can function
at temperatures between -40 to + 70.
Please choose the right AA (LR6 – 1.5V
max) type battery to suit the in-situ
operating environment.
Note: The batteries we recommend using are Alkaline. Users can use Lithium batteries,
and recharge them on their own charger caddy.
Indoor temperature 0°C to 50°C (32°F to 112°F)
Outdoor temperature -40°C to 70°C (-40°F to 158°F)
Humidity Range 20% to 95%
Air pressure 600 to 1100 hPa (17.72 to 32.48 inHg or 450 to 825.1
mmHg)
Rain 0 to 9999mm (0-393.6 inches)
Wind Speed range 0 to 180 km/h (0 to 111 mph)
Wind direction range 0 to 359 degrees
Light range 0 to 128 klux (0 to 1378 kfc)
UV index 0 to 15 level
Wireless Outdoor Sensor 433.92MHz RF transmitting frequency,100 meters range in
an open area, without walls or oors.
Specications:

X 7063
Wi-Fi Home Weather Station
3
A1: Weather forecast
A2: Value of wind speed
A3: Wind direction steering wheel
A4: Wind direction or wind top speed of 1Hr
A5: Feels like temperature
A6: Today’s highest and lowest
temperature record
A7: Calendar
A8: Day of the week
A9: Rainfall
A10: Outdoor temperature
A11: Outdoor humidity
A12: Outdoor wireless channel
A13: Indoor temperature
A14: Indoor humidity
A15: Air pressure and light intensity
A16: UV index
A17:Time
A18: Rainfall prediction probability
: Network time icon
: Summer time icon
: Alarm 1 icon
: Alarm 2 icon
: Monday-Friday repeat alarm icon
: Saturday-Sunday repeat alarm icon
: Alarm Snooze icon
: Battery low voltage icon
: Wireless receiving icon
: Wireless channel loop icon
: Wi-Fi icon
: Wi-Fi signal strength indicator
: Wind icon
: Temperature/humidity up trend arrow
: Temperature/humidity down trend arrow
Part A - Front Screen Part A icons
Part B - Buttons
B1: Snooze and backlight touch location
B2: Set and brightness of the backlight button
B3: Alarm button
B4: Up and temperature record button
B5: Down and wi button
B6: Wind button
B7: Rain button
B8: Channel button
Part C - Rear Panel
C1: Wall Hanging hole
C2: Battery compartment
C3: USB output charging socket
C4: Power supply socket
C5: Support frame
Note: You can only connect the included 5V 1.5A power supply, to the weather station receiver
screen. This is an ALTERNATIVE to battery power, but it doesn’t hurt to keep the batteries in
the compartment while powered. They will remain OK because while the device is operating on
the power supply power, the batteries won’t be being used. Nor will the batteries be charged /
recharged.

X 7063
Wi-Fi Home Weather Station
4
Please Note: The solar panel feature has been designed to only power the unit during the day. The batteries
are required for night time operation. This means the solar panel doesn’t actually charge the sensor
batteries. We recommend using three non-rechargeable alkaline LR6 (AA) batteries.
D1: Solar panel
D2: Rain funnel
D3: Wind cups
D4: Bubble level
D5: Temperature | humidity
induction box
D6: Wind Directional Vane
D7: Reset button
D8: LED indicator
D9: Manual transmit signal button
D10: Battery compartment
D11: Support rod
D12: Fixed base
D13: Socket head cap screws
D14: Drain vents for rain sensor
D15: North direction mark
D16: Rain funnel rotation mark
D17: Large nut for xing the
support rod and the base
D18: Lighting and UV sensors
Multi-combination Wireless Remote Sensor:
• Mount the sensor module array in an open area clear for 15m in all
directions.
• The sensor needs to be mounted on a sturdy platform or bracket that
is xed 1.5m above the ground.
• The base of the sensor is screwed to the platform and the support
frame. Tighten the large nut that secures the support rod to the base.
• FOR NORTHERN HEMISPHERE - Pay attention to the “N” north
point marker and arrow relief on the top of the sensor, next to the spirit
level bubble. This array has been designed for northern hemisphere
operations as default. The adjacent diagrams describe the northern
hemisphere orientation.
• FOR SOUTHERN HEMISPHERE - make sure this ‘N’ arrow marker
is pointing SOUTH, which is a reversal of the directions shown in the
diagrams! (Use a compass, including a smart phone app, to ensure the
correct orientation.) The sensor is reorientated to point south so that
the solar panel onthe array faces north to catch the sunlight. Otherwise
the solar panel may not power the measuring devices properly.
Moreover, if the sensor arrow points ‘N’ in the southern hemisphere,
then the wind direction measurements will be the opposite of what
they should be.
• Use the top bubble level to install the sensor so that the module is
aligned vertically and horizontally. Otherwise the accuracy of the rainfall
reading will be affected.
• After properly and precisely aligning the sensor, lock the two
hexagon socket screws on the side of the sensor body.
• The xing screws of the wind cup (anemometer) and the wind
direction cursor (weather vane) should be tightened.
• Clean the sensor regularly. The recommended cycle is every
1-3 months, depending on how often it rains.
Sensor Mounting Instructions

X 7063
Wi-Fi Home Weather Station
5
Installation method 1
Installation method 2
1. Remove the rainwater funnel (turn the rain and funnel according to the
direction of rotation shown).
2. Gently remove debris or insects from the rain sensor.
3. Remove debris from the rainwater funnel itself.
4. Remove the debris from the drain.
5. Reinstall the rainwater bucket.
6. Note: Do not apply oil to the rain sensor!
Note: Make sure the wireless sensor is installed within 100
meters of the weather station (line of sight). Signal range can be
affected by walls and solid objects between the station and the
sensors.
There are two installation options for the multi-
combination sensor, as you can see in the
images on the right.
Installation method 1
This installtion method allows the sensor to be
mounted on a at surface on its base.
Installation method 2
This installation method uses an additional
part to allow the sensor to be mounted
vertically against a wall.
Multi-combination Wireless Remote Sensor:
Sensor Mounting Instructions

X 7063
Wi-Fi Home Weather Station
6
Items you will need to setup your station (all are not included):
1. Crosshead screwdriver and hex driver for assembly.
2. New Batteries:
• 2 x AA alkaline or lithium batteries for the weather station
• 3 x AA alkaline or lithium batteries for the multi-combination sensor
• 2 x AA alkaline or lithium batteries for the temperature/humidity sensor (if also using X 7064 - Sold separately)
For best results:
• Remove weather station and sensors from the package and place together on a table or bench, within easy reach.
• Place batteries and screwdriver within reach of setup location.
• Keep sensors and weather station within 30cm of each other for at least 15 minutes after installing batteries. This will
allow the sensors and station to connect correctly.
Set up Preparation:
1. Insert 3 AA batteries into the multi-combination wireless remote sensor.
2. If using the X 7064 also, insert 2 x AA batteries.
3. To keep the screens backlight always on, the station must remain powered using the
included USB charger.
4. Download the WeatherSense app by scanning the QR codes on the right or search for the
app on the app store/playstore.
• Hardware Requirements: iPhone 6S (or above) enabled smart device
• Software Requirements: iOS 8.0 (or above) or Android 6.0 (or above).
5. Once you have downloaded the app, register and log in. Pair the weather station
with the Wi-Fi and server information according to the prompts in the app.
6. Congure basic settings. Set time, date, units, measurement scales, etc.
7. Insert 2 x AA batteries into the weather station (this is a requirement of activating a Wi-Fi
network link and prevents loss of settings in case of power failure).
8. Move the remote sensor to outdoor or other location after 5 minutes.
Quick Setup:
Follow in-app instructions to create an account. Once registration is completed, enter the email for account activation.
User registration:
Steps (Pairing with weather station device):
Step 1: Login
user account or
register a new
user identity if
needed.
Step 2: Make sure your
phone is connected to
a 2.4GHz Wi-Fi network
and Bluetooth function
is turned on. (Wi-Fi
weather station currently
only supports 2.4GHz
Wi-Fi network during
conguration.)
Step 3: Plug in weather station
with AC/DC power. Press
and hold the button for 3
seconds until “WI-FI AP” icon
starts blinking on the device’s
display. If the device is rst
enabled, it will automatically
enter AP mode, and “WI-FI
AP” blinks on the display.
Step 4: Please select
“W003” for the
connection method.
After the new device
search is completed,
please nd and select
“WeatherType”.

X 7063
Wi-Fi Home Weather Station
7
Step 5: Select the correct
Wi-Fi network SSID and
make sure the correct Wi-Fi
password is entered.
Step 6: Follow the in-app instructions (stages a-d shown above) to pair the weather
station with your mobile device: When the ‘device binding successful’ appears in the
app, the weather station will automatically exit AP mode. If, not please press and hold
the button for 3 seconds to exit AP Mode.
Step 7: Ensure your phone’s location service is turned on and allowed for this App.
Check that your current location city can be located in the map. If you cannot nd
your city, you can manually move the location marker on the map.
Step 8: The device will connect to your home Wi-Fi network automatically within a few
minutes. Wi-Fi and signal symbol and all weather data will be displayed after Wi-Fi is
successfully connected.
Step 7
Note: After the power AC/DC adapter is disconnected, the Wi-Fi connection of the
device will be automatically disconnected.
1. Press and hold the button for 3 seconds to enter the time setting mode.
2. Press and release the or button to adjust the value. Hold the or button to adjust quickly.
3. Press and release the button to conrm and move to the next item.
Time and unit settings:
Note: Press the location button at any time to exit the settings menu. After 20 seconds the system will
automatically exit the settings menu without any buttons being pressed.
Time and Unit Settings Menu:
1. BEEP ON/OFF
2. Time zone: -12 to +12 hr
3. Auto DST (Daylight saving time): ON |OFF
4. Hour format: 24Hr | 12Hr
5. Hour
6. Minutes
7. Calendar display format: Month/Date | Date/Month
8. Year
9. Month
10. Date
11. The Week Display: Seven languages, plus English (see the next page)
12. Temperature unit: °C | °F
13. Wind speed unit: KM/H |MPH
14. Wind degree (angle) or direction (letter) selection
15. Rainfall unit: mm| inch
16. Pressure unit: hPa| inHg | mmHg
17. Light unit: KLUX | KFC
Notes:
- Once the correct network time is received it
will automatically become the time zone of the
weather station location.
- If DST is not required in the area where the
weather station is located, set AUTO DST to
OFF, and when the network is paired properly,
the time should be correct.
- The and buttons are used to scroll
through the menus.
a) b) c) d)
Note: Over time the app may be updated and as a result these steps and images
may alter.

X 7063
Wi-Fi Home Weather Station
8
Time and unit settings: Number 11. The Week Display
Alarm Function Control:
1. Press and release the button to view the Alarm 1 time. Press and release the button again to view the Alarm 2
time. Press and release the button once more to exit the viewing mode.
2. When viewing the Alarm 1 time or the Alarm 2 time, press and release the button to turn on/off its alarm
function.
3. Alarm 1 or Alarm 2 is turned on, the symbol or is displayed. At the same time, the relevant alarm repeat
symbol is displayed.
Note: Press the location button at any time to exit the settings menu. After 20 seconds the system will
automatically exit the settings menu without any buttons being pressed.
Alarm and Snooze settings:
1. Press and hold the button for 3 seconds to enter the alarm and snooze settings menu.
2. Press and release the or button to adjust the value. Hold the or button to adjust quickly.
3. Press and release the button to conrm and move to the next item.
Alarm and Snooze Settings Menu:
1. Alarm 1 hour
2. Alarm 1 minutes
3. Alarm 1 repeat: M-F | S-S | M-S
4. Alarm 1 snooze time: 5 to 60 minutes | OFF
5. Alarm 2 hour
6. Alarm 2 minutes
7. Alarm 2 repeat: M-F | S-S | M-S
8. Alarm 2 snooze time: 5 to 60 minutes | OFF
Notes:
1. When the alarm is set to M-F, the alarm function will be activated from Monday to Friday. When the alarm is set
to S-S, the alarm function will be activated on Saturday and Sunday. When the alarm is set to display both M-F and
S-S, the alarm function will be activated throughout the week, at the set time of day.
2. The snooze time setting range: 5 ~ 60MIN, OFF. When set to OFF, it means there is no snooze function. Snooze
time unit is set in minutes.
3. The alarm buzzer will sound for about a minute. The volume will increase in four stages. Pressing the snooze or
deactivate button during the crescendo stages will close the alarm.
4. The alarm buzzer cycle will repeat, and the ringing will stop when it is deactivated, or after one hour passes.
Note: The languages may occur in a different order in the menu, compared to how they are
shown in the rows of this table.

X 7063
Wi-Fi Home Weather Station
9
Switching off the alarm signal:
To stop the alarm signal press and hold the button for more than 3 seconds.
Snooze function:
1. When the alarm sounds, touch and release the button. The alarm signal stops, and snooze will commence. At the
end of the snooze timer, it will ring again, snooze can be pressed again if desired.
2. In snooze mode, touch hold down the button for more than 3 seconds to exit snooze mode and shut off the alarm.
Temperature | Humidity Readings | History | Trend
1. Press and release the button to scroll through these measurements: High | Low temperature and humidity and
feels like temperature, dew point temperature, heat index, wind chill index.
2. High | Low temperature or humidity viewing mode, to switch viewing to records of other channels press and release
the button .
Note: Feels like temperature, dew point temperature, heat index and wind chill index are related to the value
detected by the multi-combination wireless remote sensor.
3. In Temperature | Humidity history viewing mode, press and hold the button for 3 seconds to clear all the data
history of Indoor | Outdoor remote Temperature | Humidity.
Note: Indoor | outdoor remote Temperature | Humidity reading will reset to current value.
4. Indoor | outdoor remote temperature | humidity will have trend change tips
: Temperature / humidity is rising.
: Temperature / humidity drops.
5. No display: temperature / humidity remains unchanged.
Note: Press the location button at any time to exit view mode. After 20 seconds the system will
automatically exit the settings menu without any buttons being pressed.
Air Pressure | Light Intensity | UV Index Reading:
1. In the main display interface, press and hold the button for 3 seconds to convert the display to air pressure or
light intensity.
2. There are ve status indications for the UV Index: LOW (0 to 2), MODERATE (3 to 5), HIGH (6 to 7), VERY HIGH (8 to
10), EXTREME (11+).
Wind Readings | History:
1. In the main display interface, press and hold the button for 3 seconds to display wind direction or wind speed
indicators/values.
Stages:
• WIND SPEED: Average speed over the past 30 seconds.
• 1HR TOP SPEED: Highest speed in the past hour.
• WIND DIRECTION: In letters or degrees (as set by user).
Note: The conversion is displayed as a wind direction indicator. 1 hour top speed can only be operated under the
main display interface.
2. Viewing wind speed history: Press and release the button to view the maximum wind history values: 1 Hour
(default) | 24 Hour |7 Days | Month | Year.
Stages:
• One Hour: Top speed within the past 60 minute period.
• 24 hour: Past 24 hour period, from last record.
• 7 Days: Past 7-day period, from last record.
• Month: Dened by Calendar Month i.e. January 1 - January 31.
• Year: Dened by Calendar Year i.e. January 1 - December 31.
3. When viewing wind speed history, press and hold the button for 3 seconds to clear all history of wind speeds.
Wind speed reading will reset to current wind speed.
Note: Press the location button at any time to exit view mode. After 20 seconds the system will
automatically exit the settings menu without any buttons being pressed.

X 7063
Wi-Fi Home Weather Station
10
Wireless sensor connection:
1. Users have the choice to connect the weather station to either a multi-combination wireless sensor or a
Temperature | Humidity wireless sensor (X 7064), which is sold separately. They also have the option to connect to
both sensors at the same time.
2. The weather station automatically searches for all wireless sensors within 3 minutes of power-on and registers the
sensor IDs. Each sensor generates a random ID after power-on to distinguish one from the other.
3. In the main display interface, press and release the button to view the value of the wireless sensor on the
different channels.
Note: In view mode, the ID of the wireless sensor can be displayed.
4. The temperature/humidity data of the additional channel wireless sensor needs to be displayed on the normal time
display interface. After selecting the channel in the viewing mode, touch the button to exit the viewing
mode.
Notes:
- Once the user has exited the viewing mode, the temperature and humidity values shown in the OUTDOOR
REMOTE column are shown from the selected channels.
- In the channel icon (displayed at the position of A15), the way the channels are displayed is dependant on the
sensor you are using. OUTDOOR (representing multi-combination wireless sensor) or 1/2 /3 (representing the 3
channels of temperature | humidity wireless sensor).
- When the weather station loses sensor signals or the sensor is not connected to the channel, the value of the
channel is displayed as “--”
5. Adding a new sensor or replacing the sensor:
- In channel view mode, press and hold the button for more than 3 seconds. The weather station will search for a
new signal. If the signal and its ID are successfully detected, a new sensor will be added to the weather station.
Note: When adding a new sensor or replacing a sensor (old sensor replacement battery), you need to turn on the
sensor power rst, then follow the steps above to control the weather station. When the channel icon (screen
position A15 - see base station diagram) displays the low voltage icon, , then that wireless sensor channel’s
battery needs changing. Then follow the steps above to re-add the wireless sensor to the weather station.
6. In the normal time display interface, press and hold the button for 3 seconds. The wireless channel in
the OUTDOOR REMOTE column will enter the loop mode, and the channel will be changed every 5 seconds
following this cycle: (OUTDOOR|CH1|CH2|CH3). The switching of channels will show different Temperature | Humidity
values according to each channel source.
Note: In the cycle mode, only the values of temperature and humidity are being displayed from the secondary
sensors. The values of wind speed, wind direction and rainfall are derived only from the multi-combination wireless
sensor.

X 7063
Wi-Fi Home Weather Station
11
Explanation of network weather forecast:
• After the weather station is connected to the Wi-Fi network, the weather station data will be automatically updated
every hour after the weather forecast information is obtained from the network.
• The weather station automatically downloads real-time weather data from the network, weather forecasts for the day
and the next four days, and forecasts for the highest and lowest temperatures.
• The weather station automatically uploads the meteorological data (temperature, humidity, air pressure, wind speed,
rainfall, etc.) from the weather station to the server, and the APP can automatically download that data from the server
through the network.
• Weather forecast icons that can appear on the base station screen:

X 7063
Wi-Fi Home Weather Station
12
Weather forecast:
• When the weather station is unable to connect to Wi-Fi, the weather station will predict the weather for the next
12 hours based on the air pressure trend. Of course, this prediction cannot be compared to professional weather
services supported by satellites and high-performance computers, and it can only provide an approximate indication
of local weather development.
• The weather station needs 7-10 days of air pressure calibration. After that, the weather forecast will tend to be stable
with an accuracy rate of 70%-75%.
• The weather base station screen can display the following weather icons:
Notes:
• Snowy icon will only appear if the outdoor temperature (refers to the temperature detected by multiple
combined sensors) is below -4°C (+25°F) and the forecast would be rainy or thunder rainy.
• Gale icon will only appear if the wind speed is above 50KM/H and the forecast would be Sunny or Mostly Cloudy
or Cloudy.
• Storm icon will only appear if the wind speed is above 50KM/H and the forecast would be Rainy or Thunder Rain.
• Snowstorm icon will only appear if the outdoor temperature (refers to the temperature detected by multiple
combined sensors) is below -4°C (+25°F) and the wind speed is above 50 KM / H and the forecast would be Rainy
or Thunder Rainy.
Base Station Screen Back-Light:
• If the product is powered by batteries, touch the button. The back-light will stay lit for 15 seconds.
• When the station is plugged in using the included USB charger the back-light will always be on.
• Press the button to adjust the brightness of the back-light, of which there are 3 different brightness levels.
Note: The back-light will switch off to prevent interference during channel data reception.
Base Station Low battery:
• If the “Indoor sensor” section on the screen shows the low battery icon , then you need to replace the weather
station’s batteries as soon as possible

X 7063
Wi-Fi Home Weather Station
13
Sensor Mounting Instructions:
Temperature | Humidity Wireless Remote Sensor (X 7064 sold separately):
Option 1:
1. Mount the mounting screws to the wall.
2. Hang the wireless sensor on the screw.
Option 2:
1. Insert the mounting screws through the front of the
wireless sensor into the wall.
2. Tighten the screws to t (do not over tighten).
3. If the wireless sensor is placed outdoors, install the
sensor on a north facing wall if possible.
4. Make sure the wireless sensor is installed vertically to
vent moisture.

X 7063
Wi-Fi Home Weather Station
14
Other manuals for X 7063
1
Table of contents
Other Altronics Weather Station manuals
Popular Weather Station manuals by other brands

Ambient Weather
Ambient Weather BA212 user manual

Oregon Scientific
Oregon Scientific BTHR968 user manual

PCE Instruments
PCE Instruments LUMAX instruction manual

Auriol
Auriol 4-LD4868 Usage and safety instructions

Oregon Scientific
Oregon Scientific PRYSMAchrome BAR292 manual

Somogyi Elektronic
Somogyi Elektronic HCW 23 instruction manual