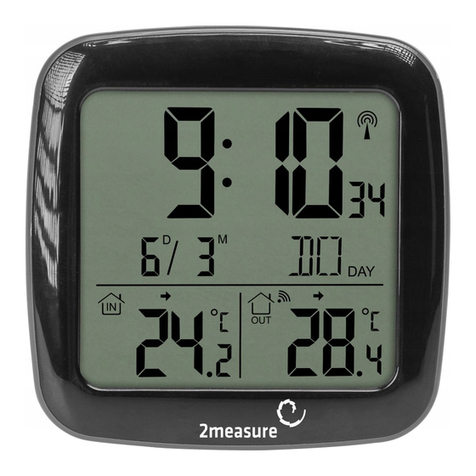
2measure 260908 User manual

─INSTRUKCJA OBSŁUGI ─
ELEKTRONICZNA STACJA
POGODY
No 260908

2
JĘZYKI
Elektroniczna stacja pogody -
instrukcja obsługi
PL - 3
Electronic weather station -
Operation manual
GB - 8
Elektronische wetterstation -
Bedienungsanleitung
DE - 13
Метеостанция электронная -
руководство по эксплуатации
RU - 18
Elektroninė orų stotelė -
Naudojimo instrukcija
LT - 24
Elektroniskā meteostacija -
apkalpošanas rokasgrāmata
LV - 29
Elektrooniline meteojaam -
Kasutusjuhend
EE - 34
Stație meteorologică electronică -
instrucțiuni de utilizare
RO - 39
Elektronická meteorologická
stanice - návod k obsluze
CZ - 44
Digitálna meteostanica - návod na
použitie
SK - 49
Station météo électronique -
notice d’utilisation
FR - 54
Електронна метеостанція -
інструкція експлуатації
UA - 59
Digitális időjárásjelző állomás -
kezelési utasítás
HU - 64

3
─ INSTRUKCJA OBSŁUGI ─
ELEKTRONICZNA STACJA POGODY
Ta instrukcja jest częścią produktu i powinna być przechowywana w sposób umożliwiający zapoznanie się z jej
treścią w przyszłości. Zawiera istotne informacje o ustawieniach i pracy urządzenia.
Zestaw zawiera:
•Stację pogody
•Czujnik zewnętrzny
•Zasilacz
•Instrukcję obsługi
Funkcje:
•Synchronizacja zegara sygnałem radiowym
•Godzina w formacie 12- lub 24-godzinnym
•Codzienny alarm
•Drzemka
•Kalendarz
•Kolorowy wyświetlacz z podświetleniem
•Pogodynka
•Fazy księżyca
•Wskaźnik komfortu
•Możliwość podłączenia 3 czujników zewnętrznych
•Ciśnienie:
−Zakresy pomiarowe ciśnienia atmosferycznego: 600hPa/mb (17,72inHg) ÷ 1100hPa/mb (32,50inHg)
−Ciśnienie w hPa/mb lub inHg
−Wskaźnik tendencji zmian ciśnienia
•Temperatura:
−Zakresy pomiarowe temperatury wewnętrznej: 0°C (32°F) ÷ 50°C (122°F)
−Zakresy pomiarowe temperatury zewnętrznej: -20°C (-4°F) ÷ 60°C (140°F)
−Temperatura w °C lub °F
−Dokładność pomiaru: +/- 1°C (+/- 2°F)
−Dokładność wyświetlania: 0,1°C (0,1°F)
−Wskaźnik tendencji zmian temperatury
−Alert temperaturowy
•Wilgotność:
−Pomiar wilgotności wewnętrznej i zewnętrznej
−Zakres pomiarowy: 20% ÷ 95% wilgotności względnej (RH)
−Dokładność pomiaru: +/- 5%
−Dokładność wyświetlania: 1%
−Wskaźnik tendencji zmian wilgotności
•Maksymalna/minimalna zarejestrowana wartość temperatury i wilgotności
•Bezprzewodowy czujnik zewnętrzny:
−Uchwyt do montażu na ścianie
−Częstotliwość transmisji radiowej 433,92 MHz
−Zasięg nadawania do 90m
−Temperatura w °C albo °F
−Możliwość wyboru kanału nadawania
•Zasilanie:
Stacja pogody:
−Zasilacz
−Baterie 2 x AA 1.5V
Czujnik zewnętrzny:
−Baterie 2 x AA 1.5V

4
Schemat urządzenia:
Panel przedni - wyświetlacz
A1: Pogodynka
A2: Ciśnienie atmosferyczne
A3: Temperatura zewnętrzna
A4: Temperatura wewnętrzna
A5: Wilgotność zewnętrzna
A6: Wilgotność wewnętrzna
A7: Zegar / Kalendarz / Alarm
A8: Faza księżyca
Panel tylny
B1: Panel dotykowy
“SNOOZE/LIGHT”
B2: Przyciski ustawień:
„SNOOZE/LIGHT”, „MEMORY”,
„HPA/INHG”, „ALERT”, „DOWN”,
„UP”, „ALARM”, „SET”
B3: Komora baterii stacji pogody
B4: Podpórka
B5: Gniazdo zasilacza
B6: Zasilacz AC/DC
Czujnik bezprzewodowy
C1: Wyświetlacz LCD – temperatura
C2:Wyświetlacz LCD – wilgotność
C3: Kontrolka transmisji
C4: Przycisk °C/°F
C5: Przycisk TX
C6: Przełącznik kanału nadawania
C7: Komora baterii czujnika

5
Uruchomienie:
W komorze baterii stacji pogody umieścić baterie 2 x AA 1.5V (brak w zestawie) lub/i podłączyć stację do zasilacza
(w zestawie). Stacja automatycznie rozpocznie pracę. UWAGA! W przypadku zamontowania baterii, komora baterii
zostaje odłączona w momencie przyłączenia stacji do zasilacza. Następnie w komorze baterii czujnika zewnętrznego
umieścić baterie 2 x AA 1.5V (brak w zestawie). Za pomocą przełączników wybrać pożądany kanał nadawania (CH1,
CH2, CH3) oraz jednostkę pomiaru temperatury wyświetlanej przez czujnik (°C lub °F).
W przypadku nawiązania połączenia z czujnikiem zewnętrznym, na wyświetlaczu pojawi się pomiar temperatury oraz
wilgotności otrzymany przez czujnik (w zależności od wykorzystywanego kanału – Outdoor 1, 2 lub 3). W celu
manualnego rozpoczęcia próby nawiązania połączenia z czujnikiem zewnętrznym, należy wcisnąć i przytrzymać
przycisk „DOWN” na stacji. Kontrolka czujnika na ekranie stacji zacznie migać. Następnie wcisnąć przycisk „TX” na
czujniku.
Zasięg sygnału z czujnika wynosi maksymalnie 90 metrów przy założeniu, że sygnał nie natrafi na żadne przeszkody
które mogłyby na niego negatywnie wpłynąć. Na osłabienie sygnału wpływają na przykład ściany, drzewa, szyby ale
także ukształtowanie terenu oraz zakłócenia z innych urządzeń elektrycznych czy elektronicznych.
Synchronizacja z nadajnikiem radiowym (RCC):
W przeciągu 7 minut od uruchomienia, stacja samoczynnie podejmie próbę synchronizacji z nadajnikiem radiowym
(symbol RRC zacznie migać). W przypadku nawiązania połączenia z nadajnikiem radiowym zegar zostanie ustawiony
automatycznie.
W celu manualnego uruchomienia synchronizacji z nadajnikiem radiowym należy wcisnąć i przytrzymać przycisk „UP”.
W czasie trwania synchronizacji możliwość konfiguracji pozostałych funkcji jest zablokowana.
Jeśli synchronizacja zakończy się niepowodzeniem (symbol RCC zniknie), system samoczynnie podejmie kolejną próbę
w ciągu następnej pełnej godziny. Ta procedura jest powtarzana automatycznie do 5 razy.
Możliwe źródła zakłóceń odbioru sygnału:
−urządzenia gospodarstwa domowego nie posiadające tłumików zakłóceń radiowych,
−odbiorniki TV w odległości mniejszej niż 2 metry,
−urządzenia emitujące wysokie częstotliwości,
−położenie topograficzne (zbyt duża odległość od nadajnika, górzystość terenu itp.),
−zaburzenia meteorologiczne.
Sygnał radiowy nadawany jest z miejscowości Mainflingen w Niemczech. Najprostszym sposobem na połączenie z
sygnałem jest ustawienie stacji przy zachodnim oknie podczas pierwszego uruchomienia. W przypadku niepołączenia
się urządzenia z sygnałem DCF77, prosimy ustawić czas ręcznie. Podczas łączenia stacji z sygnałem radiowym
przejście w tryb jakichkolwiek ustawień może być niemożliwe.
Ustawienia wyświetlacza:
W celu ręcznej konfiguracji zegara/kalendarza należy wcisnąć i przytrzymać przycisk „SET”. Po chwili na ekranie
zacznie migać liczba oznaczająca format wyświetlania godziny. Przyciskami „UP” oraz „DOWN” ustawić odpowiednią
wartość. Następnie wciskając jednokrotnie „SET” potwierdzić wybór i przejść do ustawień kolejnej funkcji. Jeżeli przez
20 sekund przycisk „SET” nie zostanie wciśnięty, stacja powróci do normalnego trybu wyświetlania.
Kolejność ustawiania funkcji:
1. Format wyświetlania godziny 12/24h
2. Strefa czasowa
2. Godzina
3. Minuty
4. Kolejność wyświetlania – dzień/miesiąc lub miesiąc/dzień
5. Rok
6. Miesiąc
7. Dzień
8. Język wyświetlania – dzień tygodnia
6
Dostępne języki wyświetlania
Ustawienia alarmu:
W celu zmiany ustawień alarmu należy wcisnąć i przytrzymać przycisk „ALARM”. Po chwili na wyświetlaczu zacznie
migać liczba oznaczająca godzinę alarmu. Przyciskami „UP” oraz „DOWN” ustawić odpowiednią wartość. Następnie
przyciskiem „ALARM” przejść do ustawień minut.
W celu aktywacji/dezaktywacji funkcji, w trybie normalnego wyświetlania należy jednokrotne wcisnąć przycisk „ALARM”.
O bieżącym stanie funkcji informuje pojawiająca się na ekranie ikona dzwonka.
Do podglądu ustawionego czasu alarmu można przejść za pomocą przycisku „SET”.
Funkcja drzemki:
Po aktywacji alarmu należy dotknąć panelu „SNOOZE/LIGHT”. Spowoduje to wyciszenie alarmu i przesunięcie jego
ponownej aktywacji o 5 minut. O bieżącym stanie funkcji informuje pojawiająca się na ekranie ikona Zz.
Format wyświetlania temperatury (°C lub °F):
W celu zmiany wyświetlanej jednostki temperatury na ekranie należy jednokrotnie wcisnąć przycisk „UP”.
Pamięć minimalnych/maksymalnych pomiarów temperatury i wilgotności:
W celu wyświetlenia zapamiętanych przez stację pomiarów temperatury i wilgotności należy:
−wcisnąć przycisk „MEMORY” jednokrotnie dla pomiarów maksymalnych,
−wcisnąć przycisk „MEMORY” dwukrotnie dla pomiarów minimalnych,
−wcisnąć przycisk „MEMORY” trzykrotnie, aby powrócić do trybu normalnego wyświetlania.
By wyczyścić pamięć urządzenia, należy wcisnąć i przytrzymać przycisk „MEMORY”.
Alert temperaturowy dla czujnika bezprzewodowego (temperatura zewnętrzna):
W celu zmiany ustawień alertu temperaturowego należy wcisnąć i przytrzymać przycisk „ALERT”. Po chwili na
wyświetlaczu zacznie migać liczba oznaczająca górny zakres temperatury dla alertu (Hi). Przyciskami „UP” oraz
„DOWN” ustawić odpowiednią wartość. Następnie przyciskiem „ALERT” przejść do ustawień dolnego zakresu
temperatury dla alertu (Lo).
W celu aktywacji/dezaktywacji funkcji, w trybie normalnego wyświetlania należy jednokrotne wcisnąć przycisk „ALERT”.
O bieżącym stanie funkcji informuje pojawiająca się na ekranie ikona dzwonka Outdoor Temp Alerts.
Prognoza pogody i ciśnienie atmosferyczne:
W celu zmiany wyświetlania jednostki pomiaru ciśnienia atmosferycznego należy wcisnąć i przytrzymać przycisk
„HPA/INHG”. Przyciskami „UP” oraz „DOWN” ustawić odpowiednią wartość. Następnie przyciskiem „HPA/INHG” przejść
do ustawień piktogramu prognozy pogody.
Piktogram obrazujący stan pogody zmienia się w zależności od zmian ciśnienia atmosferycznego (oczywiście prognoza
pogody pokazywana przez stację jest mniej dokładna, niż prognozy przygotowywane przez profesjonalne serwisy
pogodowe). Polecamy skorygowanie piktogramu np. co miesiąc do aktualnej sytuacji pogodowej, w celu otrzymania
dokładniejszych prognoz w przyszłości.
Uwaga! Pomiar ciśnienia oraz prognoza pogody podawane przez stację umieszczoną w pomieszczeniu
klimatyzowanym mogą być zafałszowane.

7
Rodzaje piktogramów:
słonecznie
lekkie
zachmurzenie
pochmurno
deszczowo
burzowo
śnieżnie
Fazy księżyca:
Stacja pokazuje aktualną fazę księżyca, zależną od bieżącej daty kalendarzowej:
Nów
Rosnący sierp
Pierwsza
kwadra
Rosnący garb
Pełnia
Zanikający garb
Trzecia
kwadra
Zanikający sierp
Wskaźnik komfortu w pomieszczeniu:
Stacja pokazuje aktualny poziom komfortu w pomieszczeniu, zależny od pomiaru temperatury oraz wilgotności:
komfortowo za zimno / za gorąco
Tendencja zmian:
Stacja pokazuje tendencję zmian temperatury, wilgotności oraz ciśnienia na podstawie dokonanych pomiarów:
tendencja wzrostowa
brak zmian
tendencja spadkowa
Podświetlenie ekranu:
Podczas wykorzystania zasilania bateryjnego dotknięcie panelu „SNOOZE/LIGHT” spowoduje podświetlenie ekranu.
Po podłączeniu zasilacza stacja automatycznie przejdzie w tryb podświetlenia ekranu. Przyciskiem „HPA/INHG” należy
wybrać jeden z 5 dostępnych trybów podświetlenia.
Informacje dodatkowe:
Gdy wartość mierzonej temperatury/wilgotności znajdzie się poza zakresem pracy urządzenia, na ekranie pojawią się
oznaczenia:
−HH.H –wartości powyżej zakresu
−LL.L –wartości poniżej zakresu
Uwaga!
Każde gospodarstwo jest użytkownikiem sprzętu elektrycznego i elektronicznego, a co za tym idzie potencjalnym
wytwórcą niebezpiecznego dla ludzi i środowiska odpadu, z tytułu obecności w sprzęcie niebezpiecznych substancji,
mieszanin oraz części składowych. Z drugiej strony zużyty sprzęt to cenny materiał, z którego możemy odzyskać
surowce takie jak miedź, cyna, szkło, żelazo i inne.
Symbol przekreślonego kosza na śmieci umieszczany na sprzęcie, opakowaniu lub dokumentach do niego
dołączonych oznacza, że produktu nie wolno wyrzucać łącznie z innymi odpadami. Oznakowanie oznacza
jednocześnie, że sprzęt został wprowadzony do obrotu po dniu 13 sierpnia 2005 r.
Obowiązkiem użytkownika jest przekazanie zużytego sprzętu do wyznaczonego punktu zbiórki w celu właściwego jego
przetworzenia. Informacje o dostępnym systemie zbierania zużytego sprzętu elektrycznego można znaleźć w punkcie

8
informacyjnym sklepu oraz w urzędzie miasta/gminy. Odpowiednie postępowanie ze zużytym sprzętem zapobiega
negatywnym konsekwencjom dla środowiska naturalnego i ludzkiego zdrowia!
Uproszczona deklaracja zgodności
Producent BROWIN Sp. z o. o. Sp. k. ul. Pryncypalna 129/141, PL 93-373 Łódź deklaruje, iż urządzenie marki
2measure, model 260908, jest zgodne z Dyrektywą Parlamentu Europejskiego i Rady 2014/53/UE z dnia 16 kwietnia
2014 r. w sprawie harmonizacji ustawodawstw państw członkowskich dotyczących udostępniania na rynku urządzeń
radiowych i uchylająca dyrektywę 1999/5/WE. Pełny tekst deklaracji zgodności dostępny jest pod adresem
internetowym www.browin.pl
─ OPERATION MANUAL ─
ELECTRONIC WEATHER STATION
This instruction constitutes a part of the product and should be stored in a manner allowing to read its contents
in the future. It contains significant information on the setting and operation of the device.
The set includes:
•Weather station
•External sensor
•Power supply unit
•User manual
Functions:
•Clock synchronisation using a radio signal
•Time display in 12- or 24-hour format
•Daily alarm
•Snooze
•Calendar
•Backlit coloured display
•Weather forecast
•Moon phases
•Comfort indicator
•Possibility to connect 3 external sensors
•Pressure:
oAtmospheric pressure measurement ranges: 600hPa/mb (17.72inHg) ÷ 1100hPa/mb (32.50inHg)
oPressure in hPa/mb or inHg
oPressure change tendency indicator
•Temperature:
−Internal temperature measurement ranges: 0°C (32°F) ÷ 50°C (122°F)
−External temperature measurement ranges: -20°C (-4°F) ÷ 60°C (140°F)
−Temperature in °C or °F
−Measurement accuracy: +/- 2°C (+/- 2°F)
−Precision of value displayed: 0.1°C (0.1°F)
−Temperature change tendency indicator
−Temperature alert
•Humidity:
−Measurement of internal and external humidity
−Range of measurement: 20% ÷ 95% relative humidity (RH)
−Measurement accuracy: +/- 5%
−Precision of value displayed: 1%
−Humidity change tendency indicator
•Maximum/minimum temperature and humidity value recorded
•Wireless external sensor:
−Fixture for installation on walls
−Radio transmission frequency 433.92 MHz
−Broadcast range of up to 60 m
−Temperature in °C or °F
−Possibility of broadcast channel selection

9
•Power supply:
Weather station:
−Power supply unit
−2 x AA 1.5V batteries
External sensor:
−2 x AA 1.5V batteries
Device diagram:
Front panel - display
A1: Weather forecast
A2: Atmospheric pressure
A3: Outdoor temperature
A4: Indoor temperature
A5: Outdoor humidity
A6: Indoor humidity
A7: Clock / Calendar / Alarm
A8: Moon phase
Rear panel
B1: “SNOOZE/LIGHT” touch panel
B2: Settings buttons:
“SNOOZE/LIGHT”, “MEMORY”,
“HPA/INHG”, “ALERT”, “DOWN”,
”UP”, ”ALARM”, “SET”
B3: Weather station battery chamber
B4: Support
B5: Power supply unit socket
B6: AC/DC power supply unit
Wireless sensor
C1: LCD display - temperature
C2: LCD display - humidity
C3: Broadcast indicator
C4: °C/°F button
C5: TX button
C6: Broadcast channel switch
C7: Sensor battery chamber

10
Starting:
Place 2 x AA 1.5 V batteries (not included) in the battery chamber of the weather station and/or connect the station to
the power supply unit (included). The station will start operating automatically. NOTE! If the batteries are inserted, the
batter chamber is disconnected when the station is connected to a power supply unit. Next, place 2 x AA 1.5 V batteries
(not included) in the battery chamber of the external sensor. Use switches to select the broadcast channel desired (CH1,
CH2, or CH3) and the temperature unit displayed by the sensor (°C or °F).
If the connection with the external sensor is established, the display will show the temperature and humidity
measurements obtained by the sensor (depending on the channel used - Outdoor 1, 2, or 3). In order to manually start
an attempt to establish connection between the station and the external sensor, push and hold the “DOWN” button on
the station. The sensor indicator the screen will start flashing. Next, push the “TX” button on the sensor.
Synchronisation with radio transmitter (RCC):
Within 7 minutes from starting up, the weather station will automatically attempt to synchronise with the radio transmitter
(the RCC symbol will start flashing). Once the connection with the radio transmitter is established, the clock will be set
automatically.
In order to manually start synchronisation with the radio transmitter, press and hold the “UP” button. During
synchronisation the possibility of configuring other functions is blocked.
If synchronisation fails (indicated by the RCC signal disappearing), the system will automatically make another attempt
during the next full hour. This procedure is repeated automatically up to 5 times.
Possible sources of interference for signal reception:
−household appliances without radio interference suppressors,
−TV sets within distance of less than 2 metres,
−high-frequency emission devices,
−topographical location (too large distance from the transmitter, hilly terrain, etc.),
−meteorological disorders.
Note! In order for the functions to operate correctly it is necessary to specify the time zone manually.
Display settings:
In order to configure the clock/calendar manually, press and hold the “SET” button. After a moment the display will show
a flashing figure representing the time display mode. Use the “UP” and “DOWN” buttons to set the appropriate value.
Next, confirm the selection by pushing the “SET” button once and move to next function settings. If the “SET” button is
not pushed for 20 seconds, the station will return to the normal display mode.
Function setting order:
1. 12/24 h time display format
2. Time zone
2. Hour
3. Minutes
4. Order of display - day/month or month/day
5. Year
6. Month
7. Day
8. Display language –weekday

11
Display languages available:
Alarm settings:
In order to change the alarm settings, press and hold the “ALARM” button. After a moment the display will show a
flashing alarm hour number. Use the “UP” and “DOWN” buttons to set the appropriate value. Then use the “ALARM”
button to move to setting minutes.
In order to activate/deactivate the alarm clock function, push the “ALARM” button once in the normal display mode.
The current functions status is shown in the form of a bell icon appearing on the display.
In order to view the alarm time set, use the “SET” button.
Snooze function:
After activating the alarm, touch the “SNOOZE/LIGHT” panel. This will silence the alarm and set its repeated activation
to 5 minutes later. The current function status is shown in the form of the “Zz” icon appearing on the display.
Temperature display format (°C or °F):
In order to change the temperature unit displayed on the screen, push the “UP” button once.
Memory of minimum/maximum temperature and humidity measurements:
In order to display the temperature and humidity measurements recorded by the measuring station it is necessary to:
−push the “MEMORY” button once for maximum measurements,
−push the “MEMORY” button twice for minimum measurements,
−push the “MEMORY” button three times in order to return to normal display mode.
In order to reset the device memory, push and hold the “MEMORY” button.
Temperature alert for the wireless sensor (outdoor temperature):
In order to change the temperature alert settings, press and hold the “ALERT” button. After a moment the display will
show a flashing number representing the upper alert temperature limit (Hi). Use the “UP” and “DOWN” buttons to set
the appropriate value. Next, use the “ALERT” button to move to the lower alert temperature limit (Lo) settings.
In order to activate/deactivate the alarm clock function, push the “ALERT” button once in the normal display mode.
The current function status is shown in the form of the Outdoor Temp Alerts bell icon appearing on the display.
Weather forecast and atmospheric pressure:
In order to change the atmospheric pressure measurement unit displayed, press and hold the “HPA/INHG” button. Use
the “UP” and “DOWN” buttons to set the appropriate value. Next, use the “HPA/INHG” button to move to the weather
forecast pictogram settings.
The pictogram representing the weather conditions changes depending on changes in atmospheric pressure (the
weather forecast shown by the station is obviously less accurate than the forecasts prepared by professional weather
forecast services). We recommend adjusting the pictogram e.g. once a month or according to the current weather
situation in order to receive more accurate forecasts in the future.
Note! The pressure measurements and weather forecast provided by a station located in an air-conditioned room may
be distorted.

12
Pictogram types:
sunny
slightly
cloudy
cloudy
rainy
heavy rainy
snowy
Moon phases:
The stations shows the current moon phase, depending on the current calendar date:
New
moon
Waxing crescent
First quarter
Waxing gibbous
Full moon
Waning gibbous
Third quarter
Waning crescent
Room comfort indicator:
The stations shows the current level of comfort in the room, based on the temperature and humidity measurement:
comfortable too cold / too hot
Change tendency:
The station shows the temperate, humidity and pressure change tendency on the basis of measurements taken:
increasing trend
no changes
decreasing trend
Screen backlight:
When the device is powered by batteries, touching the “SNOOZE/LIGHT” panel will result in the screen becoming
backlit.
After connected the power supply unit, the station will automatically switch to the screen backlight mode. Use the
“HPA/INHG” button to selected one of the 5 backlight modes available.
Additional information:
If the value of temperature/humidity measured is outside of the device’s range of measurement, the display will show
one of the following designations:
−HH.H –values above the measurement range
−LL.L –values below the measurement range
Caution!
Every household uses electrical and electronic appliances, and thus is a potential source of waste, hazardous to humans
and the environment, due to the presence of hazardous substances, mixtures, and components in the equipment. On
the other hand, discarded equipment is a valuable resource from which raw materials like copper, tin, glass, iron, and
others can be recovered.
The symbol of the crossed out wheelie bin placed on the equipment, packaging, or documentation attached to
it, means that the product must not be disposed of together with other waste. The labelling simultaneously
means that the equipment was introduced to the market after the date of August 13th, 2005.
It is the responsibility of the user to transfer the used equipment to a designated collection point for proper
recycling. Information on the available collection system for electrical equipment can be found in the shop’s information
and at the municipal office. Proper handling of discarded equipment prevents negative consequences for the
environment and human health!

13
Simplified Declaration of Conformity
Producer BROWIN Sp. z o. o. Sp. k. ul. Pryncypalna 129/141, PL 93-373 Łódź represents that the appliance of
2measure brand, 260908 model, is compatibles with the Directive 2014/53/EU of the European Parliament and the
Council of 16 April 2014 on the harmonisation of the laws of the Member States relating to making available on the
market of radio equipment and repealing the Directive 1999/5/EEC. Full Declaration of Conformity is available at the
website www.browin.pl
─ BEDIENUNGSANLEITUNG ─
ELEKTRONISCHE WETTERSTATION
Diese Bedienungsanleitung ist Bestandteil des Produkts und soll so aufbewahrt werden, dass man den Inhalt
auch in Zukunft lesen kann. Sie enthält wichtige Informationen über die Einstellungen und den Betrieb des
Gerätes.
Das Set enthält:
•eine Wetterstation
•einen Außensensor
•ein Netzgerät
•eine Bedienungsanleitung
Funktionen:
•Synchronisierung der Uhr mithilfe eines Funksignals
•Uhrzeit im 12- oder 24-Stundenformat
•Täglicher Alarm
•Schlummer
•Kalender
•Buntes Display mit Beleuchtung
•Wettervorhersage
•Mondphasen
•Anzeige des Komfortniveaus
•Möglichkeit des Anschlusses von 3 Außensensoren
•Luftdruck:
oMessbereiche des Luftdrucks: 600hPa/mb (17,72inHg) ÷ 1100hPa/mb (32,50inHg)
oLuftdruck in hPa/mb oder inHg
oAnzeige der Tendenzen der Luftdruckveränderungen
•Temperatur:
−Messbereiche der Innentemperatur: 0°C (32°F) ÷ 50°C (122°F)
−Messbereiche der Außentemperatur: -20°C (-4°F) ÷ 60°C (140°F)
−Temperatur in °C oder °F
−Messgenauigkeit: +/- 2°C (+/- 2°F)
−Anzeigegenauigkeit: 0,1°C (0,1°F)
−Anzeige der Tendenzen der Temperaturveränderungen
−Temperaturalarm
•Feuchtigkeit:
−Messung der Innen- und Außenfeuchtigkeit
−Messbereich: 20% ÷ 95% der relativen Feuchtigkeit (RH)
−Messgenauigkeit: +/- 5%
−Anzeigegenauigkeit: 1%
−Anzeige der Tendenzen der Feuchtigkeitsveränderungen
•Maximaler/minimaler registrierter Temperatur- und Feuchtigkeitswert
•Kabelloser Außensensor:
−Halter für die Montage an der Wand
−Frequenz der Rundfunkübertragung 433,92 MHz
−Signalübertragung bis 60 m
−Temperatur in °C oder °F
−Möglichkeit der Auswahl des Sendekanals
•Spannungsversorgung:

14
Wetterstation:
−ein Netzgerät
−Batterien 2 x AA 1.5V
Außensensor:
−Batterien 2 x AA 1.5V
Schema des Geräts:
Vorderes Panel –Display
A1: Wettervorhersage
A2: Luftdruck
A3: Außentemperatur
A4: Innentemperatur
A5: Außenfeuchtigkeit
A6: Innenfeuchtigkeit
A7: Uhr / Kalender / Alarm
A8: Mondphase
Hinteres Panel
B1: Touchpanel
“SNOOZE/LIGHT”
B2: Tasten der
Einstellungen:„SNOOZE/LIGHT”,
„MEMORY”, „HPA/INHG”, „ALERT”,
„DOWN”, „UP”, „ALARM”, „SET”
B3: Batteriekammer der
Wetterstation
B4: Stütze
B5: Steckdose
B6: AC/DC Netzgerät

15
Drahtloser Sensor
C1: LCD-Anzeige –Temperatur
C2: LCD-Anzeige –Feuchtigkeit
C3: Kontrolllampe der Übertragung
C4: Taste °C/°F
C5: Taste TX
C6: Umschalttaste des Sendekanals
C7: Sensorbatteriekammer
Inbetriebnahme:
In der Batteriekammer der Wetterstation die Batterien 2 x AA 1.5V (nicht im Set enthalten) platzieren oder/und die
Station an das Netzteil (im Set enthalten) anschließen. Die Station nimmt ihre Arbeit automatisch auf. UWAGA! Sollten
Batterien montiert werden, wird die Batteriekammer beim Anschluss der Station an das Netzgerät getrennt.
Anschließend in der Batteriekammer des Außensensors die Batterien 2 x AA 1.5V (nicht im Set enthalten) platzieren.
Mithilfe der Umschalttasten den gewünschten Sendekanal (CH1, CH2, CH3) sowie die Messeinheit der Temperatur,
die von Sensor angezeigt wird (°C oder °F), wählen.
Im Fall der Aufnahme einer Verbindung mit dem Außensensor erscheint auf dem Display eine durch den Sensor
ermittelte Temperatur- und Feuchtigkeitsmessung (je nach genutztem Kanal –Outdoor 1, 2 oder 3). Um den
Verbindungsversuch der Station mit dem Außensensor zu manuell zu starten, die Taste „DOWN“ auf der Station
drücken und halten. Die Kontrolllampe des Sensors auf dem Display der Station beginnt zu blinken. Anschließend die
Taste „TX” auf dem Sensor drücken.
Synchronisierung mit dem Funksender (RCC):
Innerhalb von 7 Minuten ab der Inbetriebnahme wird die Station automatisch einen Synchronisationsversuch mit dem
Funksender unternehmen (das RRC-Symbol wird anfangen zu blinken). Im Fall der Aufnahme einer Verbindung mit
dem Funksender wird die Uhr automatisch eingestellt.
Um die Synchronisierung mit dem Funksender manuell zu starten die Taste „UP“ drücken und halten.
Während der Synchronisierung ist die Möglichkeit der Konfiguration der anderen Funktionen blockiert.
Sollte der Synchronisationsversuch scheitern (das RCC-Symbol wird verschwinden), wird das System einen erneuten
Versuch innerhalb der nächsten vollen Stunde unternehmen. Diese Prozedur wird automatisch bis zu 5 mal wiederholt.
Mögliche Quellen von Störungen beim Empfang des Signals:
−Haushaltsgeräte, die keine Dämpfer für Funkstörungen haben,
−Fernseher in einer kleineren Entfernung als 2 Meter,
−Geräte die hohe Frequenzen senden,
−die topografische Lage (zu große Entfernung vom Sender, gebirgiges Gelände u. Ä.),
−Wetterstörungen.
Achtung! Damit die Funktion ordnungsgemäß arbeitet, muss die aktuelle Zeitzone manuell eingestellt werden.
Einstellungen des Displays:
Zwecks manueller Konfiguration der Uhr/des Kalenders die Taste „SET“ drücken und halten. Nach einem Moment
beginnt auf dem Display das Format der Zeitanzeige zu blinken. Mit den Tasten „UP” und „DOWN” den entsprechenden
Wert einstellen. Anschließend durch einmaliges Drücken von „SET“ die Wahl quittieren und zu den Einstellungen der
weiteren Funktion übergehen. Sollte innerhalb von 20 Sekunden die Taste „SET“ nicht gedrückt werden, kehrt die
Station zum normalen Anzeigemodus zurück.
Reihenfolge der Einstellung der Funktionen:
1. Format der Zeitanzeige 12/24h
2. Zeitzone
2. Stunde

16
3. Minuten
4. Reihenfolge der Anzeige –Tag/Monat oder Monat/Tag
5. Jahr
6. Monat
7. Tag
8. Sprache der Anzeige –Wochentag
Verfügbare Sprachen der Anzeige:
Einstellungen des Alarmsignals:
Zwecks Änderung der Einstellungen des Alarms die Taste „ALARM“ drücken und halten. Nach einem Moment beginnt
auf dem Display die Zahl zu blinken, welche die Stunde des Alarms kennzeichnet. Mit den Tasten „UP” und „DOWN”
den entsprechenden Wert einstellen. Anschließend mithilfe der Taste „ALARM“ zu den Einstellungen der Minuten
übergehen.
Um die Funktion zu aktivieren/deaktivieren einmal im Modus der Normalanzeige die Taste „ALARM“ drücken.
Über den laufenden Stand der Funktion informiert das auf dem Display erscheinende Icon der Glocke.
Zur Vorschau der eingestellten Alarmzeit kann man mithilfe der Taste „SET“ übergehen.
Schlummerfunktion:
Nach der Aktivierung des Alarms das Panel „SNOOZE/LIGHT“ drücken. Das wird den Alarm stumm schalten und seine
erneute Aktivierung um 5 Minuten verschieben. Über den laufenden Stand der Funktion informiert das auf dem Display
erscheinende Icon Zz.
Format der Temperaturanzeige (°C oder °F):
Zwecks Änderung der angezeigten Temperatureinheit, auf dem Bildschirm einmal die Taste „UP” drücken.
Speicher der minimalen/maximalen Temperatur- und Feuchtigkeitsmessungen:
Um die von der Messstation gespeicherten Temperatur- und Feuchtigkeitsmessungen angezeigt zu bekommen, sollte
man:
−für maximale Messungen die Taste „MEMORY“ einmal drücken,
−für minimale Messungen die Taste „MEMORY“ zweimal drücken,
−die Taste „MEMORY“ dreimal drücken, um zum normalen Anzeigemodus zurückzukehren.
Um den Speicher des Geräts zu leeren, die Taste „MEMORY“ drücken und halten.
Temperaturalarm für den drahtlosen Sensor (Außentemperatur):
Zwecks Änderung der Einstellungen des Temperaturalarms die Taste „ALERT“ drücken und halten. Nach einem
Augenblick beginnt auf dem Display die Zahl zu blinken, welche den oberen Temperaturbereich für den Alarm
kennzeichnet (Hi). Mit den Tasten „UP” und „DOWN” den entsprechenden Wert einstellen. Anschließend mit der Taste
„ALERT“ zu den Einstellungen des unteren Temperaturbereichs für den Alarm übergehen (Lo).
Um die Funktion zu aktivieren/deaktivieren einmal im Modus der Normalanzeige die Taste „ALERT“ drücken.
Über den laufenden Stand der Funktion informiert das auf dem Display erscheinende Icon der Glocke Outdoor Temp
Alerts.

17
Wettervorhersage und Luftdruck:
Zwecks Änderung der angezeigten Luftdruckeinheit auf dem Bildschirm einmal die Taste „HPA/INHG” drücken und
halten. Mit den Tasten „UP” und „DOWN” den entsprechenden Wert einstellen. Anschließend mit der Taste „HPA/INHG”
zu den Einstellungen des Piktogramms der Wettervorhersage übergehen.
Das Piktogramm, welches die Wetterlage zeigt, ändert sich abhängig von den Luftdruckänderungen (natürlich ist die
von der Station angezeigte Wettervorhersage weniger genau, als die Vorhersagen von professionellen Wetterdiensten).
Wir empfehlen das Piktogramm z. B. einmal im Monat, abhängig von der aktuellen Wetterlage, zu korrigieren, um künftig
genauere Vorhersagen zu erhalten.
Achtung! Die Luftdruckmessung und die Wettervorhersage, die von der Station in einem klimatisierten Raum angezeigt
werden, können verfälscht sein.
Arten der Piktogramme:
sonnig
leicht bewölkt
bewölkt
regnerisch
stürmisch
Schneefall
Mondphasen:
Die Station zeigt die aktuelle Mondphase, die vom jeweiligen Kalenderdatum abhängig ist, an:
Neumon
d
Zunehmender
Sichelmond
Erstes Viertel
Zunehmender
Dreiviertelmond
Vollmond
Abnehmender
Dreiviertelmond
Letztes Viertel
Abnehmender
Sichelmond
Anzeige des Komfortniveaus im Innenraum:
Die Station zeigt das aktuelle Komfortniveau im Innenraum, abhängig von der Temperatur- und
Feuchtigkeitsmessung, an:
komfortabel zu kalt / zu heiß
Tendenz der Änderungen:
Die Station zeigt die Tendenz der Änderungen der Temperatur, der Feuchtigkeit und des Luftdrucks auf der
Grundlage der vorgenommenen Messungen:
Anstiegstendenz
keine Änderungen
Abfalltendenz
Bildschirmbeleuchtung:
Sollte die Station durch Batterien gespeist werden, bewirkt ein Drücken des Panels „SNOOZE/LIGHT” das Beleuchten
des Displays. Nach Anschluss des Netzgeräts geht die Station automatisch in den Modus der Bildschirmbeleuchtung
über. Mit der Taste „HPA/INHG” einen der 5 verfügbaren Beleuchtungsmodi wählen.

18
Zusätzliche Informationen:
Wenn der Wert der gemessenen Temperatur/Feuchtigkeit außerhalb des Betriebsbereiches des Geräts liegt,
erscheinen auf dem Display folgende Kennzeichnungen:
−HH.H –Werte oberhalb des Bereichs
−LL.L –Werte unterhalb des Bereichs
Achtung!
Jedes Haushalt ist Benutzer der elektrischen und elektronischen Geräte, und was danach folgt der potenzielle Erzeuger
der gefährlichen für die Menschen und die Umwelt Abfälle, aus dem Titel des Anwesenheit in den Geräten der
gefährlichen Substanzen, Mischungen und Bestandteile. Von der zweiten Seite ist das verbrauchte Gerät das wertvolle
Material, aus dem wir solche Rohstoffe wie Kupfer, Zinn, Glas, Eisen und andere Rohstoffe gewinnen können.
Dieses Symbol, das auf dem Gerät, Verpackung oder den beigefügten Unterlagen untergebracht wird,
bedeutet, dass das gekaufte Produkt nicht zusammen mit den gewöhnlichen Abfällen aus dem Haushalt
beseitigt sein soll. Die Kennzeichnung bedeutet gleichzeitig, dass das Gerät zum Umsatz nach dem 13. August
2005 eingeführt worden ist.
Die Pflicht des Benutzers ist, es in die entsprechende Stelle abgeben, die sich mit der Sammlung und Recycling der
elektrischen und elektronischen Geräten beschäftigt. Informationen über das zugängliche System der Sammlung der
verbrauchten elektrischen Geräte kann man im Informationspunkt des Geschäfts und im Amt der Stadt/der Gemeinde
finden. Die Beseitigung der Geräte auf die richtige Weise und ihr Recycling helfen gegenüber den potentiell negativen
Folgen für die Umwelt und menschliche Gesundheit.
Vereinfachte Konformitätserklärung
Der Hersteller BROWIN Sp. z o. o. Sp. k. ul. Pryncypalna 129/141, PL 93-373 Łódź, erklärt hiermit, dass das Gerät
der Marke 2measure, Modell 260908, mit den Anforderungen der Richtlinie des Europäischen Parlaments und des
Rates 2014/53/EU vom 16. April 2014 über die Harmonisierung der Rechtsvorschriften der Mitgliedstaaten über die
Bereitstellung von Funkanlagen auf dem Markt und zur Aufhebung der Richtlinie 1999/5/EG übereinstimmt. Die
vollständige Konformitätserklärung finden Sie auf der Webseite www.browin.pl.
─ РУКОВОДСТВО ПО ЭКСПЛУАТАЦИИ ─
МЕТЕОСТАНЦИЯ ЭЛЕКТРОННАЯ
Это руководство является частью изделия и должно храниться таким образом, чтобы в любой момент
можно было ознакомиться с его содержанием. В нем содержится важная информация о настройках
иработе прибора.
В набор входит:
•Метеостанция
•Наружный датчик
•Блок питания
•Инструкция по эксплуатации
Функции:
•Синхронизация часов с помощью радиосигнала
•Время в 12 или 24-часовом формате
•Ежедневный сигнал будильника
•Режим ожидания
•Календарь
•Цветной дисплей с подсветкой
•Прогноз погоды
•Фазы луны
•Индикатор уровня комфорта
•Возможность подключения 3 наружных датчиков
•Давление:
−Диапазон измерений атмосферного давления: 600 гПа/мб (17,72 inHg) ÷ 1100 гПа/мб (32,50inHg)
−Давление в гектопаскалях (hPa/mb) или в дюймах ртутного столба (inHg)
−Индикатор тенденции изменения давления
•Температура:
−Диапазон измерения внутренней температуры: 0°C (32°F) ÷ 50°C (122°F)

19
−Диапазон измерения наружной температуры: -20°C (-4°F) ÷ 60°C (140°F)
−Температура в °C или °F
−Точность измерения: +/- 2°C (+/- 2°F)
−Точность отображения: 0,1°C (0,1°F)
−Индикатор тенденции изменений температуры
−Температурная готовность
•Влажность:
−Измерение внутренней и наружной влажности
−Диапазон измерений: 20% ÷ 95% относительной влажности (RH)
−Точность измерения: +/- 5%
−Точность отображения: 1%
−Индикатор тенденции изменений влажности
•Максимальное/минимальное зарегистрированное значение температуры и влажности
•Беспроводной наружный датчик:
−Держатель для монтажа на стене
−Частота радиопередачи 433,92 MГц
−Радиус передачи до 60 м
−Температура в °C или °F
−Возможность выбора канала передачи
•Питание:
Метеостанция:
−Блок питания
−Батарейки 2 х АА 1.5 В
Наружный датчик:
−Батарейки 2 х АА 1.5 В
Схема устройства
Передняя панель - дисплей
А1: Прогноз погоды
A2: Атмосферное давление:
A3: Наружная температура
A4: Внутренняя температура
A5: Наружная влажность
A6: Внутренняя влажность
A7: Часы / Календарь / Будильник
A8: Фаза луны

20
Задняя панель
Б1: Сенсорная панель
“SNOOZE/LIGHT”
Б2: Кнопки настроек:
„SNOOZE/LIGHT”, „MEMORY”,
„HPA/INHG”, „ALERT”, „DOWN”,
„UP”, „ALARM”, „SET”
Б3: Батарейный отсек
метеостанции
B4: Опора
B5: Гнездо блока питания
B6: Блок питания перем./пост.тока
Беспроводной датчик
В1: ЖК дисплей - температура
В2: ЖК дисплей - влажность
В3: Контрольная лампочка
передачи
В4: Кнопка °C/°F
В5: Кнопка TX
В6: Переключатель канала
передачи
В7: Батарейный отсек датчика
Включение:
Вставить в батарейный отсек метеостанции батарейки 2 x AA 1.5В (не входят в комплект), и/или подключить к
метеостанции блок питания (входит в комплект). Станция автоматически начнет работать. ПРИМЕЧАНИЕ! Если
батарейки установлены, то в случае подключения к станции блока питания батарейный отсек будет отключен.
Далее вставить в батарейный отсек наружного датчика батарейки 2 x AA 1.5В (не входят в комплект). С помощью
переключателей выбрать требуемый канал передачи (CH1, CH2, CH3) и единицу измерения температуры,
отображаемой датчиком (°C либо °F).
В случае установления соединения с наружным датчиком, на дисплее появятся измеренные значения
температуры и влажности, полученные датчиком (в зависимости от используемого канала - Outdoor 1, 2 либо
3). Чтобы вручную соединить станцию с наружным датчиком, необходимо нажать и удерживать кнопку „DOWN”
на станции. Контрольная лампочка датчика на экране станции начнет мигать. Далее нажать кнопку „TX” на
датчике.
Синхронизация с радиопередатчиком (RCC):
В течение 7 минут с момента включения станция автоматически предпримет попытку синхронизации с
радиопередатчиком (символ RCC начнет мигать). В случае установления соединения с радиопередатчиком
часы будут установлены автоматически.
Чтобы вручную включить синхронизацию с радиопередатчиком, необходимо нажать и удерживать кнопку „UP”.
Во время синхронизации возможность настройки других функций заблокирована.
Table of contents
Languages:
Other 2measure Weather Station manuals

2measure
2measure 260302 User manual

2measure
2measure 260808 User manual

2measure
2measure 250204 User manual

2measure
2measure 170609 User manual

2measure
2measure 250202 User manual

2measure
2measure 220000 User manual

2measure
2measure 172802 User manual

2measure
2measure 170601 User manual

2measure
2measure 170605 User manual

2measure
2measure 170610 User manual