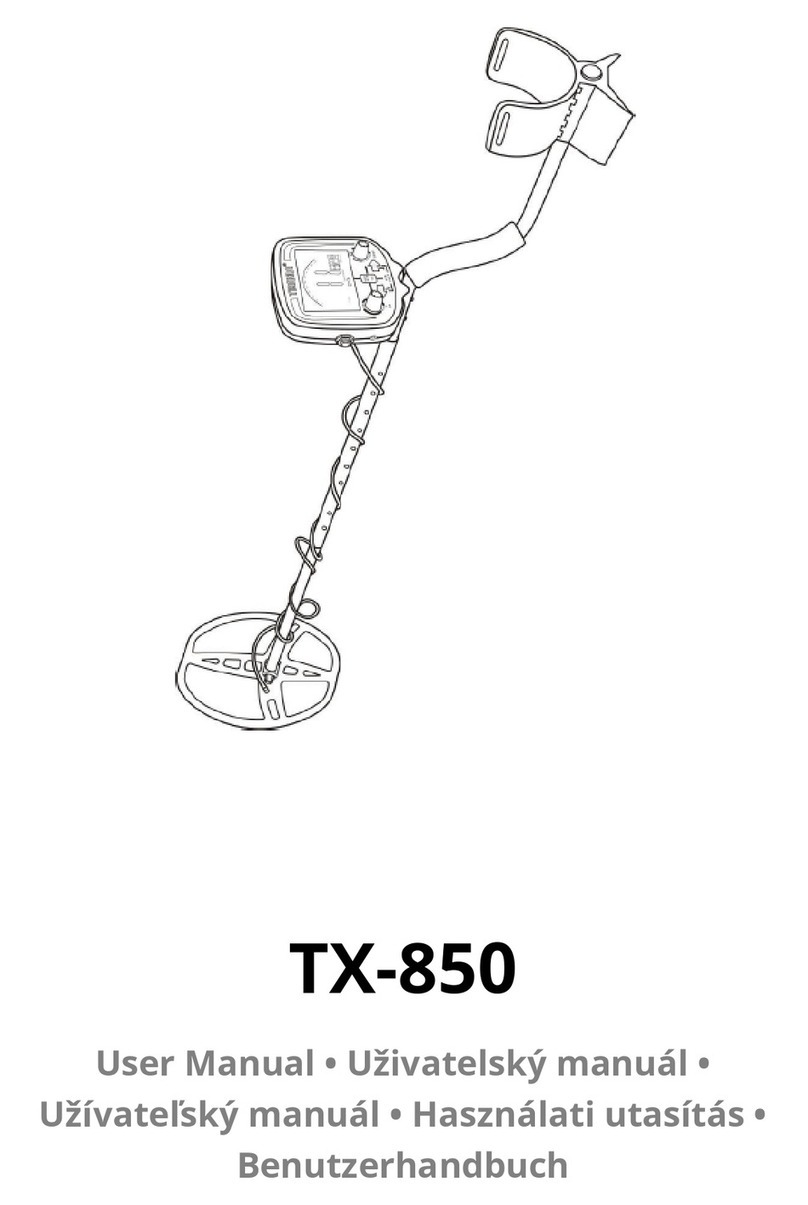
ALZA MD-5090 User manual

MD-5090
User Manual • Uživatelský manuál •
Užívateľský manuál • Használati utasítás •
Benutzerhandbuch

2
Dear customer,
Thank you for purchasing our product. Please read the following instructions carefully
before first use and keep this user manual for future reference. Pay particular attention
to the safety instructions. If you have any questions or comments about the device,
please contact the customer line.
✉www.alza.co.uk/kontakt
✆+44 (0)203 514 4411
Importer Alza.cz a.s., Jankovcova 1522/53, Holešovice, 170 00 Praha 7, www.alza.cz

3
Features
With your metal detector, you can hunt for coins, relics, jewellery, gold, and silver just
about anywhere. This metal detector is versatile and easy to use.
Features include:
Two operation Modes: All metal, Disc.
ALL METAL – Lets you search for all different types of metal with audio ground balance
and high sensitivity. It is the best operation mode.
DISC – discriminates what kind of metal is being detected.
Volume – To adjust the volume level of speaker and headphone.
Earphone Jack – lets you connect headphones (not supplied) to the detector.
View Meter and Pointer – The meter pointer swings to the right if metal is found.
Waterproof Search Coil – lets you use the detector even if you must put it under water.
NOTE: The search coil is waterproof, but the control housing is not.
Adjustable Shaft – Lets you adjust the detector’s length.
Operates on two 9V alkaline batteries (not supplied).
Parts of the detector
Control Box
Arm Rest
Adjustable
Stem with
Cable
Search Coil

4
Preparation
Assembling the detector
Assembling your detector is easy and requires no special tools. Just follow these steps.
1) Unscrew the fixing knob on the search coil and remove the knobs and the connector.
Insert the smaller stem and align the holes on the search coil bracket and the stem.
Push the connector through the holes and tighten the knob.
2) Loosen the stem’s lock nut (connected with the handle) in the direction of the arrow.
Then insert the smaller stem into the big stem connected with the handle. Turn the
stem’s lock nut in the reserve direction of the arrow to lock it in place.
3) Insert the latch on the top of the handle into the assembly hole on the bottom of the
control box. Then slightly push the control box in the direction of IN marked on the
handle to fix the latch in place.
4) Tighten the fixing screw.
5) Insert the search coil cable plug into the five-pin jack on the front control box’s
housing.
Fixing Screw
Latch
Control Box
Assembly Hole
Lock nut

5
6) Lengthen or shorten the stem, so when you stand upright with the detector in your
hand, the search coil is level with and about 5-2 inches / 1-5 cm above the ground. After
that tighten the lock nut.
CAUTION:
•The search coil’s plug fits into the connector only one way. Do not force the plug
or you could damage it.
•Do not disassemble the stem lock nut. In case you disassemble it, place the
washer on the top of the stem connected with the handle with the small head of
the washer upwards. Then hitch the stem lock nut on the washer then tighten it
to lock it in place.
Adjusting the search coil
Loosen the knobs at the search coil’s end, adjust the search coil to the desired angle.
(The search coil should be parallel with the ground.) Tighten the knobs just enough to
keep the search coil from rotating or wobbling.
Installing batteries
1) Turn off the power before installing the batteries.
2) Press on the battery compartment cover and slide the cover off in the direction of the
arrow.
3) Connect the battery with the battery connector taking care of the polarity. Then put
the battery into the compartment.
4) Replace the cover.

6
CAUTIONS:
•Use only fresh alkaline batteries of required size.
•Do not mix the old and new batteries of different types of batteries.
•Do not mix alkaline, standard (carbon-zinc), or rechargeable (nickel-cadmium)
batteries.
•If you do not plan to use the unit for a long time, remove the batteries. Batteries
can leak chemicals that can destroy electronic parts.
You can extend battery life by using earphones, which require less power than the built-
in speakers.
Using Headphones
You can connect a pair of headphones (not supplied) to the detector so you can listen
privately. Using earphones also saves battery power and makes it easier to identify
subtle changes in sound you hear, for better detection results.
To connect earphones to the detector, insert the earphone’s 3.5mm plug into the EAR
jack on the control panel.
NOTE: The detector’s internal speaker disconnects when you connect earphones.
LISTENING SAFETY:
•To protect your hearing, set the volume to the lowest setting before you begin
listening, adjust the volume to a comfortable level.
•Do not listen at extremely high volume levels. Extended high volume listening can
lead to permanent hearing loss.
•Once you set the volume, do not increase it. Over time, your ears adapt to the
volume level, so a volume level that does not cause discomfort might still damage
your hearing.
•Do not wear headphones while operating your detector near high-traffic areas.
Pay attention to traffic safety.
EAR

7
Functions and indicators
•DISC – Rotate the control clockwise away from ALL METAL to get DISC mode. The
DISC mode comes with auto ground balance. Rotate the control slowly and
clockwise t eliminate different trash objects. Rotate the control counter-clockwise
to the end to get ALL METAL mode. ALL METAL also comes with auto ground
balance. It is used to find only ferrous metal, but also non-ferrous one (see more
details below).
•SENS – Rotate the control counter-clockwise to the end to power off the unit.
Rotate the control clockwise to power on the unit. Continue rotating it clockwise
to get higher sensitivity.
•VOLUME – Rotate the control clockwise to get higher level or to get lower volume
level by rotating it counter-clockwise.
•LOW BATT – Low battery indicator. When LOW BATT indicator lights, user should
replace the batteries at once.
•EAR – 3.5mm headphone jack for connecting headphones.
•VIEW METER – When unit finds any metal target, the meter pointer swings to the
right.
Sens
Volume
Disc
Low BATT
Ear
View Meter

8
Testing and using the detector
This metal detector has two operation modes: ALL METAL & DISC.
ALL METAL – is used to find all kinds of metal targets.
DISC – is used to discriminate the metal type.
Set the operation mode to ALL METAL, DISC to counter-clockwise end, SENS to high
position. Then hold the search coil parallel with the ground about 5-2 inches / 1-5cm
above the surface. Sweep the search coil from side to side in an arc line of 2.75 inches /
7cm motion.
When the detector detects a buried target, it sound a tone. Make a visual note of exact
spot on the ground where the detector beeps. Then stop the search coil directly over
this point on the ground. Move the search coil straight forward away from you and
straight back towards you a couple of times.
Meantime slowly rotate the DISC control clockwise away from ALL METAL until the unit
does not sound or sounds short tone. You can identify what kind of metal is detected
according to the setting position of DISC.
A reference for you to know what kind of metal is rejected depending on the DISC
setting.
Setting of DISC
Metal Rejected
Near 11:00
Iron
Near 12:00
Nickel coin (5 ), pull tab
Near 13:00
Zinc coin (1 87 version)
Near 15:00
Copper coin (1 76 version)
When the DISC control is set the clockwise end most of metal is rejected except silver (25
, 50 , $1.

9
Search coil Sweeping Hints:
•Never sweep the search coil as if were a pendulum. Raising the search coil while
sweeping or at the end of a sweep will cause false readings.
CORRECT WRONG
•Sweep slowly, hurrying will cause you to miss targets.
•It is better you sweep the search coil from side to side on an arc line of 3 inches
motion and keep the search coil parallel with the ground.
Factors That Affect the Detecting
It is difficult to have an accurate detecting result. Sometimes the detecting may be
restricted by some factors.
•The angle of the target buried in the soil.
•The depth of the target.
•The level of oxidization of the target.
•The size of the target.
•Electro-magnetic and electrical interference surrounding the target.
In area of highly mineralized ground or wet sand, the detector will sound even uf there
is no metal. In this case, you can lower the sensitivity or increase the DISC number.
Meantime enhance the distance between the search coil and the ground.
In area with trashy metal, you can set DISC numeric value to 50. In this case most nails
and small pieces of iron will be eliminated.
Metallic digging tolls will also affect the detection of they are near the search coil. So it is
better place them a little far away.

10
Care and maintenance
Your metal detector is an example of superior design and Craftsmanship. The following
suggestions will help you care for your metal detector so you can enjoy it for years.
Handle the detector gently and carefully. Dropping it can damage
circuit boards and cases and can cause the detector to work
improperly.
Use the detector only in normal temperature environments.
Temperature extremes can shorten the life of electronic devices
damage the cases of the detector.
Wipe the detector with a damp cloth occasionally to keep it looking
new. Do not use harsh chemicals, cleaning solvents, or strong
detergents to clean the detector.
Keep the detector away from dust and dirt, which can cause premature
wear of parts.

11
Code of Ethics for Treasure Hunters
Remember that every treasure hunter should follow these ten commandments:
1. Before you search, make sure that the search site for the place where you want
to search is not restricted by any laws or regulations. If so, respect them.
2. Do not damage nature, sown fields, roads, or trees, do not start a fire in the
forest.
3. Backfill the pits that you will dig so that after the first rain it is not known that the
place has been dug in.
4. Take everything you dig out. Do not leave cans, pipes, wires, and other debris in
the woods.
5. Be quiet and considerate. Best so that no one knows about you. Do not spread
piles of leaves or sticks in the forest.
6. Be careful - try to see and not be seen. Not all forest visitors have good
intentions.
7. Do not drive to the forest, leave the car in a safe place, and walk to the site.
8. Do not enter reservations and other places where it is prohibited.
9. Do not disturb the animals unnecessarily.
10. Report important findings as required by law.
Alza.cz is not responsible for the use of the device in conditions that are in conflict with
local laws.

12
Warranty Conditions
A new product purchased in the Alza.cz sales network is guaranteed for 2 years. If you
need repair or other services during the warranty period, contact the product seller
directly, you must provide the original proof of purchase with the date of purchase.
The following are considered to be a conflict with the warranty conditions, for
which the claimed claim may not be recognized:
•Using the product for any purpose other than that for which the product is intended
or failing to follow the instructions for maintenance, operation and service of the
product.
•Damage to the product by a natural disaster, the intervention of an unauthorized
person or mechanically through the fault of the buyer (e.g. during transport, cleaning
by inappropriate means, etc.).
•Natural wear and aging of consumables or components during use (such as
batteries, etc.).
•Exposure to adverse external influences, such as sunlight and other radiation or
electromagnetic fields, fluid intrusion, object intrusion, mains overvoltage,
electrostatic discharge voltage (including lightning), faulty supply or input voltage and
inappropriate polarity of this voltage, chemical processes such as used power
supplies, etc.
•If anyone has made modifications, modifications, alterations to the design or
adaptation to change or extend the functions of the product compared to the
purchased design or use of non-original components.

13
WEEE
This product must not be disposed of as normal household waste in accordance with
the EU Directive on Waste Electrical and Electronic Equipment (WEEE - 2012/19 / EU).
Instead, it shall be returned to the place of purchase or handed over to a public
collection point for the recyclable waste. By ensuring this product is disposed of
correctly, you will help prevent potential negative consequences for the environment
and human health, which could otherwise be caused by inappropriate waste handling of
this product. Contact your local authority or the nearest collection point for further
details. Improper disposal of this type of waste may result in fines in accordance with
national regulations.

14
Vážený zákazníku,
děkujeme Vám za zakoupení našeho výrobku. Před prvním použitím si prosím pečlivě
přečtěte následující pokyny a uschovejte si tento návod k použití pro budoucí použití.
Zvláštní pozornost věnujte bezpečnostním pokynům. V případě jakýchkoli dotazů nebo
připomínek k přístroji se obraťte na zákaznickou linku.
✉www.alza.cz/kontakt
✆+420 225 340 111
Dovozce Alza.cz a.s., Jankovcova 1522/53, Holešovice, 170 00 Praha 7, www.alza.cz

15
Funkce
S detektorem kovů můžete hledat mince, relikvie, šperky, zlato a stříbro téměř kdekoli.
Tento detektor kovů je všestranný a snadno se používá.
Mezi jeho funkce patří:
Dva provozní režimy: Všechny kovy, DISC.
ALL METAL – Umožňuje hledat všechny různé druhy kovů se zvukovým vyvážením země
a vysokou citlivostí. Jedná se o nejlepší provozní režim.
DISC – rozlišuje, jaký druh kovu je detekován.
Hlasitost – slouží k nastavení úrovně hlasitosti reproduktoru a sluchátek.
Konektor pro sluchátka – umožňuje připojit k detektoru sluchátka (nejsou součástí
balení).
Zobrazení měřiče a ukazatele – ukazatel měřiče se v případě nálezu kovu vychýlí
doprava.
Vodotěsná vyhledávací cívka – umožňuje používat detektor, i když jej musíte dát pod
vodu.
POZNÁMKA: Hledací cívka je vodotěsná, ale ovládací kryt nikoli.
Nastavitelná hřídel – umožňuje nastavit délku detektoru.
Funguje na dvě 9V alkalické baterie (nejsou součástí balení).

16
Části detektoru
Příprava
Sestavení detektoru
Sestavení detektoru je snadné a nevyžaduje žádné speciální nářadí. Stačí postupovat
podle následujících kroků.
1) Odšroubujte upevňovací knoflík na vyhledávací cívce a vyjměte knoflíky a konektor.
Vložte menší dřík a zarovnejte otvory na držáku vyhledávací cívky a dříku. Zasuňte
konektor do otvorů a utáhněte knoflík.
2) Povolte pojistnou matici dříku (spojenou s rukojetí) ve směru šipky. Poté zasuňte
menší dřík do velkého dříku spojeného s rukojetí. Otočte pojistnou maticí dříku ve
směru šipky, abyste jej zajistili na místě.
Ovládací skříňka
Opěrka
Nastavitelný
dřík s kabelem
Vyhledávací cívka
Pojistná
matice

17
3) Zasuňte západku na horní straně rukojeti do montážního otvoru na spodní straně
ovládací skříňky. Poté lehce zatlačte na ovládací skříňku ve směru IN vyznačeném na
rukojeti, abyste západku upevnili na místě.
4) Utáhněte upevňovací šroub.
5) Zasuňte zástrčku kabelu vyhledávací cívky do pětikolíkového konektoru na krytu
přední ovládací skříňky.
6) Prodlužte nebo zkraťte dřík tak, aby, když stojíte vzpřímeně s detektorem v ruce, byla
vyhledávací cívka v úrovni a asi 5-2 palce / 1-5 cm nad zemí. Poté utáhněte pojistnou
matici.
POZOR:
•Zástrčka vyhledávací cívky zapadá do konektoru pouze jedním směrem.
Nevytahujte zástrčku silou, jinak byste ji mohli poškodit.
•Nerozebírejte pojistnou matici dříku. V případě, že ji demontujete, nasaďte
podložku na horní část dříku spojenou s rukojetí malou hlavičkou podložky
nahoru. Poté nasaďte pojistnou matici dříku na podložku a utáhněte ji, abyste ji
zajistili na místě.
Přizpůsobení vyhledávací cívky
Uvolněte knoflíky na konci vyhledávací cívky a nastavte vyhledávací cívku do
požadovaného úhlu. (Vyhledávací cívka by měla být rovnoběžná se zemí.) Utáhněte
knoflíky jen natolik, aby se vyhledávací cívka neotáčela nebo nekývala.
Upevňovací
šroub
Západka
Ovládací
skříňka
Montážní
otvor
Malá hlavička

18
Instalace baterií
1) Před instalací baterií vypněte napájení.
2) Stiskněte kryt prostoru pro baterie a posuňte jej ve směru šipky.
3) Připojte baterii pomocí konektoru baterie a dbejte na polaritu. Poté vložte baterii do
přihrádky.
4) Nasaďte kryt.
UPOZORNĚNÍ:
•Používejte pouze čerstvé alkalické baterie požadované velikosti.
•Nemíchejte staré a nové baterie různých typů.
•Nemíchejte alkalické, standardní (uhlíko-zinkové) ani dobíjecí (nikl-kadmiové)
baterie.
•Pokud přístroj neplánujete delší dobu používat, vyjměte baterie. Z baterií mohou
unikat chemikálie, které mohou zničit elektronické součásti.
Životnost baterií můžete prodloužit použitím sluchátek, která vyžadují méně energie než
vestavěné reproduktory.
Použití sluchátek
K detektoru můžete připojit sluchátka (nejsou součástí dodávky), abyste mohli
poslouchat v soukromí. Používání sluchátek také šetří energii baterie a usnadňuje
identifikaci jemných změn slyšeného zvuku, což umožňuje dosáhnout lepších výsledků
detekce.
Chcete-li k detektoru připojit sluchátka, zasuňte 3,5mm konektor sluchátek do zdířky
EAR na ovládacím panelu.
EAR

19
POZNÁMKA: Po připojení sluchátek se interní reproduktor detektoru odpojí.
BEZPEČNOST PŘI POSLECHU:
•Chcete-li chránit svůj sluch, nastavte před zahájením poslechu nejnižší hlasitost a
nastavte ji na pohodlnou úroveň.
•Neposlouchejte při extrémně vysoké úrovni hlasitosti. Dlouhodobý poslech při
vysoké hlasitosti může vést k trvalému poškození sluchu.
•Po nastavení hlasitosti ji nezvyšujte. V průběhu času se vaše uši přizpůsobí úrovni
hlasitosti, takže úroveň hlasitosti, která nezpůsobuje nepohodlí, může přesto
poškodit váš sluch.
•Při práci s detektorem v blízkosti míst s velkým provozem nenoste sluchátka.
Dbejte na bezpečnost silničního provozu.
Funkce a indikátory
•DISC – Otáčením ovladače ve směru hodinových ručiček z polohy ALL METAL
přejdete do režimu DISC. Režim DISC je vybaven automatickým vyvážením země.
Otáčením ovladače pomalu a ve směru hodinových ručiček odstraňte různé
odpadkové předměty. Otáčením ovladače proti směru hodinových ručiček až na
konec získáte režim ALL METAL. Režim ALL METAL je rovněž vybaven
automatickým vyvážením země. Slouží k vyhledávání pouze železných kovů, ale
také neželezných (viz další podrobnosti níže.
•SENS – Otočením ovladače proti směru hodinových ručiček na konec přístroj
vypnete. Otočením ovladače ve směru hodinových ručiček jednotku zapnete.
Pokračujte v otáčení ve směru hodinových ručiček, abyste dosáhli vyšší citlivosti.
SENS
Hlasitost
DISC
Nízká
baterie
EAR
Zobrazení měřiče

20
•HLASITOST – Otáčením ovladače ve směru hodinových ručiček dosáhnete vyšší
úrovně hlasitosti, otáčením proti směru hodinových ručiček dosáhnete nižší
úrovně hlasitosti.
•NÍZKÁ BATERIE – Indikátor slabé baterie. Když se rozsvítí indikátor LOW BATT,
uživatel by měl baterie ihned vyměnit.
•EAR – 3,5mm konektor pro připojení sluchátek.
•ZOBRAZENÍ MĚŘIČE – Když jednotka najde jakýkoli kovový cíl, ukazatel metru se
vychýlí doprava.
Testování a použití detektoru
Tento detektor kovů má dva provozní režimy: ALL METAL & DISC.
ALL METAL – slouží k vyhledávání všech druhů kovových cílů.
DISC – slouží k rozlišení typu kovu.
Nastavte provozní režim na ALL METAL, DISC na konec proti směru hodinových ručiček,
SENS do vysoké polohy. Poté držte vyhledávací cívku rovnoběžně se zemí asi 5-2 palce /
1-5 cm nad povrchem. Vyhledávací cívkou kmitejte ze strany na stranu obloukovým
pohybem o délce 2,75 palce / 7 cm.
Když detektor zjistí zakopaný cíl, vydá zvukový signál. Vizuálně si poznamenejte přesné
místo na zemi, kde detektor zapípá. Poté zastavte vyhledávací cívku přímo nad tímto
bodem na zemi. Pohybujte vyhledávací cívkou přímo dopředu od sebe a několikrát
přímo zpět k sobě.
Mezitím pomalu otáčejte ovladačem DISC ve směru hodinových ručiček od polohy ALL
METAL, dokud se přístroj neozve nebo se neozve krátký tón. Podle polohy nastavení
ovladače DISC poznáte, jaký druh kovu je detekován.
Odkaz pro vás, abyste věděli, jaký druh kovu je odmítán v závislosti na nastavení DISC.
Nastavení DISC
Kov odmítnut
Blízko 11:00
Železo
Blízko 12:00
Niklák (5 ), vytahovací záložka
Blízko 13:00
Zinková mince (1 87 verze)
Blízko 15:00
Měděná mince (1 76 verze)
Když je ovladač DISC nastaven ve směru hodinových ručiček, většina kovů je vyřazena s
výjimkou stříbra (25 , 50 , $1).
Table of contents
Languages:
Other ALZA Metal Detector manuals