9
WASHER MAINTENANCE
Operate your washer only when you are home. If moving, or
not using your washer for a period of time, follow these steps:
1. Unplug or disconnect power to washer.
2. Turn off water supply to washer, to avoid ooding due to
water pressure surge.
WINTER STORAGE CARE
IMPORTANT: To avoid damage, install and store washer
where it will not freeze. Because some water may stay in
hoses, freezing can damage washer. If storing or moving
during freezing weather, winterize your washer.
To winterize washer:
1. Shut off both water faucets; disconnect and drain water
inlet hoses.
2. Put 1 qt. (1 L) of R.V.-type antifreeze in basket and run
washer on RINSE/SPIN cycle for about 30 seconds to
mix antifreeze and remaining water.
3. Unplug washer or disconnect power.
NON-USE AND VACATION CARE
Replace inlet hoses after 5 years of use to reduce the risk
of hose failure. Periodically inspect and replace inlet hoses
if bulges, kinks, cuts, wear, or leaks are found.
When replacing your inlet hoses, mark the date of
replacement on the label with a permanent marker.
NOTE: This washer does not include inlet hoses. See the
“Installation Instructions” for more information.
WATER INLET HOSES
WASHER CARE
Recommendations to Help Keep Your Washer Clean and
Performing at its Best
1. Always follow the detergent manufacturer’s instructions
regarding the amount of detergent to use. Never use more
than the recommended amount because that may increase
the rate at which detergent and soil residue accumulate
inside your washer, which in turn may result
in undesirable odor.
2. Use warm and hot wash water settings sometimes (not
exclusively cold water washes), because they do a better
job of controlling the rate at which soils and detergent
accumulate.
3. Always leave the washer lid open between uses to help dry
out the washer and prevent the buildup of odor-causing
residue.
Cleaning Your Top Loading Washer
Read these instructions completely before beginning the
routine cleaning processes recommended below. This Washer
Maintenance Procedure should be performed, at a minimum,
once per month or every 30 wash cycles, whichever occurs
sooner, to control the rate at which soils and detergent may
otherwise accumulate in your washer.
Cleaning the Inside of the Washer
To keep your washer odor-free, follow the usage instructions
provided above, and use this recommended monthly cleaning
procedure:
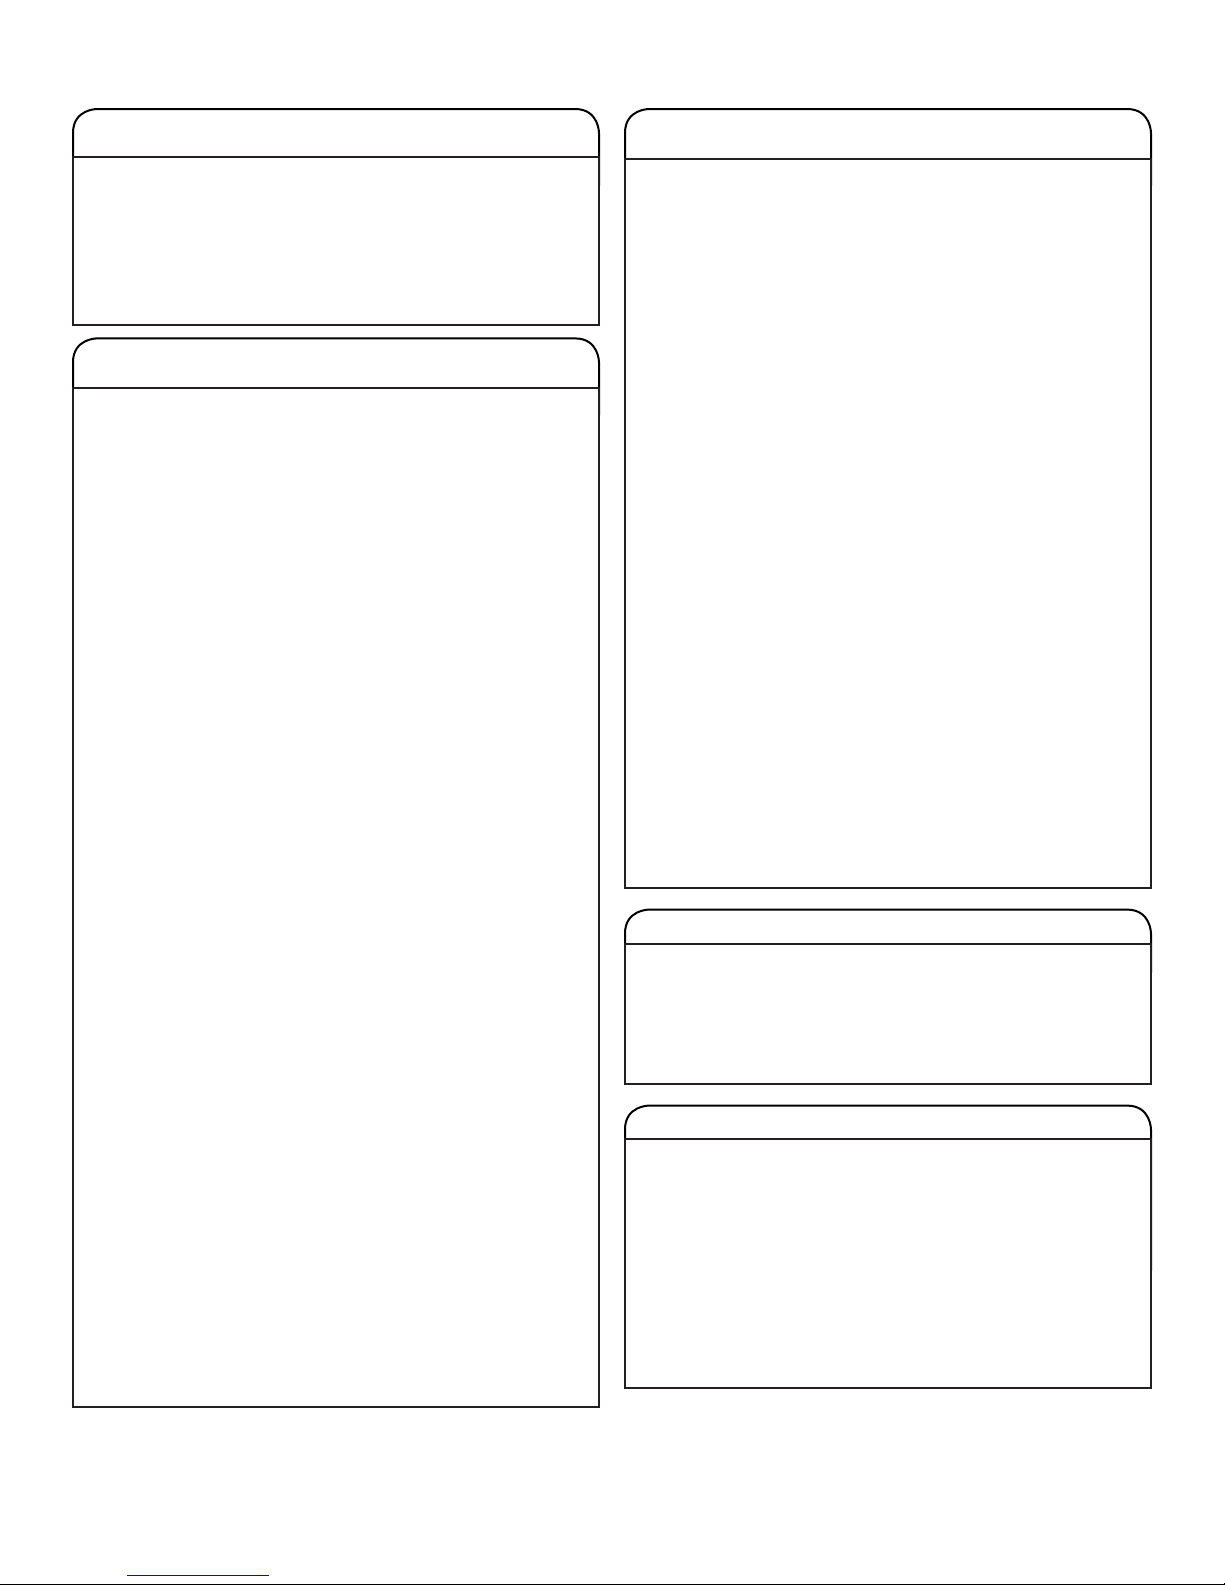
Recommended Cycle for Cleaning the Washer
Refer to the “Cycle Guide” for the optimal cycle for cleaning
the inside of the washer. Use this cycle with affresh®Washer
Cleaner or liquid chlorine bleach as described below.
Begin procedure
1. affesh®Washer Cleaner Cycle Procedure
(Recommended for Best Performance):
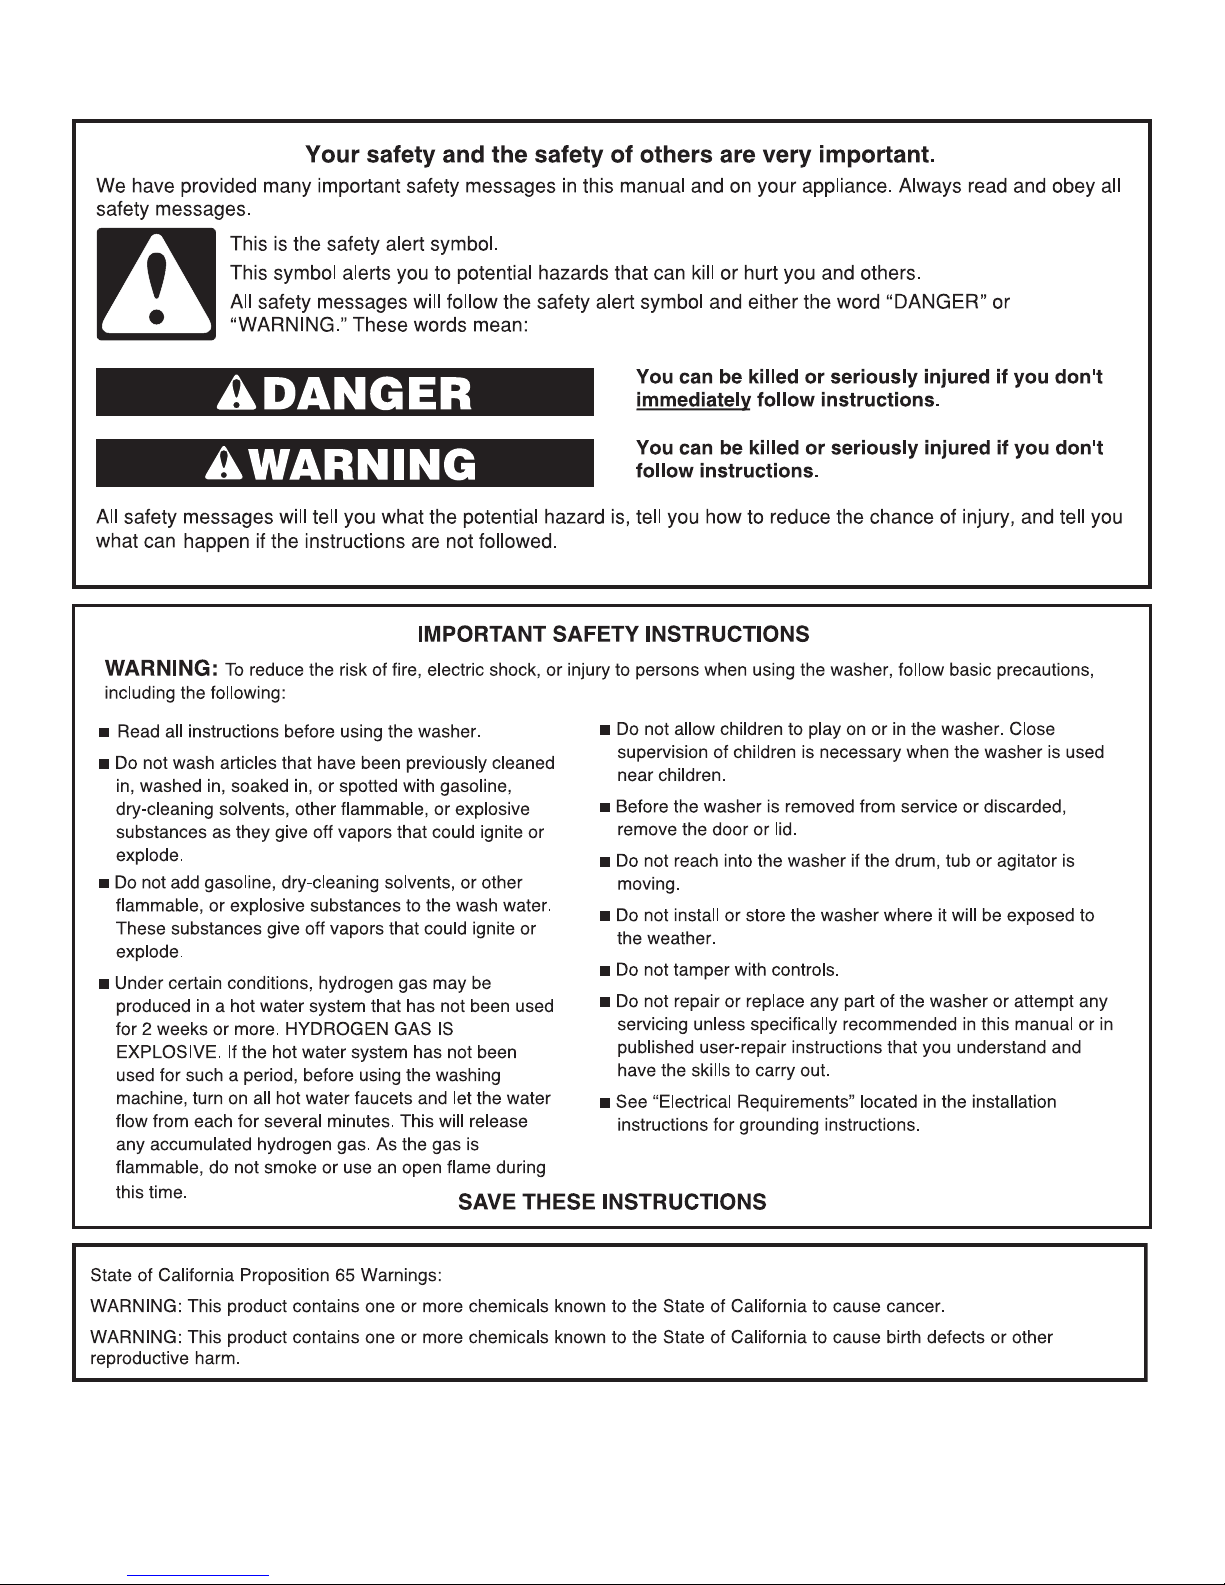
a. Open the washer lid and remove any clothing or items.
b. Place an affesh®Washer Cleaner tablet in the bottom
of the washer basket.
c. Do not place an affresh®Washer Cleaner tablet
in the detergent dispenser.
d. Do not add any detergent or other chemical to the
washer when following this procedure.
e. Close the washer lid.
f. Select the cycle recommended for cleaning the inside
of the washer.
g. Press the START/Pause/Unlock Lid button to start the
cycle.
NOTE: For best results, do not interrupt cycle. If cycle must
be interrupted, press START/Pause/Unlock Lid once or
twice (depending on model). After the cycle has stopped,
run a RINSE/SPIN cycle to rinse cleaner from washer.
WASHER CARE (cont.)
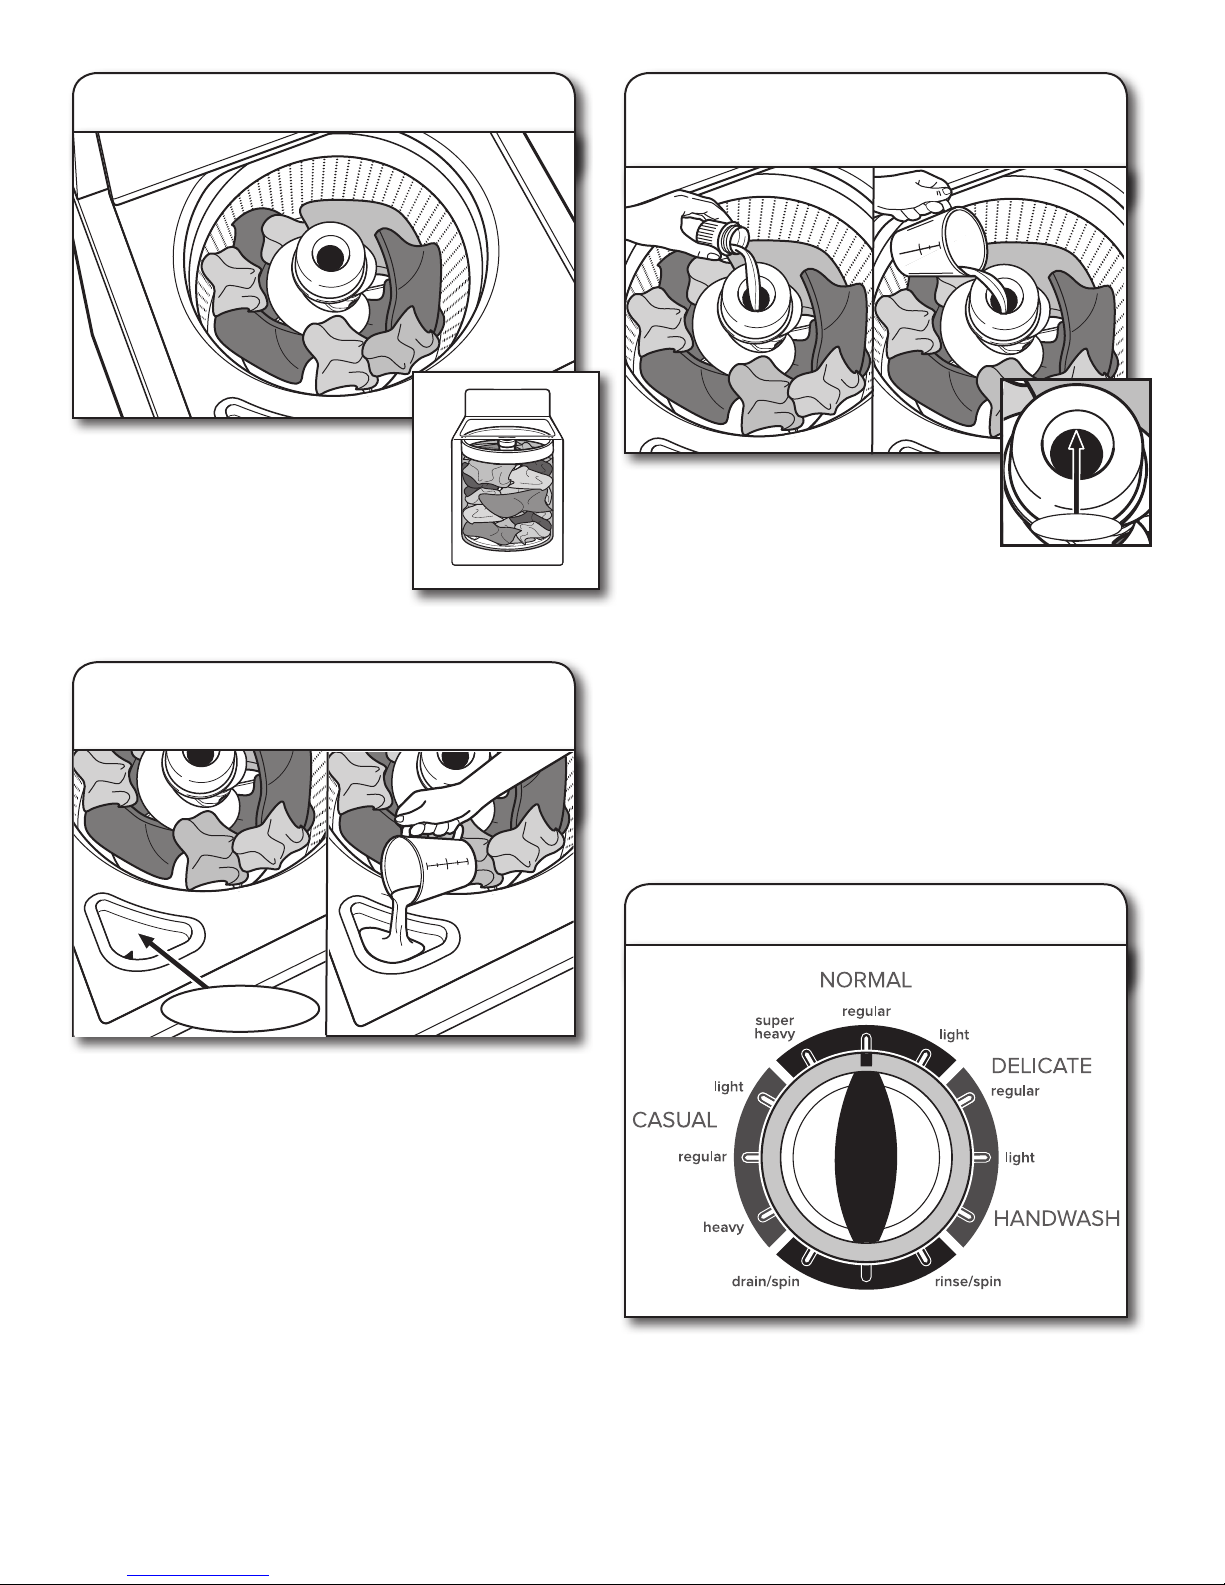
2. Chlorine Bleach Procedure (Alternative):
a. Open the washer lid and remove any clothing
or items.
b. Add 1 cup (236 mL) of liquid chlorine bleach
to the bleach compartment.
NOTE: Use of more liquid chlorine bleach than is
recommended above could cause washer damage
over time.
c. Close the washer lid.
d. Do not add any detergent or other chemical
to the washer when following this procedure.
e. Select the cycle recommended for cleaning the inside
of the washer.
f. Press the START/Pause/Unlock Lid button to start the
cycle.
NOTE: For best results, do not interrupt cycle. If cycle
must be interrupted, press START/Pause/Unlock Lid
once or twice (depending on model). After the cycle has
stopped, run a RINSE/SPIN cycle to rinse cleaner from
washer.
Cleaning the Dispensers
After a period of using your washer, you may nd some
residue buildup in the washer’s dispensers. To remove
residue from the dispensers, wipe them with a damp cloth
and towel dry. Do not attempt to remove the dispensers or
trim for cleaning. The dispensers and trim are not removable.
If your model has a dispenser drawer, however, remove the
drawer and clean it before or after you run the Clean Washer
cycle. Use an all-purpose surface cleaner, if needed.
Cleaning the Outside of the Washer
Use a soft, damp cloth or sponge to wipe away any spills.
Use only mild soaps or cleaners when cleaning external
washer surfaces.
IMPORTANT: To avoid damaging the washer’s nish, do not
use abrasive products.