8 9
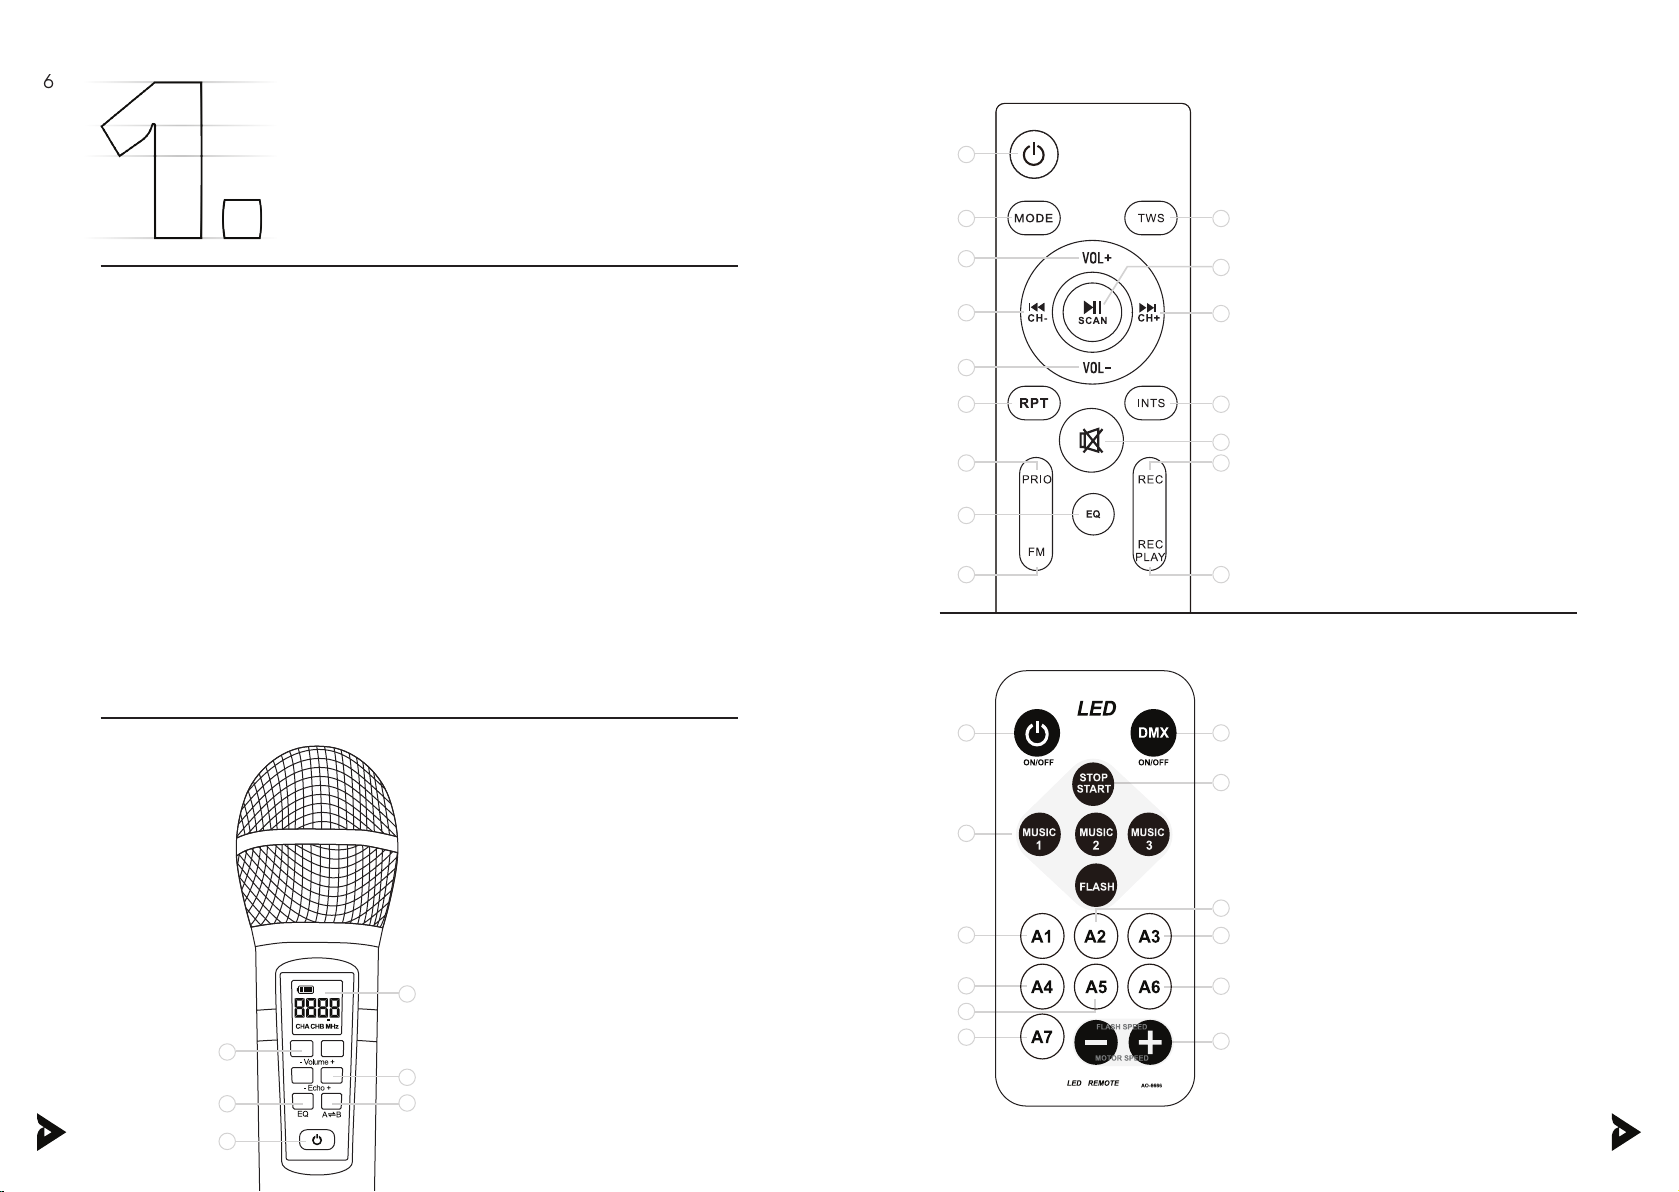
]Parts & Features[
]Review before using[
1. Keep this manual for any future reference.
2. Adhere to all warnings.
3. Keep ventilation openings clear; do not block any of this machine’s
vents/openings.
4. Install and set up the machine according to the manufacturer’s
instructions provided in this manual.
5. Do not install near any heat sources (i.e. radiators, heat registers,
stoves, amplifiers, or any other objects that produce heat).
6. Protect the machine’s power cord. Prevent the power cord from
being walked on or pinched – particularly at the plugs, convenience
receptacles, and the point from which they come out of the machine.
7. Unplug the machine during lightning storms or when unused for long
periods of time.
8. Refer all technical services to qualified personnel. Servicing is required
when the machine has been damaged in any way, such as damage
to the power-supply cord or plug, contact with liquid, exposure to
moisture or rain, failing to operate normally, if the machine has been
dropped, etc.
9. Do not force the SD card into its slot. It can only be inserted in one
direction. If the card does not insert in easily, remove it and try
reinserting in the opposite direction.
10. To maintain peak performance and battery longevity, fully charge the
karaoke machine at least once every three months.
11. To prevent interference, do not hold the microphone too close to the
karaoke machine speakers.
12. The optimal distance of the wireless microphone is 30 meters (approx.
98 feet) from the karaoke machine speakers.
13. Fully charge the karaoke machine before storing for a long period of
time. Microphone wireless range and sound quality might be aected
by low battery.
Take note:
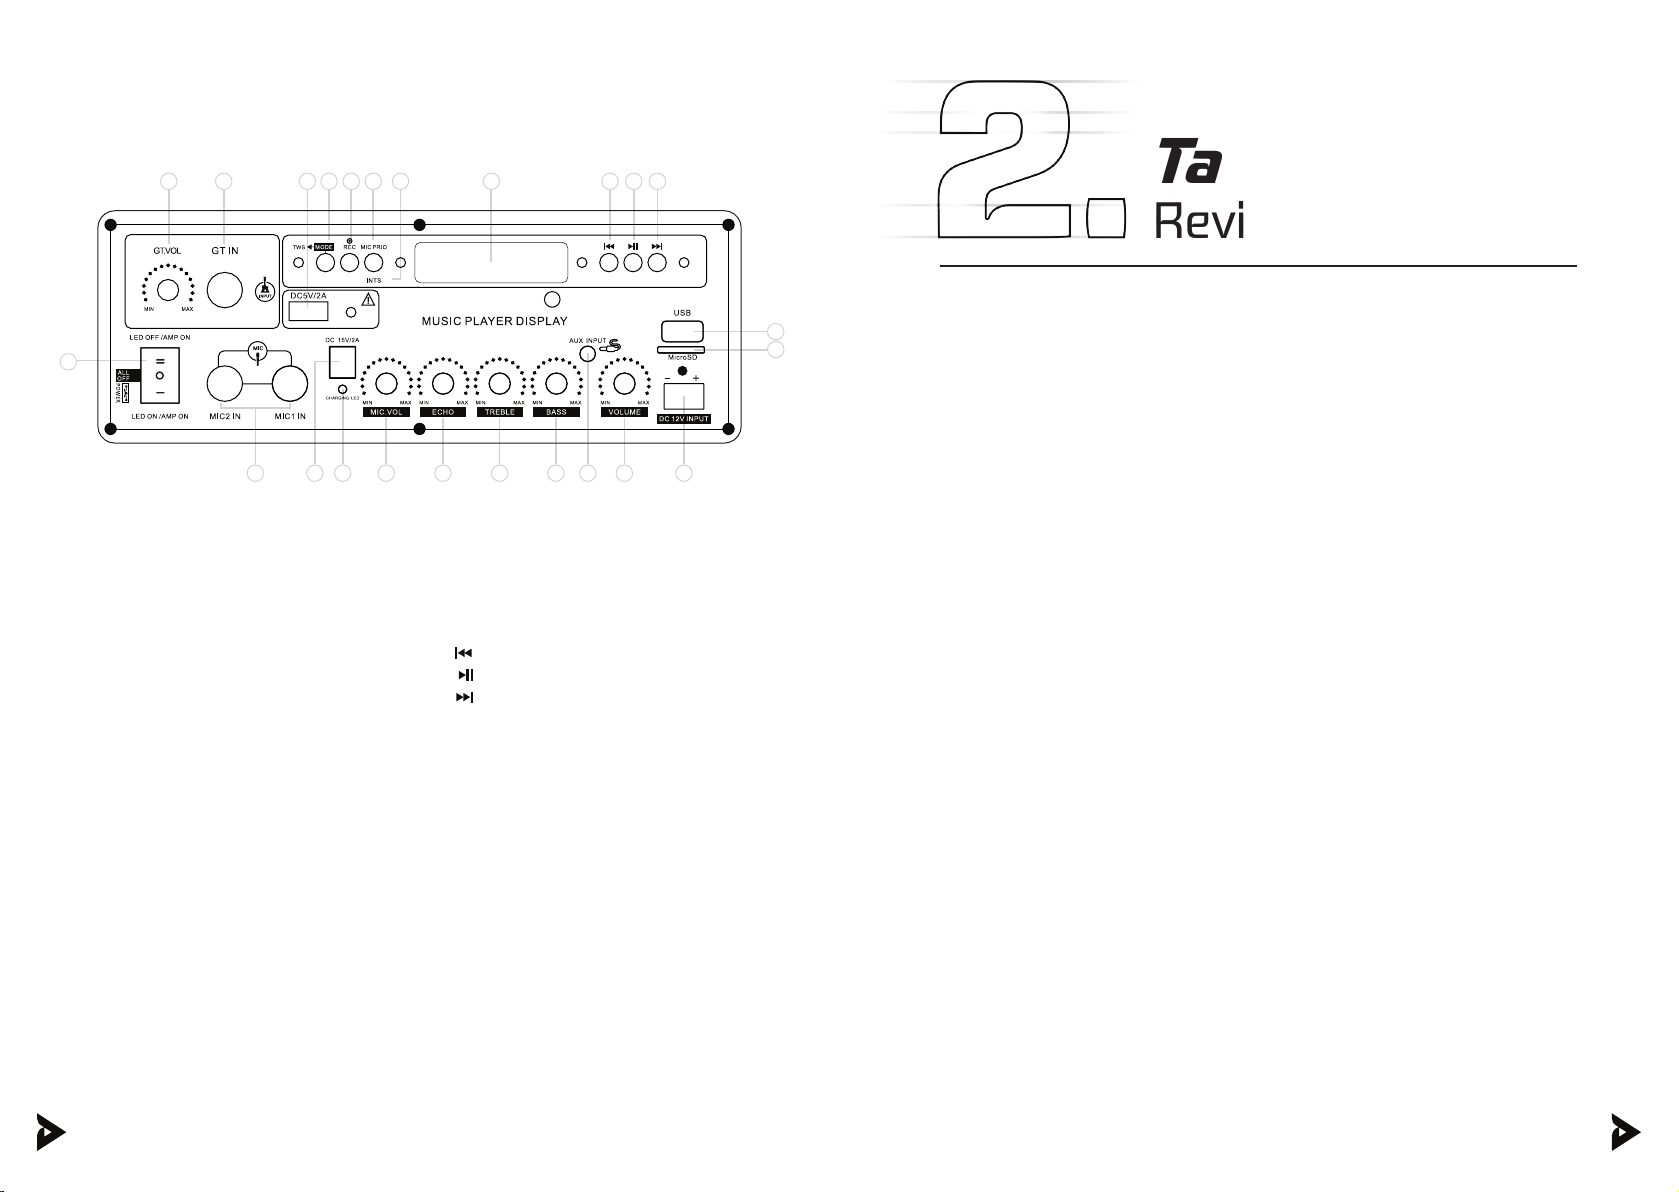
Review before using
1. Main Power On/O, LED On/O, and
Amp Power On/O
2. Guitar Input
3. Guitar Volume
4. External Mic Input
5. DC5V/2A Disco Ball/External Charger
Input
6. DC15V/2A Machine Charger Input
7. Charging Light Indicator
8. Mic Volume
9. Music Echo
10. Music Treble
11. Music Bass
12. Music Volume
13. AUX Input
14. DC12V Car Battery Input
15. TF MicroSD Card
16. USB Port
17.
18.
19.
20. Music Player Display
21. Mic Priority
22. Record
23. Mode and TWS Pairing
24. Accompany: Karaoke Song Converter
4 6 7 8 9 10 11 13 12 14
16
171819
15
20212223 242 5
3
1