ASSEMBLY INSTRUCTIONS
BEFORE YOU START:
5.The assembly steps are similar for all of the tables.
There are small differences in the hardware used
to attach the table legs.
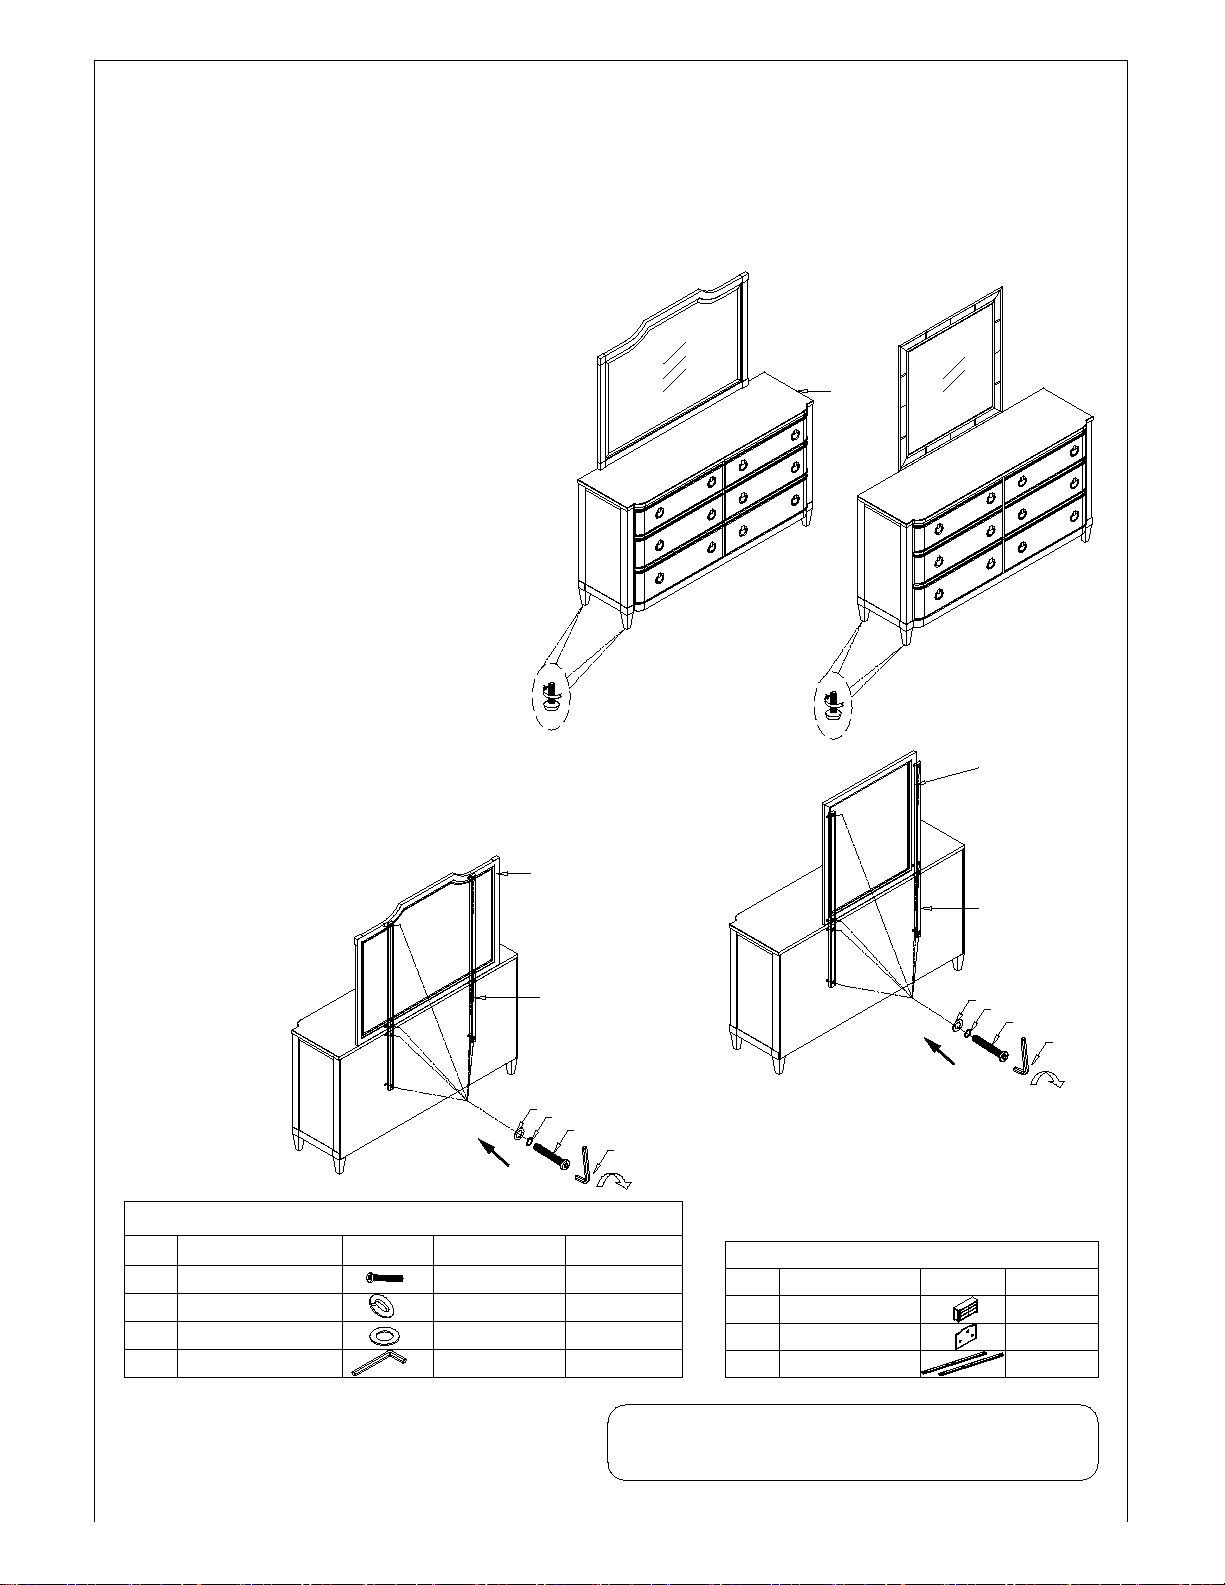
1. Check the parts against the parts list to make sure
all items are present.
2. Assemble your furniture on a soft, flat surface to
avoid scratching the finish.
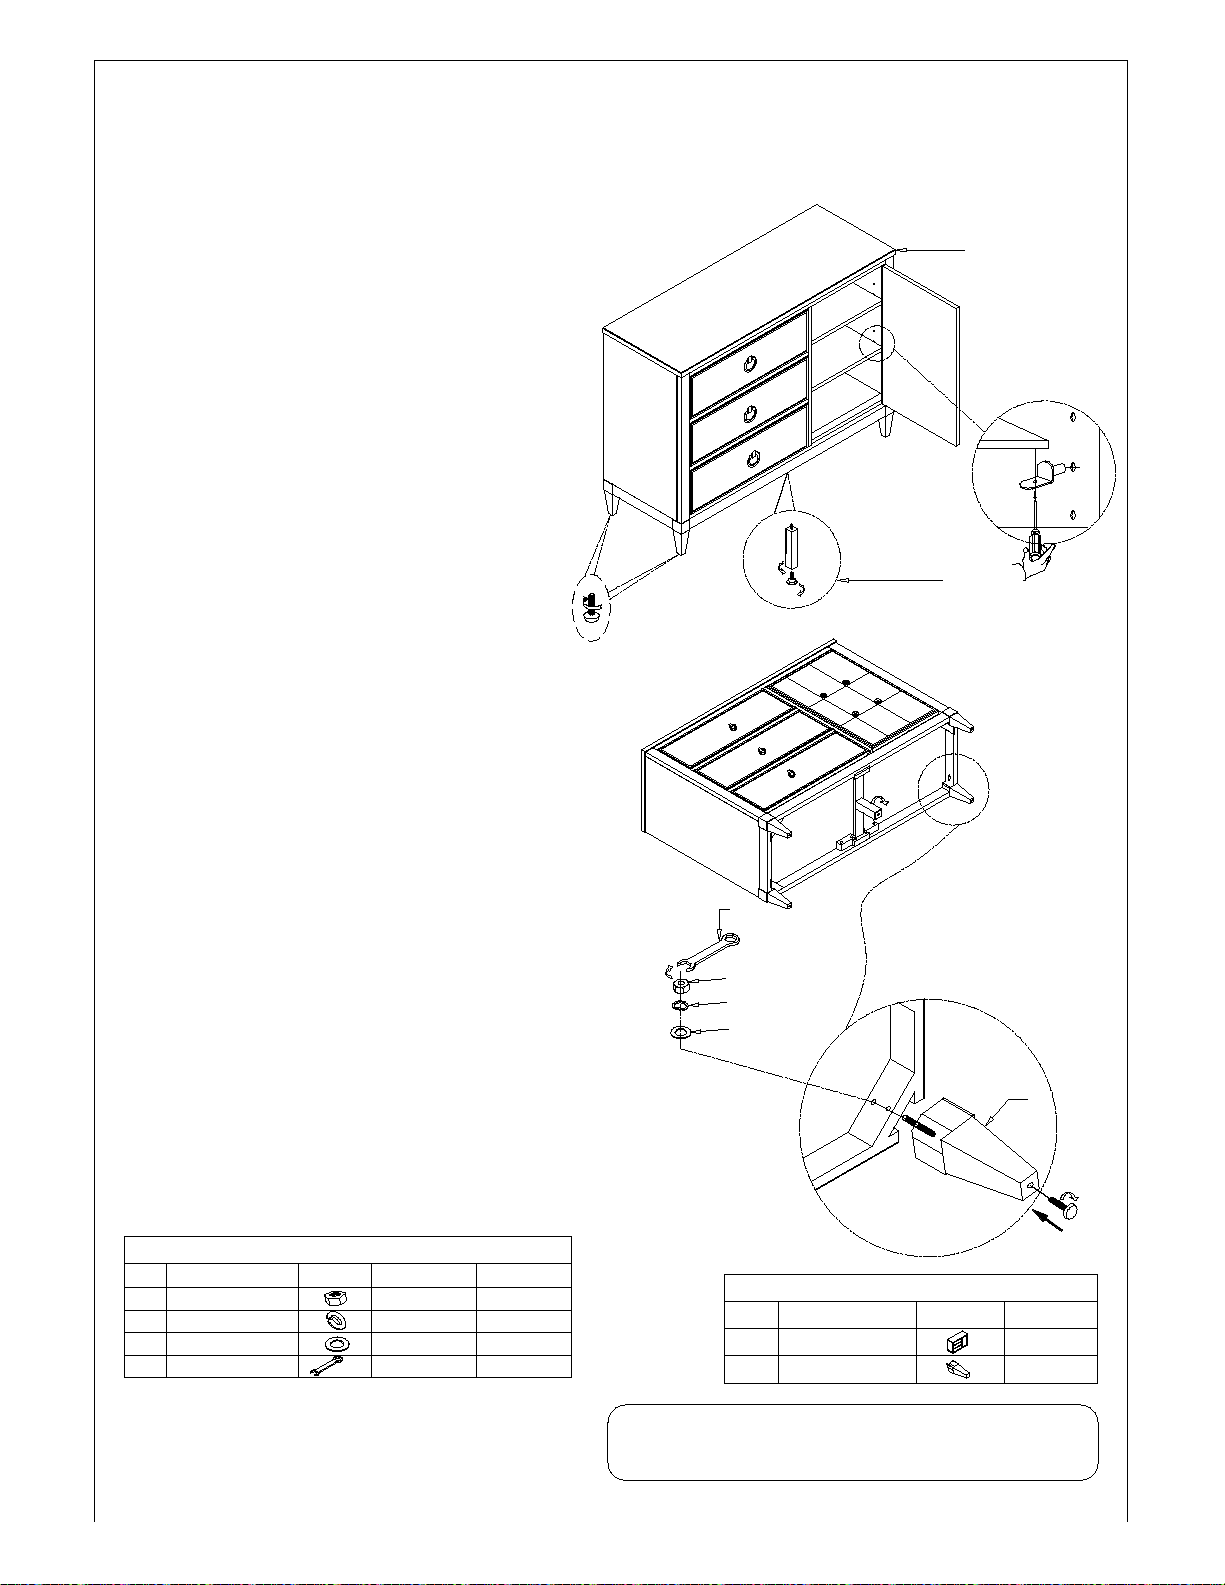
3. Do not over tighten any screws, nuts or
bolts during assembly.
4. Your furniture may require occasional tightening.
CAUTION:
INSTRUCTIONS:
PARTS LIST:
No. Description Sketch Quantity
11PC
2
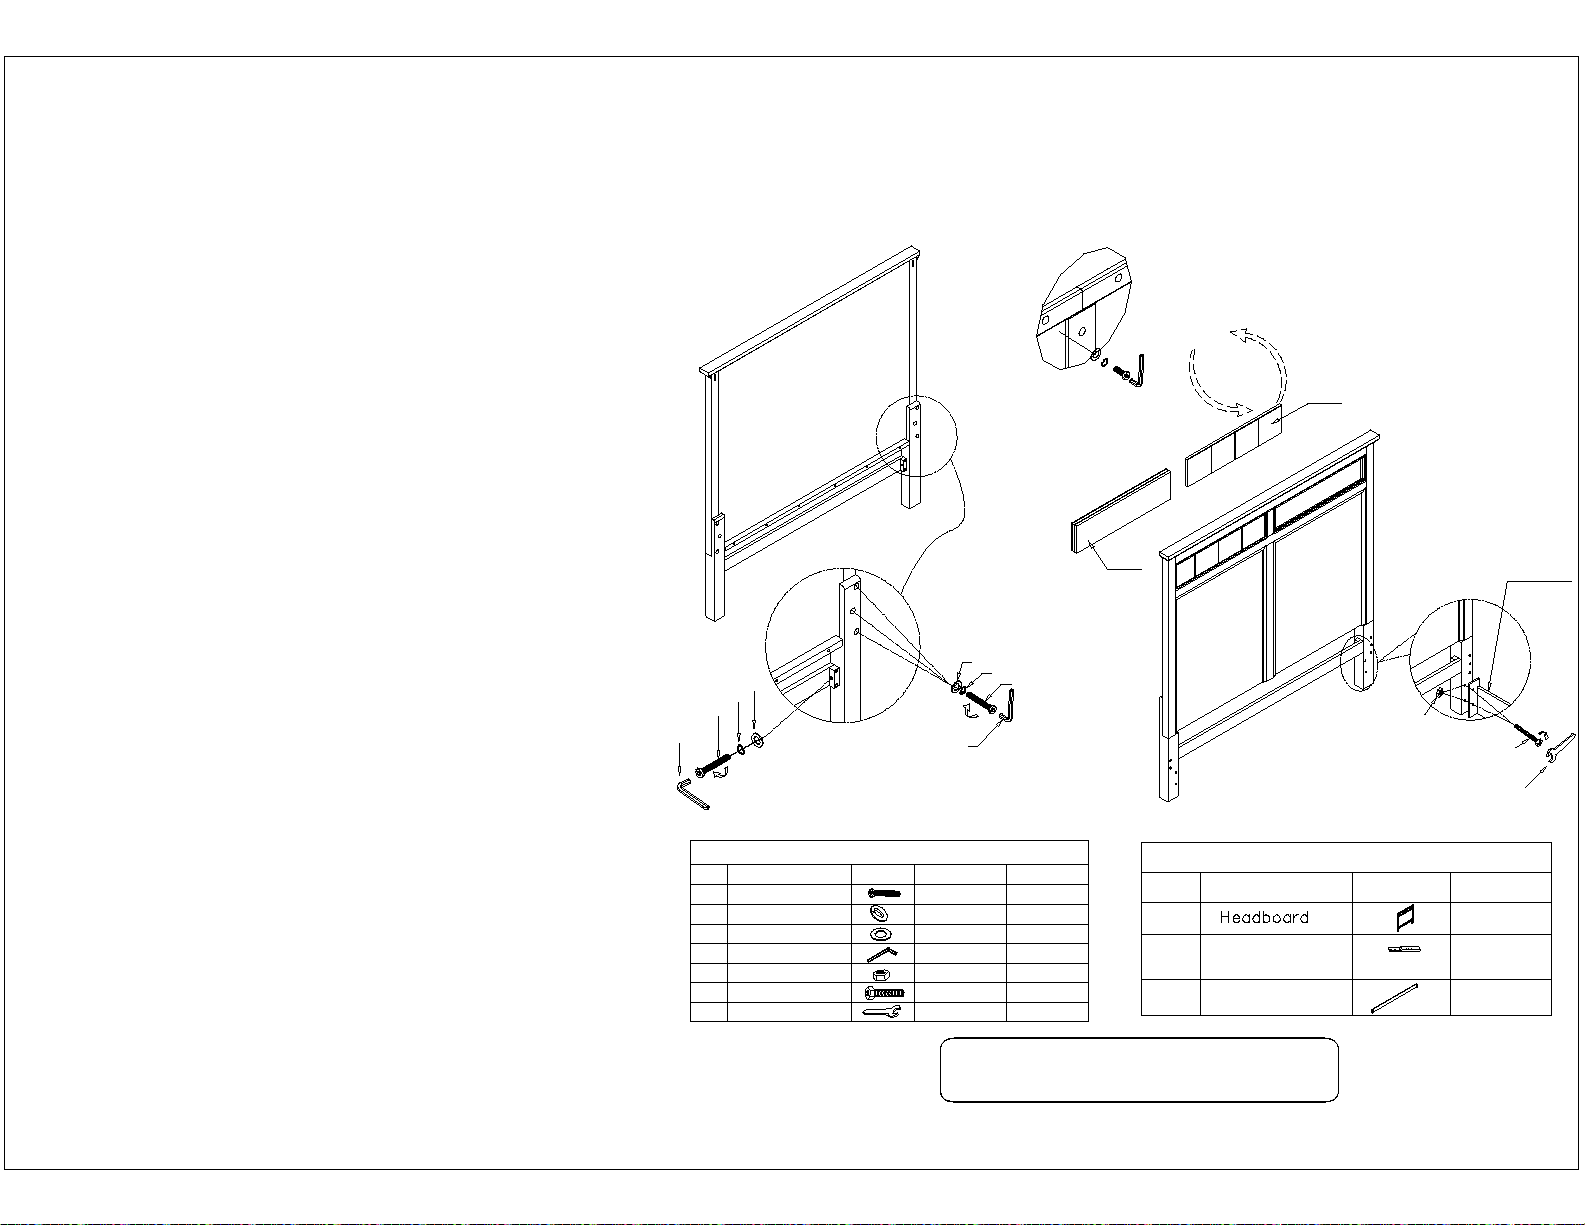
Headboard
Footboard
Rails
Slats
3
4
5Slat Support
1PC
2PCS
5PCS
5PCS
1
2
3
4
5
Screwdriver
(not Provided)
Diagram 3
A
Diagram 1
D
Diagram 2
AØ5/16"4-1/2" 8PCS
B8PCS
C
Quantity
HARDWARE LIST:
No. Description Sketch Size
Nut
DWood Screw
12mm 1PC
10PCS
#8*1"
Hanger Bolt
Ø5/16
B
C
1. Attach the Side rails to the Headboard and Footboard. Use
Hanger bolt (A), Nut (B) and Wrench to the tighten as shown
Diagram 1.
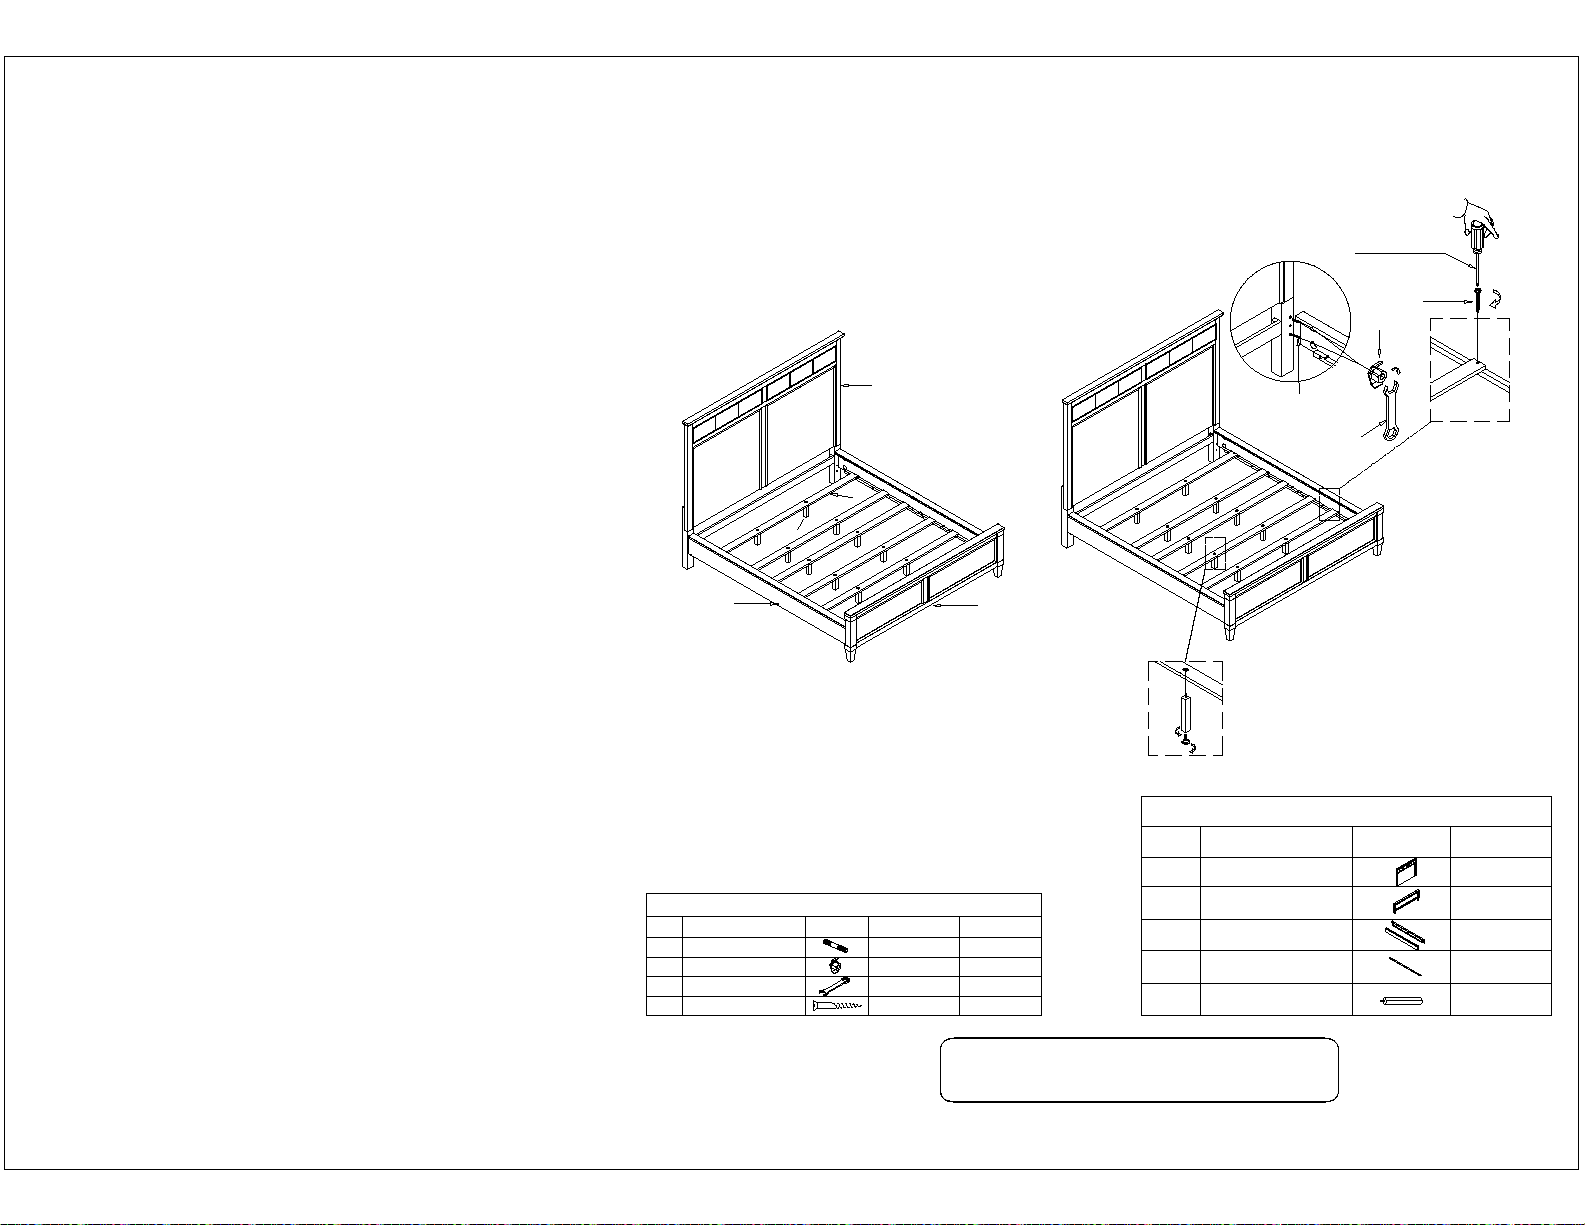
2. Attach the Slat support to the Slats. as shown Diagram 2.
3. Use Wood screw (D) to lock the Slats on the Side rails. as
shown Diagram 3.
Spanner Wrench
848-304-5/0 Sambre Panel Bed Hdbd
848-305-5/0 Sambre Panel Bed Ftbd
848-R42- 5/0 Bolt On Bedrails
Tools required:
Phillips Screw Driver (not supplied)