manuals.online logo
Brands
  1. Home
  2. •
  3. Brands
  4. •
  5. Ameriwood HOME
  6. •
  7. Indoor Furnishing
  8. •
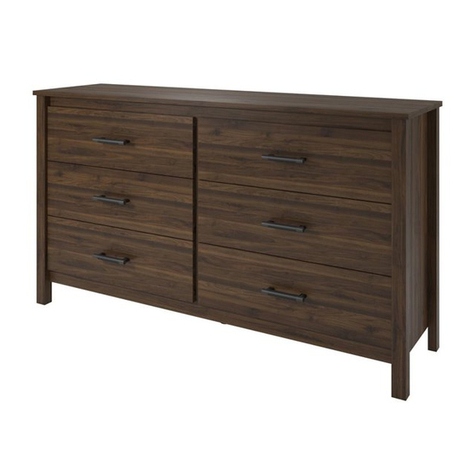
  9. Ameriwood HOME 5662412COM User manual

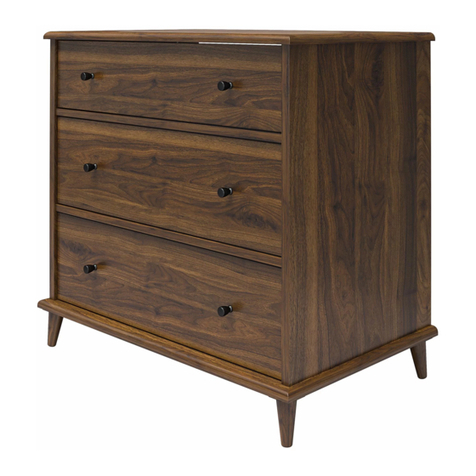
Ameriwood HOME 5662412COM User manual

WARNING ADVERTENCIA AVERTISSEMENT
Unit can tip over causing severe injury
or death.
Anchor unit to stud or wall.
DO NOT allow children to climb on unit.
Put heavy items on lower shelves or drawers.
Read and follow all assembly instructions.
Este mueble puede caerse por encima
causando daño serio o la muerte
Anolar el mueble a un espárrago muro.
NO dejar que los niños suben por encima del mueble.
Poner los articulos mas pesados en los tableros o cajones inferiores.
Leer y sequir todos de los instucciones para el montaje.
L'unité peut basculer et causer des
blessures graves ou la mort.
Fixez l'unité au mur ou à un montant.
Ne laissez PAS les enfants grimper sur le meuble
Déposez les pièces lourdes sur les tablettes ou tiroirs
du bas.
Lire et suivre toutes les instructions d'assemblage.
STOP
ALTO
ARRÊT
DO NOT RETURN PRODUCT TO THE STORE
NO REGRESAS ESTA PRODUCTO A LA TIENDA
NE RETOURNEZ PAS LE PRODUIT AU MAGASIN
Individual stores do not stock parts.
Las tiendas no tiene partes.
Les magasins individuels ne gardent pas de pièces.
If a part is missing or damaged, please visit our website or call our toll-free customer
service line. We will gladly ship your replacement parts FREE of charge.
Si las partes están perdidas o dañadas Por favor visite nuestra página de Internet o
llame a nuestra línea de teléfono gratis de Servicio al Cliente. Nosotros le enviaremos
sus repuestos sin cargo adicional, serán totalmente gratis.
Si une pièce est manquante ou endommagée, veuillez visiter notre site web ou appelez
sans frais notre Service à la clientèle. Nous expédierons avec plaisir vos pièces de
rechange GRATUITEMENT.
Need Parts or
Assistance? Nesacitas partes o
Asistancia? Besoin de Pièces ou
d'assistance?
WWW.AMERIWOOD.COM/PARTS
or call toll free:
o llame a nuestra línea gratis:
ou appelez sans frais: 1-800-489-3351
For prompt, reliable service; please have your assembly manual ready.
Para servicio mas rapido y reliable por favor tenga esta manual listo.
Pour un service rapide et fiable, s'il vous plaît ayez votre livret d'assembage en
main.
-KEEP FOR REFERENCE- -GUARDAR PARA REFERENCIA- -GARDEZ POUR RÉFÉRENCE-
B345662412COM0
5662412COM
Please Recycle
Recicle Por Favor
Réutilisez SVP
Date of Purchase ___ / ___ / ___
Lot Number:
THIS INSTRUCTION BOOKLET CONTAINS IMPORTANT SAFETY INFORMATION.
PLEASE READ AND KEEP FOR FUTURE REFERENCE.
B345662412COM0
3 /24
www.ameriwood.com
PARTS - PIEZAS - PIECES
left panel
panel izquierdo
panneau gauche
35662412010
right panel
panel derecho
panneau droit
35662412020
kick
retroceso
plaque de poussée
35662412060
2 stringer
2 carriles
2 rails
35662000050
5 drawer bottoms
5 cajones inferiores
5 fonds de tiroir
35662331160
AB
C
D
E
F
G
H
I
J
KL
2 side kicks
2 patadas laterales
2 coups de pied de côté
35662412070
top
cime
dessus
35662412030
bottom
fondo
fond
35662000040
5 drawer fronts
5 cajones del frente
5 devants du tiroir
35662412111
5 drawer backs
5 cajones trasero
5 dos du tiroir
39991167065150B
front molding
moldura delantera
avant moulage
35662412080
10 drawer sides
10 lados del cajon
10 côté de tiroir
39991167346200C
5 drawer braces
5 llaves del cajon
5 supports de tiroir
35538000121
left molding
moldura izquierda
moulure gauche
35662412090
right molding
moldura derecha
moulure droite
35662412100
P
DWR
SIDE DWR
BACK
B345662412COM0
4 /24
www.ameriwood.com
PARTS - PIEZAS - PIECES
x
10 9
#A21520
compression dowel
clavija de compresion
goujon de compression
x94
#A53600
angle bracket
support de l'angle
anaquel del ángulo
x13 34
#A21110
nail
clavo
clou
x
14
4
#A12810
1" pan head
cabeza redondo 1"
tête ronde
1"
x
21
#A84050
safety bracket kit
juego del soporte de seguridad
ensemble de courroie de sécurite
x
6
17
cam bolt
#A22510
perno de leva
boulon de came
x50
#A11080
7
7/16" cabeza plano
7/16" flat head
7/16" tête plate
x
right cabinet memberleft cabinet member left drawer runner right drawer runner
corredera de mueble derechacorredera de mueble izquierda deslizador izquierdo de cajón deslizador derecha de cajón
111
15
x
#A56770
cdba
1
glissière gauche du cabinet glissière droite du cabinet coulisse gauche du tiroir coulisse droite du tiroir
x
410
#A54520
drawer bracket
soporte de caón
support de tiroir
x
310
#A52460
knob
perilla
bouton
back panel
panel trasero
panneau arriere
K566200000
Q
x
8
48
#A12120
7/16" pan head
cabeza redondo 7/16"
tête ronde 7/16"
tète plate 2"
cabeza plano 2"
2" flat head
x
#A13710
11 7
x
12 4
#A22895
dovetail key
llave de cola de milano
clé de queue d'aronde
2a
2b
2c 2d
This piece is paperboard construction. It is not made from wood but
is required for the assembly of your unit.
Esto pedazo son la construcción del cartón. Ello no son hecho de
madera, pero se requlere para la asamblea de su unidad.
Ces peèce sont de construction en carton. Alle ne sont pas
fabriquées de bois, mais nécessaires pour l'assemblage de votre
meuble.
x16 10
#A17250
5/8" screw
tornillo 5/8"
vis 5/8"
x
#A22570
cam lock
cerradura de leva
serrure de came
517
x
15 30
A21970
drive fastener
sujetador de la impulsión
attache d'entraînement
B345662412COM0
5 /24
www.ameriwood.com
2
3½ turn to fully
lock.
½ se vuelven a
totalmente
cerradura.
½ tour pour
verrouiller
complètement.
4
Tighten to fully seat. Do not over
tighten.
Apriétese a totalmente asiento. No
haga encima de apriétese.
Serrez pour mettre le siège bien en
place. Ne pas trop serrer.
Proper orientation of cam.
La orientación apropiada de leva.
Bonne orientation de la came.
1
This illustration shows how the CAM fastening system works.
Esta ilustración muestra el sistema de fijación de leva y como funciona.
Cette illustration montre le système de fixation CAME et son fonctionnement.
Lock
Apretar
Serrer
Titus
Titus
Titus
1
B345662412COM0
6 /24
www.ameriwood.com
Finished Edge
Borde Acabado
Bord Fini
1a
x
5
x
64
x
7x15 1a
6
6
7
A
1a
1a
1a
1a
1a
7
7
7
7
7
7
7
7
7
7
7
7
7
7
7
x
52
5
Proper orientation of CAM LOCK
Posición correcta de la cerradura de leva.
Bonne orientation de la SERRURE DE CAME
2
B345662412COM0
7 /24
www.ameriwood.com
x
64
x
7x15
b
5
x
1
Finished Edge
Borde Acabado
Bord Fini
1b
7
6
6
B
1b
1b
1b
1b
1b
7
7
7
7
7
7
7
7
7
7
7
7
7
7
7
x
52
Proper orientation of CAM LOCK
Posición correcta de la cerradura de leva.
Bonne orientation de la SERRURE DE CAME
5
3
B345662412COM0
8 /24
www.ameriwood.com
x
14
2
x
8x1
91x
Angle bracket (9) flush with front edge of left panel (A).
Soporte en ángulo (9) al ras con el borde delantero del
panel izquierdo (A).
Crochet pointu (9) ras bord avant du panneau de
gauche (A).
Front edge of side kick (G) flush with front edge of left panel (A).
Borde delantero de la patada lateral (G) al ras con el borde
delantero del panel izquierdo (A).
Rebord avant du coup de côté (G) en affleurement avec le bord
avant du panneau de gauche (A).
Finished Edge
Borde Acabado
Bord Fini
A
G
8
9
14
4
B345662412COM0
9 /24
www.ameriwood.com
x
8x1
91x
x
14
2
Front edge of side kick (G) flush with front edge of right panel (B).
Borde delantero de la patada lateral (G) al ras con el borde frontal del panel de la derecha (B).
Rebord avant du coup de côté (G) en affleurement avec le bord avant du panneau de droite (B).
Angle bracket (9) flush with front edge of right panel (B).
Soporte en ángulo (9) al ras con el borde frontal del panel de la
derecha (B).
Crochet pointu (9) ras bord avant du panneau de droite (B).
Finished Edge
Borde Acabado
Bord Fini
8
9
14 B
G
5
B345662412COM0
10 /24
www.ameriwood.com
x
12
4
H
I
J
12 12
Join together the front, left and right moldings as shown using the dovetail keys (12).
You may need to tap the dovetail keys (12) to fully insert.
Se unen al frente, las molduras izquierdas y derecha como se muestra usando las teclas de cola de Milano (12).
Puede que necesites golpear las teclas de cola de Milano (12) para introducir completamente.
S'unir le front, les moulures de gauche et de droite comme indiqué en utilisant les touches de queue d'aronde (12).
Vous devrez peut-être Appuyez sur les touches de la queue d'aronde (12) pour l'insérer complètement.
6
B345662412COM0
11 /24
www.ameriwood.com
x
64
6
6
x
11 7
x
21
2a
2b
2a
2b
C
H
I
J
Dovetail key (12) on bottom.
Cola de pato llave (12) en la parte inferior.
Queue d'aronde clé (12) sur le fond.
11
11
Surface with holes.
Superficie con agujeros.
Surface avec trous.
1st 1st
2nd
2nd
7
B345662412COM0
12 /24
www.ameriwood.com
x
10 4
Approx.
7/16"
10
D
Ex2
5
5
10 10
x
58
Proper orientation of CAM LOCK
Posición correcta de la cerradura de leva.
Bonne orientation de la SERRURE DE CAME
8
B345662412COM0
13 /24
www.ameriwood.com
A
D
E
E
Pilot holes along front edge.
Agujeros a lo largo del borde delantero.
Trous de guidage le long du bord avant.
Finished Edge
Borde Acabado
Bord Fini
UNLOCK LOCK
APRETAR
DESAPRETAR
OUVRIR SERRER
9
B345662412COM0
14 /24
www.ameriwood.com
D
E
E
A
B
Finished Edge
Borde Acabado
Bord Fini
UNLOCK LOCK
APRETAR
DESAPRETAR
OUVRIR SERRER
10
B345662412COM0
15 /24
www.ameriwood.com
A
B
C
UNLOCK LOCK
APRETAR
DESAPRETAR
OUVRIR SERRER
11
B345662412COM0
16 /24
www.ameriwood.com
x
8x6
92x
8
8
8
8
9
D
F
B
A
Carefully turn the unit over and position the kick (F) as shown. Using
angle brackets (9) and screws (8), attach as shown.
Con cuidado voltee la unidad y coloque la patada (F) como se muestra.
Utilizando paréntesis angulares (9) y tornillos (8), fije como se muestra.
Soigneusement, retournez l'unité et positionner le coup de pied (F). À
l'aide de crochets pointus (9) et les vis (8), fixez.
Be sure bottom edges are flush with one another.
Asegúrese de que los bordes inferiores estén al ras uno con el otro.
N'oubliez pas les bords inférieurs soient à égalité avec l'autre.
12
B345662412COM0
17 /24
www.ameriwood.com
Notch location
Ubicación de la muesca
Endroit de l'encoche
Assure that the unit is square.
Distance from corner to corner must be equal as shown.
Asegura que el unidad es cuadrada.
Distancia de esquina a esquina debe ser igual como se
muestra por favor.
Assurez-vous que le meuble està égalité.
La distance de coin en coin doit être égale comme montré.
Flush the edge of the back panel with the bottom edge of the bottom shelf. Align
squarely and nail straight through into back edges.
Alinie el borde del panel trasero con el borde inferior del estante inferior. Alinee en
ángulo recto y clave derecho dentro o en los bordes traseros.
Alignez le bord du panneau arrière avec le bord inférieur de la tablette inférieure.
Alignez à égalité et enfoncez les clous perpendiculairement dans les bords arrière.
product collapse, and/or serious injury.
Por favor asegúrese que las Parte de atrás se atan
firmemente. Todos los clavos deben manejarse en las
partes recto y deben apretarse firmemente. El fracaso para
hacer para que podría causar inestabilidad, derrumbamiento
del producto, y/o la lesión seria.
S’il-vous-plaît assurez-vous que les PANNEAUX
ARRIÈRES sont attachés solidement. Tous les clous
doivent être enfoncés perpendiculairement et solidement
dans les parties. Sinon le meuble peut devenir instable,
s’effondrer subitement et/ou causer des blessures graves.
tightened firmly. Failure to do so could cause instability,
All nails must be driven into the parts straight and
Please make sure that the Backs are attached securely.
ADVERTENCIA
AVERTISSEMENT
WARNING
13 x 34
13
IMPORTANT!
THE BACK PANEL IS A STRUCTURAL PART OF THIS UNIT AND MUST BE INSTALLED PROPERLY.
IMPORTANTE!
EL PANEL TRASERO ES UNA PARTE ESTRUCTURAL DE ESTA UNIDAD Y DEBE SER INSTALADO CORRECTAMENTE.
IMPORTANT!
LE PANNEAU ARRIÈRE EST UNE PIÈCE STRUCTURELLE DU MEUBLE ET DOIT ÊTRE INSTALLÉ CORRECTEMENT.
13
B345662412COM0
18 /24
www.ameriwood.com
Carefully line up the drawer bracket with the holes in the drawer side as shown. Attach the drawer bracket to the drawer
side using screws.
Alinee cuidadosamente el soporte del cajón con los orificios del lado del cajón como se muestra. Fije el soporte del
cajón al lado del cajón usando los tornillos.
Alignez soigneusement le support du tiroir avec les trous du côté du tiroir comme illustré. Fixez le support du tiroir au
côté du tiroir à l'aide des vis.
Bracket Orientation
Orientación del soporte
Orientation du support
Bracket Orientation
Orientación del soporte
Orientation du support
Finished Edge
Borde Acabado
Bord Fini
x
410
4
4
x5
x
8x20
8
88
8
DWR
SIDE DWR
SIDE
14
B345662412COM0
19 /24
www.ameriwood.com
1c
x
5
1d
x
5
x
7x20
Finished Edge
Borde Acabado
Bord Fini
7
7
1a
1b
x5
Finished Edge
Borde Acabado
Bord Fini 8
6
K
15
x
8x20
x
65
8
x5
DWR
SIDE
DWR
SIDE
DWR
SIDE
DWR
SIDE
16
B345662412COM0
20 /24
www.ameriwood.com
x
10 5
10
x5
K
L
L
Approx.
7/16"
10
x5
17
5
x
55
Proper orientation of CAM LOCK
Posición correcta de la cerradura de leva.
Bonne orientation de la SERRURE DE CAME
UNLOCK LOCK
APRETAR
DESAPRETAR
OUVRIR SERRER
P
K
unfinished surface
superficie inacabado
surface non fini
x5
DWR
SIDE
DWR
SIDE
DWR
SIDE
DWR
SIDE

Other Ameriwood HOME Indoor Furnishing manuals
Ameriwood HOME 5985333W User manual

Ameriwood HOME

Ameriwood HOME 5985333W User manual

Ameriwood HOME 2595339COM User manual

Ameriwood HOME

Ameriwood HOME 2595339COM User manual

Ameriwood HOME 5206412COM User manual

Ameriwood HOME

Ameriwood HOME 5206412COM User manual

Ameriwood HOME 5683215PCOM User manual

Ameriwood HOME

Ameriwood HOME 5683215PCOM User manual

Ameriwood HOME 5894330COM User manual

Ameriwood HOME

Ameriwood HOME 5894330COM User manual

Ameriwood HOME 1794096COM User manual

Ameriwood HOME

Ameriwood HOME 1794096COM User manual

Ameriwood HOME 1870012COM User manual

Ameriwood HOME

Ameriwood HOME 1870012COM User manual

Ameriwood HOME 6425335COM User manual

Ameriwood HOME

Ameriwood HOME 6425335COM User manual

Ameriwood HOME 2758305COM User manual

Ameriwood HOME

Ameriwood HOME 2758305COM User manual

Ameriwood HOME 9737407COM User manual

Ameriwood HOME

Ameriwood HOME 9737407COM User manual

Ameriwood HOME 1635015COM User manual

Ameriwood HOME

Ameriwood HOME 1635015COM User manual

Ameriwood HOME Andover 8760340BLO User manual

Ameriwood HOME

Ameriwood HOME Andover 8760340BLO User manual

Ameriwood HOME 8297335COM User manual

Ameriwood HOME

Ameriwood HOME 8297335COM User manual

Ameriwood HOME 5998222W User manual

Ameriwood HOME

Ameriwood HOME 5998222W User manual

Ameriwood HOME B345951303COM00 User manual

Ameriwood HOME

Ameriwood HOME B345951303COM00 User manual

Ameriwood HOME 5430837COM User manual

Ameriwood HOME

Ameriwood HOME 5430837COM User manual
Ameriwood HOME 4542341COM User manual

Ameriwood HOME

Ameriwood HOME 4542341COM User manual

Ameriwood HOME 5758337COM User manual

Ameriwood HOME

Ameriwood HOME 5758337COM User manual

Ameriwood HOME 6743333COM User manual

Ameriwood HOME

Ameriwood HOME 6743333COM User manual

Ameriwood HOME 5894325COM User manual

Ameriwood HOME

Ameriwood HOME 5894325COM User manual

Ameriwood HOME Farmington Lift Top Coffee Table 3321846COM User manual

Ameriwood HOME

Ameriwood HOME Farmington Lift Top Coffee Table 3321846COM User manual

Ameriwood HOME 4294407COM User manual

Ameriwood HOME

Ameriwood HOME 4294407COM User manual

Ameriwood HOME 3700339COM User manual

Ameriwood HOME

Ameriwood HOME 3700339COM User manual

Ameriwood HOME Twin Headboard 5320340EBL User manual

Ameriwood HOME

Ameriwood HOME Twin Headboard 5320340EBL User manual

Popular Indoor Furnishing manuals by other brands

Bestway P3052 manual

Bestway

Bestway P3052 manual

Safco 1902 Assembly instructions

Safco

Safco 1902 Assembly instructions

Whittier Wood Furniture 1382AFGACe manual

Whittier Wood Furniture

Whittier Wood Furniture 1382AFGACe manual

Sauder 409086 manual

Sauder

Sauder 409086 manual

venture horizon 2641 Assembly instructions

venture horizon

venture horizon 2641 Assembly instructions

Baxton Studio 3SWH0408195 Assembly instructions

Baxton Studio

Baxton Studio 3SWH0408195 Assembly instructions

Rize Clarity II Enhanced owner's manual

Rize

Rize Clarity II Enhanced owner's manual

Furniture of America CM4142C Assembly instructions

Furniture of America

Furniture of America CM4142C Assembly instructions

Thomashilfen ThevoChair user manual

Thomashilfen

Thomashilfen ThevoChair user manual

Core Products Elgin EL223 Assembly instructions

Core Products

Core Products Elgin EL223 Assembly instructions

Actiforce Aluforce Pro 140 M Assembly manual

Actiforce

Actiforce Aluforce Pro 140 M Assembly manual

Blanco BLANCOSUPREME 512-722 Specification sheet

Blanco

Blanco BLANCOSUPREME 512-722 Specification sheet

Kinfine HOMEPOP K7117 Assembly instructions

Kinfine

Kinfine HOMEPOP K7117 Assembly instructions

Coaster California 300260KW Assembly instructions

Coaster

Coaster California 300260KW Assembly instructions

Million Dollar Baby Alden Care and maintenance

Million Dollar Baby

Million Dollar Baby Alden Care and maintenance

VITO K245 Assembling instructions

VITO

VITO K245 Assembling instructions

studio tk borough quick start guide

studio tk

studio tk borough quick start guide

Otto MONA 53 Assembly instruction

Otto

Otto MONA 53 Assembly instruction

manuals.online logo
manuals.online logoBrands
  • About & Mission
  • Contact us
  • Privacy Policy
  • Terms and Conditions

Copyright 2025 Manuals.Online. All Rights Reserved.