manuals.online logo
Brands
  1. Home
  2. •
  3. Brands
  4. •
  5. Ameriwood HOME
  6. •
  7. Indoor Furnishing
  8. •
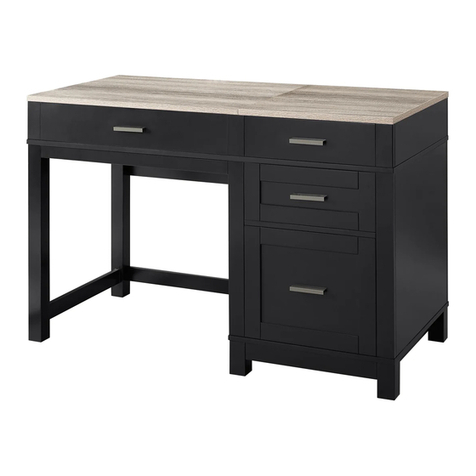
  9. Ameriwood HOME 5683215PCOM User manual

Ameriwood HOME 5683215PCOM User manual

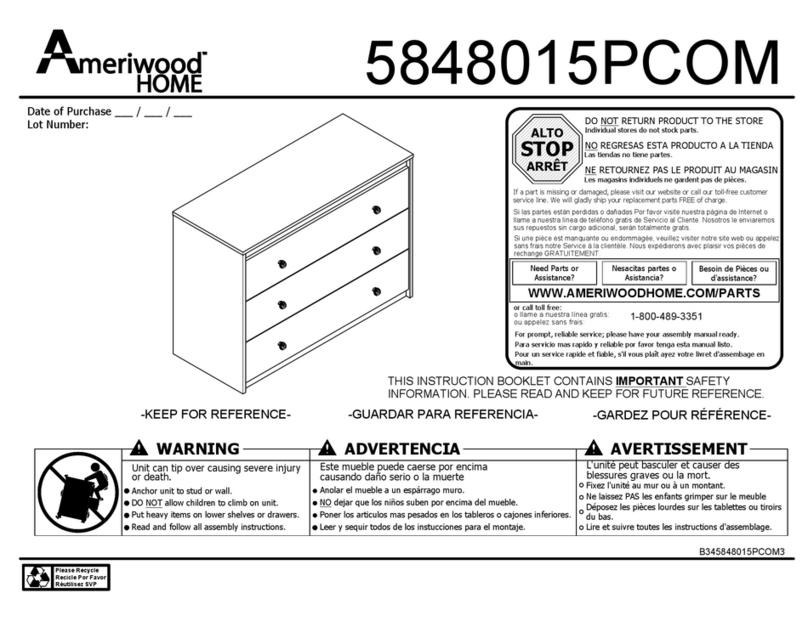
WARNING ADVERTENCIA AVERTISSEMENT
Unit can tip over causing severe injury
or death.
Anchor unit to stud or wall.
DO NOT allow children to climb on unit.
Put heavy items on lower shelves or drawers.
Read and follow all assembly instructions.
Este mueble puede caerse por encima
causando daño serio o la muerte
Anolar el mueble a un espárrago muro.
NO dejar que los niños suben por encima del mueble.
Poner los articulos mas pesados en los tableros o cajones inferiores.
Leer y sequir todos de los instucciones para el montaje.
L'unité peut basculer et causer des
blessures graves ou la mort.
Fixez l'unité au mur ou à un montant.
Ne laissez PAS les enfants grimper sur le meuble
Déposez les pièces lourdes sur les tablettes ou tiroirs
du bas.
Lire et suivre toutes les instructions d'assemblage.
STOP
ALTO
ARRÊT
DO NOT RETURN PRODUCT TO THE STORE
NO REGRESAS ESTA PRODUCTO A LA TIENDA
NE RETOURNEZ PAS LE PRODUIT AU MAGASIN
Individual stores do not stock parts.
Las tiendas no tiene partes.
Les magasins individuels ne gardent pas de pièces.
If a part is missing or damaged, please visit our website or call our toll-free customer
service line. We will gladly ship your replacement parts FREE of charge.
Si las partes están perdidas o dañadas Por favor visite nuestra página de Internet o
llame a nuestra línea de teléfono gratis de Servicio al Cliente. Nosotros le enviaremos
sus repuestos sin cargo adicional, serán totalmente gratis.
Si une pièce est manquante ou endommagée, veuillez visiter notre site web ou appelez
sans frais notre Service à la clientèle. Nous expédierons avec plaisir vos pièces de
rechange GRATUITEMENT.
Need Parts or
Assistance?
Nesacitas partes o
Asistancia?
Besoin de Pièces ou
d'assistance?
WWW.AMERIWOODHOME.COM/PARTS
or call toll free:
o llame a nuestra línea gratis:
ou appelez sans frais: 1-800-489-3351
For prompt, reliable service; please have your assembly manual ready.
Para servicio mas rapido y reliable por favor tenga esta manual listo.
Pour un service rapide et fiable, s'il vous plaît ayez votre livret d'assembage en
main.
-KEEP FOR REFERENCE- -GUARDAR PARA REFERENCIA- -GARDEZ POUR RÉFÉRENCE-
B345683215PCOM
4
5683215PCOM
Please Recycle
Recicle Por Favor
Réutilisez
Date of Purchase ___ / ___ / ___
Lot Number:
THIS INSTRUCTION BOOKLET CONTAINS IMPORTANT SAFETY INFORMATION.
PLEASE READ AND KEEP FOR FUTURE REFERENCE.
B345683215PCOM
4
3 /35
www.ameriwoodhome.com
PARTS - PIEZAS - PIECES
Parts List
DESCRIPTION
PART NUMBER
QTY
ITEM
LEFT PANEL356832150101A
RIGHT PANEL
356832150201B
TOP356832150311C
BOTTOM
356832150401D
CENTER MOLDING
356832150501E
UPPER SIDE MOLDING356852150802
H
LOWER RAIL356852150902I
STRINGER356830001301M
LEFT PANEL RAIL356832151401N
RIGHT PANEL RAIL
356832151501
O
UPPER FRONT MOLDING
356832151601P
FRONT LEG
356832151702
Q
REAR LEG
356832151802R
BACK PANEL
K5683215011
S
Parts shown are the base cabinet of your model. Drawer is shown on next pages. Please note, some parts are labeled with a sticker and
some parts have a letter stamped on a raw edge.
.
Piezas mostradas son la base del gabinete de su modelo. Cajón se muestra en las siguientes páginas. Nota: algunas partes están
marcados con una etiqueta y algunas partes tienen una letra impresa en un borde.
Parties représentées sont l'armoire base de votre modèle. Tiroir est affiché sur les pages suivantes. S'il vous plaît noter, certaines parties
sont marqués avec un autocollant et certaines parties ont une lettre estampillée sur un bord brut.
A
C
B
D
EO
M
I
H
N
P
Q
Q
R
S
This piece is paperboard construction. It is not made from wood but is required for the assembly of your unit.
Esto pedazo son la construcción del cartón. Ello no son hecho de madera, pero se requlere para la asamblea de su unidad.
Cette pièce est de construction en carton. Elle n'est pas fabriquée de bois, mais nécessaire pour l'assemblage de votre meuble.
Spanish & French parts list on page 5.
Lista de piezas españolas y francesas en la página 5.
Liste des pièces espagnoles et françaises à la page 5.
H
B345683215PCOM
4
4 /35
www.ameriwoodhome.com
PARTS - PIEZAS - PIECES
Parts List
DESCRIPTION
PART NUMBER
QTY
ITEM
DRAWER FRONT
356832150601F
LEFT DRAWER SIDE
356833310701
G
RIGHT DRAWER SIDE356833311001
J
DRAWER BACK356833311101K
DRAWER BOTTOM356833311201L
Parts shown are for the drawer of your model. Please note, some parts are labeled with a sticker and some parts have a letter stamped on a
raw edge.
Piezas mostradas son para el cajón de su modelo. Nota: algunas partes están marcados con una etiqueta y algunas partes tienen una letra
impresa en un borde.
Pièces indiqués sont pour le tiroir de votre modèle. S'il vous plaît noter, certaines parties sont marqués avec un autocollant et certaines
parties ont une lettre estampillée sur un bord brut.
K
G
J
L
F
B345683215PCOM
4
5 /35
www.ameriwoodhome.com
Parts List
DESCRIPTION
PART NUMBER
QTY
ITEM
PANEL IZQUIERDO / PANNEAU GAUCHE
356832150101A
PANEL DERECHO / PANNEAU DROIT
356832150201B
PARTE SUPERIOR / PANNEAU SUPÉRIEUR
356832150311C
FONDO / FOND356832150401D
MOLDURA CENTRO / CENTRE DE MOULAGE356832150501E
FRENTE DEL CAJÓN / FACE DE TIROIR
356832150601F
LADO DEL CAJÓN IZQUIERDA / GAUCHE TIROIR SIDE
356833310701
G
MOLDURAS LATERALES SUPERIOR / UPPER SIDE MOULAGE
356852150802H
RIEL INFERIOR / RAIL INFÉRIEUR
356852150902
I
LATERALES DE CAJÓN DERECHO / TIROIR DE DROITE SIDE
356833311001J
CAJÓN DE ATRÁS / DE TIROIR ARRIERE
356833311101K
PARTE INFERIOR DEL CAJÓN / FOND DE TIROIR
356833311201L
LARGUERO / RAIDISSEUR
356830001301M
RIEL DE PANEL DE LA IZQUIERDA / GAUCHE PANNEAU RAIL
356832151401N
PANEL DE LA DERECHA CARRIL / DROIT PANNEAU RAIL
356832151501
O
MOLDURA DELANTERA SUPERIOR / SUPERIEURE AVANT MOULAGE356832151601
P
PATA DELANTERA / AVANT LEG356832151702Q
PATA TRASERA / ARRIÈRE LEG
356832151802R
PANEL TRASERO / PANNEAU ARRIÈRE
K5683215011S
B345683215PCOM
4
6 /35
www.ameriwoodhome.com
PARTS - PIEZAS - PIECES
x
cam bolt
#A22610
perno de leva
boulon de came
2
10
x
raccord
conectador
16
connector
#A22920
3
x
4 16
#A22910
connector bolt
perno del conectador
boulon de raccordement
x
#A21660
wood dowel
clavija de madera
goujon de bois
56
x
6 14
#A12850
1" pan head
1" cabeza redondo
1" vis
x
#A17400
8-32 x 7/8" bolt
tornillo 7/8"
vis 7/8"
72
x
8 4
#A11600
1-1/4" flat head
cabeza plano 1-1/4"
tête plate 1-1/4"
x
13 1
#A52480
knob
perilla
bouton
x11 6
#A21110
nail
clavo
clou
x
#A11080
cabeza plano 7/16"
7/16" flat head
tête plate 7/16"
x
10
10
x
#A12120
7/16" pan head
cabeza redondo 7/16"
tête ronde 7/16"
912
right cabinet memberleft cabinet member left drawer runner right drawer runner
corredera de mueble derechacorredera de mueble izquierda deslizador izquierdo de cajón deslizador derecha de cajón
x
#A56750
glissière gauche du cabinet glissière droite du cabinet coulisse gauche du tiroir coulisse droite du tiroir
14d14c14b
14 1
14a
x
12 2
#A54200
drawer bracket
soporte de caón
support de tiroir
x
A22620
cam lock
cerradura le leva
serrure de camd
1 10
B345683215PCOM
4
7 /35
www.ameriwoodhome.com
2
3½ turn to fully
lock.
½ se vuelven a
totalmente
cerradura.
½ tour pour
verrouiller
complètement.
4
Tighten to fully seat. Do not over
tighten.
Apriétese a totalmente asiento. No
haga encima de apriétese.
Serrez pour mettre le siège bien en
place. Ne pas trop serrer.
Proper orientation of cam.
La orientación apropiada de leva.
Bonne orientation de la came.
1
This illustration shows how the CAM fastening system works.
Esta ilustración muestra el sistema de fijación de leva y como funciona.
Cette illustration montre le système de fixation CAME et son fonctionnement.
Lock
Apretar
Serrer
1
B345683215PCOM
4
8 /35
www.ameriwoodhome.com
Finished Edge
Borde Acabado
Bord Fini
x
12
3
A
3
3
B
3
You will need to tap the connector (3) with a hammer to
fully insert. Be sure the connector is positioned as shown
before pushing into holes.
Quizá necesites golpear el conector (3) suavemente con
un martillo para insertar conpletamente. Esté seguro que
conectador está colocado como se muestra antes de
empujar en los agujeros.
Vous devrez taper le connecteur (3) avec un marteau
pour l'insérer complètement. Assurez-vous que le
connecteur est placé comme indiqué avant de
pousser dans les trous.
3
Finished Edge
Borde Acabado
Bord Fini
Important: When using a power drill or power screwdriver for screwing, please be aware to slow down and stop when screw is
tight. Failure to do so may result in stripping the screw.
Importante: Cuando se utiliza un taladro eléctrico o corriente desarmador para atornillar, tenga en cuenta a despacio y se
detendrá cuando el tornillo está apretado. No hacerlo puede resultar en despojar el tornillo.
Important : Lorsque vous utilisez une perceuse électrique ou un tournevis électrique pour le vissage, sachez pour ralentir et
arrêter lorsque la vis est serrée. Faute de quoi vous risquez dans la vis se déshabillant.
2
B345683215PCOM
4
9 /35
www.ameriwoodhome.com
Q
Q
x
4 12
4
R
R
4
4
4
4
4
4
4
4
4
4
4
You will use the larger holes in the rear legs (R) for the connector bolts (4). The rear legs (R) has holes in the front and rear surface.
Utilizará los agujeros más grandes en las piernas traseras (R) para los tornillos del conector (4). Las patas traseras (R) agujeros en
la superficie frontal y trasera.
Vous allez utiliser les plus grands trous dans les pattes arrière (R) pour les boulons de connecteur (4). Les pieds arrière (R) a des
trous dans la surface avant et arrière.
3
B345683215PCOM
4
10 /35
www.ameriwoodhome.com
Finished Edge
Borde Acabado
Bord Fini
A
Q
R
Press the front and rear legs (Q&R) onto the left panel (A) so the connector bolts (4) engage the connectors (3). Turn the screw in
the center of the connector (3) clockwise to lock in place.
Pulse las piernas delanteras y traseras (Q&R) en el panel de la izquierda (A) por lo que los pernos de conector (4) se acoplan los
conectores (3). Gire el tornillo en el centro del conector (3) hacia la derecha para que encaje en su lugar.
Appuyez sur l'avant et arrière jambes (Q & R) sur le panneau de gauche (A) pour les boulons de connecteur (4) engagent les
connecteurs (3). Tourner la vis dans le centre du connecteur (3) vers la droite pour verrouiller en place.
End View
Vista Final
Vau Finale
Turn screw clockwise to lock in place.
Gire hacia la derecha el tornillo para bloquear en su lugar.
Tournez la vis vers la droite pour verrouiller en place.
Small holes in rear surface.
Los agujeros pequeños en superficie posterior.
Petits trous dans la surface arrière.
4
B345683215PCOM
4
11 /35
www.ameriwoodhome.com
Finished Edge
Borde Acabado
Bord Fini
B
Q
R
Press the front and rear legs (Q&R) onto the right panel (B) so the connector bolts (4) engage the connectors (3). Turn the screw
in the center of the connector (3) clockwise to lock in place.
Pulse las piernas delanteras y traseras (Q&R) en el panel dela derecho (B) por lo que los pernos de conector (4) se acoplan los
conectores (3). Gire el tornillo en el centro del conector (3) hacia la derecha para que encaje en su lugar.
Appuyez sur l'avant et arrière jambes (Q & R) sur le panneau de droite (B) pour les boulons de connecteur (4) engagent les
connecteurs (3). Tourner la vis dans le centre du connecteur (3) vers la droite pour verrouiller en place.
Small holes in rear surface.
Los agujeros pequeños en superficie posterior.
Petits trous dans la surface arrière.
Turn screw clockwise to lock in place.
Gire hacia la derecha el tornillo para bloquear en su lugar.
Tournez la vis vers la droite pour verrouiller en place.
End View
Vista Final
Vau Finale
5
B345683215PCOM
4
12 /35
www.ameriwoodhome.com
x
2
3
5
x
51
x
14 1
14a
x
x
3
10
A
R
Q
2
1
10
14a
x
1 2
Proper orientation of CAM LOCK
Posición correcta de la cerradura de leva.
Bonne orientation de la SERRURE DE CAME
6
B345683215PCOM
4
13 /35
www.ameriwoodhome.com
x
14 1
14b
x
x
3
10
x
51
x
2
3
5
1
B
R
Q
2
10
14b
x
1 2
Proper orientation of CAM LOCK
Posición correcta de la cerradura de leva.
Bonne orientation de la SERRURE DE CAME
7
B345683215PCOM
4
14 /35
www.ameriwoodhome.com
H
I
6
A
Q
R
x
64
Attach the upper side molding (H) and lower rail (I) to the left panel (A) as shown with screws (6).
Coloque la moldura superior (H) y el carril inferior (I) al panel izquierdo (A) como se muestra con los tornillos (6).
Attacher le moulage de côté supérieur (H) et inférieur rail (I) pour le panneau de gauche (A), comme indiqué au moyen de vis (6).
Be sure the top edge of the upper side molding
(H) is flush with the top edge of the left panel (A).
Asegúrese de que el borde superior de la moldura
lateral superior (H) está a ras con el borde
superior del panel izquierdo (A).
Soyez sûr que le bord supérieur de la moulure
latérale supérieure (H) est aligné avec le bord
supérieur du panneau de gauche (A).
Be sure the bottom edge of the lower rail (I) is flush with
the bottom edge of the left panel (A).
Asegúrese de que el borde inferior del riel inferior (I) está
a ras con el borde inferior del panel izquierdo (A).
Soyez sûr que le bord inférieur du rail inférieur (I) est
aligné avec le bord inférieur du panneau de gauche (A).
I
A
H
Finished Edge
Borde Acabado
Bord Fini
8
B345683215PCOM
4
15 /35
www.ameriwoodhome.com
B
6
H
I
x
6 4
Q
R
Attach the upper side molding (H) and lower rail (I) to the right panel (B) as shown with screws (6).
Coloque la moldura superior (H) y el carril inferior (I) al panel derecho (B) como se muestra con los tornillos (6).
Attacher le moulage de côté supérieur (H) et inférieur rail (I) pour le panneau de droite (B), comme indiqué au moyen de vis (6).
Be sure the bottom edge of the lower rail (I) is flush with
the bottom edge of the right panel (B).
Asegúrese de que el borde inferior del riel inferior (I) está
a ras con el borde inferior del panel derecho (B).
Soyez sûr que le bord inférieur du rail inférieur (I ) est
aligné avec le bord inférieur du panneau de droite (B).
Be sure the top edge of the upper side
molding (H) is flush with the top edge of
the right panel (B).
Asegúrese de que el borde superior de la
moldura lateral superior (H) está a ras con
el borde superior del panel derecho (B).
Soyez sûr que le bord supérieur de la
moulure latérale supérieure (H) est aligné
avec le bord supérieur du panneau de
droite (B).
B
I
H
Finished Edge
Borde Acabado
Bord Fini
9
B345683215PCOM
4
16 /35
www.ameriwoodhome.com
A
Q
x
6 3
R
6
N
Position the left panel rail (N) as shown.
Attach the left panel rail (N) to the left panel
(A) with screws (6) as shown. If needed
loosen screws, make needed adjustment of
rail and re-tighten.
Coloque el riel del panel a la izquierda (N)
como se muestra. Coloque el riel panel de la
izquierda (N) para el panel izquierdo (A) con
los tornillos (6) como se muestra. Si es
necesario tornillos flojos, hacer el ajuste
necesaria del ferrocarril y vuelva a apretar.
Positionner le rail de gauche (N). Fixer le rail
de gauche (N) pour le panneau de gauche
(A) avec les vis (6), tel qu'illustré. Si
nécessaire de desserrer les vis, effectuer les
réglages nécessaires de rail et resserrer.
H
I
10
B345683215PCOM
4
17 /35
www.ameriwoodhome.com
6
O
B
Q
R
H
I
Position the right panel rail (O) as shown. Attach
the right panel rail (O) to the right panel (B) with
screws (6) as shown. If needed loosen screws,
make needed adjustment of rail and re-tighten.
Coloque el riel del panel a la derecho (O) como
se muestra. Coloque el riel panel de la derecho
(O) para el panel derecho (B) con los tornillos
(6) como se muestra. Si es necesario tornillos
flojos, hacer el ajuste necesaria del ferrocarril y
vuelva a apretar.
Positionner le rail panneau de droite (O). Fixer le
rail du panneau de droite (O) dans le panneau
de droite (B) avec les vis (6), tel qu'illustré. Si
nécessaire de desserrer les vis, effectuer les
réglages nécessaires de rail et resserrer.
x
6 3
11
B345683215PCOM
4
18 /35
www.ameriwoodhome.com
C
x
42
x
2
4
4
2
12
B345683215PCOM
4
19 /35
www.ameriwoodhome.com
x
52
5
5
D
1
1
Proper orientation of CAM LOCK
Posición correcta de la cerradura de leva.
Bonne orientation de la SERRURE DE CAME
x
1 4
13
B345683215PCOM
4
20 /35
www.ameriwoodhome.com
M
x
2
3
x
52
5
5
1
1
3
You will need to tap the connector (3) with a hammer to fully insert. Be
sure the connector is positioned as shown before pushing into holes.
Quizá necesites golpear el conector (3) suavemente con un martillo para
insertar conpletamente. Esté seguro que conectador está colocado como
se muestra antes de empujar en los agujeros.
Vous devrez taper le connecteur (3) avec un marteau pour l'insérer
complètement. Assurez-vous que le connecteur est placé comme indiqué
avant de pousser dans les trous.
x
1 2
Proper orientation of CAM LOCK
Posición correcta de la cerradura de leva.
Bonne orientation de la SERRURE DE CAME

Other manuals for 5683215PCOM

1

Other Ameriwood HOME Indoor Furnishing manuals
Ameriwood HOME 5976303COM User manual

Ameriwood HOME

Ameriwood HOME 5976303COM User manual

Ameriwood HOME 3391348COM User manual

Ameriwood HOME

Ameriwood HOME 3391348COM User manual

Ameriwood HOME 5206412COM User manual

Ameriwood HOME

Ameriwood HOME 5206412COM User manual

Ameriwood HOME 3341335COM User manual

Ameriwood HOME

Ameriwood HOME 3341335COM User manual

Ameriwood HOME 6571846COM User manual

Ameriwood HOME

Ameriwood HOME 6571846COM User manual

Ameriwood HOME 5695412COM User manual

Ameriwood HOME

Ameriwood HOME 5695412COM User manual

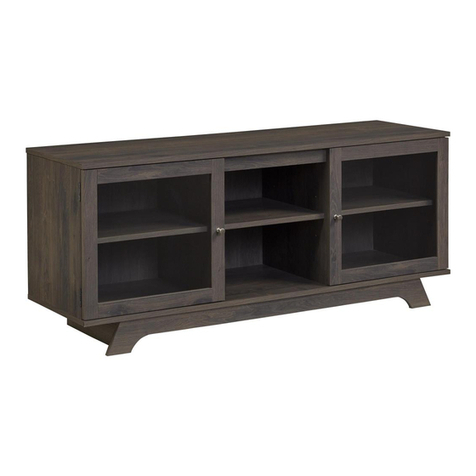
Ameriwood HOME 6723340COM User manual

Ameriwood HOME

Ameriwood HOME 6723340COM User manual

Ameriwood HOME 7916348COM User manual

Ameriwood HOME

Ameriwood HOME 7916348COM User manual

Ameriwood HOME 2402412COM User manual

Ameriwood HOME

Ameriwood HOME 2402412COM User manual

Ameriwood HOME 2276335COM User manual

Ameriwood HOME

Ameriwood HOME 2276335COM User manual

Ameriwood HOME Franklin 5062915COM User manual

Ameriwood HOME

Ameriwood HOME Franklin 5062915COM User manual

Ameriwood HOME Eden 9358926COM User manual

Ameriwood HOME

Ameriwood HOME Eden 9358926COM User manual

Ameriwood HOME 1766496COM User manual

Ameriwood HOME

Ameriwood HOME 1766496COM User manual

Ameriwood HOME 7224015PCOM User manual

Ameriwood HOME

Ameriwood HOME 7224015PCOM User manual

Ameriwood HOME 5661213PCOM User manual

Ameriwood HOME

Ameriwood HOME 5661213PCOM User manual

Ameriwood HOME 9627096 User manual

Ameriwood HOME

Ameriwood HOME 9627096 User manual

Ameriwood HOME 1822222COM User manual

Ameriwood HOME

Ameriwood HOME 1822222COM User manual

Ameriwood HOME 5284012PCOM User manual

Ameriwood HOME

Ameriwood HOME 5284012PCOM User manual

Ameriwood HOME 9482096 User manual

Ameriwood HOME

Ameriwood HOME 9482096 User manual

Ameriwood HOME 5062921COM User manual

Ameriwood HOME

Ameriwood HOME 5062921COM User manual

Ameriwood HOME 8620015WCOM User manual

Ameriwood HOME

Ameriwood HOME 8620015WCOM User manual

Ameriwood HOME 4 Drawer Dresser 8612303COM User manual

Ameriwood HOME

Ameriwood HOME 4 Drawer Dresser 8612303COM User manual

Ameriwood HOME 5759354COM User manual

Ameriwood HOME

Ameriwood HOME 5759354COM User manual

Ameriwood HOME 2694800COM User manual

Ameriwood HOME

Ameriwood HOME 2694800COM User manual

Popular Indoor Furnishing manuals by other brands

driade Park Associati GAZELLE Assembly instructions

driade

driade Park Associati GAZELLE Assembly instructions

Kaboodle W-70102 Assembly manual

Kaboodle

Kaboodle W-70102 Assembly manual

New Classic Furniture CELESTE D400-B3S Assembly instruction

New Classic Furniture

New Classic Furniture CELESTE D400-B3S Assembly instruction

Sauder County Line 415995 Assembly instructions

Sauder

Sauder County Line 415995 Assembly instructions

Kvik OU849 Assembly instructions

Kvik

Kvik OU849 Assembly instructions

Konifera Samar Assembly instructions

Konifera

Konifera Samar Assembly instructions

Forte HVND03 Assembling Instruction

Forte

Forte HVND03 Assembling Instruction

Furniture of America YNJ-2092C35 Assembly instructions

Furniture of America

Furniture of America YNJ-2092C35 Assembly instructions

Girsberger Diagon quick start guide

Girsberger

Girsberger Diagon quick start guide

Canvas 088-2276-4 Assembly instructions

Canvas

Canvas 088-2276-4 Assembly instructions

IKEA KNOXHULT 003.342.54 manual

IKEA

IKEA KNOXHULT 003.342.54 manual

BUY-RITE Allegro Styling Station Assembly instructions

BUY-RITE

BUY-RITE Allegro Styling Station Assembly instructions

Home Decorators Collection M61267T4-IV Assembly instructions

Home Decorators Collection

Home Decorators Collection M61267T4-IV Assembly instructions

Sauder Boone Mountain 416971 instruction manual

Sauder

Sauder Boone Mountain 416971 instruction manual

Pier 1 Imports CM8861A Assembly

Pier 1 Imports

Pier 1 Imports CM8861A Assembly

Boraam FENTON 76024 Assembly instructions

Boraam

Boraam FENTON 76024 Assembly instructions

ERBA Floor cabinet 2 doors 06746 instruction manual

ERBA

ERBA Floor cabinet 2 doors 06746 instruction manual

Kimball Office KORE Assembly instructions

Kimball Office

Kimball Office KORE Assembly instructions

manuals.online logo
manuals.online logoBrands
  • About & Mission
  • Contact us
  • Privacy Policy
  • Terms and Conditions

Copyright 2025 Manuals.Online. All Rights Reserved.