manuals.online logo
Brands
  1. Home
  2. •
  3. Brands
  4. •
  5. Ameriwood HOME
  6. •
  7. Indoor Furnishing
  8. •
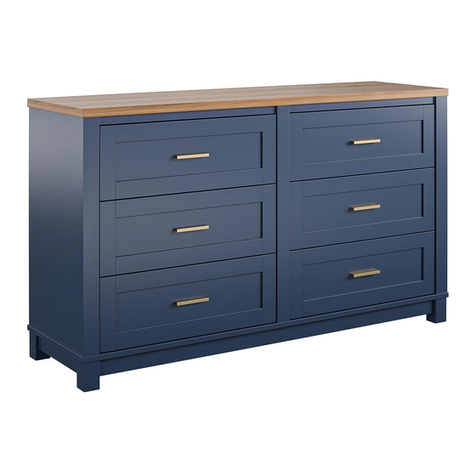
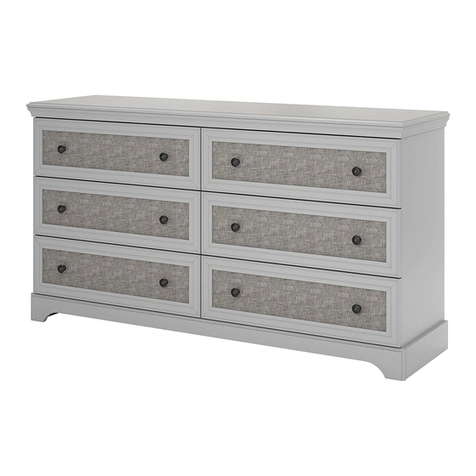
  9. Ameriwood HOME 5889501PCOM User manual

Ameriwood HOME 5889501PCOM User manual

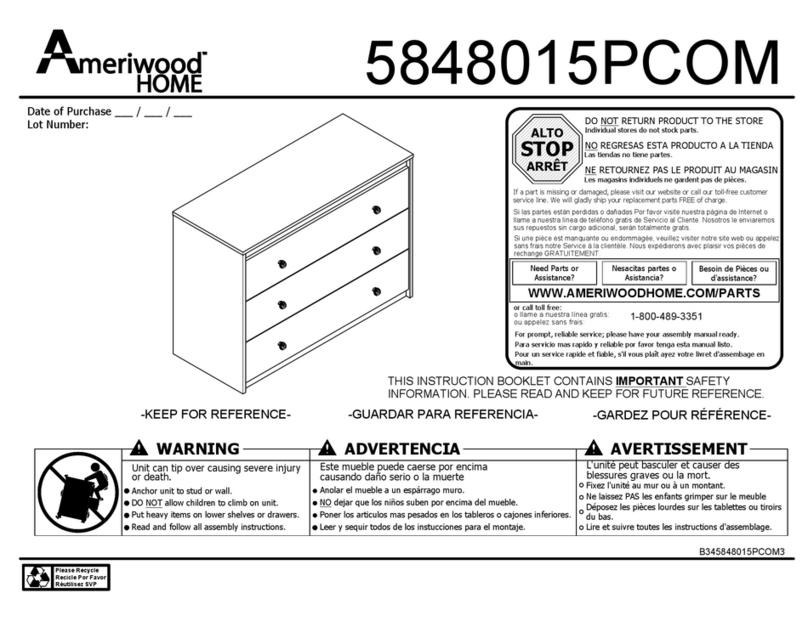
WARNING ADVERTENCIA AVERTISSEMENT
Unit can tip over causing severe injury
or death.
Anchor unit to stud or wall.
DO NOT allow children to climb on unit.
Put heavy items on lower shelves or drawers.
Read and follow all assembly instructions.
Este mueble puede caerse por encima
causando daño serio o la muerte
Anolar el mueble a un espárrago muro.
NO dejar que los niños suben por encima del mueble.
Poner los articulos mas pesados en los tableros o cajones inferiores.
Leer y sequir todos de los instucciones para el montaje.
L'unité peut basculer et causer des
blessures graves ou la mort.
Fixez l'unité au mur ou à un montant.
Ne laissez PAS les enfants grimper sur le meuble
Déposez les pièces lourdes sur les tablettes ou tiroirs
du bas.
Lire et suivre toutes les instructions d'assemblage.
STOP
ALTO
ARRÊT
DO NOT RETURN PRODUCT TO THE STORE
NO REGRESAS ESTA PRODUCTO A LA TIENDA
NE RETOURNEZ PAS LE PRODUIT AU MAGASIN
Individual stores do not stock parts.
Las tiendas no tiene partes.
Les magasins individuels ne gardent pas de pièces.
If a part is missing or damaged, please visit our website or call our toll-free customer
service line. We will gladly ship your replacement parts FREE of charge.
Si las partes están perdidas o dañadas Por favor visite nuestra página de Internet o
llame a nuestra línea de teléfono gratis de Servicio al Cliente. Nosotros le enviaremos
sus repuestos sin cargo adicional, serán totalmente gratis.
Si une pièce est manquante ou endommagée, veuillez visiter notre site web ou appelez
sans frais notre Service à la clientèle. Nous expédierons avec plaisir vos pièces de
rechange GRATUITEMENT.
Need Parts or
Assistance?
Nesacitas partes o
Asistancia?
Besoin de Pièces ou
d'assistance?
WWW.AMERIWOODHOME.COM/PARTS
or call toll free:
o llame a nuestra línea gratis:
ou appelez sans frais: 1-800-489-3351
For prompt, reliable service; please have your assembly manual ready.
Para servicio mas rapido y reliable por favor tenga esta manual listo.
Pour un service rapide et fiable, s'il vous plaît ayez votre livret d'assembage en
main.
-KEEP FOR REFERENCE- -GUARDAR PARA REFERENCIA- -GARDEZ POUR RÉFÉRENCE-
B345889501PCOM
3
5889501PCOM
Please Recycle
Recicle Por Favor
Réutilisez SVP
Date of Purchase ___ / ___ / ___
Lot Number:
THIS INSTRUCTION BOOKLET CONTAINS IMPORTANT SAFETY
INFORMATION. PLEASE READ AND KEEP FOR FUTURE REFERENCE.
B345889501PCOM
3
3 /23
www.ameriwoodhome.com
PARTS - PIEZAS - PIECES
Parts List
DESCRIPTION
PART NUMBER
QTY
ITEM
LEFT PANEL358890150111A
RIGHT PANEL358890150211B
PARTITION358890150311C
TOP
358890150401D
BOTTOM
358890000501E
KICK
358890150601F
BACK PANELK588900001S
Spanish & French parts list on page 5.
Lista de piezas españolas y francesas en la página 5.
Liste des pièces espagnoles et françaises à la page 5.
Parts shown are the base cabinet of your model. Drawer parts shown on next page. Please note, some parts are labeled with a sticker and
some parts have a letter stamped on a raw edge.
Piezas mostradas son la base del gabinete de su modelo. Cajon que se muestra en la siguiente página. Tenga en cuenta las mismas partes
se etiquetan con una etiqueta engomada y algunas partes tienen una carta impresa en un borde crudo.
Pièces indiquées sont le placard de votre modèle. Tiroir montrés sur la page suivante. Veuillez noter que les mêmes pièces sont pourvus
d'une étiquette et certaines régions ont une lettre estampillée sur le bord brut.
This piece is paperboard construction. It is not made from wood
but is required for the assembly of your unit.
Esto pedazo son la construcción del cartón. Ello no son hecho
de madera, pero se requlere para la asamblea de su unidad.
Cette pièce est de construction en carton. Elle n'est pas
fabriquée de bois, mais nécessaire pour l'assemblage de votre
meuble.
A
B
C
D
E
F
S
B345889501PCOM
3
4 /23
www.ameriwoodhome.com
PARTS - PIEZAS - PIECES
Parts List
DESCRIPTIONPART NUMBERQTYITEM
DRAWER SIDE39991167346200C
12
-
DRAWER BACK
39991167052240B6
-
DRAWER BOTTOM358893311216
L
LEFT UPPER DRAWER FRONT358893121311M
LEFT LOWER DRAWER FRONT
358893261411N
LEFT MIDDLE DRAWER FRONT
358893271511
O
RIGHT UPPER DRAWER FRONT358893121611P
RIGHT LOWER DRAWER FRONT358893261711Q
RIGHT MIDDLE DRAWER FRONT
358893271811R
Parts shown are for the drawer. Please note, some parts are labeled with a sticker and some parts have a letter stamped on a raw edge.
Piezas que se muestran son para el cajón. Tenga en cuenta que algunas partes están etiquetados con una pegatina y algunas partes
tienen una carta sellada en un borde crudo.
Pièces indiqués sont pour le tiroir. S'il vous plaît noter, certaines parties sont marqués avec un autocollant et certaines parties ont une lettre
estampillée sur un bord brut.
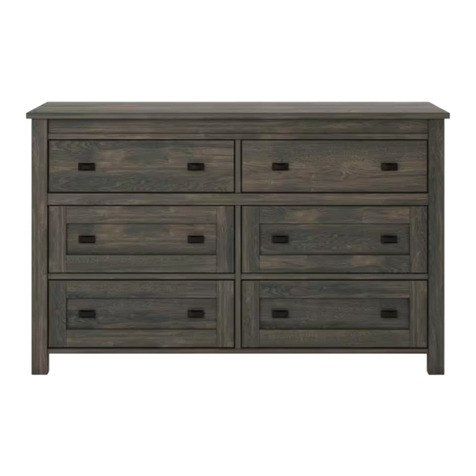
Please note, you model has six drawers. All the drawers assemble the same way. Once assembled, you will have 3 left
drawers and 3 right drawers.
Tenga en cuenta, que el modelo tiene seis cajones. Todos los cajones se ensamblan de la misma manera. Una vez
montado, tendrá 3 cajones de izquierda y 3 cajones adecuados.
S'il vous plaît noter que vous modèle a six tiroirs. Tous les tiroirs assembler la même façon. Une fois assemblé, vous aurez 3
tiroirs à gauche et 3 tiroirs à droite.
L
MNOPQR
DWR
SIDE
DWR
BACK
DWR
SIDE
B345889501PCOM
3
5 /23
www.ameriwoodhome.com
Parts List
DESCRIPTION
PART NUMBER
QTY
ITEM
panel izquierdo / panneau gauche
358890150111A
panel derecho / panneau droit
358890150211B
partición / cloison 358890150311C
cima / dessus358890150401D
fondo / fond358890000501E
retroceso / plaque358890150601
F
cajón inferiore / fond de tiroir
358893311216L
frente del cajón superior izquierdo / en haut à gauche avant du tiroir
358893121311M
izquierda frente del cajón inferior / inférieur gauche avant du tiroir358893261411N
frente del cajón medio izquierdo / avant gauche de tiroir du milieu358893271511O
frente del cajón superior derecha / en haut à droite avant de tiroir358893121611P
parte inferior derecha frente del cajón / en bas à droite avant du tiroir358893261711Q
delantero derecho cajón del medio / avant droit de tiroir du milieu
358893271811R
panel trasero / panneau arrière
K588900001
S
cajón de los lado /côté du tiroir39991167346200C
12
-
cajón trasero / dos du tiroir39991167052240B6
-
B345889501PCOM
3
6 /23
www.ameriwoodhome.com
PARTS - PIEZAS - PIECES
x
cam bolt
#A22610
perno de leva
boulon de came
6
10
x
2 12
#A52010
knob
perilla
bouton
x
#A21660
wood dowel
clavija de madera
goujon de bois
77
x
#A12120
7/16" pan head
cabeza redondo 7/16"
tête ronde 7/16"
956
x
10 35
#A21110
nail
clavo
clou tête plate 1-3/4"
cabeza plano 1-3/4"
1-3/4" flat head
x
#A13410
13 2
x
15 1
#A43105
foot
pie
patte
x
#A53600
angle bracket
support de l'angle
anaquel del ángulo
14 4
x
12 12
#A12930
1-1/8" pan head
1-1/8" cabeza redondo
1-1/8" vis
x
3 1
#A84050
safety bracket kit
juego del soporte de seguridad
nsemble de courroie sécurite
3a
3b
3c 3d
left drawer runner
deslizador izquierdo de cajón
coulisse gauche du tiroir
right drawer runner
deslizador derecha de cajón
coulisse droite du tiroir
right cabinet member
correda de mueble derecha
glissière droite du cabinet
left cabinet member
correda de mueble izquierda
glissière gauche du cabinet
x
#A567701 6
1a 1b
1d
1c
x
4 12
A54520
drawer bracket
soporte de cajón
support de tiroir
x
#A11080
cabeza plano 7/16"
7/16" flat head
tête plate 7/16"
x
60
8
x
#A21970
drive fastener
sujetador de la impulsión
attache d'entraînement
11 24
x
#A22620
cam lock
cerradure de leva
serrure de came
510
B345889501PCOM
3
7 /23
www.ameriwoodhome.com
2
3½ turn to fully
lock.
½ se vuelven a
totalmente
cerradura.
½ tour pour
verrouiller
complètement.
4
Tighten to fully seat. Do not over
tighten.
Apriétese a totalmente asiento. No
haga encima de apriétese.
Serrez pour mettre le siège bien en
place. Ne pas trop serrer.
Proper orientation of cam.
La orientación apropiada de leva.
Bonne orientation de la came.
1
This illustration shows how the CAM fastening system works.
Esta ilustración muestra el sistema de fijación de leva y como funciona.
Cette illustration montre le système de fixation CAME et son fonctionnement.
Lock
Apretar
Serrer
1
B345889501PCOM
3
8 /23
www.ameriwoodhome.com
Finished Edge
Borde Acabado
Bord Fini
Important: When using a power drill or power screwdriver for screwing, please be aware to slow down and stop when screw is
tight. Failure to do so may result in stripping the screw.
Importante: Cuando se utiliza un taladro eléctrico o corriente desarmador para atornillar, tenga en cuenta a despacio y se
detendrá cuando el tornillo está apretado. No hacerlo puede resultar en despojar el tornillo.
Important : Lorsque vous utilisez une perceuse électrique ou un tournevis électrique pour le vissage, sachez pour ralentir et
arrêter lorsque la vis est serrée. Faute de quoi vous risquez dans la vis se déshabillant.
x
6
6
x
3 1
3a
3b
3a
3b
6
6
D
2
B345889501PCOM
3
9 /23
www.ameriwoodhome.com
x
72
x
15 1
7
7
5
5
E
15
x
54
Proper orientation of CAM LOCK
Posición correcta de la cerradura de leva.
Bonne orientation de la SERRURE DE CAME
3
B345889501PCOM
3
10 /23
www.ameriwoodhome.com
x
72
x
98
x
14 4
7
7
Edge of kick and surface of bottom to be flush with each other.
Borde de la patada y la superficie del fondo hasta quedar al ras con la otra.
Bord de coup et la surface du fond à égalité avec l'autre.
9
9
14
E
F
4
B345889501PCOM
3
11 /23
www.ameriwoodhome.com
x
6
2
x
71
5
6
7
Finished Edge
Borde Acabado
Bord Fini
A
x
1 3
1a
x
x
98
8
1a
1a
1a
1a
marked with a "L"
marcado con una "L"
marqué avec un "L"
x
52
Proper orientation of CAM LOCK
Posición correcta de la cerradura de leva.
Bonne orientation de la SERRURE DE CAME
5
B345889501PCOM
3
12 /23
www.ameriwoodhome.com
6
7
5
B
Finished Edge
Borde Acabado
Bord Fini
x
71
x
x
98
x
6
2
x
1 3
1b
marked with a "R"
marcado con una "R"
marqué avec un "R"
8
1b
1b
1b
1b
x
52
Proper orientation of CAM LOCK
Posición correcta de la cerradura de leva.
Bonne orientation de la SERRURE DE CAME
6
B345889501PCOM
3
13 /23
www.ameriwoodhome.com
x
71
7
Finished Edge
Borde Acabado
Bord Fini
x
x
18
8
x
1 3
1b
x
13
1a
5
CC
1a 8
8
1b
1b
1b
1b
1a
1a
1a
right surface
superficie derecha
surface droite
left surface
superficie izquierda
surface gauche
marked with a "L"
marcado con una "L"
marqué avec un "L"
marked with a "R"
marcado con una "R"
marqué avec un "R"
x
52
Proper orientation of CAM LOCK
Posición correcta de la cerradura de leva.
Bonne orientation de la SERRURE DE CAME
7
B345889501PCOM
3
14 /23
www.ameriwoodhome.com
x
13 2
13
C
E
F
Finished Edge
Borde Acabado
Bord Fini
Please Note: The partition (C) will
overhang the kick (F) slightly.
Nota: La partición (C) sobresalir de
la patada (F) ligeramente.
S'il vous plaît Remarque: La
partition (C) va surplomber le coup
(F) légèrement.
8
B345889501PCOM
3
15 /23
www.ameriwoodhome.com
A
B
C
E
Finished Edge
Borde Acabado
Bord Fini
Finished Edge
Borde Acabado
Bord Fini
Finished Edge
Borde Acabado
Bord Fini
UNLOCKLOCK
APRETAR
DESAPRETAR
OUVRIRSERRER
9
B345889501PCOM
3
16 /23
www.ameriwoodhome.com
A
E
C
B
D
Finished Edge
Borde Acabado
Bord Fini
UNLOCKLOCK
APRETAR
DESAPRETAR
OUVRIRSERRER
10
B345889501PCOM
3
17 /23
www.ameriwoodhome.com
Carefully turn the unit over onto its front
side as shown.
Cuidadosamente vire la unidad sobre la
parte delantera como se muestra.
Tournez soigneusement l'unité sur le
devant comme montré.
Assure that the unit is square.
Distance from corner to corner must be equal as shown.
Asegura que el unidad is cuadrada.
Distancia de esquina a esquina debe ser igual como se
muestra por favor.
Assurez-vous que le meuble està égalité.
La distance de coin en coin doit être égale comme montré.
Attach the back panel so that the bottom edge is even
with the bottom (E) and aligned side to side. Nail straight
into back edges as shown with nails (10).
Fije el panel trasero de forma que el borde inferior esté
parejo con la parte inferior (E) y el lado alineado a lado.
Clavo recto intto volver bordes como se muestra con las
uñas (10).
Fixez le panneau arrière de sorte que le bord inférieur est
encore avec le fond (E) et alignés côte à côte. Clouer
droite intto bords arrière comme montré avec des clous
(10).
x10 35
2 people are required for this step.
2 personas se requieren para este paso.
2 personnes sont nécessaires pour cette étape.
Back panel notch location here.
Nuevo panel de ubicación muesca aquí.
Nouveau lieu d'encoche panneau ici.
IMPORTANT!
THE BACK PANEL IS A STRUCTURAL PART OF THIS UNIT AND MUST BE INSTALLED PROPERLY.
IMPORTANTE!
EL PANEL TRASERO ES UNA PARTE ESTRUCTURAL DE ESTA UNIDAD Y DEBE SER INSTALADO CORRECTAMENTE.
IMPORTANT!
LE PANNEAU ARRIÈRE EST UNE PIÈCE STRUCTURELLE DU MEUBLE ET DOIT ÊTRE INSTALLÉ CORRECTEMENT.
10
S
E
11
B345889501PCOM
3
18 /23
www.ameriwoodhome.com
Bracket Orientation
Orientación del soporte
Orientation du support
Bracket Orientation
Orientación del soporte
Orientation du support
Finished Edge
Borde Acabado
Bord Fini
Finished Edge
Borde Acabado
Bord Fini
44
x6 x6
Using screws (9), attach a drawer bracket (4) to the drawer sides as shown.
Usando los tornillos (9), fije un soporte del cajón (4) a los lados del cajón como se muestra.
À l'aide des vis (9), fixez un support de tiroir (4) sur les côtés du tiroir, tel qu'illustré.
x
4 12
x
924
DWR
SIDE
DWR
SIDE
9
99
9
12
B345889501PCOM
3
19 /23
www.ameriwoodhome.com
13
x
924
Please Note: You will assemble 6 drawers. All 6 drawers assemble in the same manner. The assembly illustration will show 1 drawer. You
will repeat each step 6 times for each drawer.
Por favor Nota: Usted montar 6 cajones. Todos los cajones 6 se reúnen en la misma manera. La ilustración ensamblaje mostrará 1 cajón.
Va a repetir cada paso 6 veces para cada cajón.
S'il vous plaît Note: Vous aurez assembler 6 tiroirs. Tous les 6 tiroirs assembler de la même manière. L'assemblée illustration montrera 1
tiroir. Vous allez répéter chaque étape 6 fois pour chaque tiroir.
finished surface
lado terminado
surface finie
9
MN
P
O
QR
MN
P
O
QR
L
x6 x6
DWR
SIDE
DWR
SIDE
DWR
SIDE
DWR
SIDE
Note: Be sure the groove in the drawer sides are centered with
the groove in the drawer front.
Nota: Asegúrese de que la ranura de los lados del cajón esté
centrada con la ranura del frente del cajón.
Remarque: s'assurer que la rainure des côtés du tiroir est
centrée avec la rainure de l'avant du tiroir.
14
B345889501PCOM
3
20 /23
www.ameriwoodhome.com
11
M
OP
N
QR
L
x6
x
2 12
15
x
12 12
x6
11
x
11 24
DWR
SIDE
DWR
SIDE
DWR
SIDE
DWR
SIDE
DWR
BACK
x
1 6
1d
1c
x
x
24
8
Attach the knobs (2) after the slides are
mounted to the drawer sides.
Fije las perillas (2) después de que las
correderas estén montadas en los lados del
cajón.
Fixez les boutons (2) une fois que les glissières
sont montées sur les côtés du tiroir.
1c
1d
8
8
12
2
12
2
MNOPQR
You will need to tap the drive fasteners
(11) with a hammer to securely fasten.
Deberá apretar los sujetadores de la
unidad (11) con un martillo para
sujetarlo firmemente.
Vous aurez besoin de taper les
attaches du lecteur (11) avec un
marteau pour fixer solidement.

Other Ameriwood HOME Indoor Furnishing manuals
Ameriwood HOME 4216306COM User manual

Ameriwood HOME

Ameriwood HOME 4216306COM User manual

Ameriwood HOME 1822096COM User manual

Ameriwood HOME

Ameriwood HOME 1822096COM User manual

Ameriwood HOME 5774219COM User manual

Ameriwood HOME

Ameriwood HOME 5774219COM User manual

Ameriwood HOME 5983325COM User manual

Ameriwood HOME

Ameriwood HOME 5983325COM User manual

Ameriwood HOME 4836354EBL User manual

Ameriwood HOME

Ameriwood HOME 4836354EBL User manual

Ameriwood HOME Franklin 5062196PCOM User manual

Ameriwood HOME

Ameriwood HOME Franklin 5062196PCOM User manual

Ameriwood HOME Colebrook 5555555COM User manual

Ameriwood HOME

Ameriwood HOME Colebrook 5555555COM User manual

Ameriwood HOME 5997015WCOM User manual

Ameriwood HOME

Ameriwood HOME 5997015WCOM User manual

Ameriwood HOME 6667214COM User manual

Ameriwood HOME

Ameriwood HOME 6667214COM User manual

Ameriwood HOME 34825 User manual

Ameriwood HOME

Ameriwood HOME 34825 User manual

Ameriwood HOME TYLER 4947013COM User manual

Ameriwood HOME

Ameriwood HOME TYLER 4947013COM User manual

Ameriwood HOME Monticello 7962319COM User manual

Ameriwood HOME

Ameriwood HOME Monticello 7962319COM User manual

Ameriwood HOME Good To Go 5206015GM User manual

Ameriwood HOME

Ameriwood HOME Good To Go 5206015GM User manual

Ameriwood HOME River Layne 5983103COM User manual

Ameriwood HOME

Ameriwood HOME River Layne 5983103COM User manual

Ameriwood HOME Armada 5990837COM User manual

Ameriwood HOME

Ameriwood HOME Armada 5990837COM User manual

Ameriwood HOME 5894325COM User manual

Ameriwood HOME

Ameriwood HOME 5894325COM User manual

Ameriwood HOME 3663339COM User manual

Ameriwood HOME

Ameriwood HOME 3663339COM User manual

Ameriwood HOME Carver 5989196COM User manual

Ameriwood HOME

Ameriwood HOME Carver 5989196COM User manual

Ameriwood HOME 5759354COM User manual

Ameriwood HOME

Ameriwood HOME 5759354COM User manual

Ameriwood HOME 5430847COM User manual

Ameriwood HOME

Ameriwood HOME 5430847COM User manual

Ameriwood HOME 5969500COM User manual

Ameriwood HOME

Ameriwood HOME 5969500COM User manual

Ameriwood HOME 4105 Installation and operation manual

Ameriwood HOME

Ameriwood HOME 4105 Installation and operation manual

Ameriwood HOME Colebrook 5969308COM User manual

Ameriwood HOME

Ameriwood HOME Colebrook 5969308COM User manual

Ameriwood HOME 8620900WCOM User manual

Ameriwood HOME

Ameriwood HOME 8620900WCOM User manual

Popular Indoor Furnishing manuals by other brands

myspace my16960 Assembly

myspace

myspace my16960 Assembly

Better Homes and Gardens Bryant Series Assembly manual

Better Homes and Gardens

Better Homes and Gardens Bryant Series Assembly manual

RTA CLR3114 Assembly instructions

RTA

RTA CLR3114 Assembly instructions

byLIVING MATTHEW 140 AZ-160 AZ Assembly instructions

byLIVING

byLIVING MATTHEW 140 AZ-160 AZ Assembly instructions

Birlea VALENTINO 2 DRAWER Assembly instructions

Birlea

Birlea VALENTINO 2 DRAWER Assembly instructions

Poliman Movels ELISA C0503 Assembly instructions

Poliman Movels

Poliman Movels ELISA C0503 Assembly instructions

SAUTHON Volcan 01165A manual

SAUTHON

SAUTHON Volcan 01165A manual

StyleWell 1006232175 Use and care guide

StyleWell

StyleWell 1006232175 Use and care guide

Northridge Home 1D201 Assembly manual

Northridge Home

Northridge Home 1D201 Assembly manual

DITALIA BA-91 Assembly manual

DITALIA

DITALIA BA-91 Assembly manual

Baumax ST14002 3399682 Assembling Instruction

Baumax

Baumax ST14002 3399682 Assembling Instruction

modway EEI-2533 manual

modway

modway EEI-2533 manual

Sanus Systems WFV66 Assembly instructions

Sanus Systems

Sanus Systems WFV66 Assembly instructions

Spectrum Industries Elite Lectern 55258 owner's manual

Spectrum Industries

Spectrum Industries Elite Lectern 55258 owner's manual

CLEAR DESIGN KIT-BLBC72 quick start guide

CLEAR DESIGN

CLEAR DESIGN KIT-BLBC72 quick start guide

Design Within Reach Aero Low Shelving Care Instructions

Design Within Reach

Design Within Reach Aero Low Shelving Care Instructions

SAFAVIEH COUTURE Lorna SFV2104 Assembly

SAFAVIEH COUTURE

SAFAVIEH COUTURE Lorna SFV2104 Assembly

firplak GODAI STRUCTURE CABINET Assembly instructions

firplak

firplak GODAI STRUCTURE CABINET Assembly instructions

manuals.online logo
manuals.online logoBrands
  • About & Mission
  • Contact us
  • Privacy Policy
  • Terms and Conditions

Copyright 2025 Manuals.Online. All Rights Reserved.