Ametek 953N Series Instruction sheet

ReadyLink™ EtherNet/IP™ LDT
with RapidRecall™
Network LDT - Conguration Manual
ABSOLUTE PROCESS CONTROL
KNOW WHERE YOU ARE... REGARDLESS

Manual Overview
The ReadyLink™ Network LDT manual will be divided into
two separate manuals, one for Mechanical Installation &
Wiring, and one for Network Configuration. This Network
Configuration manual contains all of the details on how to
configure the Network LDT, establish an IP address and
how to interface into the Host network. For installation,
wiring or specifications please refer to either 953N or
957N Mechanical Installation manuals.
NOTE: Ametek has checked the accuracy of this manual
at the time it was approved for printing. This manual may
not provide all possible ways of installing and configuring
the LDT. Any errors or additional possibilities to the
installation and configuration of the LDT will be added
in subsequent editions. Comments for the improvement
of this manual are welcome. Ametek reserves the right
to revise and redistribute the entire contents or selected
pages of this manual. All rights to the contents of this
manual are reserved by Ametek.
Function of this Document
These operating instructions are designed to address
the technical aspects of commissioning our Ethernet/
IP™ Network LDT into the Host network. Please read
the entire chapter before working with the Network LDT.
These instructions are written for trained personnel
who are responsible for commissioning Ethernet based
sensors into the host network.
!
Turning on power - Note that the system may
execute uncontrolled movement when power
is first applied when the Network LDT is part
of a closed loop system whose parameters have not yet
been configured.
Contents
Introduction ................................................................. 3
Chapter 1 Dimensions................................................. 4
Chapter 2: Wiring Overview. ...................................... 6
Chapter 3: Quick Start................................................. 8
Chapter 4: EtherNet/IP™ Network Overview ........... 13
Chapter 5: Configuration Data / LDT Memory ......... 18
Chapter 6: Web Server / Page .................................. 19
Chapter 7: How to Configure Ethernet/IP™
adapter with Studio 5000........................ 20
Chapter 8: LED Summary ......................................... 22
Chapter 9: Part Numbering ....................................... 24
2
FACTORY AUTOMATION
®
Phone: 248-435-0700 Toll Free: 800-635-0289 Fax: 248-435-8120 www.ametekfactoryautomation.com

Introduction
AMETEK Factory Automation markets, engineers, and manufactures
sensors and controls for demanding and harsh industrial environments.
Products include GEMCO® linear and rotary sensors. Our sensors are
absolute and never require homing or calibrating in the event of a power
loss and are built in the USA to meet global application needs.
The ReadyLink™ EtherNet/IP LDT with RapidRecall™ is our newest
linear displacement transducer (LDT) being developed with an EtherNet/
IP network interface. The Network LDT provides maximum flexibility
for installation and ease of use in demanding, high-performance,
networked industrial applications. EtherNet/IP™ is an Industrial
Ethernet implementation of the Common Industrial Protocol (CIP),
managed by the Open DeviceNet Vendor Association (ODVA). EtherNet/
IP™ was introduced in 2001 and today is the most developed, proven
and complete industrial Ethernet network solution available for
manufacturing automation. EtherNet/IP™ systems require only a single
point network connection for both configuration and control, thus
simplifying installation and wiring.
Our linear displacement transducer line utilizes advanced, proven
Magnetostrictive technology to provide highly precise and absolute
non-contact position feedback down to 1 micron resolution. We
package these sensors to survive in the most demanding and hostile
environments. The position of the magnet on the sensing element is
precisely determined by a time of flight method. The LDT converts this
position value where it is transmitted to the customer controller via the
Ethernet Network.
The Network LDT supports Star, Line and Device Level Ring (DLR)
topology and supports static IP address setting or DHCP (Dynamic
Host Control Protocol). DLR provides device level network rerouting in
the event of a break in the ring. The static IP address can be assigned
via a PC, or the last octet can be set manually via three rotary DIP
switches. There are five diagnostic LEDs located on the cover next
to the connectors that indicate the status of the LDT and Network
communication.
The AMETEK ReadyLink™ EtherNet/IP™ LDT is a smart device; it has
a RapidRecall™ Configuration Module to help aid in the configuration
of the LDT. This module can be used to help configure the static IP
address of the LDT as well as other functions. The module has three
rotary DIP switches that allow the user to configure how the IP address
will be assigned. The RapidRecall™ module can also store all user
configurations. Once the LDT has been configured, these settings can
be uploaded to the module.
Data is communicated over the Ethernet Network using two types of
messaging:
• I/O Messaging (Position, Velocity and Status Bits)
• Explicit Messages (Parameters & Configuration)
I/O Messaging is used for time critical data such as position, velocity
and status bits. Explicit messages are used for configuration data
such as position scaling, resolution and count direction, among other
parameters. The Network LDT module conforms to the Encoder device
profile device type 22h.
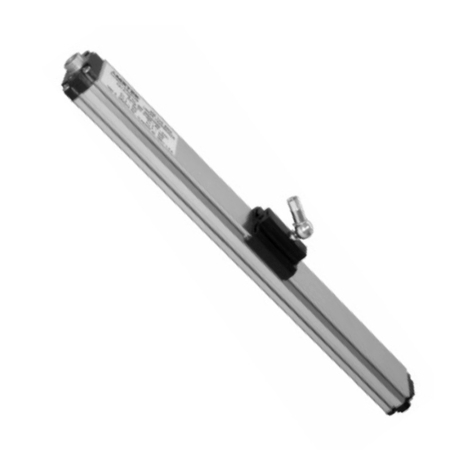
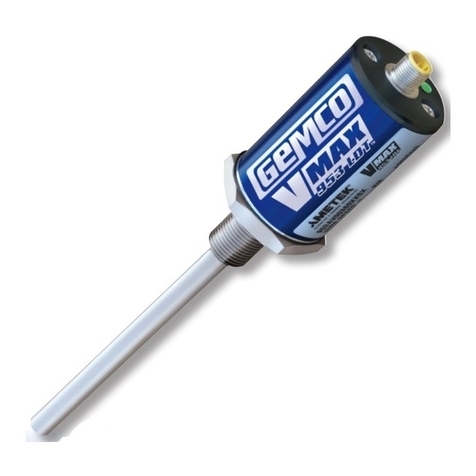
The Network LDT is available in two different package styles; the 953N
is our Rod Style package that is suitable for installation into hydraulic
cylinders, and our 957N Brik Low Profile Style package that incorporates
the same electronics but is housed in an aluminum style extrusion.
The Ethernet Network LDT has three connectors. The incoming power is
supplied via a 4-pin M12-A style connector. The Network communication
will be through either of the two 4-pin M12-D coded connectors. There
are diagnostic LED’s located on the cover next to the connectors that
will indicate the health of the LDT and its Network communication status.
The Network LDT is totally configurable and can be set for your exact
needs. Parameters such as counting direction, position and velocity
format, resolution, zero position, velocity upper and lower end limits as
well as position end limits are all programmable.
Position Update
The position of the magnet along the active measuring range is precisely
determined by a time of flight method. The Network LDT converts this
position value where it is transmitted to the host controller via the
Network. All displacement outputs are absolute and do not lose their
position after loss of power.
LDT Position update frequencies are available up to 1,000 measurements
per second (Length dependant).
ReadyLink™ Internal Update Time
Stroke Length - Inches Update Time
≤6.0" 1ms
6.1" - 50.0" 1.5ms
50.1" - 100.0" 2ms
100.1" - 200.0" 3ms
200.1" - 250.0" 3.5ms
250.1" - 300.0" 4ms
The network Requested Packet Interval (RPI) is configured in the host
controller and is typically between 2mSec to 20mSec, and must be equal
to or greater than the ReadyLink™ LDT’s Internal Update Time.
Counting Direction & Resolution
The Network LDT can be configured for increasing or decreasing
position, or velocity counts, along with the desired resolution. These
parameters will all be configured during the LDT Network configuration.
Direction counting may be configured so that the position value either
increases or decreases as the position magnet moves away from the
LDT's head (electronics). The default zero position will be closest to
the head of the LDT, but can be user configured at time of set up to be
located anywhere along the active stroke range (Area between Null &
Dead Bands). The resolution of the positional output is selectable and
can be set for English (Imperial) or metric units.
Network LDT Default Settings
Position Measurement Increasing from Head to Tip
Position Format Inches
Position Measuring Increment 0.0001"
Preset Zero position will be located closest
to head. At 2" Null point, LDT will de-
fault to 2.0000"
Velocity Increasing from Head to Tip
Velocity Format Inches / Second
Velocity Resolution 0.01"/sec
3
FACTORY AUTOMATION
®
Phone: 248-435-0700 Toll Free: 800-635-0289 Fax: 248-435-8120 www.ametekfactoryautomation.com

Chapter 1 – Dimensions
Rod Style Dimension Drawing (PD-0124400)
4.97
126.28
2.00
50.80
NULL
STROKE
2.50
DEAD BAND
.405
10.29
TUBE
.31
7.87
TYPICAL
3/4-16 X 1.00 [25.40]
THREAD WITH JAM NUT
3.00
76.20
SEE BELOW
1.28 DIA.
MAGNET SHOWN
1.25 [31.75]
HEX
MALE 4 PIN (M12-A) INPUT VOLTAGE
1
2
3
4
FEMALE 4 PIN (M12-D) BUS LINKS 1 AND 2
1.01
25.69
FLAT FACE
VITON O-RING
RAISED FACE
.91
23.15 .10
2.54
VITON O-RING
SHEET 1 OF 2
2.50
63.50
GROUND LUG:
1/4" TERMINAL
INPUT VOLTAGE
PIN NUMBER
WIRE COLOR
SUPPLY VOLTAGE
1
BROWN
+24 VDC
2
WHITE NO CONNECTION
3
BLUE
DC GROUND (FOR SUPPLY)
4
BLACK
NO CONNECTION
BUS CONNECTIONS LINKS 1 AND 2
PIN NUMBER
WIRE COLOR FUNCTION
1
WHITE/ORANGE
Tx+
2
WHITE/GREEN
Rx+
3
ORANGE
Tx-
4
GREEN
Rx-
REVISIONS
ZONE
REV.
DESCRIPTION
DATE
APPROVED
A
RELEASED 5/12/2014
GSL
DR.
DATE
APP.
DATE
SCALE
DRAWING NO.
TITLE
TOLERANCE ALLOWANCE
+/- 0.010 ON 2 PLACE DECIMALS
+/- 0.005 ON 3 PLACE DECIMALS
+/- 0.0005 ON 4 PLACE DECIMALS
+/- 30 MIN. ON ALL ANGLES
REV.
SIZE
THIRD ANGLE PROJECTION
UNLESS OTHERWISE SPECIFIED:
SURFACE FINISH
UNLESS OTHERWISE SPECIFIED
63
PROPERTY OF AMETEK AUTOMATION & PROCESS
TECHNOLOGIES. UNAUTHORIZED USE, DUPLICATION OR
DISTRIBUTION IS STRICTLY PROHIBITED BY FEDERAL LAW.
TECHNOLOGIES. ALL RIGHTS RESERVED. DRAWING IS
AMETEK AUTOMATION & PROCESS
COPYRIGHT
2014
c
J.S.B.
02/14/14
B.D.B.
02/14/14
DIMENSION DRAWING
NETWORK LDT
ROD STYLE
FULL
PD0124400
A
D
STRAIGHT CABLE CONNECTOR
2.22
[56.44]
REF.
90º RIGHT ANGLE CONNECTOR.42
[10.62]
REF.
1.60
[40.74]
REF.
RAISED FACE
VITON O-RING
.91
[23.15] .10
[2.54]
FLAT FACE
VITON O-RING
1.01
[25.69]
4
FACTORY AUTOMATION
®
Phone: 248-435-0700 Toll Free: 800-635-0289 Fax: 248-435-8120 www.ametekfactoryautomation.com

3.00
76.20
4.24
107.70
.22
5.59
(2) PER
MTG. FOOT
.60
15.24
.30
7.62
.36
9.02 .30
7.62
1.37
34.80
1.97
50.04
2.68
68.07
R.87
22.01
360
ROTATION
.99
25.02
MOUNTING BRACKETS SLIDE IN THE
GROOVES ON THE SIDE OF THE
EXTRUDED HOUSING. WHEN TIGHTENED
WITH FASTENING HARDWARE, THE
MOUNTING BRACKETS CLAMP THE UNIT INTO
PLACE. IT IS RECOMMENDED TO USE ONE
MOUNTING BRACKET ON EACH END, AND ONE
BRACKET EVERY 3 FEET [1 METER] BETWEEN.
1
2
3
4
L = NULL + STROKE + DEAD ZONE
1.22
[31.00]
.56
14.22 .07
1.88
.20
5
1.50
38.10
1.81
45.97
.92
23.37
.81
20.46
1.20
30.48
1.45
36.83
2.65
67.31
DEAD ZONE
2.00
50.80
NULL
SENSING STROKE LENGTH:
1 INCH TO 180 INCHES
25MM TO 4572MM
TOP MOUNT
STYLE
SIDE MOUNT
STYLE
M5 X 0.8 X .56 [14.22] DEEP
ALTERNATE LINKAGE
MOUNTING HOLE
MAGNET SENSOR
LOCATION
MAGNET SENSOR
LOCATION
1/4 INCH
6.35
MAX.
FLOATING MAGNET DETAIL
MAGNET
SENSOR
SENSING
SURFACE
FLOATING MAGNET
ISOMETRIC VIEW
2.50
63.50
GROUND LUG:
1/4" TERMINAL
2.06
52.32
.40
10.16
M5 X 0.8 X .40 [10.16] DEEP
LINKAGE MOUNTING
HOLE
MALE 4 PIN (M12-A) INPUT VOLTAGE
FEMALE 4 PIN (M12-D) BUS LINKS 1 AND 2
SHEET 1 OF 2
INPUT VOLTAGE
PIN NUMBER
WIRE COLOR
SUPPLY VOLTAGE
1
BROWN
+24 VDC
2
WHITE
NO CONNECTION
3
BLUE
DC GROUND (FOR SUPPLY)
4
BLACK
NO CONNECTION
BUS CONNECTIONS LINKS 1 AND 2
PIN NUMBER
WIRE COLOR
FUNCTION
1
WHITE/ORANGE
Tx+
2
WHITE/GREEN
Rx+
3
ORANGE
Tx-
4
GREEN
Rx-
REVISIONS
ZONE
REV.
DESCRIPTION
DATE
APPROVED
A
RELEASED 5/12/2014
GSL
DR.
DATE
APP.
DATE
SCALE
DRAWING NO.
TITLE
TOLERANCE ALLOWANCE
+/- 0.010 ON 2 PLACE DECIMALS
+/- 0.005 ON 3 PLACE DECIMALS
+/- 0.0005 ON 4 PLACE DECIMALS
+/- 30 MIN. ON ALL ANGLES
REV.
SIZE
THIRD ANGLE PROJECTION
UNLESS OTHERWISE SPECIFIED:
SURFACE FINISH
UNLESS OTHERWISE SPECIFIED
63
PROPERTY OF AMETEK AUTOMATION & PROCESS
TECHNOLOGIES. UNAUTHORIZED USE, DUPLICATION OR
DISTRIBUTION IS STRICTLY PROHIBITED BY FEDERAL LAW.
TECHNOLOGIES. ALL RIGHTS RESERVED. DRAWING IS
AMETEK AUTOMATION & PROCESS
COPYRIGHT
2014
c
J.S.B.
02/14/14
B.D.B
02/14/14
DIMENSION DRAWING
NETWORK LDT
BRIK STYLE
FULL
PD0124500
A
D
Profile Style Dimension Drawing (PD-0124500)
5
FACTORY AUTOMATION
®
Phone: 248-435-0700 Toll Free: 800-635-0289 Fax: 248-435-8120 www.ametekfactoryautomation.com

Chapter 2: Wiring
The Ethernet Network LDT has three connectors.
The incoming power is supplied via a 4-pin M12-A
style connector. The Network communication will
be through either of the two 4-pin M12-D coded
connectors. The LDT supports Star, Line and
Device Level Ring (DLR) topology.
Note: Any unused connectors should be covered
using our 04-521619 connector end cap.
2.1 Wiring Connections
Once the LDT has been installed, wiring connections
can be made. There are two groups of connections
you will need to make. They are as follows:
• Power Supply Connections (including ground
and shield)
• LDT Input/output Network Connections
Power Supply/Ground Connections
The incoming power cable is a 4-Pin, M12-A, Euro Style cordset. It has
4 conductors of 22ga, with a shield; these cables are available in either
Straight or Right Angle versions. To reduce electrical noise, the shield
must be properly used. When grounding the LDT, a single earth ground
should be connected to the power supply common. The LDT power
supply common should be connected to the power supply common (-)
terminal. On our Straight version cable the shield is tied to the cable's
coupling nut, and should not be connected to the controller's ground
(See figure 4-2 Grounding Connections). However, if you are using one
of our 949-044LXX Right Angle version cables, the cables shield is not
tied to the cable's coupling nut, in this case it is recommended to tie
the shield to the power supply common. Any unused wires should be
insulated and tied back.
On corsets where the shield is tied to the coupling nut, the LDT’s shield
should NOT be tied to the earth ground at the power supply (See figure
4-2 Grounding Connections).
In order for the Network LDT to operate properly, the LDT’s external
power supply must provide a voltage between +7 to +30 VDC. Each
LDT will draw approximately 3 watts of power. The power supply must
be rated at 150mA minimum. The power supply should provide less
than 1% ripple and 10% regulations. (The power supply should be
dedicated to the LDT to prevent noise from external loads from affecting
the position readings.) It is preferable that the cable between the LDT
and the power supply be one continuous run. If you are using a junction
box, it is highly recommended that the splice junction box be free of
AC and/or DC transient-producing lines. The shield should pass straight
thru this enclosure and not tied to ground.
Network Connections
The Network communication will be two 4-pin M12-D coded connectors.
Our Network LDT supports Star, Line & DLR topology.
These connections will require M12-D cables; these are available in
either Straight or Right Angle versions, as well as M12-D on one end
and RJ45 on the other. All cables have 4 conductors of 24ga, with an
aluminum/polyester/aluminum foil with an overall braid of tinned copper
shield. These cables meet the Requirements of TIA/EIA568-C, Category
5e Cable for 10 and 100 Base-T Ethernet. Always observe proper
grounding techniques such as single point grounding and isolating high
voltage (i.e. 120/240 VAC) from low voltage cables, whenever possible.
WARNING: Do not route the ReadyLink™
Network LDT cables near high voltage sources.
!
6
FACTORY AUTOMATION
®
Phone: 248-435-0700 Toll Free: 800-635-0289 Fax: 248-435-8120 www.ametekfactoryautomation.com

2.2 Grounding Connections
There is a ¼” terminal ground lug provided on the LDT’s head / cover
assembly to help ensure a good ground. This lug should be tied to the
chassis of the machine. This ground is internally isolated from the LDT's
internal power supply.
Always observe proper grounding techniques such as single point
grounding and isolating high voltage (i.e. 120/240 VAC) from low voltage
(7-30 VDC cables).
June 2, 2014 Page 1 of 2.
Macintosh HD:Users:cjacobsen2:Library:Caches:TemporaryItems:Outlook Temp:EMC Grounding Overview[2].docx
LDT “Transducer”
Internal
Power
Supply
Common
Ethernet 1
Ethernet 2
M12-D
M12-D
M12-A
Chassis
Ground
Spade Chassis
”Housing”
Guide
Tube
Customer
Power
Supply
Power Supply cable shield IS connected to connector coupling nut
Network Cable lengths
Per ODVA specifications, it is recommended that the maximum total cable run length be 100 meters or less. Typical cable lengths are 1 and 5 meters,
cables greater than 10 meters are available; however, proper care must be taken during installation. It is recommended that one uninterrupted piece
of cable is always used. Any extension to the existing cabling should be mounted in a junction box free of any other cabling, the cable should be a
twisted shielded pair with a braided shield. The shield should pass straight thru this enclosure and not tied to ground.
Note: The shield of the power supply cable is tied to the connector's coupling nut.
7
FACTORY AUTOMATION
®
Phone: 248-435-0700 Toll Free: 800-635-0289 Fax: 248-435-8120 www.ametekfactoryautomation.com

Chapter 3 Quick Start
Overview
The AMETEK ReadyLink™ EtherNet/IP™ LDT with RapidRecall™ is a
smart device; it has a RapidRecall™ Configuration Module to help aid in
configuration of the LDT. This module is located on the head assembly
of the LDT, next to the connectors. The RapidRecall™ module can be
used to help configure the static IP address of the LDT and store all
user defined configurations. In the module there are three rotary DIP
switches that will allow the user to configure how the IP address will
be assigned. Once the LDT has been configured, these settings can
be uploaded to the module. One of the key benefits to uploading the
configuration data to the RapidRecall™ module is that, if anything was
to ever go wrong with the LDT, the RapidRecall™ module with the entire
user programmed settings could be removed from the original unit and
installed on the replacement unit. With a simple command from the DIP
switches the user configuration settings can be downloaded from the
Rapid Recall™ Module to the new LDT.
This module is held in place with two 6-32 x ½" screws. The network
configuration module connects to the LDT thru a Micro USB-B connector.
3.1 - Programming the IP Address
This chapter will describe how to program the IP address, the subnet
mask and the gateway for the Ethernet/IP™ LDT.
There are four ways to program the IP address in the Network LDT.
• Through our IPconfig Network utility program (Switches must be
set to 255)
• Through BootP/DHCP server (Switches must be set to 255)
• Through a web browser (Switches must be set to 255)
• Through the rotary DIP switches on the RapidRecall™
Configuration module
These modes are determined by how the DIP switches are set in the
RapidRecall™ Configuration Module. The default out of the box settings
for these switches will be 255 DHCP enabled.
3.2 - IP Addressing Modes
Static IP Address Selection – Via Rotary DIP Switches
DIP Switch Position Function IPconfig, BOOTP/DHCP,
Web page Programmability
DHCP Static IP Address
000 DHCP No Enabled Disabled
001 to 254 Static IP address lower octet value; upper 3 octets
from previous setup stored in LDT non-volatile
memory
No Disabled Enabled
255 Entire Address assigned in LDT non-volatile memory.
If DHCP is enabled the DHCP server will assign an
IP address on start-up. If DHCP is disabled the
previous IP address will be retained in memory.
Yes Programmable Programmable
Note: Changing the Node address via the DIP switches, will only take effect on power up. Changing the IP address with power applied to the LDT
will generate a minor fault.
When the DIP switches are set to 000 – 254, you cannot set the IP address using the IPconfig, BootP or the internal web browser.
8
FACTORY AUTOMATION
®
Phone: 248-435-0700 Toll Free: 800-635-0289 Fax: 248-435-8120 www.ametekfactoryautomation.com
3.3 - Default Settings
The ReadyLink™ Ethernet/IP™ LDT out of the box default settings will
be DHCP Enabled and the switches will be set to 255.
The default baud rate and duplex mode are Auto/Auto. Auto/Auto,
supports autonegotiation on both the baud rate (100/10) and the duplex
mode (full/half).
3.4 - Using IPconfig Utility Program
An IPconfig utility as well as the EDS files are available on our website
www.ametekfactoryautomation.com. They are located in the Linear
Feedback category under the ReadyLink Network LDT product. Select
Literature to access these downloads. The IPconfig utility program
allows the user to detect any AMETEK Network LDT on the network,
even if the unit’s configuration is outside the host’s subnet.
Step 1: Connect Network LDT to your network.
Cable connections must be made to the Network LDT for both
communications and power and the switches in the Rapid Recall™
module must be set to 255.
Step 2: Access Network LDT
1. Make sure the configuration DIP switches are set to 255.
2. Turn Power on to the LDT.
3. Open the utility program and press scan. The IP configuration for
the AMETEK Network LDT will be displayed. The device can be
identified by the MAC ID which is found on the product's label.
Step 3: Program new IP address
1. Double click on the IP address you wish to change.
2. Enter the desired IP address, subnet mask and gateway. Verify that
the DHCP button is set to Off.
3. Select “Set”.
4. The new IP address will be assigned and the screen will default
back to the home page. To see the new IP address press “Scan”.
(Initialized to “out of box” condition)
IP Address: 192.168.1.1
Subnet Mask: 255.255.255.0
Gateway Address: 192.168.1.254
DHCP Enabled (on)
9
FACTORY AUTOMATION
®
Phone: 248-435-0700 Toll Free: 800-635-0289 Fax: 248-435-8120 www.ametekfactoryautomation.com
3.5 - Using BOOTP/DHCP Utility Program
Studio 5000 BOOTP/DHCP application can be used to assign an IP
address to the Network LDT via DHCP. Cable connections must be
made to the Network LDT for both communications and power. DHCP
must be enabled and the switches in the Rapid Recall™ module must
be set to 255.
Note: The Network LDT’s factory out of the box state has the DIP
switches set to 255 and the DHCP enabled.
Attention: DHCP is not recommended for a plant floor environment due to
the risk involved when an IP address changes.
Perform the following steps:
Step 1: Connect LDT to network with power off. Open the BOOTP/DHCP
Server Software in the Windows browser with the Network LDT
in an unpowered state. A module configuration screen will
open to configure or modify the EtherNet/IP address. In the
Request History Pane you will see the time a message came
from an EtherNet module, data type and MAC Addresses of the
devices on the network. No IP addresses are shown for the
devices with the DHCP enabled.
Step 2: Power up the Network LDT, an incoming request for an IP
address that the server has received from the LDT will appear in
the Request History Pane. The LDT can be identified by its MAC
address that appears in the pane. Click on the MAC address to
highlight that row and then click on the “Add to Relation List”
button, which will open the New Entry dialog box.
Enter the desired IP address and click OK.
The desired IP address and its MAC address will appear in the Relation
List Pane.
10
FACTORY AUTOMATION
®
Phone: 248-435-0700 Toll Free: 800-635-0289 Fax: 248-435-8120 www.ametekfactoryautomation.com

Step 3: A new incoming request for an IP address will appear in the
Request History Pane. If it does not, cycle power to the LDT and new
incoming request for an IP address will appear. This time the pane will
include the new IP address along with the time, data type, and MAC
address. At this point the IP address is only temporary since the DHCP is
still enabled.
Step 4: Click on the IP address in the Relations List Pane to highlight
that row, then click the Disable BOOTP/DHCP button to make the new
IP address permanent. The Status bar will display the (Disable DHCP)
Command Successful.
Step 5: Exit the BOOTP/DHCP Server.
11
FACTORY AUTOMATION
®
Phone: 248-435-0700 Toll Free: 800-635-0289 Fax: 248-435-8120 www.ametekfactoryautomation.com

3.6 - Using a Web Browser
In order to use the internal webpage you must know the LDT’s IP
address. The default out of the box setting is 192.168.1.1 with the DIP
switches set to 255 DHCP enabled. If power is applied to the Network
LDT in this mode your Network will assign the next available IP address.
If this happens you will need to use the IPconfig or BootP utility tools to
select the appropriate IP address and to disable the DHCP mode.
Step 1: Connect the Network LDT to your network
Cable connections must be made to the Network LDT for both
communications and power. DHCP must be disabled using the IPconfig
or BootP utilities, and the switches in the Rapid Recall™ module must
be set to 255.
Step 2: Access Network LDT Configuration Module
1. With power off, remove the RapidRecall™ Configuration module.
Make sure the configuration switches are set to 255. Reassemble
unit.
2. Turn Power On to the LDT.
3. Open a web browser and type in the IP address for the unit in the address
field. Press enter and the network LDT webpage will be displayed.
Step 3: Program a New IP address (Alternate way to program the IP
address)
1. Under the Configuration tab, select Ethernet Config.
a. Enter the Desired IP address, Subnet Mask and Gateway.
b. Select “Save”
c. Cycle power to the unit to allow the new IP address to be set.
2. See Chapter 6 – Web Page Layout for LDT configurations.
3.7 - DIP Switch Setting 000 DHCP
The 000 DHCP DIP switch setting is a back door that can be used to
force the Network LDT into the DHCP mode. This would typically only
be used if you do not know the units IP address or cannot access the
Network LDT using the IPconfig or BootP utilities.
Step 1: Set the DIP switches to 000.
Step 2: Apply power to the Network LDT – The network will search and
assign the next available IP address.
Step 3: Once the new IP address has been assigned, un-power the unit
and remove the RapidRecall™ Configuration Module and set the
DIP switches to 255.
Step 4: Reapply power. The network will now assign the next available
IP address. From here you should be able to follow the IPconfig
or BootP instructions.
3.8 - DIP Switch Setting 001-254
The ReadyLink™ Ethernet/IP™ LDT out of the box default settings
will be DHCP Enabled and the switches will be set to 255), and the IP
address will be set to 192.168.1.1.
If the RapidRecall™ Configuration Module is set to 001-254 before
power is applied to the unit, the Static IP address lower octet value will
be set to the value of these three switches; the upper 3 octets will be set
for what was previous stored in LDT non-volatile memory. For example,
the out of box setting is 192.168.1.1. If the DIP switch settings were
set to 005 then the IP address would be set to 192.168.1.5. However, if
network communication was established to the LDT in question prior to
the switches being set to 005, then the LDT’s IP address will default to
whatever the host network assigned.
The key to the 001 to 254 DIP switch settings are that they can be used
to set the lower octet of the LDT’s IP address. The units default IP
address was set to 192.168.1.1 at time of shipment; however by using
one of the IP configuration utilities the IP address can be set to any
desired address. Once the new IP address is established the DIP
switched can be used to set the lower octet. A good example may
be that you are interested in using the DIP switches to set the units IP
address but your network is not 192.168.1.XXX. In this case simply set
the DIP switches to 255 and use one of the IP configuration utilities to
assign the IP address, once set disable DHCP. Power down the network
LDT and change the DIP switch settings to any value between 1 and
254. Reassembly the unit and reapply power. On power up the upper 3
octets will be what you just set using the IP address utility and the lower
octet will be equal to the three DIP switches.
12
FACTORY AUTOMATION
®
Phone: 248-435-0700 Toll Free: 800-635-0289 Fax: 248-435-8120 www.ametekfactoryautomation.com

Chapter 4 – Network Programming for
Ethernet/IP™
Description
Data is communicated over Ethernet using two types of messaging:
• I/O Messaging (Position & Velocity)
• Explicit Messages (Parameters & Configuration)
I/O Messaging is used for time critical data such as position & velocity
status. Explicit messages are used for configuration data such as
Positions scaling, resolution and count direction. The Network LDT
module will conform to the Encoder device profile which is device
type 22h.
4.1 I/O data Transfer
The Network LDT is classified as an Input only device. The following
Assembly object instances are supported: (See Chapter 3 for compete
listing off all Instances & Attributes).
# Instance
1 Position
2 Position, Warning and Alarm Flags
3 Position and Velocity
100 Position, Velocity and Status
110 Configuration
180 Diagnostic
199 Input Only Heartbeat
Instance Only Heartbeat Assembly (Instance 199)
This assembly instance is used for the heartbeat connection point for
Input Only connections. The data size is 0.
4.2 Explicit Messages:
Configuration data is transferred to the Network LDT through explicit
messages. The Network LDT uses the Position Sensing Class 0x23
(hex). These values are listed in the following tables.
4.2.1 Assembly Object (Class ID 04h)
The following Assembly object instances are supported.
# Instance Data
Access
Set_Attribute_
Single Support
1 Position R No
2 Position, Warning
and Alarm Flags
R No
3 Position and Velocity R No
100 Position, Velocity
and Status
R No
101 Position, Velocity
and Extended Status
R No
110 Configuration RW Yes
180 Diagnostic R No
199 Input Only Heartbeat N/A N/A
4.2.1.1 Position Assembly (Instance 1)
Buffer Offset
Length Data
Mapped Attribute
Byte Bit Cls Inst Attr
0 0 4 bytes Position 23h 1 10
Total size: 4 bytes
4.2.1.2 Position, Warning and Alarm Flags Assembly
(Instance 2)
Buffer Offset
Length Data
Mapped Attribute
Byte Bit Cls Inst Attr
0 0 4 bytes Position 23h 1 10
4 0 1 bit Alarm Flag 23h 1 46
1 1 bit Warning Flag 23h 1 49
2 6 bits Reserved (set to 0)
Total size: 5 bytes
4.2.1.3 Position and Velocity Assembly (Instance 3)
Buffer Offset
Length Data
Mapped Attribute
Byte Bit Cls Inst Attr
0 0 4 bytes Position 23h 1 10
4 0 4 bytes Velocity 23h 1 24
Total size: 8 bytes
4.2.1.4 Position, Velocity and Status Assembly
(Instance 100)
Buffer Offset
Length Data
Mapped Attribute
Byte Bit Cls Inst Attr Bit
0 0 4 bytes Position 23h 1 10
4 0 4 bytes Velocity 23h 1 24
8
0 1 bit Lost Magnet
Signal
23h 1 44 12
1 1 bit Signal in DEAD
Zone
23h 1 44 13
2 1 bit Signal in NULL
Zone
23h 1 44 14
3 1 bit Extra Signals 23h 1 44 15
4 1 bit Position Above
Upper Limit
23h 1 21 1
5 1 bit Position Below
Lower Limit
23h 1 21 2
6 1 bit Velocity Above
Upper Limit
23h 1 47 7
7 1 bit Velocity Below
Lower Limit
23h 1 47 6
Total size: 9 bytes
13
FACTORY AUTOMATION
®
Phone: 248-435-0700 Toll Free: 800-635-0289 Fax: 248-435-8120 www.ametekfactoryautomation.com

The Position & Velocity values are each 4 bytes long, with byte 0 =
Least Significant byte and byte 3 = Most Significant Byte. These are
Hexadecimal values.
Ametek_LDT:I1.Data[0] =LSB byte
Ametek_LDT:I1.Data[1] = Byte 1
Ametek_LDT:I1.Data[2] = Byte 2
Ametek_LDT.I1.Data[3]=MSB byte
These can easily be converted in your ladder Logic to display in a
decimal format.
Transmitting position & velocity data in the 4 byte format is typically the
fastest and most efficient way. However; if this is causing a problem in
your programming you can use Assembly Instance 101. Instance 101 is
12 bytes in length. In Instance 101 positional and velocity data looks like
a decimal value in the correct order.
Another alternative way of viewing position and velocity data without
doing the copy and divide ladder logic as shown above. Assembly
Instance 1 or Assembly Instance 3 are 4 bytes and 8 bytes in length
respectively. Because they are divisible by 4, you can choose for them
to be displayed as a DINT type instead of a SINT type. This creates 1
variable for the position and 1 variable for the velocity.
The user selects either Assembly Instance 1 or Assembly Instance 3 in
the Module Definition and under Size then select DINT instead of SINT.
This is shown in the screen shot below.
Studio 5000 Screen shot. See Chapter 7 for further details.
4.2.1.5 Position, Velocity and Status Assembly
(Instance 101)
Same as Instance 100, except 12 bytes in length. Position & Velocity
data will look like a decimal value in the correct order.
Buffer Offset
Length Data
Mapped Attribute
Byte Bit Cls Inst Attr Bit
0 0 4 bytes Position 23h 1 10
4 0 4 bytes Velocity 23h 1 24
32
0 1 bit Lost Magnet
Signal
23h 1 44 12
1 1 bit Signal in DEAD
Zone
23h 1 44 13
2 1 bit Signal in NULL
Zone
23h 1 44 14
3 1 bit Extra Signals 23h 1 44 15
4 1 bit Position Above
Upper Limit
23h 1 21 1
5 1 bit Position Below
Lower Limit
23h 1 21 2
6 1 bit Velocity Above
Upper Limit
23h 1 47 7
7 1 bit Velocity Below
Lower Limit
23h 1 47 6
8-31 12 bits Reserved for
future use
Total size: 12 bytes
4.2.1.6 Configuration Assembly (Instance 110)
Buffer Offset
Length Data
Mapped Attribute
Byte Bit Cls Inst Attr
0 0 2 bytes Position Format 23h 1 15
2 0 1 byte Direction Counting
Toggle
23h 1 12
3 0 1 bytes Reserved (set to 0)
4 0 4 bytes Position Measuring
Increment
23h 1 18
8 0 4 bytes Position Low Limit 23h 1 22
12 0 4 bytes Position High Limit 23h 1 23
16 0 2 bytes Velocity Format 23h 1 25
18 0 2 bytes Reserved (set to 0)
20 0 4 bytes Velocity Resolution 23h 1 26
24 0 4 bytes Minimum Velocity 23h 1 27
28 0 4 bytes Maximum Velocity 23h 1 28
32 0 1 byte Position Filter Type 23h 1 100
33 0 1 byte Velocity Filter Size 23h 1 101
34 0 1 byte Fault Output Type 23h 1 102
35 0 1 byte Sync Mode 23h 1 103
Total size: 36 bytes
14
FACTORY AUTOMATION
®
Phone: 248-435-0700 Toll Free: 800-635-0289 Fax: 248-435-8120 www.ametekfactoryautomation.com

4.2.1.7 Input Only Heartbeat Assembly (Instance 199)
This assembly instance is used for the heartbeat connection point for
Input Only connections. The data size is 0.
4.3 Position Sensor Object (Class ID 23h)
4.3.1 Class Attributes
# Name Access Memory Type Default
Value
1 Revision R NV UINT 2
4.3.2 Instance Attributes
Hex
#
Dec
#Name Access Memory Type Default
Value
1 1 Number of Attributes R NV USINT 40
2 2 Attribute List R NV USINT[ ]
a 10 Position Value Signed R V DINT
b 11 Position Sensor Type R NV UINT 0
c 12 Direction Counting Toggle RW NV BOOL 0
f 15 Position Format RW NV ENGUNIT 0802h
12 18 Position Measuring Increment RW NV UDINT 1
13 19 Preset Value RW V DINT 0
15 21 Position State Register R V BYTE 0
16 22 Position Low Limit RW NV DINT -16777215
17 23 Position High Limit RW NV DINT 16777215
18 24 Velocity Value R V DINT 0
19 25 Velocity Format RW NV ENGUNIT 2B01h
1a 26 Velocity Resolution RW NV UDINT 10000
1b 27 Minimum Velocity Setpoint RW NV DINT -16777215
1c 28 Maximum Velocity Setpoint RW NV DINT 16777215
29 41 Operating Status R V BYTE 0
2c 44 Alarms R V WORD 0
2d 45 Supported Alarms R NV WORD
2e 46 Alarm Flag R V BOOL 0
2f 47 Warnings R V WORD 0
30 48 Supported Warnings R NV WORD 04C0h
31 49 Warning Flag R V BOOL 0
33 51 Offset Value R NV DINT 0
64 100 Position Filter Type RW NV USINT 3
65 101 Velocity Filter Size RW NV USINT 3
66 102 Fault Output Type RW NV USINT 0
67 103 Sync Mode RW NV BOOL 0
Number of Attributes (Attribute 1)
The total number of instance attributes supported. This will be a fixed
value of 28.
Attribute List (Attribute 2)
The list of supported instance attributes. This will be an array consisting
of all supported attribute numbers in numerical order.
Position Value Signed (Attribute 10)
The current position value read by the module. This value will be
scaled based on the Position Format engineering units and the Position
Measuring Increment and offset by the Offset Value.
Position Sensor Type (Attribute 11)
The type of sensor. This will be a fixed value of 8,
specifying an absolute linear encoder.
Direction Counting Toggle (Attribute 12)
The direction that the Position Value increases.
A value of 0 indicates that the position increases
when moving away from the Head (electronics).
A value of 1 indicates that the position increases
when moving toward the Head (electronics).
Position Format (Attribute 15)
The engineering units used for the Position Value.
This setting will determine the scaling for the
Position Value.
Allowable values for this attribute are:
Value Position Units
2202h centimeter
2203h millimeter
2204h micron
2207h inch
0800h 0.01 inch
0801h 0.001 inch
0802h 0.0001 inch
Position Measuring Increment (Attribute 18)
The size of “steps” in the Position Value
measurement. The steps are specified in the
engineering units selected by the Position Format.
Example: Position Format is set to micron. Position
Measuring Increment is set to 5. The Position
Value will move in steps of 5 microns.
Preset Value (Attribute 19)
The Preset Value is used to calibrate the Offset
Value at the current measured position. When
the Preset Value is set, the Offset Value will be
calculated so that
Position Value = Preset Value =
(internal scaled position value) + Offset Value
The value returned when the Preset Value is read
will be the last value written; it is meaningless once
the position sensor has moved.
15
FACTORY AUTOMATION
®
Phone: 248-435-0700 Toll Free: 800-635-0289 Fax: 248-435-8120 www.ametekfactoryautomation.com

Position State Register (Attribute 21)
Indicates the state of the Position Value relative to the Position High
Limit and Position Low Limit.
The attribute is an 8 bit bitstring with the following bit assignments.
Bits Description
0Position is out of range (above or below the set limits)
1 Position is above the High Limit
2 Position is below the Low Limit
3-7 Reserved (set to 0)
Postion Low Limit (Attribute 22)
If the Position Value is below this limit, it will be indicated in the Position
State Register. The attribute value is expressed in the engineering units
selected by Position Format.
Position High Limit (Attribute 23)
If the Position Value is above this limit, it will be indicated in the Position
State Register. The attribute value is expressed in the engineering units
selected by Position Format.
Velocity Value (Attribute 24)
The current velocity value read by the module. This value will be
scaled based on the Velocity Format engineering units and the Velocity
Resolution.
Velocity Format (Attribute 25)
The engineering units used for the Velocity Value. This setting will
determine the scaling for the Velocity Value.
Allowable values for this attribute are:
Value Velocity Units
2B01h centimeter/sec
2B07h inch/sec
Velocity Resolution (Attribute 26)
The resolution steps of the Velocity Value. This setting specifies a
divider used to calculate Velocity Value in the units selected by the
Velocity Format.
Example: Velocity Format is set to inch/sec. Velocity Resolution is set
to 100. The resulting Velocity Value will be expressed in 0.01 inch/sec.
Measuring Unit Velocity Resolution Velocity Value
inch/sec 1000 0.001 inch/sec
inch/sec 100 0.01 inch/sec
centimeter/sec 100 0.01centimeter/sec
centimeter/sec 10 0.1centimeter/sec
Minimum Velocity Setpoint (Attribute 27)
If the Velocity Value is below this limit, it will be indicated in the Warnings
attribute. The attribute value is expressed in the engineering units
selected by Velocity Format.
Maximum Velocity Setpoint (Attribute 28)
If the Velocity Value is above this limit, it will be indicated in the Warnings
attribute. The attribute value is expressed in the engineering units
selected by Velocity Format.
Operating Status (Attribute 41)
The attribute is an 8 bit bitstring with the following bit assignments.
Bits Description
0 Direction (0=position increasing, 1=position decreasing)
1 Scaling (set to 1)
2-7 Reserved (set to 0)
Alarms (Attribute 44)
The current alarm status of the module.
The attribute is a 16 bit bitstring with the following bit assignments.
Bits Description
0 Position Error
1-11 Reserved (set to 0)
12 Lost Magnet Signal
13 Signal in DEAD Zone
14 Signal in NULL Zone
15 Extra Signals
Supported Alarms (Attribute 45)
The alarms that are supported by the module.
The attribute is a 16 bit bitstring with the same bit assignments as shown
above for the Alarms attribute. The value is fixed and all non-reserved
bits are set. (F001h)
Alarm Flag (Attribute 46)
Indicates that one or more of the supported alarms are active.
Warnings (Attribute 47)
The current warning status of the module.
The attribute is a 16 bit bitstring with the following bit assignments.
Bits Description
0-5 Reserved (set to 0)
6 Minimum Velocity Flag
7 Maximum Velocity Flag
8-9 Reserved (set to 0)
10 Position Limits Exceeded
11-15 Reserved (set to 0)
16
FACTORY AUTOMATION
®
Phone: 248-435-0700 Toll Free: 800-635-0289 Fax: 248-435-8120 www.ametekfactoryautomation.com

Supported Warnings (Attribute 48)
The warnings that are supported by the module.
The attribute is a 16 bit bitstring with the same bit assignments as shown
above for the Warnings attribute. The value is fixed and all non-reserved
bits are set. (04C0h)
Warning Flag (Attribute 49)
Indicates that one or more of the supported warnings are active.
Offset Value (Attribute 51)
The current offset that is used for calibration when calculating the
Position Value. The value is represented in the units selected by the
Position Format.
Position Filter Type (Attribute 100)
The filter to be used when filtering the Position Value.
This is an enumerated value with the following allowable values.
Value Position Filter Type Description
0 Unfiltered No filtering applied
1 Average 20 point rolling filter average
2 Advanced Filter AMETEK Standard – Filter is based
off of speed of magnet. The faster
the speed the less filtering, the
slower the speed the more filtering.
Velocity Filter Size (Attribute 101)
The rolling filter size to be used when filtering the Velocity Value.
Default value is set to 3.
Fault Output Type (Attribute 102)
The action to be taken with the position data when a fault occurs.
This is an enumerated value with the following allowable values.
Value Fault Output Type
0 Hold Last Data
1 Zero Data
Sync Mode (Attribute 103)
The synchronization mode to be used by the module. This mode
will be used in future expansion. At the current time the only version
available is Asynchronous.
This is an enumerated value with the following allowable values.
Value Sync Mode
0 Async
1 Sync
4.3.3 Services
Service Code Class Support Instance
Support
Get_Attribute_Single 0Eh Yes Yes
Set_Attribute_Single 10h No Yes
Save 16h Yes No
Restore 15h Yes No
Reset 05h Yes No
Save (Service 16h)
Save all attribute values to NV memory.
The Save service has an optional 1 byte of service data with the
following meaning.
Save Data Value Behavior
00h or no data Save to USERConfiguration store
01h Reserved
02h Save to Rapid Recall Module
Restore (Service 15h)
Load all attribute values from NV memory. The values will be loaded
from the USER Configuration Store.
Reset (Service 05h)
Reset / reinitialize the object and reload the configuration.
The Reset service has an optional 1 byte of service data with the
following meaning.
Reset Data Value Behavior
00h or no data Reinitialize the object and load the configuration
from the User Configuration store.
01h Reinitialize the object and load the configuration
from the Manufacturing Configuration store and
update the User Configuration store with the
loaded values.
02h Reinitialize the object and load the configuration
from the Rapid Recall module and update the
User Configuration store with the loaded values.
4.4 Advanced Parameter Object (Class ID 64h)
4.4.1 Class Attributes
# Name Access Memory Type Default
Value
1 Revision R NV UINT 2
4.4.2 Instance Attributes
17
FACTORY AUTOMATION
®
Phone: 248-435-0700 Toll Free: 800-635-0289 Fax: 248-435-8120 www.ametekfactoryautomation.com

Hex # Dec # Name Access Memory Type
0C 12 Memory
Checksum
R NV USINT[]
32 50 Part Number R NV SHORT_
STRING
33 51 Serial
Number
R NV SHORT_
STRING
Memory Checksum (Attribute 12)
The list of memory checksum values for the position sensing variables
starting with RAM, NVRAM and Rapid Recall memory. The purpose of
this attribute is to quickly verify that the memory in RAM is the same that
is in NVRAM and that no parameters have been changed either through
an explicit message or through the webpage
Memory Checksum[0] = RAM
Memory Checksum[1] = NVRAM
Memory Checksum[2] = Rapid Recall Module
The Checksum values can be found in our Advanced parameter Object.
They can be retrieved by issuing an explicit message to class 100,
instance 1, attribute 12. The response will return 3 bytes of data. The first
byte is the RAM checksum, the second byte is the NVRAM checksum
and the third byte is the Rapid Recall checksum. The Explicit message
expects the Class and Attribute numbers to be in hexidecimal. Class 64
(hex), Instance 1, Attribute 0C (hex).
Part Number (Attribute 50)
This read only value will display the part number printed on the label of
the unit.
Serial Number (Attribute 51)
This read only value will display the Serial number printed on the label
of the unit.
4.4.3 Services
Service Code Class Support Instance Support
Get_Attribute_Single 0Eh Yes Yes
Chapter 5 Configuration Data
Network LDT Memory
The Network LDT has three memory locations. These are called Factory,
User and RAM. Both the Factory and User memories are stored in
E2 memory. The Factory settings can be used to reset the LDT back
to factory defaults. All configuration settings can be made from our
Webpage or PLC and “Loaded” into RAM for testing purposes. Note:
These values will not be written to USER memory until the “Save”
command is issued. If they are not saved to USER they will be lost on
power down. On power-up the configuration settings in USER will be
transferred to RAM.
The LDT’s RapidRecall™ Configuration Module is a smart device that
can store all user configurations. Once the LDT has been configured
these setting can be uploaded to the module by setting the DIP switches
to “606”. Refer to Chapter 8 for all setting and features of the Rapidrecall™
Configuration Module, or a Save(02h) command can be sent to store these
values in the RapidRecall™ Module.
One of the key benefits to uploading the configuration data to the
RapidRecall™ Configuration Module is that, if anything was to ever go
wrong with the LDT, the module could be removed from the original unit
and installed on the new unit. (In order to upload the configuration data
the DIP switches would need to be set to “616”). Or a Reset(2) command
can be sent to restore these values from the RapidRecall Module
The non-volatile attribute values in the Position Sensor and Advanced
Parameters objects are stored in the E2 (EEPROM) or flash memory.
The E2 memory is divided into 2 sections:
USER Configuration Store – The USER Configuration Store holds the
attribute values that have been set in the field by the customer.
FACTORY Configuration Store – The FACTORY Configuration Store
holds the attribute values that have been set during manufacturing.
These are the “factory default” values for the attributes.
The following diagram illustrates the flow of attribute values between the
application and E2.
Network Memory Block Diagram -Diagnostics
Web
Load
RAM USER Factory
Reset
Power-Up
RapidRecall™
Configuration Module
606 & 616
From LDT RapidRecall™ Configuration Module
Bootup /
Restore /
Reset (0)
Save (0)
E2 Memory E2 Memory
Reset (1)
Working
Attribute
Values
Configuration
Store
Configuration
Store
Save (1)
Position
MFG
MFG
Position
Save (2)
Reset (2)
Reset (2)
The current attribute values being used by the application are
determined as follows:
• On bootup
o All attribute values will be loaded from the USER Configuration
Store to RAM (Working Attribute Values).
• When a Set_Attribute service is issued
o The attribute will be set to the requested value and the new
value will be used immediately.
• When a Restore service is issued
o All attribute values for the associated object will be loaded
from the USER Configuration Store to RAM.
• When a Reset(0) service is issued
o All attribute values for the associated object will be loaded
from the USER Configuration Store to RAM.
• When a Reset(1) service is issued
o All attribute values for the associated object will be loaded from the
FACTORY Configuration Store to the USER Configuration store.
Attribute values are saved to the configuration stores as follows:
• When a Save(0) service is issued
o All attribute values for the associated object will be written to
the USER Configuration Store.
• When a Reset(1) service is issued
o All attribute values in the FACTORY Configuration Store will be
written to the USER Configuration Store.
18
FACTORY AUTOMATION
®
Phone: 248-435-0700 Toll Free: 800-635-0289 Fax: 248-435-8120 www.ametekfactoryautomation.com

Chapter 6 Web Server
To help aid in configuring the units IP address and user settings, there
is an internal web server in the Network LDT. These web pages can be
used to monitor and configure the Network LDT. The intent of the web
pages are to provide nearly the same functionality that exists through
the CIP network interface.
6.1Main Web Page
The Main web page is loaded when the module’s IP address is specified
by the users’ web browser. The Main page provides an introduction to
the module, its capabilities and the modules identification information.
Navigation through the site is done with the tabbed menu or the menu
links on the home page. The Configuration menu has multiple pages
and a tabbed submenu will be displayed on those pages.
Displayed on the Home
page:
• General product and
company introduction
• Menu to all other web
pages
• Position & Status
• Configuration
• Diagnostics
• Module Part Number
• Module Serial Number
6.2 Position Status Page
The Position Status web page displays the current position and status
data of the module.
Displayed on the
Position Status page:
• Position Value
• Velocity Value
• Direction of Travel
• Status and Alarm Flag
Status
6.3 Position Sensor Configuration Page
The Position Sensor Configuration web page provides an interface to
view and set the position sensor parameters.
Displayed and settable via the Position Sensor Configuration page:
• Direction Counting
Toggle
• Position Format
• Position Measuring
Increment
• Position Filter Type
• Position Low Limit
• Position High Limit
• Velocity Format
• Velocity Filter Type
• Minimum Velocity
Setpoint
• Maximum Velocity
Setpoint
• Fault Output Type
• Sync Mode
The page will also provide
the ability to set the Preset
Value to calibrate the
position to the current
location.
The Load button will load the pending values into the working
parameters in memory; no save to non-volatile will be done.
The Save button will load the pending values into the working
parameters in memory and write the resulting configuration to the User
configuration storage.
The Factory Save button will load the pending values into the working
parameters in memory and write the resulting configuration to the
Factory configuration storage. – Note: This button appears on the
screen but is non functional unless the appropriate password has been
entered under the Diagnostics Tab. The Factory Save values should
never be altered unless instructed to do so by the factory.
The RapidRecall™ Reset button will take the current values stored in
the RapidRecall Module and save them to the LDTs RAM and User
Configuration Store. This function acts the same as if the DIP switches
on the RapidRecall™ Module were set to “616”
The RapidRecall™ Save button will take the current values stored in the
LDTs RAM and write them to the RapidRecall™ Module. This function
acts the same as if the DIP switches on the RapidRecall Module were
set to “606”
6.4 Ethernet Configuration Web Page
The Ethernet Configuration web page provides the ability to view and
set the Ethernet configuration parameters.
Displayed and settable via the Ethernet Configuration web page:
• IP Address
• Subnet Mask
• Gateway Address
• DHCP Enable
The Save button will load the
pending values into the working
parameters in memory and write
the resulting configuration to the
User configuration storage.
19
FACTORY AUTOMATION
®
Phone: 248-435-0700 Toll Free: 800-635-0289 Fax: 248-435-8120 www.ametekfactoryautomation.com

Chapter 7 EtherNet/IP™ Configuration
To configure the PLC and the Ethernet/IP™ you will need to use the
Studio 5000 software. Open the Studio 5000 interface and follow the
steps below:
1. EDS Hardware Install Tool:
Click the Tools menu and select EDS Hardware Installation Tool
2. Register EDS Files: Welcome screen
The EDS Wizard will open, click Next
3. Options Window
In the Options window, select Register an EDS File, then click Next
4. Registration: Register a single file
The Registration windows opens, click Browse and select EDS file
downloaded from the www.ametekapt website. Click Next
5. EDS File Installation Test Results
Check ethernet ldt.eds file box below, then hit Next
6. Final Task Summary
The Final task Summary window opens, and displays would you like
ot register the following device, click Next
20
FACTORY AUTOMATION
®
Phone: 248-435-0700 Toll Free: 800-635-0289 Fax: 248-435-8120 www.ametekfactoryautomation.com
This manual suits for next models
1
Table of contents
Other Ametek Transducer manuals
Popular Transducer manuals by other brands

Humminbird
Humminbird transducer Assembly & operating instructions

Lika
Lika DRAW WIRE SFPS1 manual

S+S Regeltechnik
S+S Regeltechnik PREMASGARD 111 Series Operating Instructions, Mounting & Installation

kries
kries IKI-LUM 92 Assembly instructions

Airmar
Airmar P19-12 Owner's guide & installation instructions

Shark
Shark 100T quick start guide