manuals.online logo
Brands
  1. Home
  2. •
  3. Brands
  4. •
  5. Veris Industries
  6. •
  7. Transducer
  8. •
  9. Veris Industries PW Series User manual

Veris Industries PW Series User manual

Z202882-0X Page 1 of 4 ©2019 Veris Industries USA 800.354.8556 or +1.503.598.4564 / suppor[email protected] 1219
Alta Labs, Enercept, Enspector, Hawkeye, Trustat, Aerospond, Veris, and the Veris ‘V’ logo are trademarks or registered trademarks of Veris Industries, L.L.C. in the USA and/or other countries.
Other companies’ trademarks are hereby acknowledged to belong to their respective owners.
NOTICE
• This product is not intended for life or safety applications.
• Do not install this product in hazardous or classied locations.
•
Read and understand the instructions before installing this product.
• Turn o all power supplying equipment before working on it.
• The installer is responsible for conformance to all applicable codes.
If this product is used in a manner not specied by the manufacturer, the protection
provided by the product may be impaired. No responsibility is assumed by the
manufacturer for any consequences arising out of the use of this material.
Installation Guide
Pressure TM
Product Identication
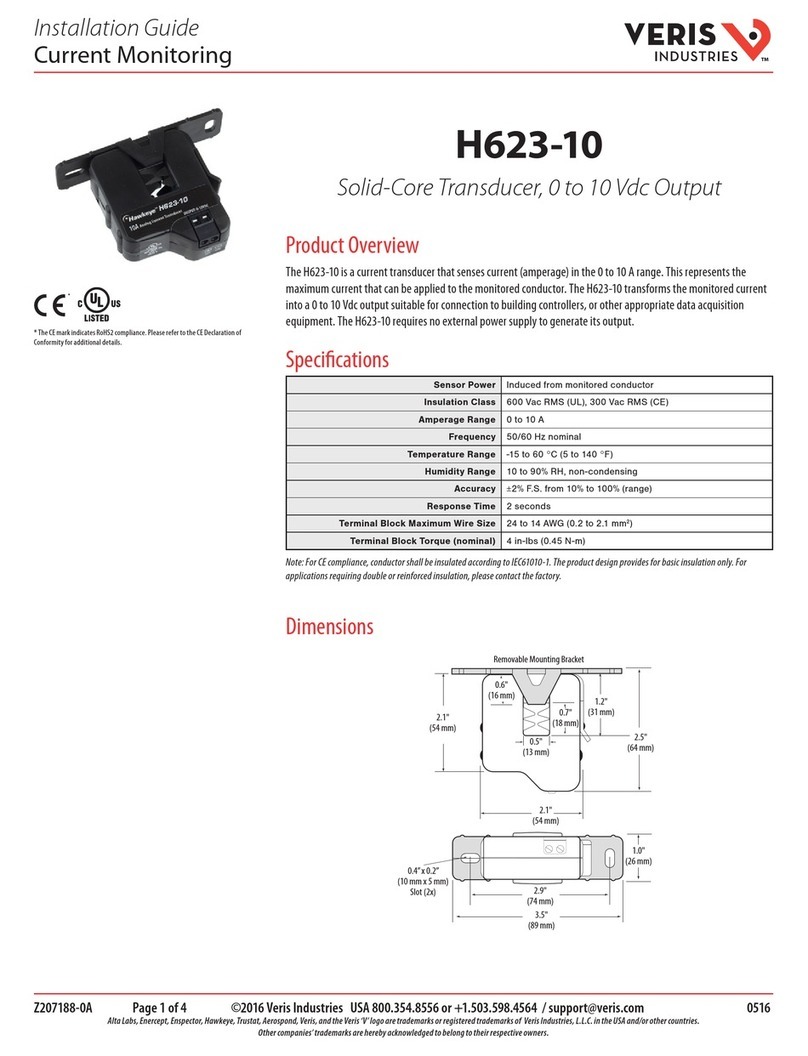
Specications
Product Overview
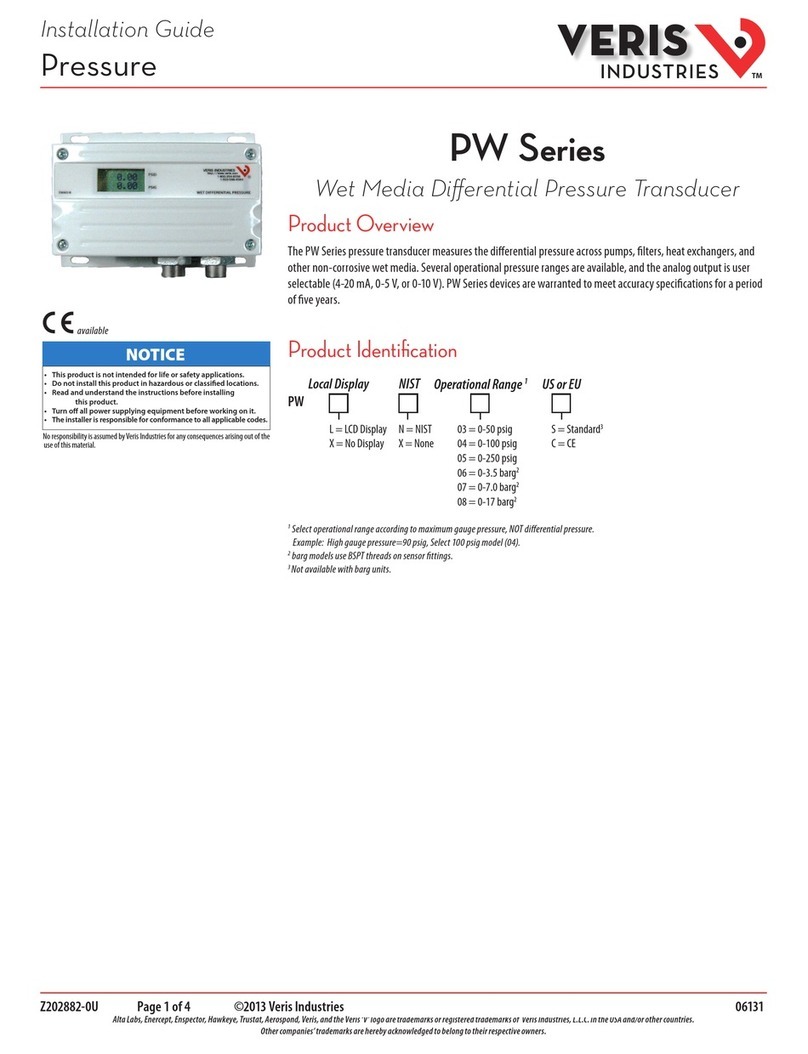
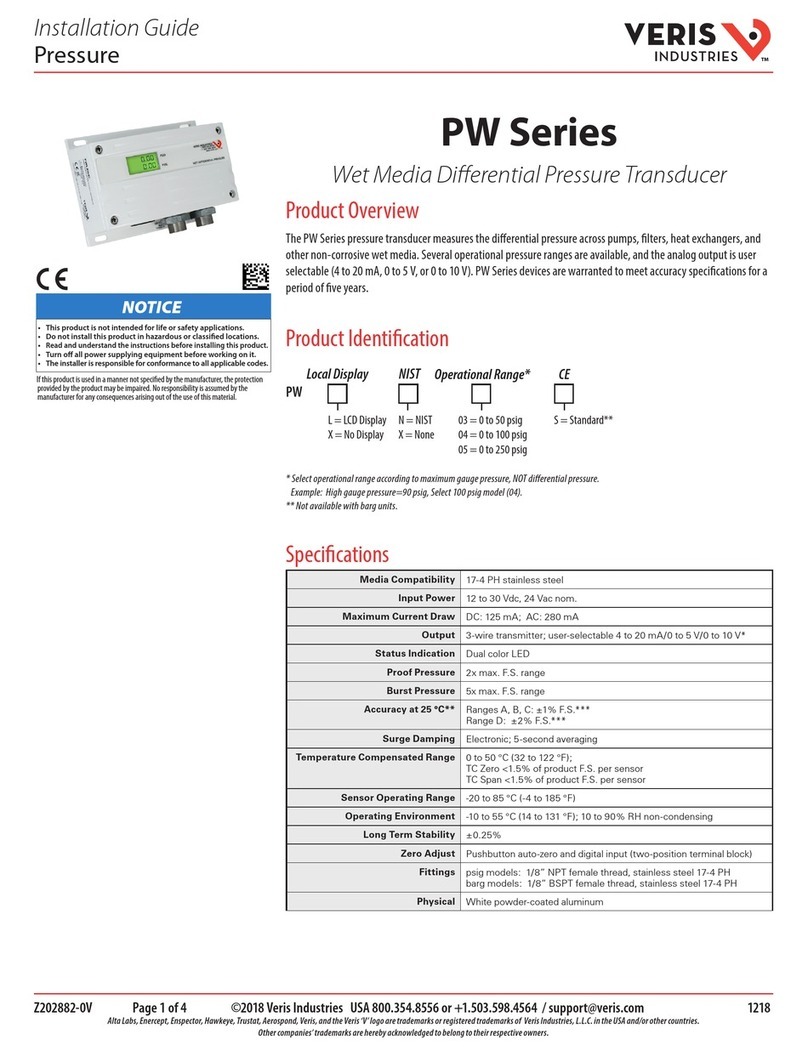
The PW Series pressure transducer measures the dierential pressure across pumps, lters, heat exchangers, and
other non-corrosive wet media. Several operational pressure ranges are available, and the analog output is user
selectable (4 to 20 mA, 0 to 5 V, or 0 to 10 V). PW Series devices are warranted to meet accuracy specications for a
period of ve years.
The optional pre-assembled bypass valve is designed for easy maintenance and one-step installation.
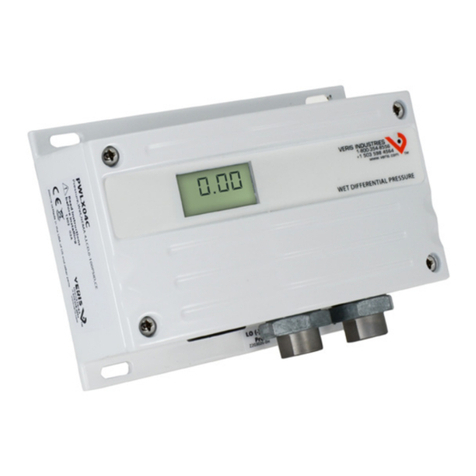
PW Series
Wet Media Differential Pressure Transducer
Local Display
L = LCD Display
X = No Display
NIST
N = NIST
X = None
Options
S = Standard
BP = With mounted bypass assembly
Operational Range*
03 = 0 to 50 psig
04 = 0 to 100 psig
05 = 0 to 250 psig
PW
* Select operational range according to maximum gauge pressure, NOT dierential pressure.
Example: High gauge pressure=90 psig, Select 100 psig model (04).
Media Compatibility 17-4 PH stainless steel
Input Power Class 2; 15 to 30 Vdc, 24 Vac nom. 50/60 Hz*
Maximum Current Draw DC: 125 mA; AC: 280 mA
Output 3-wire transmitter; user-selectable 4 to 20 mA/0 to 5 V/0 to 10 V*
Status Indication Dual-color LED
Proof Pressure 2x max. F.S. range***
Burst Pressure 5x max. F.S. range***
Accuracy at 25 °C** Ranges A and B: ±1% F.S. typical***;
Range C: ±1.5% F.S. typical***;
Range D: ±2% F.S. typical***
Surge Damping Electronic; 1 or 5 second averaging
Temperature Compensated Range 0 to 50 °C (32 to 122 °F);
TC Zero <1.5% of product F.S.*** per sensor
TC Span <1.5% of product F.S.*** per sensor
Sensor Operating Range -20 to 85 °C (-4 to 185 °F)
Operating Environment -10 to 50 °C (14 to 122 °F); 10 to 90% RH non-condensing
Media Temp. Limits -20 to 85 °C (-4 to 185 °F); 0 to 90% RH non-condensing
Long Term Stability ±0.25%
Zero Adjust Pushbutton auto-zero and digital input (two-position terminal block)
Zero Oset
(Bidirectional and Port Swap modes only)
0.5%
Fittings 1/8” NPT female thread, stainless steel 17-4 PH
Physical White powder-coated aluminum, NEMA 4, IP65
PWxxxS
PWxxxBP
Z202882-0X Page 2 of 4 ©2019 Veris Industries USA 800.354.8556 or +1.503.598.4564 / suppor[email protected] 1219
Alta Labs, Enercept, Enspector, Hawkeye, Trustat, Aerospond, Veris, and the Veris ‘V’ logo are trademarks or registered trademarks of Veris Industries, L.L.C. in the USA and/or other countries.
Other companies’ trademarks are hereby acknowledged to belong to their respective owners.
TM
PW Series Installation Guide
2.2"
(57 mm)
4"
(102 mm)
5.8"
(147 mm)
LOW HIGH
WET DIFFERENTIAL PRESSURE
Dimensions
PRESSURE RANGES
0 to 50 psig 5/10/25/50 psid
0 to 100 psig 10/20/50/100 psid
0 to 250 psig 25/50/125/250 psid
Note: To conform to EMC Standards, use shielded cabling. Technical information is available from the factory on request.
* VFD systems and system wiring generate fields that can disrupt electrical devices. Ensure that these fields are minimized and
are not affecting the sensor or sensor wiring.
** Accuracy combines linearity, hysteresis, and repeatability.
*** F.S. is defined as full span of selected range in bidirectional mode.
Specications (cont.)
PWxxxS
PWxxxBP
6.75”
(172 mm)
8.7”
(221 mm)
8.7”
(221 mm)
7.75”
(191 mm)
1.8”
(46 mm)
3.5”
(89 mm)
3.5”
(89 mm)
0.4”
(11 mm)
1.0”
(25 mm)
12.0”
(305 mm)
0.5”
(13 mm)
1.5”
(38 mm)
0.3”
(8 mm)
Z202882-0X Page 3 of 4 ©2019 Veris Industries USA 800.354.8556 or +1.503.598.4564 / suppor[email protected] 1219
Alta Labs, Enercept, Enspector, Hawkeye, Trustat, Aerospond, Veris, and the Veris ‘V’ logo are trademarks or registered trademarks of Veris Industries, L.L.C. in the USA and/or other countries.
Other companies’ trademarks are hereby acknowledged to belong to their respective owners.
TM
PW Series Installation Guide
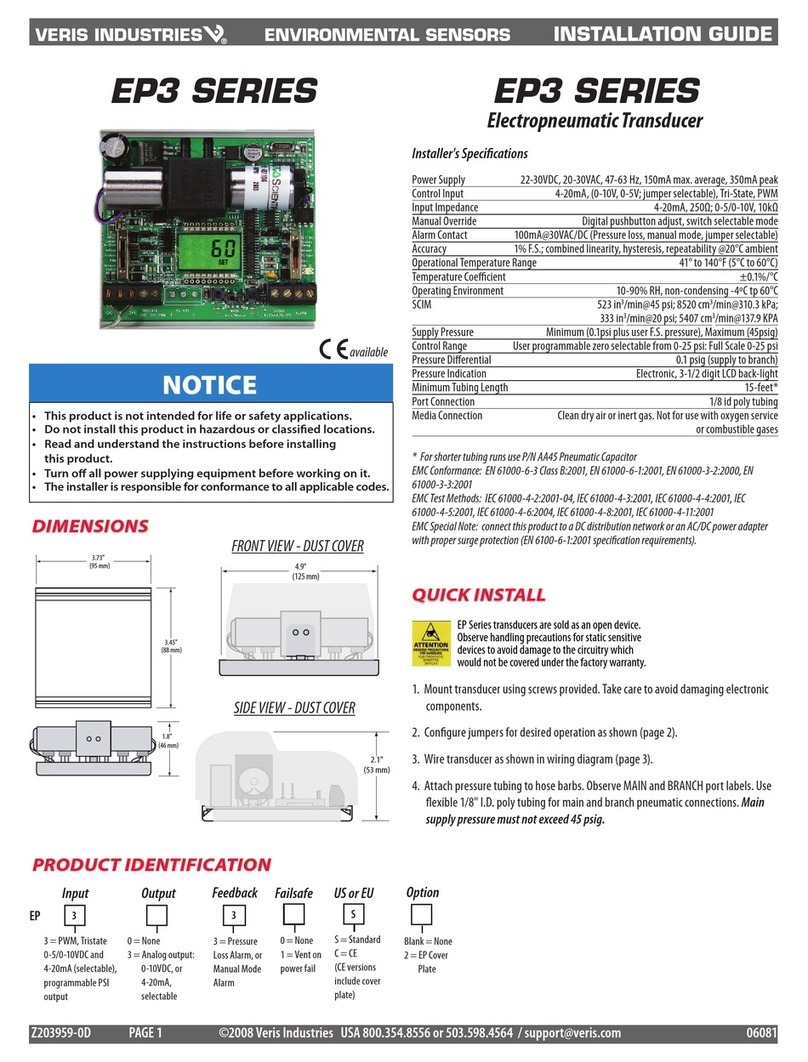
Installation Observe precautions for handling static sensitive
devices to avoid damage to the circuitry that
is not covered under the factory warranty.
1. Find a suitable mounting position near the location to be measured. Mount the PW housing using the self-tapping screws
provided.
2. Remove the lid from the housing to reveal the board. Wire the PW terminals to the power source and to the digital control
system as shown. Congure the jumpers for desired operating parameters. Replace the cover.
Model
-03
-04
-05
A
50
100
250
B
25
50
125
C
10
20
50
D
5
10
25
Range
Zero Button
Remote Zero
(Dry Contact)
Range
A
B
C
D
Low Sensors Hi
Power
Shield
Signal
Common
ON
OFF
mA
Volt
1 2 3 4 5 6 Status LED
DIP Switches
Num
1
2
3
4
5
6
Function
Damping
Test
Mode
Analog
Port
Voltage Out2
O/On1
Fast/Slow
Operate/Test
Normal/Bidirec.
Normal/Reverse
Normal/Swap
0 to 10 V/0 to 5 V
1. “O” position is the default setting for all DIP switches.
2. Ignored in mA mode.
POWER
DIGITAL CONTROL
Analog Input: 0 to 5 V/0 to 10 V
or 4 to 20 mA
Optional
Digital Output
POWER SOURCE
15 to 30 Vdc/24 Vac SIGNAL
COM
3. Connect tubing to the high and low ports on the PW.
WET DIFFERENTIAL PRESSURE
Low
Port
High
Port
PSID
PSIG
4. Connect the other ends of the tubing to a pipe or duct, across the pump, lter, or other pressure dierential.
Notes
During operation, the LCD shows two pressure values. The value adjacent to the PSID label shows the dierential pressure, while
the value adjacent to the PSIG label shows the high port gauge pressure. The gauge pressure value is read from the high port if DIP
switch #5 is in the Normal position. If this DIP switch is in the Port Swap position, the PSIG value is read from the low port, and the
value is usually a negative number.
This product uses a half-wave rectier power supply. If the installer is using a transformer to power the device, do not use the
same transformer to power other devices utilizing non-isolated full-wave power supplies.
Optional: Connect the Zero terminals to the digital output (contact closure) of the control system. The Zero input is for dry-contact
only. Do not apply voltage to the Zero terminals.
To use the auto zero function, press and hold the Zero button for two seconds or provide contact closure on the auxiliary ‘Remote
Zero’ terminal to reset the output to zero pressure. To protect the device from accidental zeroing, this feature is only enabled when
the detected pressure is within 5% of factory calibration.
Z202882-0X Page 4 of 4 ©2019 Veris Industries USA 800.354.8556 or +1.503.598.4564 / suppor[email protected] 1219
Alta Labs, Enercept, Enspector, Hawkeye, Trustat, Aerospond, Veris, and the Veris ‘V’ logo are trademarks or registered trademarks of Veris Industries, L.L.C. in the USA and/or other countries.
Other companies’ trademarks are hereby acknowledged to belong to their respective owners.
TM
PW Series Installation Guide
LED Blink Codes LED Color Status
Solid Green Normal operation.
Flashing Green Low > High; use port swap jumper or bidirectional mode.
Solid Red Dierential pressure is too high; select a higher pressure range.
Flashing Red Gauge pressure over sensor range; reduce line pressure or replace with a higher range device.
Alternating Green/Red Flash Sensor input is below sensor range.Verify that the sensor is connected correctly.
Commissioning
(PWxxxBP only)
1. Close C and D.
2. Open B (null).
3. Open D (bleed or purge).
4. Slowly open A to bleed air from line.
5. Close B, then fully open A.
6. Slowly open C to bleed air from line.
7. Close D, then fully open C.
BA
C
D
BA
C
D
BA
C
D
Valve positions: All closed
Valve positions: All open
Valve positions: Normal operation
1. Bleed or purge: see Commissioning step.
2. Equalize pressure: open B.
3. Isolate sensors: close A and C.
Maintenance
(PWxxxBP only)

This manual suits for next models

8

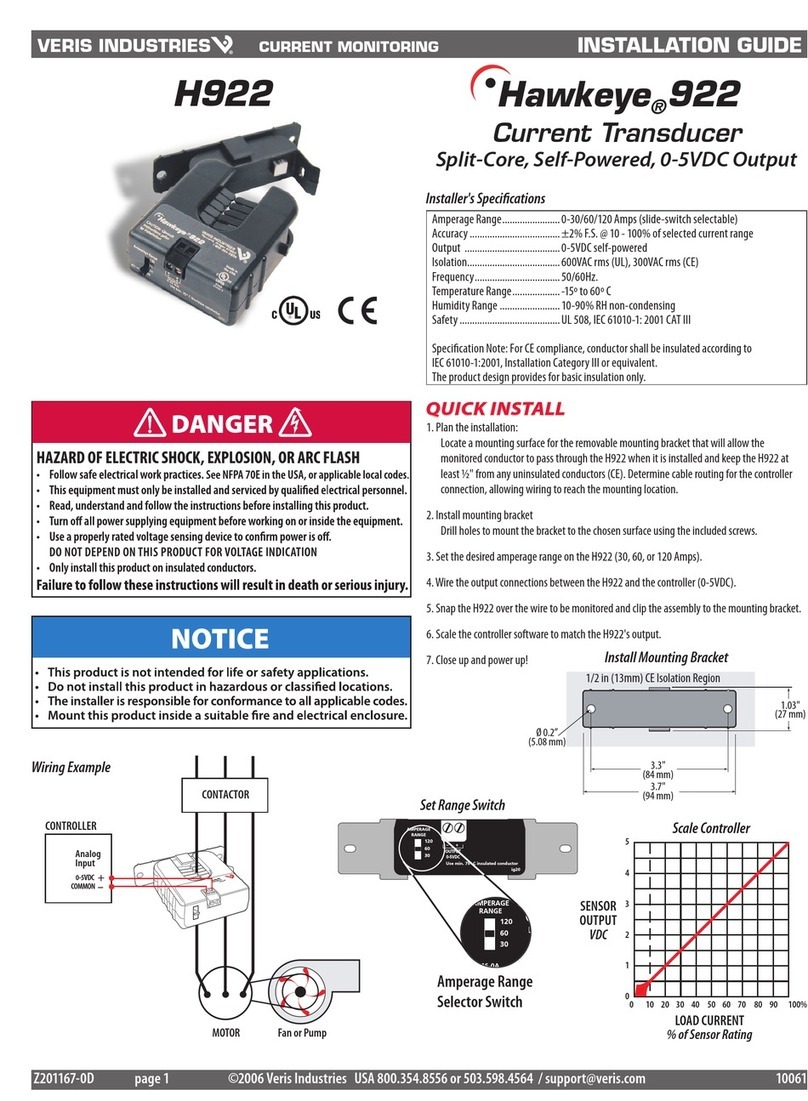
Other Veris Industries Transducer manuals

Veris Industries H622-20 User manual

Veris Industries

Veris Industries H622-20 User manual

Veris Industries PW2 Series User manual

Veris Industries

Veris Industries PW2 Series User manual

Veris Industries H623-10 User manual

Veris Industries

Veris Industries H623-10 User manual

Veris Industries Hawkeye 922 User manual

Veris Industries

Veris Industries Hawkeye 922 User manual

Veris Industries PWR Series User manual

Veris Industries

Veris Industries PWR Series User manual

Veris Industries Hawkeye H720 User manual

Veris Industries

Veris Industries Hawkeye H720 User manual

Veris Industries PW Series User manual

Veris Industries

Veris Industries PW Series User manual

Veris Industries ENERCEPT H8035 User manual

Veris Industries

Veris Industries ENERCEPT H8035 User manual

Veris Industries PWXN07C User manual

Veris Industries

Veris Industries PWXN07C User manual

Veris Industries PH Series User manual

Veris Industries

Veris Industries PH Series User manual

Veris Industries EP3 Series User manual

Veris Industries

Veris Industries EP3 Series User manual

Veris Industries PW Series User manual

Veris Industries

Veris Industries PW Series User manual

Popular Transducer manuals by other brands

Pulsar 3 instruction manual

Pulsar

Pulsar 3 instruction manual

Swagelok PTX user manual

Swagelok

Swagelok PTX user manual

novotechnik TIM Series user manual

novotechnik

novotechnik TIM Series user manual

Kele UCS-621 quick start guide

Kele

Kele UCS-621 quick start guide

GEM 3240 operating instructions

GEM

GEM 3240 operating instructions

Simrad 38-200 COMBI C -  REV D installation manual

Simrad

Simrad 38-200 COMBI C - REV D installation manual

HBM U9B operating manual

HBM

HBM U9B operating manual

Humminbird transducer manual

Humminbird

Humminbird transducer manual

Mianyang Weibo Electronic WBP314P75 user manual

Mianyang Weibo Electronic

Mianyang Weibo Electronic WBP314P75 user manual

S+S Regeltechnik THERMASGARD RGTM 2 Operating Instructions, Mounting & Installation

S+S Regeltechnik

S+S Regeltechnik THERMASGARD RGTM 2 Operating Instructions, Mounting & Installation

Ruskin AMS Series Assembly, installation and operation instructions

Ruskin

Ruskin AMS Series Assembly, installation and operation instructions

APAR AR250 User instruction

APAR

APAR AR250 User instruction

S+S Regeltechnik THERMASGARD RTM Series Operating Instructions, Mounting & Installation

S+S Regeltechnik

S+S Regeltechnik THERMASGARD RTM Series Operating Instructions, Mounting & Installation

Exodraft XTP150 manual

Exodraft

Exodraft XTP150 manual

gtm KTN-LF Series operating manual

gtm

gtm KTN-LF Series operating manual

B-K Medical Type 8553 user guide

B-K Medical

B-K Medical Type 8553 user guide

B-K Medical 8870 user guide

B-K Medical

B-K Medical 8870 user guide

Hervisa Perles VOLTO Series Operator's manual

Hervisa Perles

Hervisa Perles VOLTO Series Operator's manual

manuals.online logo
manuals.online logoBrands
  • About & Mission
  • Contact us
  • Privacy Policy
  • Terms and Conditions

Copyright 2025 Manuals.Online. All Rights Reserved.