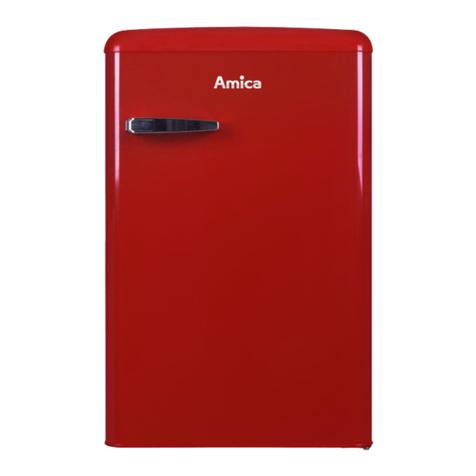
Amica GSN 324 020 Series User manual

Freezer / Gefrierschrank / Congélateur armoire /
Diepvrieskast
GSN 324 020* /
GSN 324 160*
IO-REF-0814/2
(09.2021)
OPERATING INSTRUCTIONS EN
GEBRAUCHSANWEISUNG DE
NOTICE D’UTILISATION FR
GEBRUIKSAANWIJZING NL


- 3 -
GUIDELINES CONCERNING THE SAFETY OF USE 8
INSTALLATION AND OPERATING CONDITIONS OF THE APPLIANCE 13
INSTALLATION BEFORE USING THE APPLIANCE FOR THE FIRST TIME 13
MINIMUM DISTANCES FROM THE HEAT SOURCES 13
MAINS CONNECTION 14
DISCONNECTING THE MAINS 14
CLIMATE RANGE 14
UNPACKING 15
DISPOSAL OF OLD APPLIANCE 16
CONTROLS 17
APPLIANCE CONTROLS 17
OPERATING YOUR FREEZER 17
OPERATION AND FUNCTIONS 20
STORAGE OF FOOD IN THE FRIDGE-FREEZER 20
FREEZING FOOD** 20
USING THE REFRIGERATOR EFFICIENTLY 22
PRACTICAL EVERYDAY TIPS 22
UNDERSTANDING THE STARS 22
PRACTICAL TIPS 23
FOOD THAT SHOULD NOT BE STORED IN A REFRIGERATOR 23
DEFROSTING, WASHING AND MAINTENANCE 24
DEFROSTING THE FRIDGE*** 24
DEFROSTING THE FREEZER** 24
DEFROST THE FREEZER CHAMBER FOLLOWING STEPS:** 25
AUTOMATIC FRIDGE DEFROSTING**** 25
WASHING THE FRIDGE AND FREEZER CHAMBERS MANUALLY**** 25
TAKING OUT AND PUTTING IN THE SHELVES***** 25
TAKING OUT AND PUTTING IN THE DOOR SHELF***** 25
TROUBLE-SHOOTING 26
WARRANTY AND AFTER SALES SERVICE 28
WARRANTY 28
EN- Table of contents

- 4 -
SICHERHEITSHINWEISE 30
INBETRIEBNAHME UND BETRIEBSBEDINGUNGEN DES GERÄTES 35
VORBEREITUNG FÜR DEN ERSTEN BERIEB 35
MINDESTABSTÄNDE ZU WÄRMEQUELLEN 35
ELEKTRISCHER ANSCHLUSS 36
GERÄT VOM STROMNETZ TRENNEN 36
KLIMAKLASSE 36
AUSPACKEN 37
ENTSORGUNG VON ALTGERÄTEN 38
STEUERUNG 39
STEUERUNG DES GERÄTES 39
BEDIENEN DES GEFRIERTEILS 39
BEDIENUNG UND FUNKTIONEN 42
AUFBEWAHREN DER LEBENSMITTEL IM KÜHL- UND GEFRIERRAUM 42
TIEFKÜHLUNG DER LEBENSMITTEL** 42
ENERGIESPARENDE NUTZUNG DES KÜHLSCHRANKS 44
PRAKTISCHE RATSCHLÄGE 44
WAS BEDEUTEN DIE STERNE? 44
ZONEN IM KÜHLSCHRANK 45
PRODUKTE, DIE NICHT IM KÜHLSCHRANK AUFBEWAHRT WERDEN SOLLTEN. 45
ABTAUEN, REINIGEN UND PFLEGEN 46
ABTAUEN DES KÜHLRAUMES*** 46
ABTAUEN DES GEFRIERRAUMES** 46
ABTAUENDES GEFRIERRAUMES:** 47
AUTOMATISCHE ABTAUUNG DES KÜHLRAUMES**** 47
AUTOMATISCHE ABTAUUNG DES GEFRIERRAUMES**** 47
REINIGEN DES KÜHL- UND GEFRIERRAUMES**** 47
EINBAU UND AUSBAU DER ABSTELLPLATTEN ***** 47
EINBAU UND AUSBAU DER TÜRFÄCHER ***** 47
LOKALISIERUNG VON STÖRUNGEN 48
GARANTIE, NACHVERKAUF-SERVICE 50
GARANTIE 50
DE- Inhaltsverzeichnis

- 5 -
CONSIGNES DE SECURITÉ D’UTILISATION 52
INSTALLATION ET CONDITIONS DE FONCTIONNEMENT DE L’APPAREIL 57
INSTALLATION AVANT LA PREMIÈRE MISE EN MARCHE 57
LES DISTANCES MINIMUMS DES SOURCES DE CHAUFFAGE 57
RACCORDEMENT AU RÉSEAU ÉLECTRIQUE 58
MISE HORS CIRCUIT 58
CLASSE CLIMATIQUE 58
DÉBALLAGE 59
ÉLIMINATION DES APPAREILS USAGÉS 60
COMMANDE 61
COMMANDE DE L’APPAREIL 61
UTILISATION DU CONGÉLATEUR 61
UTILISATION ET FONCTIONS 64
CONSERVATION DES DENRÉES DANS LE RÉFRIGÉRATEUR 64
CONGÉLATION DES PRODUITS** 64
COMMENT EXPLOITER LE REFRIGERATEUR DE FAÇON ECONOMIQUE? 66
CONSEILS PRATIQUES 66
QUE VEULENT DIRE LES ÉTOILES? 66
ZONES DE STOCKAGE DANS LE RÉFRIGÉRATEUR 67
PRODUITS QUI NE DEVRAIENT PAS ÊTRE STOCKÉS DANS LE RÉFRIGÉRATEUR 67
DÉGIVRAGE, NETTOYAGE ET CONSERVATION 68
DÉGIVRAGE DU RÉFRIGÉRATEUR*** 68
DÉGIVRAGE DU CONGÉLATEUR** 68
MODE OPÉRATOIRE POUR LE DÉGIVRAGE DU COFFRE DU CONGÉLATEUR:** 69
DÉGIVRAGE AUTOMATIQUE DU RÉFRIGÉRATEUR**** 69
DÉGIVRAGE AUTOMATIQUE DU CONGÉLATEUR**** 69
LAVAGE À MAIN DU COMPARTIMENT RÉFRIG ÉRATEUR ET CONGÉLATEUR**** 69
ENLÈVEMENT ET MISE EN PLACE DES CLAYETTES ***** 69
ENLÈVEMENT ET MISE EN PLACE DU BALCONNET ***** 69
LOCALISATION DES PANNES 70
GARANTIE, SERVICE APRÈS-VENTE 72
GARANTIE 72
FR- Table des matières

- 6 -
AANWIJZINGEN BETREFFENDE VEILIGHEID VAN GEBRUIK 74
INSTALLATIE EN WERKOMSTANDIGHEDEN VAN HET APPARAAT 79
INSTALLATIE VOOR DE EERSTE INGEBRUIKNAME 79
MINIMALE AFSTANDEN VAN WARMTEBRONNEN 79
AANSLUITEN OP HET ELECTRICITEITSNET 80
UITSCHAKELEN 80
KLIMAATKLASSE 80
UITPAKKEN 81
VERWIJDERING VAN GEBRUIKTE APPARATUUR 82
BEDIENING 83
BEDIENING VAN HET APPARAAT 83
BEDIENING VAN UW VRIEZER 83
BEDIENING EN FUNCTIES 86
HET BEWAREN VAN PRODUCTEN IN DE KOELKAST 86
HET INVRIEZEN VAN PRODUCTEN** 86
HOE KAN DE KOELKAST ECONOMISCH GEBRUIKT WORDEN? 88
PRAKTISCHE TIPS 88
WAT BETEKENEN DE STERRETJES? 88
ZONES IN DE KOELKAST 89
LEVENSMIDDELEN DIE NIET IN DE KOELKAST BEWAARD MOGEN WORDEN 89
ONTDOOIEN, WASSEN EN ONDERHOUD 90
ONTDOOIEN VAN DE KOELKAST*** 90
ONTDOOIEN VAN DE DIEPVRIEZER** 90
OM DE VRIESRUIMTE TE ONTDOOIEN HANDELT U ALS VOLGT:** 91
AUTOMATISCH ONTDOOIEN VAN DE KOELKAST**** 91
AUTOMATISCH ONTDOOIEN VAN DE DIEPVRIEZER**** 91
HANDWASSEN VAN DE KOELKAST EN DIEPVRIEZER**** 91
UITHALEN EN INZETTEN VAN DE LEGPLATEAUS***** 91
PLAATSEN EN VERPLAATSEN VAN DE OPBERGVAK***** 91
STORINGEN VINDEN EN VERHELPEN 92
GARANTIE, SERVICE 94
GARANTIE 94
NL- Inhoudsopgave

- 7 -
Dear customer,
From now on, your daily housework will be easier
than ever before. Your appliance is excepon-
ally easy to use and extremely ecient. Aer reading
these Operang Instrucons, operang the appliance
will be easy.
Before being packaged and leaving the manufacturer,
the appliance was thoroughly checked with regard to
safety and funconality.
Before using the appliance, please carefully read
these Operang Instrucons. By following these
instrucons carefully you will be able to avoid any
problems in using the appliance. It is important to
keep these Operang Instrucons and store them in a
safe place so that they can be consulted at any me.
Follow these instrucons carefully in order to avoid
possible accidents.
Sincerely,

- 8 -
GUIDELINES CONCERNING
THE SAFETY OF USE
• The appliance is intended for household use only.
• The manufacturer reserves the right to introduce
changes which do not aect the operation of the ap-
pliance.
• Some provisions in this user manual are unied for
refrigerating products of dierent types (for a refrig-
erator, refrigerator-freezer or freezer)
• The Manufacturer shall not be held liable for damage
arising from the failure to observe the instructions
contained in this manual.
• Keep this manual for future reference, or to pass it
over to the next user.
• This appliance is not intended for use by persons (in-
cluding children) with limited physical or mental ca-
pabilities and persons who lack experience or famili-
arity with the appliance.
• Do not allow children to use the appliance. Do not
allow them to play with the appliance. They must not
climb inside the drawers and swing on the doors.
• The appliance operates properly at the ambient tem-
perature (see product che). Do not use it in the cel-
lar, unheated summer cottage during autumn and
winter.
• When placing, moving, lifting the appliance, do not
hold the door handles, do not pull the condenser at
the rear part of the refrigerator and do not touch the
compressor unit.
• When transporting, moving or positioning the
fridge-freezer do not tilt it by more than 40° from
the vertical position. Should such a situation occur,
the appliance should be switched on after minimum
2 hours from its replacement in the right position
(g.2).
• Pull the plug out from the mains socket before each

- 9 -
maintenance activity. Do not pull on the cord, but
hold the body of the plug instead.
• The “cracking” sound, which the appliance may emit
is caused by the expansion and contraction of parts
as a result of temperature variations.
• For safety reasons do not repair the appliance your-
self. Repairs carried out by persons who do not have
the required qualications may result in serious dan-
ger for the user of the appliance.
• Air the room in which the appliance is placed for a few
minutes (the size of the room for a product contain-
ing isobuthane/R600a must be at least 4m3) to avoid
damage to the cooling system.
• Do not refreeze partly thawed products.
• Do not store beverages in bottles and cans, especially
carbonated beverages, in the freezer chamber. The
cans and the bottles may explode.
• Do not put frozen products, taken out directly from
the freezer (lollies, ice cubes, etc.) into your mouth,
their low temperature may cause severe frostbite.
• Make sure you do not damage the cooling system,
by puncturing the refrigerant pipes in the evaporator
or breaking the pipes. The refrigerant is ammable.
If the refrigerant makes contact with the eyes, rinse
them with clean water and call for medical assistance
immediately.
• If the power wire gets broken, it should be replaced
with a new one in a specialist repair shop.
• This appliance is intended for food storage, do not
use it for other purposes.
• When performing activities, such as cleaning, main-
tenance or moving, the appliance must be completely
disconnected from power supply (by pulling the plug
out from the socket)
• This appliance can be used by children aged 8 years
and older or by persons with physical, mental or sen-
sory handicaps, or by those who are inexperienced
or unfamiliar with the appliance, provided they are
- 10 -
supervised or have been instructed how to safely use
the appliance and are familiar with risks associated
with the use of the appliance. Ensure that children
do not play with the appliance. Cleaning and main-
tenance of the appliance should not be performed by
children unless they are 8 years or older and are su-
pervised by a competent person.
• WARNING: Do not use mechanical devices or oth-
er means to accelerate the defrosting process, other
than those recommended by the manufacturer.
• WARNING: Do not use electrical appliances inside the
food storage compartments of the appliance, unless
they are of the type recommended by the manufac-
turer.
• If the socket does not match the refrigerator plug,
it must be replaced by the manufacturer, its service
agent or similar qualied persons in order to avoid a
hazard.
• In order to obtain more space in the freezer, you can
remove the drawers and place the food directly on the
shelves. This has no eect on the product mechanical
properties and cooling performance. Declared freezer
capacity was calculated with the drawers removed.
WARNING: Risk of re / ammable
materials
• Children aged from 3 to 8 years are allowed to load
and unload refrigerating appliances.
• WARNING: When positioning the appliance, ensure
the supply cord is not trapped or damaged.
To avoid contamination of food, please respect the fol-
lowing instructions:
• Opening the door for long periods can cause a sig-
nicant increase of the temperature in the compart-
ments of the appliance.
• Clean regularly surfaces that can come in contact
with food and accessible drainage systems.

- 11 -
• Store raw meat and sh in suitable containers in the
refrigerator, so that it is not in contact with or drip
onto other food.
• Two-star frozen-food compartments are suitable for
storing pre-frozen food, storing or making ice-cream
and making ice cubes.
• One-, two- and three-star compartments are not
suitable for the freezing of fresh food
Compartments
TYPE
Target storage
temp.[OC] Appropriate food
1 Fridge +2≤+8
Eggs, cooked food, packaged food, fruits and
vegetables, dairy products, cakes, drinks and
other foods are not suitable for freezing.
2Freezer
!
≤-18
Seafood (sh, shrimp, shellsh), freshwater
aquatic products and meat products
(recommended for 3 months, the longer the
storage time, the worse the taste and nutrition),
suitable for frozen fresh food.
3Freezer
@
≤-18
Seafood (sh, shrimp, shellsh), freshwater
aquatic products and meat products
(recommended for 3 months, the longer the
storage time, the worse the taste and nutrition),
are not suitable for frozen fresh food.
4Freezer
#
≤-12
Seafood (sh, shrimp, shellsh), freshwater
aquatic products and meat products
(recommended for 2 months, the longer the
storage time, the worse the taste and nutrition),
are not suitable for frozen fresh food
5Freezer
$
≤-6
Seafood (sh, shrimp, shellsh), freshwater
aquatic products and meat products
(recommended for 1 months, the longer the
storage time, the worse the taste and nutrition),
are not suitable for frozen fresh food.
60- star
compartment -6≤0
Fresh pork, beef, sh, chicken, some packaged
processed foods, etc. (Recommended to eat
within the same day, preferably no more than
3 days). Partially encapsulated processed foods
(non-freezable foods)

- 12 -
7 Chill 2≤+3
Fresh/frozen pork, beef, chicken, freshwater
aquatic products, etc.(7 days below 0OC and above
0OC is recommended for consumption within that
day, preferably no more than 2 days). Seafood
(less than 0 for 15 days, it is not recommended to
store above 0OC)
8 Fresh Food 0≤+4
Fresh pork, beef, sh, chicken, cooked food,
etc. (Recommended to eat within the same day,
preferably no more than 3 days)
9 Wine +5≤+20 red wine,white wine,sparkling wine etc.
• Note: please store dierent foods according to the
compartments or target storage temperature of your
purchased products.
• If the refrigerating appliance is left empty for long
periods, switch o, defrost, clean, dry, and leave the
door open to prevent mould developing within the
appliance.
• Water dispenser cleaning (special for water dispenser
products): Clean water tanks if they have not been
used for 48 h; ush the water system connected to a
water supply if water has not been drawn for 5 days.
• Pursuant to Commission Regulation (EU) 2019/2019,
the minimum availability period for spare parts nec-
essary to repair the appliance is 7 or 10 years de-
pending on the type and purpose of the spare part.
• The list of spare parts and the ordering procedure
are available on the websites of the manufacturer,
importer or an authorized representative.
• For more information about the product, please refer
to the EU EPREL Product Database at https://eprel.
ec.europa.eu. For more information, please use your
mobile device to scan the QR code on the energy la-
bel or enter the product model listed on the energy
label in the EPREL search engine https://eprel.ec.eu-
ropa.eu/

- 13 -
INSTALLATION AND OPER-
ATING CONDITIONS OF THE
APPLIANCE
This refrigeration appliance is not intended for use as a built-in appliance.
Installation before using the appliance for the rst time
• Take the product out of the package, remove the scotch tape protect-
ing the door and the equipment. Any remaining adhesive stains may
be removed with a mild washing agent.
• Do not throw away the polystyrene elements of the packaging. If it is
necessary to transport the fridge-freezer, pack it in the polystyrene
elements and lm as well as protect ing it with scotch tape
• Clean the interior surface of the fridge- freezer and the elements of
the equipment with a washing agent dissolved in lukewarm water,
then wipe it dry.
• Place the fridge-freezer on an even, at and stable surface, in dry,
aired and shaded room, far from the heat sources such as: oven,
hob, central heating radiators, central heating pipes, hot water in-
stallation, etc.
• On the exterior surface of the product may be a protective foil, this
foils should be removed.
• Make sure the appliance is placed in a horizontal position by screwing
in the 2 adjustable front legs (g. 3)
• To ensure that the door opens freely, the distance between the side
of the appliance (on door hinges side) and the wall is shown on gure
5.*
• Ensure adequate ventilation of the room and free air circulation from
all sides of the appliance (g. 6).*
Minimum distances from the heat sources
• from the electric gas and other ovens - 30 mm,
• from oil or coal red ovens - 300 mm,
• from built-in ovens - 50 mm
If there is no possibility of ensuring the above- mentioned distances,
provide an appropriate insulation board.
Warning:
• The rear wall of the refrigerator, in particular, the condenser and oth-
er elements of the cooling system must not contact other elements,
which may damage them, (e.g. central heating pipes and the water
supply pipes).
• It is forbidden to readjust or modify any parts of the unit. It is crucial
not to damage the capillary tube visible in the compressor recess.
The tube may not be bent, straightened or wound.
• If the capillary tube is damaged by the user the guarantee will be
void (g. 8).
• In some models the handle is put into the appliance, You should
screw it with Your own screwdriver,

- 14 -
Mains connection
• Prior to connection, it is recommended to set the temperature control
knob to an „OFF” or other position that disconnects the appliance
from the power supply (See page with the control description).
• This appliance should be connected to AC 220-240V 50Hz supply
socket. The socket must be tted properly, and must be supplied with
an earthing conduit and a 10A fuse.
• It is a legal requirement that the appliance is properly earthed. The
manufacturer will not be held liable for any damage or injury which
may result from the failure to full this requirement.
• Do not use adapters, multiple sockets and two-wire extension leads.
If it is necessary to use the extension lead, it must be equipped with
a protection ring and a single socket and must have a VDE/GS safety
certicate.
• If an extension lead is used (with a protection ring and safety certif-
icate), its socket must be located at a safe distance, away from the
sinks, and must not be in a place where it could be ooded by water
or waste water.
• See the type plate at the lower part of the internal wall of the appli-
ance for detailed specications**.
Disconnecting the mains
Make sure the appliance can be easily disconnected from the mains,
either by pulling the plug out of the mains socket, or by switching the
two-pole switch o (g. 9).
Climate range
The information about the climate range of the appliance is provided
on the rated plate. It indicates at which ambient temperature (that is,
room temperature, in which the appliance is working) the operation of
the appliance is optimal (proper).
Climate class Allowable ambient temperature
SN Extended Temperate
This refrigeration appliance is intended for use
at an ambient temperature ranging between
10°C and 32°C
N Temperate
This refrigeration appliance is intended for use
at an ambient temperature ranging between
16 °C and 32°C
ST Subtropical
This refrigeration appliance is intended for use
at an ambient temperature ranging between
16 °C and 38 °C
T Tropical
This refrigeration appliance is intended for use
at an ambient temperature ranging between
16 °C and 43 °C
* Only free-standing appliances
** According to the model

- 15 -
UNPACKING
During transportation, protective
packaging was used to protect the
appliance against any damage. Af-
ter unpacking, please dispose of all
elements of packaging in a way that
will not cause damage to the environ-
ment.
All materials used for packaging the appliance are
environmentally friendly; they are 100% recyclable
and are marked with the appropriate symbol.
Important! Packaging materials (bags, polyethyl-
ene, polystyrene, etc.) should be kept away from
children during unpacking.

- 16 -
DISPOSAL OF OLD
APPLIANCE
In accordance with European Directive
2012/19/EU and local legislation re-
garding used electrical and electronic
goods, this appliance is marked with
the symbol of the crossed-out waste
container. This marking indicates that
the appliance must not be disposed
of together with other household waste after it has
been used.
The user is obliged to hand it over to waste collec-
tion centre collecting used electrical and electron-
ic goods. The collectors, including local collection
points, shops and local authority departments pro-
vide recycling schemes.
Proper handling of used electrical and electronic
goods helps avoid environmental and health haz-
ards resulting from the presence of dangerous com-
ponents and the inappropriate storage and process-
ing of such goods.

- 17 -
CONTROLS
Appliance controls
The control panel is shown in gure 10. For reference it is also shown
below:
Using the Control Panel
1. Freezer temperature set button
2. Super freeze symbol (Super freeze LED)
3. Alarm symbol (Alarm LED)
4. Freezer adjusted temperature indicator
Operating your Freezer
Freezer Temperature Set Button: This button allows setting temperature
of the freezer. In order to set values for freezer partition, press this but-
ton. Use this button also to activate super freeze mode.
Alarm symbol (Alarm LED): In case of a problem within the freezer, the
alarm led will release red light.
Super Freezer Mode
When Would It Be Used?
• To freeze huge quantities of food.
• To freeze fast food.
• To freeze food quickly.
• To store seasonal food for a long time.
How To Use?
• Press temperature set button until super freezing light comes on.
• Super freezing led will light during this mode.
• Maximum amount of fresh food (in kilograms) to be frozen within 24
hours is shown on the appliance label.
• For optimal appliance performance in maximum freezer capacity, set
the appliance to active super freeze mode 24 hours before you put
the fresh food into the freezer.

- 18 -
During This Mode:
If you press temperature set button, the mode will be cancelled and the
setting will be restored from -16.
Super freeze mode will automatically cancel after 24 hours, depending
on the environmental temperature or when the freezer sensor reaches a
suciently low temperature.
Freezer Temperature Settings
• The initial temperature of the setting display is -18 °C.
• Press freezer setting button once.
• Every time you press the button, the setting temperature will de-
crease. (-16 °C, -18 °C, -20 °C,.. super freezing)
• If you press freezer setting button until super freezer symbol is dis-
played on freezer.
• Settings display and you do not press any button within the following
3 seconds, super freezing will blink.
• If you keep on pressing, it will restart from last value.
Recommended Temperature Values for Freezer
When to adjust Inner Temperature
For minimum freezing capacity -16OC, -18OC
In normal usage -18OC, -20OC, -22OC
For maximum freezing capacity -24OC
Stand-By Mode
How To Activate ?
Set “2” set value and push set button until all leds are blink three times.
How It Works?
In stand-by mode; all components will be disabled. If user push set but-
ton while in stand-by mode, all leds will blink three times to show stand-
by mode is active.
How To Deactivate?
Push and hold set button until display returns to normal working. After
mode deactivated, display may shows “Sr” because of refrigerator is
warm. When refrigerator reaches normal temperature, “Sr” will be dis-
appear.
Door Open Alarm Function
If freezer door is opened more than 2 minutes, appliance sounds ‘beep
beep’.
Temperature Adjustment Warnings
• It is not recommended that you operate your freezer in environments
colder than 10°C in terms of its eciency.
• Do not start another adjustment while you are already making an
adjustment.
• Temperature adjustments should be made according to the frequen-
cy of door openings, the quantity of food kept inside the freezer and
the ambient temperature in the location of your freezer.

- 19 -
• In order to allow your freezer to reach the operating temperature
after being connected to mains, do not open the door frequently or
place large quantities of food in the freezer. Please note that, de-
pending on the ambient temperature, it may take 24 hours for your
freezer to reach the operating temperature.
• A 5 minute delay function is applied to prevent damage to the com-
pressor of your freezer when connecting or disconnecting to mains,
or when an energy breakdown occurs. Your freezer will begin to op-
erate normally after 5 minutes.
Important installation instructions
This appliance is designed to work in dicult climate conditions (up to
43 degrees C or 110 degrees F) and is powered with ‘Freezer Shield’
technology which ensures that the frozen food in the freezer will not de-
frost even if the ambient temperature falls as low as -15 °C. So you may
then install your appliance in an unheated room without having to worry
about frozen food in the freezer being spoilt. When the ambient temper-
ature returns to normal, you may continue using the appliance as usual.

- 20 -
OPERATION AND FUNCTIONS
Storage of food in the fridge-freezer
• The products should be placed on plates, in containers or packed in
food wrap. Distribute them evenly over the shelves.
• If the food contacts the rear wall, it may cause frosting or wetting of
the products.
• Do not put dishes with hot food into the fridge
• Products which absorb avours easily such as butter, milk, white
cheese and products with intense avour, such as sh, smoked meat,
hard cheese must be placed on shelves, packed in food wrap or in
tightly sealed containers.
• The storage of vegetables containing signicant quantities of water
will cause the deposition of condensation on the vegetable contain-
ers, it does not impact on the proper functioning of the fridge.
• Before putting the vegetables into the fridge, dry them well.
• Excessive moisture shortens the shelf life of vegetables, especially
the leafed vegetables.
• Do not wash the vegetables before storing in the refrigerator. Wash-
ing removes the natural protection, therefore it is better to wash the
vegetables directly before consumption.
• It is recommended to place the products in freezer drawers 1, 2, 3*
up to natural loading capacity (Fig. 11a / 11b).**
1. Packed products
2. Shelf
3. Natural loading capacity
4.
!
• Stacking of products on the freezer shelves is acceptable.*
• It is acceptable to place products beyond the natural loading capacity
by 20-30 mm.**
• In order to increase the loading capacity of the freezer chamber and
allow the stacking of products on the freezer evaporator wire shelves
up to maximum height it is possible to remove drawers 1 and 2.*
Freezing food**
• Practically all the food products, except for vegetables consumed
raw, such as lettuce can be frozen.
• Only food products of the highest quality, divided into small portions
for single use, should be frozen.
• Products should be packed in materials that are odourless, resistant
to air and moisture penetration, and not susceptible to fat. Plastic
bags, polyethylene and aluminium sheets are the best wrapping ma-
terials.
• The packaging should be tight and should stick to the frozen prod-
ucts. Do not use glass containers.
• Keep fresh and warm foodstu at ambient temperature away from
the products, which have already been frozen.
• We advise you not to place more of fresh food at a time to the freezer
per day (see table witch technical specication).
This manual suits for next models
3
Table of contents
Languages:
Other Amica Freezer manuals

Amica
Amica FZ2916.3DFX User manual

Amica
Amica BZ2263 User manual

Amica
Amica FZ096.4 User manual

Amica
Amica FZ206.4E User manual

Amica
Amica FZ042.4AA User manual

Amica
Amica FZ208.3AA(E) User manual

Amica
Amica DT 374 166 Series User manual

Amica
Amica AB6201 User manual

Amica
Amica FK2623F Quick start guide

Amica
Amica FZ206.3 AA User manual

Amica
Amica GSN 324 150 W User manual

Amica
Amica FZ292FSW User manual

Amica
Amica GSN 327 010 E User manual

Amica
Amica FS098.3 User manual

Amica
Amica FZ041.3 User manual

Amica
Amica GS 324 100 W User manual

Amica
Amica VT 862 AL User manual

Amica
Amica GS 321 100 W User manual

Amica
Amica GS15440Si User manual

Amica
Amica GT 311 100 W User manual