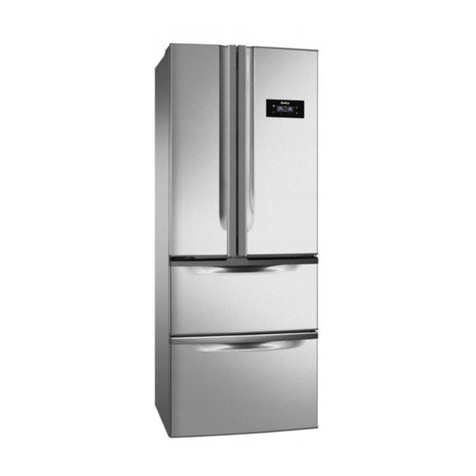
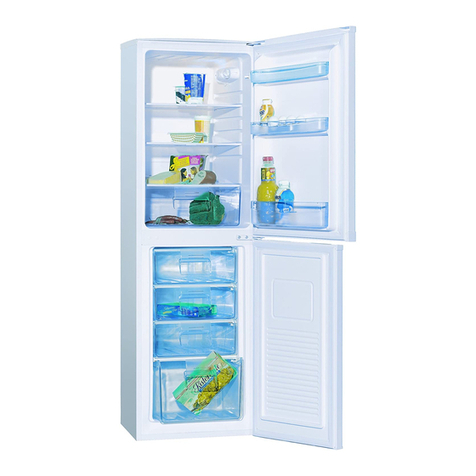
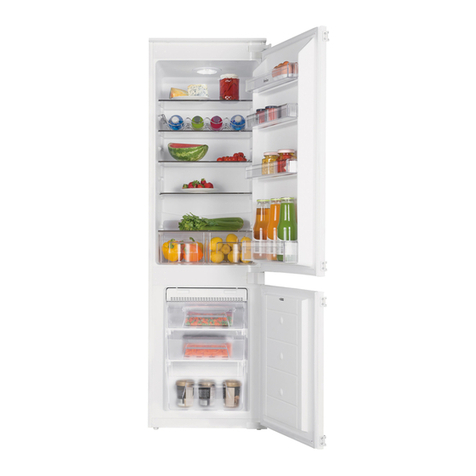
Amica FK350HSW? FK350HSX? FK320HSW? FK320HSX User manual

FK350HSW
FK350HSX
FK320HSW
FK320HSX
OPERATING MANUAL
FRIDGE FREEZER

2
Note!
This fridge-freezer is intended for use at home only.
The manufacturer reserves the right to introduce modications, which do not affect the
operation of the appliance. The changes in the equipment, as well as the inside and
outside decoration, which do not affect its functionality and safety are permissible.
GENERAL INFORMATION,
This Amica fridge freezer is a combination of exceptional user-friendliness and excellent efciency.
Prior to dispatch, each unit was carefully checked for its safety and operating capabilities.
Before starting the appliance, please read this operating manual carefully.
GENERAL INFORMATION

3
TABLE OF CONTENTS
Introduction
Installation
Operation and
functions
Clearing
Environmental
protection
Specication
Construction and equipment of the appliance.............................................4
Guidelines concerning the safety of use......................................................8
Installation and operating conditions of the appliance...............................10
Change in the door hinging.......................................................................12
Description of the appliance......................................................................14
Storage of frozen products........................................................................18
Defrosting, washing and maintenance......................................................20
Trouble-shooting.......................................................................................22
Ozone layer protection..............................................................................24
Packaging.................................................................................................24
Disposal of the equipment.........................................................................24
Specication..............................................................................................25

4
Construction and equipment of the appliance
Example: model FK350HSW-02AW
Additional equipment
21 22 23 24
1
2
3
4
5
6
7
8
9
10
11
12
13
14
15
16
17
18
19
20

5
Construction and equipment of the appliance
1- Control panel
2- Fridge fan
3- Glass Shelf
4- Folded bottle holder
5- Fresh zone container
6- Glass shelf above the vegetable compartment
7- Vegetable compartment
8- Small drawer (freezer)
9- Medium drawer (freezer)
10- Quick freezing tray
11- Large drawer (freezer)
12- Water discharge
13-Reecting element
14- Door shelf lid
15- Tilt door shelf
16- Tilt door shelf frame
17- Medium door shelf
18- Large door shelf
19- Small door shelf
20- Pizza shelf
21- Egg tray
22- Bottle holder
23- Pusher
24- Separator
The accurate description of the equipment for the model of the fridge-freezer purchased
by you may be found in the tables on next pages.

6
EQUIPMENT
Items of equipment FK350HSW-
02AW
FK350HSX-
02AW
FK320H-
SW+02AW
FK320H-
SX+02AW
Equipment of the fridge
Glass Shelf 4 3
Glass shelf above the vegeta-
ble compartment
1 1
Fresh zone container 1 1
Vegetable compartment 1 1
Large door shelf 1 1
Small door shelf 1 1
Medium door shelf 1 1
Medium door compartment with
a lid
1 1
The bottom tilt part of the me-
dium door shelf with a lid
1 1
Folded bottle holder 1 1
Vegetable compartment sepa-
rator
1 1
Egg tray 2 2
Large door shelf holder 1 1
Lighting type B - incande-
scent bulb
B - incande-
scent bulb
Equipment of the freezer
Small drawer (freezer) 3 1
Medium drawer (freezer) 0 1
Quick freezing tray 1 1
Large drawer (freezer) 1 1
Pizza shelf 1 1

7
GUIDELINES CONCERNING THE SAFETY OF USE
lThe Manufacturer shall not be held
liable for the damage arising from
the failure to observe the principles
contained in this manual.
lKeep this manual for future re-
ference, or to pass it over to the
possible next user.
lThis appliance is not intended for
use by persons (including children)
with limited physical, sensual or
psychical capabilities and persons
who lack experience or familiarity
with the appliance, unless attended
or in accordance with the operating
manual for the appliance delivered by
persons responsible for their safety.
lDo not allow the unattended
children to use the appliance. Do
not allow them to play with the
appliance. They must climb insi-
de the drawers and swing on the
doors.
lThe fridge-freezer operates properly
at the SN-T ambient temperature
(see page 25). Do not use it in the
cellar, unheated summer cottage
during autumn and winter.
lWhen placing, moving, lifting the
appliance, do not hold the door han-
dles, pull the condenser at the rear
part of the refrigerator and touch the
compressor unit.
lWhen transporting, moving or
placing the fridge-freezer do not
tilt it by more than 40° from the
vertical position. Should such a
situation occur, the appliance may
be switched on after minimum 2
hours from its placement in the
right position (g.1).
1
lPull the plug out from the mains
socket before each maintenance
activity. Do not pull the cord, but hold
the body of the plug instead.
lThe cracking-like sound, which the
appliance may emit is caused by
expansion and shrinking of parts as a
result of temperature variations.
lFor safety reasons do not repair the
appliance on your own. Repairs car-
ried out by persons who do not have
required qualications may constitute
a serious hazard for the user of the
appliance.
max 40

8
GUIDELINES CONCERNING THE SAFETY OF USE
lMake sure you do not damage
the cooling system, by punching the
refrigerant pipes in the evaporator or
breaking the pipes. The refrigerant
splashes are ammable. Rinse the
eyes with clean water and call for
medical assistance immediately
in case of their contact with the
refrigerant.
lAir the room in which the appliance
is placed for a few minutes (the size
of the room for a product containing
isobuthane/R600a must be at least
4m3) in case of the damage of the
cooling system.
lDo not refreeze the partly thawed
products.
lDo not store beverages in bottles
and cans, especially the carbonated
beverages in the freezer chamber. The
cans and the bottles may explode.
lDo not put the frozen products,
taken out directly from the freezer
(lollies, ice cubes, etc.) into your
mouth, their low temperature may
cause severe frost-bites.

9
Installation before using the applian-
ce for the rst time
1.Take the product out of the package, re-
move the scotch tapes protecting the door
and the equipment. The possibly remaining
adhesive stains may be removed with a mild
washing agent.
2.Do not throw away the polystyrene ele-
ments of the packaging. In the case of the
necessity to transport the fridge-freezer,
pack it in the polystyrene elements and lm,
as well as protect it with a scotch tape.
3.Clean the interior surface of the fridge-
freezer and the elements of the equipment
with a washing agent dissolved in lukewarm
water, then wipe it dry.
4.Place the fridge-freezer on an even, at and
stable surface, in dry, aired and shadowy
room, far from the heat sources such as
an oven, cooktop, central heating radiator,
central heating pipe, hot water installation,
etc.
Minimal distances from the heat
sources
- from the electric gas and other
ovens - 30 mm,
- from oil or coal red ovens - 300
mm,
- from in-built ovens - 50 mm
If there is no possibility to ensure the above-
mentioned distances, provide an appropriate
insulation board.
INSTALLATION AND OPERATING CONDITIONS OF THE APPLIANCE
2
3
5.Make sure the appliance is placed in the
horizontal position by screwing in 2 adju-
stable front legs (g. 2)
The rear wall of the refrigerator, in
particular, the condenser and other
elements of the cooling system may
not contact other elements, which
may damage them, (e.g. central
heating pipe and the water supply
pipe).
6.In order to ensure easy opening of the
door, the distance between the side
wall of the appliance (from the side of
the door hinges), and the wall should
amount to: 100 mm.
7.Ensure adequate ventilation of the room
and free air circulation from all sides of
the appliance (g. 3).
min 30mm
min 30mm
1850-2000mm
Condenser

10
INSTALLATION AND OPERATING CONDITIONS OF THE APPLIANCE
It is prohibited to readjust or modify
any parts of the unit. It is crucial not
to damage the capillary tube visible
in the compressor recess. The tube
may not be bent, straightened and
wound.
If the capillary tube is damaged by
the user the guarantee will be void
(g. 4).
lThe data is provided on the rated plate
located at the bottom of the wall inside the
chamber.
Mains connection
lAfter the appliance is switched on by me-
ans of ”1” button, the freezer chamber
is rst to cool off. After the temperature
in the freezer chamber is reached, the
fridge chamber is switched on. The rst
switch on of the appliance requires the
temperature stabilisation period.
lThe appliance is intended for connection to
alternating current. The connection values
for voltage (V) and frequency (Hz) are given
on the nameplate in the cabinet.Power must
be connected via a wall socket with switch.
The wall socket should be easily accessible.
All earthing requirements stipulated by the
local electricity authority must be observed.
The cabinet plug and wall socket should
then give correct earthing. If in doubt,
contact your local supplier or an authorised
electrician.
4
5
capillary
tube
This appliance must be earthed
The flexible cord (mains lead)
tted to this appliance has three
cores for use with a 3-pin 13-amp
plug. If a BS 1363 (13-amp) fused
plug is used, it should be tted
with a 13-amp fuse.
Important
The cores in this mains lead are coloured
in accordance with the following code:
GREEN-AND-YELLOW: EARTH
BLUE: NEUTRAL
BROWN: LIVE
These colours might not correspond with
the colour markings identifying the termi-
nals in your plug.

11
1. Switch off the appliance using button "1".
2. Empty the appliance from the foodstuff.
3. Take out the 2 plugs of the fridge upper
blind (g. 6).
CHANGE OF THE DOOR HINGING
6
7
10
4. Take out the 2 plugs of the control panel
(g. 7).
5. Unscrew the upper hinge bolts, holding the
door of the fridge(g. 8).
8
7. Unscrew the upper hinge bolt and turn the
hinge pin down (g. 9).
9
8. Unscrew the middle hinge bolt (g. 10).
9. Remove the freezer door including the
bottom hinge lock and put it aside at a safe
place.
10. Ret the middle hinge plugs to the oppo-
site side (g. 11).
11
11. Ret the plug and fridge door lock to the
opposite side.
12. Tilt the fridge-freezer backwards at an an-
gle of 40°, to enable the access to the bottom
hinge.
13. Unscrew both adjusting legs.
6. Remove the fridge door including the
bottom hinge lock and put it aside at a safe
place.

12
16
12
18
15
14
17
CHANGE OF THE DOOR HINGING
15. Unscrew the bottom hinge pin and ret
it to the other side (g.13). Screw in the cup
tightly.
13
14. Unscrew 2 bottom hinge tting bolts using
the cross screwdriver (g. 12).
16. Screw the bottom hinge in on the opposi-
te side of the refrigerator (g.14).
17. Screw both adjusting legs in.
18. Ret the freezer door including its bottom
hinge lock and washer.
19. Holding the freezer door, screw the mid-
dle hinge in (g.15).
20. Ret the fridge door including the middle
hinge lock and washer, holding the fridge
door, screw the upper hinge in (g. 16).
21. Fit in the fridge door upper blind plugs
(g. 17).
22. Fit in the control panel upper blind plugs
(g. 18).
23. Switch the fridge-freezer on in accordan-
ce with the relevant items of the manual.

13
Control panel
Electronic control
OPERATION AND FUNCTIONS
12345678 91011
12 13 14 15
The fridge-freezer has been equipped with
electronic control. The control is located be-
hind the fridge door. The appliance has been
set by the manufacturer to operate in the opti-
mal temperature, that is, +5°C in the fridge
chamber and -18°C in the freezer chamber. If
the user intends to change the manufacturer
temperature settings, the new settings witll be
stored in the memory of the electronic control-
ler. In the case of the supply voltage decay,
the control maintains the last settings, which
will be taken into account when the appliance
is switched on again.
Electronic control functions
l(1) – on/off function of the fridge and the
freezer, operation is signalled by means of
the green control lamp
l(2) – preview of the temperature set in the
freezer
l(3) – super freezing, the blue control lamps
indicates that the function is switched on
l(4) – display of temperatures, alarm condi-
tion symbols of the freezer
l (5) – ”Holiday” function, the green control
lamp indicates that the function is on
l (6) – ”Fan” function, the yellow control lamp
indicates that the function is on
l (7) – ”Eco” function, the green control lamp
indicates that the function is on
l(8) - display of temperatures, alarm condi-
tion symbols of the fridge
l(9) - super refrigeration, the active function
is signalled by the blue control lamp
l(10) – preview of the temperature set in
the fridge
l(11) – the on/off function of the fridge, the
green control lamp signals the operation
l(12) – change in the temperature setting of
the freezer – decrease in the temperature
l(13) - change in the temperature setting of
the freezer – increase in the temperature
l(14) – change in the temperature setting of
the fridge – decrease in the temperature
l(15) - change in the temperature setting of
the fridge – increase in the temperature
Switching the appliance on and off
Switching the fridge and freezer (the who-
le appliance) on: press and hold the button
(1). The green colour lamp signals that the
appliance is switched on. Additionally, the
present temperature will appear on the di-
splays (4) – freezer temperature, (8) – fridge
temperature. Switching the fridge and freezer
(the whole appliance) off: press and hold the
button (1), the symbols ‘- - ‘ will appear on
the displays. It is possible to switch off the
fridge while maintaining the operation of the
freezer.

14
OPERATION AND FUNCTIONS
Switching off the fridge: during the operation
of the fridge-freezer, there is a possibility of
switching off only the fridge by means of but-
ton (11). The display of the fridge signals this
by means of the symbol ‘- -‘. Switching on the
fridge: by means of the button (11), the pre-
sent temperature of the fridge will appear on
the display.
Temperature adjustment
The temperature in the fridge may be set
within the range from +2°C to +9°C. The
presently set temperature shall be displayed
by pressing and holding button (10). Pressing
button (14) or (15) will allow the change in
the temperature settings in the fridge. The
temperature in the freezer may be set within
the range from -25°C to -16°C. The presently
set temperature shall be displayed by pres-
sing and holding button (2). Pressing button
(12) or (13) will allow the change in the tem-
perature settings in the freezer. A short sound
signal will be audible at each button pressing.
In the case of the failure of the power supply,
the controller will remember the recent set-
tings, which will be taken into account when
the power supply is provided again.
Temperature inside the fridge-freezer
The temperatures set and shown on the di-
splays are average fridge and freezer tem-
peratures. Do not change the temperature
setting in the fridge or the freezer just becau-
se it is hotter in summer. The increase in the
ambient temperature will be detected by the
sensors and the compressor will be started
automatically for a longer period of time in or-
der to maintain the set temperatures.
Super freezing
Super freezing is very important for keeping
the foodstuff fresh. The freezing function is
started by pressing and holding button (3).
The backlit blue lamp informs us that the
function is switched on. It is possible to select
between the 24- or 48 hour freezing:
- the quick freezing function for a period of 24
hours will be switched on by single pressing
and holding button (3). The display (4) will
show the number “24”.
- the quick freezing function for a pierod of
48 hours will be switched on by the double
pressing and holding button (3). The display
(4) will show the number ”48”.
- pressing button (3) once again will switch off
the super freezing function and control lamp
in button (3) will not be backlit. If the quick
freezing will not be switched off deliberately,
the function will be switched off automatically
after 24/48h. After pressing the button of the
super freezing function, the symbols “24” and
“48” are displayed for 5 seconds. Then, the
present temperature in the freezer will be di-
splayed. It is recommended to switch on the
super freezing function about two hours be-
fore lling the freezer in with large quantities
of foodstuff.
Minor temperature changes
The slight changes in temperature are perfec-
tly normal and may occur, for instance, when
the appliance is lled in with fresh products
or when the door is open for a longer period
of time. This will not affect the condition of
the stored foodstuff, and the temperature will
quickly return to its set value. The internal li-
ghting lamp will be lit, when the fridge door
are open. If the door still remains open, the
internal lighting lamp will be switched off after
about 3 min. The display will show the “dr”
symbol for alarm and the sound signal will be
switched on.

15
OPERATION AND FUNCTIONS
Super freezing function
Super freezing is very important for keeping
the foodstuff fresh. The freezing function is
started by pressing and holding button (10).
The backlit blue lamp informs us that the func-
tion is switched on. When button (10) is pres-
sed and held once again, the super freezing
function will be switched off and the blue dio-
de in the button will not be backlit. If the quick
freezing will not be switched off deliberately,
the function will be switched off automatically
after reaching the minimum temperature. It is
recommended to switch on the super freezing
function before lling the freezer in with a lar-
ger quantity of fresh food products.
Fan function
The fan at the operating fridge is not active.
It is switched on/off by means of button (6),
and the yellow lamp in button (6) informs us
the function is switched on. It is recommended
to switch on the fan function, which allows an
event temperature to be maintained at each
fridge levels. After the fan is switched on, it
operates in cycles, except for the situation
when the door is open.
Holiday function
The holiday function may be switched on/off
by means of button (5) and the green lamp in
button (5) informs us that the function is swit-
ched on. It is a minimum energy consump-
tion function necessary to cool the fridge. It
prevents the formation of bacterias and foul
odours. During the operation of this function,
the fridge operates in cycles. The function is
remembered after the power supply voltage
decay.
Recommendations:
- the function may be switched on for a pe-
riod of longer absence (a few days) at home,
provided that the fridge is emptied from food
products
- during the operation of this function do not
open the fridge door
After the holiday function is switched off deli-
berately, the last programmed setting is valid.
Eco function
The eco function may be switched on/off by
means of button (7) and the green lamp in but-
ton (7) informs us that the function is switched
on. It is the function of the optimal consump-
tion of energy necessary to cool off the fridge
and freezer. After the eco function is switched
off, the temperature returns to the required
temperatures. The function is remembered
after the power supply voltage decay.
Alarms
The normal use of the fridge-freezer may
cause a great number of various situations
leading to the failure of the function, resulting
in the disturbance of the stable operation of
the whole appliance. These states will be pre-
sented on the display by means of the alarm
symbols. In the case of the simultaneous oc-
currence of a few alarms, they will be display-
ed one after another. The alarms referring to
the fridge will be shown on the fridge display
(8), while the alarms referring to the freezer
will appear on the freezer display (4).
Alarm symbols
E1 – Failure of the fridge temperature sen-
sor.
E2 - Failure of the freezer temperature sen-
sor.
E3 - Failure of the no-frost evaporator tempe-
rature sensor.
HI – Too high temperature in the freezer in
relation to the setting

16
OPERATION AND FUNCTIONS
LO – Too low temperature in the freezer in
relation to the setting
dr – Open fridge door
E1, E2 and E3
The in-built emergency program maintains
the permissible temperature until the error or
failure is eliminated.
HI and LO
HI – hot
LO - cold
The temperature in the freezer is to high/low
for a period longer than two hours in compa-
rison with the temperature set.
dr
The fridge door is open for a period longer
than 3 min. The alarm code will disappear, if
the door is closed.
Alarm interruption
The alarm symbol and sound signal may al-
ways be interrupted by pressing any button.
Exception: E1, E2 and E3 – where the sym-
bol clearance on the display will be possible
just after the visit paid by an authorised
service technician.
Reecting element
Reecting element – an integral part of elec-
tronic control; it affects proper functioning of
the lighting system and the system informing
of door opening . (see: g. 19 and 19a)
19
It is forbidden to unglue the
reecting element.
Wash only with a sponge and
gentle detergents (e.g. washing-
up liquid)
19a

17
OPERATION AND FUNCTIONS
Storage of food in the fridge-freezer
Observe the following recommen-
dations to ensure the food remains
fresh.
lThe products kept in the Fresh zone
chamber remain fresh even three ti-
mes longer than the products stored
in standard conditions. They also ma-
intain all the nutritional values, taste,
avour and vitamins.
lThe temperature in the Fresh Zone
chamber is always lower than the one
in the fridge and is within the range
from "0°C to +3°C. Owing to the adequ-
ate temperature and air moisture, the
Fresh Zone chamber is an ideal place
for storage of meat, smoked meat, sh
and cheese.
lOwing to the fact that the interior of
the refrigerator is covered by a special
protective layer, the stored products
are protected from the development of
microorganisms, bacteria and mould.
Owing to this, we can enjoy the taste
and nutritional values of food for a lon-
ger period of time.
lThe products should be placed on plates
in containers or packed in food wrap. Di-
stribute them evenly all over the shelves.
lPay attention whether the food contacts
the rear wall, if so, it may cause frosting
or wetting of the products.
lDo not put dishes with hot content into
the fridge
l Products which take over foreign avours
easily such as butter, milk, white cheese
and products with intense avour, such as
sh, smoked meat, hard cheese must be
placed on shelves, packed in food wrap or
in tightly sealed containers.
Freezing food
lIt is allowed to place the food in the she-
lves (see g. 20).
20
l Storage of vegetables containing signicant
quantity of water will cause the deposition
of water steam on the vegetable containers,
it does not impact the proper functioning of
the fridge.
lBefore putting the vegetables into the fridge,
dry them well.
lExcessive moisture shortens the shelf life
of vegetables, especially the leafed vegeta-
bles.
lDo not wash the vegetables before storing
in the refrigerator. Washing removes the
natural protection, therefore it is better to
wash the vegetables directly before con-
sumption.
lPractically all the food products, except for
vegetables consumed raw, such as lettuce
can be frozen.
lOnly food products of the highest quality,
divided into small portions for single use,
should be frozen.
Bottom drawer
Grate shelf
15mm

18
OPERATION AND FUNCTIONS
The time of storage of the frozen products depends on their quality when fresh, before fre-
ezing and on the storage temperature.
The following storage periods are recommended when the temperature of -18°C or lower is
maintained:
Products Months
Beef 6-8
Veal 3-6
Giblets 1-2
Pork 3-6
Poultry 6-8
Eggs 3-6
Fish 3-6
Vegetables 10-12
Fruit 10-12
lIn order to maintain good quality of the
frozen food, reorganise the food that is in
the middle of the freezer, so that it does not
touch the products that are not frozen yet.
lIt is recommended to move the already
frozen products to one side and place the
fresh products that are to be frozen to the
opposite side, as close to the rear and side
walls as possible.
lBear in mind that the temperature in the
freezer is affected by several factors,
including the ambient temperature and
the quantities of food products in the
chamber, frequency of opening the door,
amount of frost in the freezer, and the
thermostat setting.
lIf you cannot open the freezer door
immediately after closing it, allow 1-2
minutes for negative pressure to com-
pensate, and retry opening the door.
lProducts should be packed in materials that
are odourless, resistant to air and moisture
penetration, and not susceptible to fat.
Plastic bags, polyethylene and aluminium
sheets are the best wrapping materials.
lThe packaging should be tight and should
stick to the frozen products. Do not use
glass containers.
lKeep the fresh and warm foodstuff at am-
bient temperature away from the products,
which have already been frozen.
lWe advise not to place more than 2 kg of
fresh food at a time to the freezer per day
(see table on page 24).

19
lThe appliance operates in cycles: it refri-
gerates (then the frost settles on the rear
wall), and defrosts (water ows down the
rear wall).
Disconnect the appliance from
the mains before cleaning by re-
moving the plug from the mains
socket or switching off the fuse.
Prevent water from penetrating the
control panel or the light.
lDo not use defrosting aerosols. They may
cause the formation of explosive mixture,
or contain slovents which may damage the
plastic components of the appliance and
even be harmful to health.
lMake sure the water used for cleaning
does not ow into the evaporation container
through the discharge opening.
lThe whole appliance, except for the door
gasket must be cleaned with a mild cleaning
detergent. The door gasket should be cle-
aned with water and wiped dry.
lWash all the accessories (vegetable con-
tainers, door shelves, glass shelves, etc.).
Automatic fridge defrosting
The fridge chamber has been equipped with
the automatic defrosting function. However,
frost may settle on the rear wall of the fridge
chamber. This happens usually, when large
quantities of fresh food products are stored in
the fridge.
Automatic fridge defrosting
The freezer chamber has been equipped with
the automatic defrosting function (no-frost).
The food is frozen in the cooled circulation air,
and the moisture from the freezer chamber
is discharged outside. As a result, no ice and
frost is produced in the freezer and the pro-
ducts do not freeze on each other.
Washing the fridge and freezer chambers
manually
It is recommended to wash the fridge and
freezer chambers at least once a year. This
prevents the formation of bacteria and foul
odours. Switch the appliance, using button
(1), remove the food from the chambers and
wash them using water with a mild detergent.
Then, wipe the chambers dry with a cloth.
Defrosting, washing and maintenance
Defrosting
Frost settles on the rear wall of the fridge cham-
ber. It is removed automatically. During the
defrosting, the condensate, which contains con-
taminants may clog the opening in the through.
Should it occur, carefully unclog the opening with
the cleaning plug (g. 21).
21

20
Defrosting, washing and maintenance
Bulb replacement
1. Switch off the appliance using button "1"
and unplug the appliance from the mains
socket.
2. Unscrew the bolt fastening the bulb cover
with a cross screwdriver and take the cover
off.
3. Replace the bulb with a new one observing
the following paramters: 220-240 V, max. 15
W, E14 thread, maximum bulb dimensions:
diameter – 26 mm, length – 55 mm.
4. Put the caver back and t it in (g. 23).
Taking out and putting in the door
shelf
Lift the door shelf, remove it and put it back
from the top into its required position (g.
24).
22 24
23
Do not use bulbs of greater or
smaller power, apply only the
bulbs of parameters given above.
Taking out and putting in the shelves
Slide the shelf out, then slide it in as much as
possible so that its clamp could t the guide
groove (g. 22).
E14
max. 15W
bulb cover
This manual suits for next models
3
Table of contents
Other Amica Refrigerator manuals

Amica
Amica KGC15493W User manual

Amica
Amica FK3293 User manual

Amica
Amica KGC15440E User manual

Amica
Amica VKS15917W User manual

Amica
Amica UC150 3 Series User manual

Amica
Amica FM133.4 User manual

Amica
Amica FZ041.3 User manual

Amica
Amica KGC15488E User manual

Amica
Amica FM104.4 User manual

Amica
Amica UC1503 User manual

Amica
Amica EKGC16187 User manual

Amica
Amica VD 1442 AR User manual

Amica
Amica FK2965.3LAA User manual

Amica
Amica KGC15477W User manual

Amica
Amica FC2395.1GAA / VJ 1442 G User manual

Amica
Amica EKGCS387600 User manual

Amica
Amica AR5222R User manual

Amica
Amica VJ 852.3 BW User manual

Amica
Amica FK2515.4UTAA User manual

Amica
Amica FM108.4 User manual