manuals.online logo
Brands
  1. Home
  2. •
  3. Brands
  4. •
  5. Amisco
  6. •
  7. Indoor Furnishing
  8. •
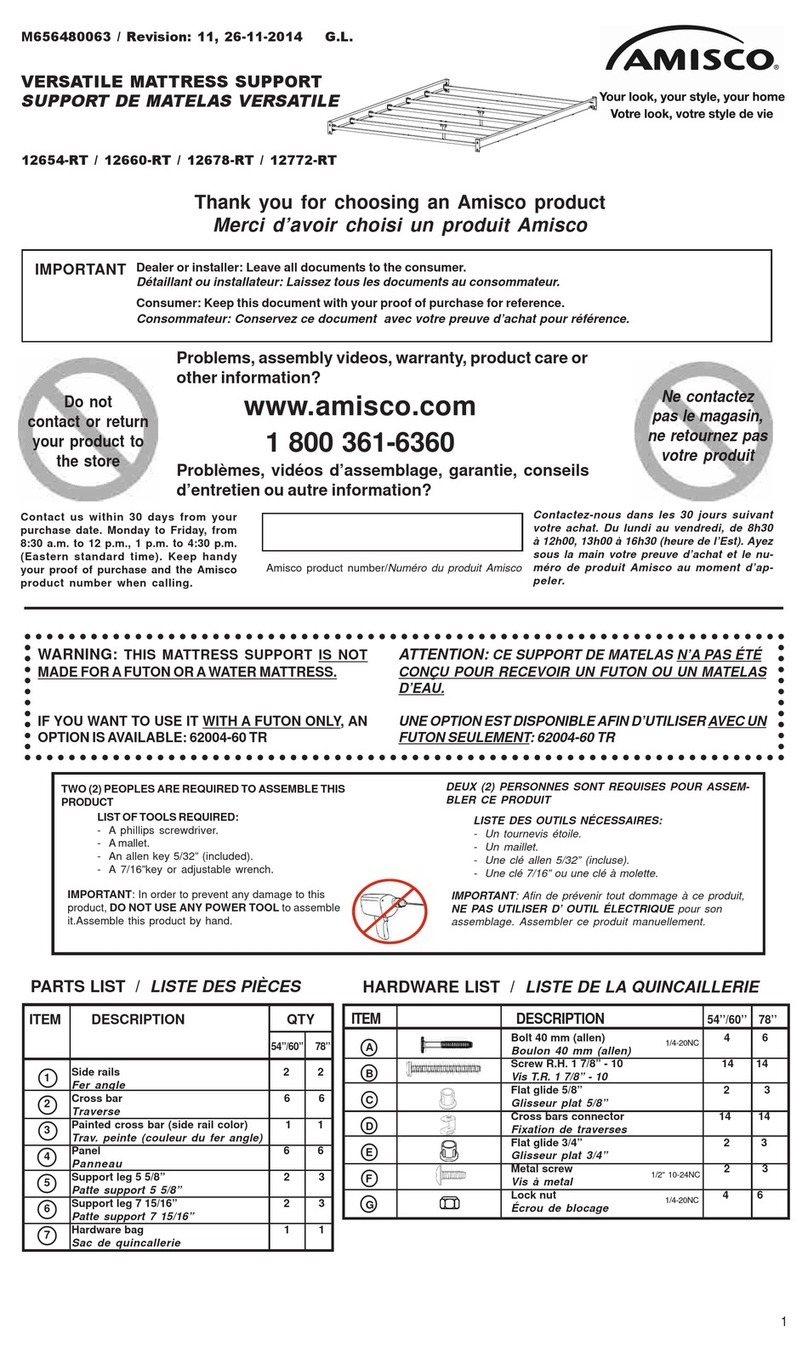
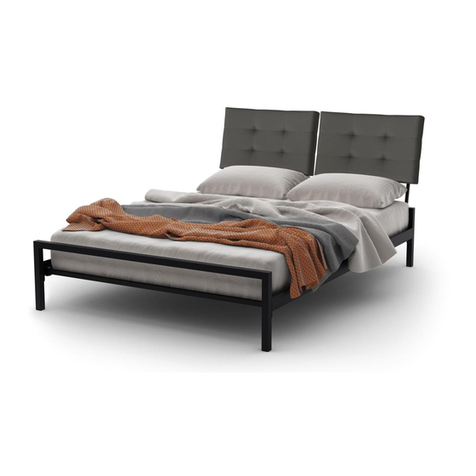
  9. Amisco M656480150 User manual

Amisco M656480150 User manual

LISTE DES OUTILS NÉCESSAIRES:
-Une clé allen 5/32” et 3/16” (incluse).
-Une clé 7/16” ou une clé à molette.
LIST OF TOOLS REQUIRED:
-An allen key 5/32” and3/16” (included).
-A 7/16”key or adjustable wrench.
TWO (2) PEOPLE ARE REQUIRED TO ASSEMBLE THIS
PRODUCT
DEUX (2) PERSONNES SONT REQUISES POUR ASSEM-
BLER CE PRODUIT
IMPORTANT: In order to prevent any damage to
this product, DO NOT USE ANY POWER TOOL to
assemble it.Assemble this product by hand.
IMPORTANT: Afin de prévenir tout dommage à ce produit,
NE PAS UTILISER D’ OUTILS ÉLECTRIQUES pour son
assemblage. Assembler ce produit manuellement.
PARTS LIST / LISTE DES PIÈCES
Headboard
Tête de lit 1
Footboard
Pied de lit 1
Extension leg
Patte rallonge 2
Hardware bag
Sac de quincaillerie 1
ITEM DESCRIPTION QTY
1
2
3
4
HARDWARE LIST / LISTE DE LA QUINCAILLERIE
Bolt S.H. (Allen) 4
Boulon T.H. (Allen)
Bolt S.H. (Allen) 4
Boulon T.H. (Allen)
Locknut 4
Écrou de blocage
Flat washer 8
Rondelle plate
Screw 8
Vis
Threaded plate 2
Plaque filetée
Plate 2
Plaque
ITEM DESCRIPTION QTY
A
B
C
D
E
F
G
1/4-20nc
1/4-20nc
1/4-20nc
1/4”
M656480150 / Revision: 6, 15-12-2014 G.L.
HEADBOARD AND FOOTBOARD ASSEMBLY
ASSEMBLAGE DE LA TÊTE ET DU PIED DE LIT
1
5/16-18nc
Thank you for choosing an Amisco product
Merci d’avoir choisi un produit Amisco
Ne contactez
pas le magasin,
ne retournez pas
votre produit
Do not
contact or return
your product to
the store
Amisco product number/Numéro du produit Amisco
Contact us within 30 days from your
purchase date. Monday to Friday, from
8:30 a.m. to 12 p.m., 1 p.m. to 4:30 p.m.
(Eastern standard time). Keep handy
your proof of purchase and the Amisco
product number when calling.
Contactez-nous dans les 30 jours suivant
votre achat. Du lundi au vendredi, de 8h30
à 12h00, 13h00 à 16h30 (heure de l’Est). Ayez
sous la main votre preuve d’achat et le nu-
méro de produit Amisco au moment d’ap-
peler.
IMPORTANT Dealer or installer: Leave all documents to the consumer.
Détaillant ou installateur: Laissez tous les documents au consommateur.
Consumer: Keep this document with your proof of purchase for reference.
Consommateur: Conservez ce document avec votre preuve d’achat pour référence.
www.amisco.com
1 800 361-6360
Problems, assembly videos, warranty, product care or
other information?
Problèmes, vidéos d’assemblage, garantie, conseils
d’entretien ou autre information?
2
1
Detail B
13
2
1) Remove the 2 or 6 glides by pulling on the straps . Discard these glides, they will
not be used for assembly.
Enlever 2 ou 6 glisseurs en tirant sur les sangles. Disposer de ces glisseurs, ils ne
seront pas utilisés pour le montage.
Strap / Sangle
F
E
G
F
E
3) Insert screws E in the holes of the plate G .
Insérer les vis Edans les trous de la plaque G.
4) Insert the assembly of plates F and G in the extension legs 3. Align
screws with the holes in the leg and screw only one screw (detail A) until
plates F and Gstay in place.
Insérer le montage des plaques Fet Gdans les pattes rallonge 3. Aligner
les vis Edans les trous des pattes et visser une seule vis (detail A) jusqu’à
ce que les plaques Fet Gtiennent en place.
3F
G
E
Detail A
WARNING
The plates are unfinished steel
parts. They may have sharp
edges. To prevent injury, wear
gloves during the assembly.
MISE EN GARDE
Les plaques sont des pièces
de métal non finies. Elles
peuvent avoir des arêtes vives.
Pour éviter des blessures,
porter des gants durant
l’assemblage.
!
2) Screw lightly screws E in the treaded plate F .
Visser légèrement les vis Edans la plaque filetée F.
5) Place the headboard 1on a stable surface, holes facing up. Insert extension legs 3into the legs of the head 1, align holes with screws (see detail B). Tighten all screws.
Placer la tête de lit 1sur une surface stable, trous vers le haut. Insérer les pattes rallonge 3dans les pattes de la tête 1, aligner les trous avec les vis (voir détail B).
Visser fermement toutes les vis.
MAMA
MAMA
MATTRESS SUPPORTTRESS SUPPOR
TTRESS SUPPORTTRESS SUPPOR
TTRESS SUPPORT FRT FR
T FRT FR
T FROM OOM O
OM OOM O
OM OTHER BRANDSTHER BRANDS
THER BRANDSTHER BRANDS
THER BRANDS
SUPPORSUPPOR
SUPPORSUPPOR
SUPPORT DE MAT DE MA
T DE MAT DE MA
T DE MATELAS D’ATELAS D’A
TELAS D’ATELAS D’A
TELAS D’AUTRES MARUTRES MAR
UTRES MARUTRES MAR
UTRES MARQQ
QQ
QUESUES
UESUES
UES
AMISCO NONAMISCO NON
AMISCO NON VERSAVERSA
VERSAVERSA
VERSATILE MATILE MA
TILE MATILE MA
TILE MATTRESS SUPPORTTRESS SUPPOR
TTRESS SUPPORTTRESS SUPPOR
TTRESS SUPPORTT
TT
T
SUPPORSUPPOR
SUPPORSUPPOR
SUPPORT DE MAT DE MA
T DE MAT DE MA
T DE MATELAS NONTELAS NON
TELAS NONTELAS NON
TELAS NON VERSAVERSA
VERSAVERSA
VERSATILETILE
TILETILE
TILE AMISCOAMISCO
AMISCOAMISCO
AMISCO
AMISCOAMISCO
AMISCOAMISCO
AMISCO VERSAVERSA
VERSAVERSA
VERSATILE MATILE MA
TILE MATILE MA
TILE MATTRESS SUPPORTTRESS SUPPOR
TTRESS SUPPORTTRESS SUPPOR
TTRESS SUPPORTT
TT
T
SUPPORSUPPOR
SUPPORSUPPOR
SUPPORT DE MAT DE MA
T DE MAT DE MA
T DE MATELASTELAS
TELASTELAS
TELAS VERSAVERSA
VERSAVERSA
VERSATILETILE
TILETILE
TILE AMISCOAMISCO
AMISCOAMISCO
AMISCO
Mattress 12” thick or more, without box spring.
Matelas 12” et plus, sans sommier caisse.
0
5
7 1/2
9
10
12
14 1/2
Mattress 12” thick or less, without box spring.
Matelas 12” et moins, sans sommier caisse.
Box spring and mattress.
Sommier caisse et matelas.
”
”
”
”
”
”
”
1) Choose the height of your mattress support.
Choisir la hauteur de votre support de matelas.
2) Screw-on lightly Bbolts, Clocknuts and Dwashers of the headboard .
Visser légèrement les boulons B, écrous de blocage Cet les rondelles Dà la tête de lit .
3) Screw-on lightly Abolts to footboard 2.
Visser légèrement les boulons Aau pied de lit 2.
COUNTERSUNK HOLES OR STICKER (ON SOME MODELS), TOWARDS THE REAR.
L’EMBOSSAGEDESTROUSOUÉTIQUETTE(SURCERTAINSMODÈLES) VERS
L’ARRIÈRE.
2
A
1+3
B
D
C
Make sure to tighten the
lock nuts by passing the bolts
through the nylon rings.
S’assurer de serrer les écrous de
blocage en passant les boulons à
travers les bagues de nylon.
1) Screw-on lightly Bbolts, Clocknuts and Dwashers in the lowest holes
of the headboard, in the lowest holes.
Visser légèrement les boulons B, écrous de blocage Cet les rondelles D
à la tête de lit,dans les trous les plus bas.
2) Screw-on lightly Abolts to footboard 2, in the lowest holes.
Visser légèrement les boulons Aau pied de lit 2, dans les trous les plus
bas.
3) Hook angle bars to footboard 2and headboard .
Accrocher les fers angles au pied de lit 2et à la tête de lit .
4) Tighten all bolts and nuts.
Resserrer tous les boulons et écrous.
5) Follow the instructions provided with the mattress support to assemble it.
Suivre les instructions fournies avec le support de matelas pour l’assembler.
C
DB
1+3
2
D
A
COUNTERSUNK HOLES OR STICKER (ON SOME MODELS), TOWARDS
THE REAR.
L’EMBOSSAGEDESTROUSOUÉTIQUETTE(SURCERTAINS MODÈLES)
VERSL’ARRIÈRE.
Make sure to tighten the
lock nuts by passing the bolts
through the nylon rings.
S’assurer de serrer les écrous de
blocage en passant les boulons à
travers les bagues de nylon.
1) Assemble headboard to the mattress support with Bbolts, C
locknuts and Dwashers.
Assembler la tête de lit au support de matelas à l’aide des boulons B
, des écrous de blocage Cet des rondelles D .
2) Assemble footboard 2to the mattress support with Abolts and
D washers.
Assembler le pied de lit 2au support de matelas à l’aide des boulons
Aet des rondelles D.
3) Tighten all bolts and nuts.
Resserrer tous les boulons et écrous.
3
NOTE: IFYOU GOT COUNTOURED END BRACKETS ON YOUR MATTRESS SUPPORT, YOU MAYNEED LONGER BOLTS. PLEASE CONTACTAMISCO.
SIVOTRESUPPORTDE MATELASADES PLAQUES COURBÉES, VOUS POURRIEZAVOIR BESOIN DE BOULONS PLUS LONG.SVPCONTACTERAMISCO.
4) Hook angle bars to footboard 2and headboard .
Accrocher les fers angles au pied de lit 2et à la tête de lit .
5) Tighten all bolts and nuts.
Resserrer tous les boulons et écrous.
6) Follow the instructions provided with the mattress support to assemble it.
Suivre les instructions fournies avec le support de matelas pour l’assembler.
M656480150
Other Amisco Indoor Furnishing manuals

Amisco M656480199 User manual

Amisco

Amisco M656480199 User manual

Amisco 50537-38-50838-BO User manual

Amisco

Amisco 50537-38-50838-BO User manual

Amisco TABLE User manual

Amisco

Amisco TABLE User manual

Amisco 30564 User manual

Amisco

Amisco 30564 User manual

Amisco 50554-42-90539 User manual

Amisco

Amisco 50554-42-90539 User manual

Amisco M656480123 User manual

Amisco

Amisco M656480123 User manual

Amisco Cardin Swivel Stool with Arms 41430 User manual

Amisco

Amisco Cardin Swivel Stool with Arms 41430 User manual

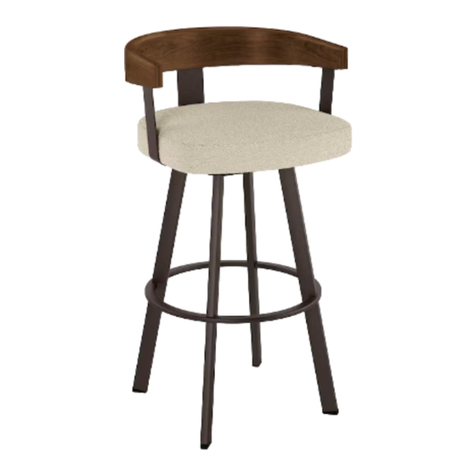
Amisco Luna Modern Stool 40317 User manual

Amisco

Amisco Luna Modern Stool 40317 User manual

Amisco M656480363 User manual

Amisco

Amisco M656480363 User manual

Amisco M656480205 User manual

Amisco

Amisco M656480205 User manual

Amisco Lidya 50588-90863 User manual

Amisco

Amisco Lidya 50588-90863 User manual

Amisco 16054-RT User manual

Amisco

Amisco 16054-RT User manual

Amisco 41443 User manual

Amisco

Amisco 41443 User manual

Amisco 30556 User manual

Amisco

Amisco 30556 User manual

Amisco Lidya 50984-90273 User manual

Amisco

Amisco Lidya 50984-90273 User manual

Amisco M656480155 User manual

Amisco

Amisco M656480155 User manual

Amisco 30438 User manual

Amisco

Amisco 30438 User manual

Amisco 41421 User manual

Amisco

Amisco 41421 User manual

Amisco 50696 User manual

Amisco

Amisco 50696 User manual

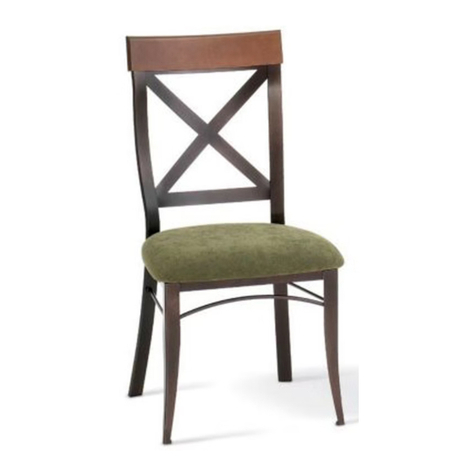
Amisco Kyle Swivel Stool with Cross Back 41414 User manual

Amisco

Amisco Kyle Swivel Stool with Cross Back 41414 User manual

Amisco 50510 User manual

Amisco

Amisco 50510 User manual

Amisco SINGAPORE User manual

Amisco

Amisco SINGAPORE User manual

Amisco Skyla 44434-26WE/1B25JKF4 User manual

Amisco

Amisco Skyla 44434-26WE/1B25JKF4 User manual

Amisco ALEX 50685-91462 User manual

Amisco

Amisco ALEX 50685-91462 User manual

Popular Indoor Furnishing manuals by other brands

less care LV1-24 installation instructions

less care

less care LV1-24 installation instructions

SouthShore 3127 Assembly instructions

SouthShore

SouthShore 3127 Assembly instructions

Home Styles 5092 942 Assembly instructions

Home Styles

Home Styles 5092 942 Assembly instructions

LOWE'S Smartcore quick guide

LOWE'S

LOWE'S Smartcore quick guide

HOMEDEPOT SUMMERVILLE FTS70209C Use and care guide

HOMEDEPOT

HOMEDEPOT SUMMERVILLE FTS70209C Use and care guide

Simpli Home WyndenHall brooklyn+max 3AXCSAW-09-BR manual

Simpli Home

Simpli Home WyndenHall brooklyn+max 3AXCSAW-09-BR manual

Simpli Home Brooklyn+Max WyndenHall AXCBED15-FG manual

Simpli Home

Simpli Home Brooklyn+Max WyndenHall AXCBED15-FG manual

Home Styles Lloyd 5180-16 quick start guide

Home Styles

Home Styles Lloyd 5180-16 quick start guide

System Build 3402335COM manual

System Build

System Build 3402335COM manual

Simpli Home WyndenHall Brooklyn + Max ARTISAN... Assembly instructions

Simpli Home

Simpli Home WyndenHall Brooklyn + Max ARTISAN... Assembly instructions

System Build 6777408COM manual

System Build

System Build 6777408COM manual

Jason.L Quadro A 2400L x 700D mm Assembly instructions

Jason.L

Jason.L Quadro A 2400L x 700D mm Assembly instructions

HAMPTON BAY FTS70660C Use and care guide

HAMPTON BAY

HAMPTON BAY FTS70660C Use and care guide

Disc-O-Bed ONE 30531 Assembly instructions

Disc-O-Bed

Disc-O-Bed ONE 30531 Assembly instructions

Home Styles 88 5523 61 Assembly instructions

Home Styles

Home Styles 88 5523 61 Assembly instructions

HOMEDEPOT Home Decorators Collection MERRYFIELD... Assembly instructions

HOMEDEPOT

HOMEDEPOT Home Decorators Collection MERRYFIELD... Assembly instructions

Happy Beds Secret Vanity Assembly instructions

Happy Beds

Happy Beds Secret Vanity Assembly instructions

HAMPTON BAY GCS00394A-F Use and care guide

HAMPTON BAY

HAMPTON BAY GCS00394A-F Use and care guide

manuals.online logo
manuals.online logoBrands
  • About & Mission
  • Contact us
  • Privacy Policy
  • Terms and Conditions

Copyright 2025 Manuals.Online. All Rights Reserved.