Amit KS-630MiL User manual

ks-630mil_mm_en_104
KS-630MiL
Camera system
Assembly manual
Version 1.04

KS-630MIL
ks-630mil_mm_en_104 2/74
AMiT, spol. s r.o. does not provide any warranty concerning the contents of this
publication and reserves the right to change the documentation without obliga-
tion to inform anybody or authority about it.
This document can be copied and redistributed under following conditions:
1. The whole text (all pages) must be copied without any changes.
2. All redistributed copies must retain the AMiT, spol. s r.o. copyright notice
and any other notices contained in the documentation.
3. This document must not be distributed for purpose making of profit.
The names of products and companies used herein can be trademarks or regis-
tered trademarks of their respective owners.
AMiT is a registered trademark
Copyright (c) 2011, AMiT, spol. s r. o.
Producer: AMiT, spol. s r. o.
Naskové 3/1100, 150 00 Praha
www.amit.cz

KS-630MIL
3/74 ks-630mil_mm_en_104
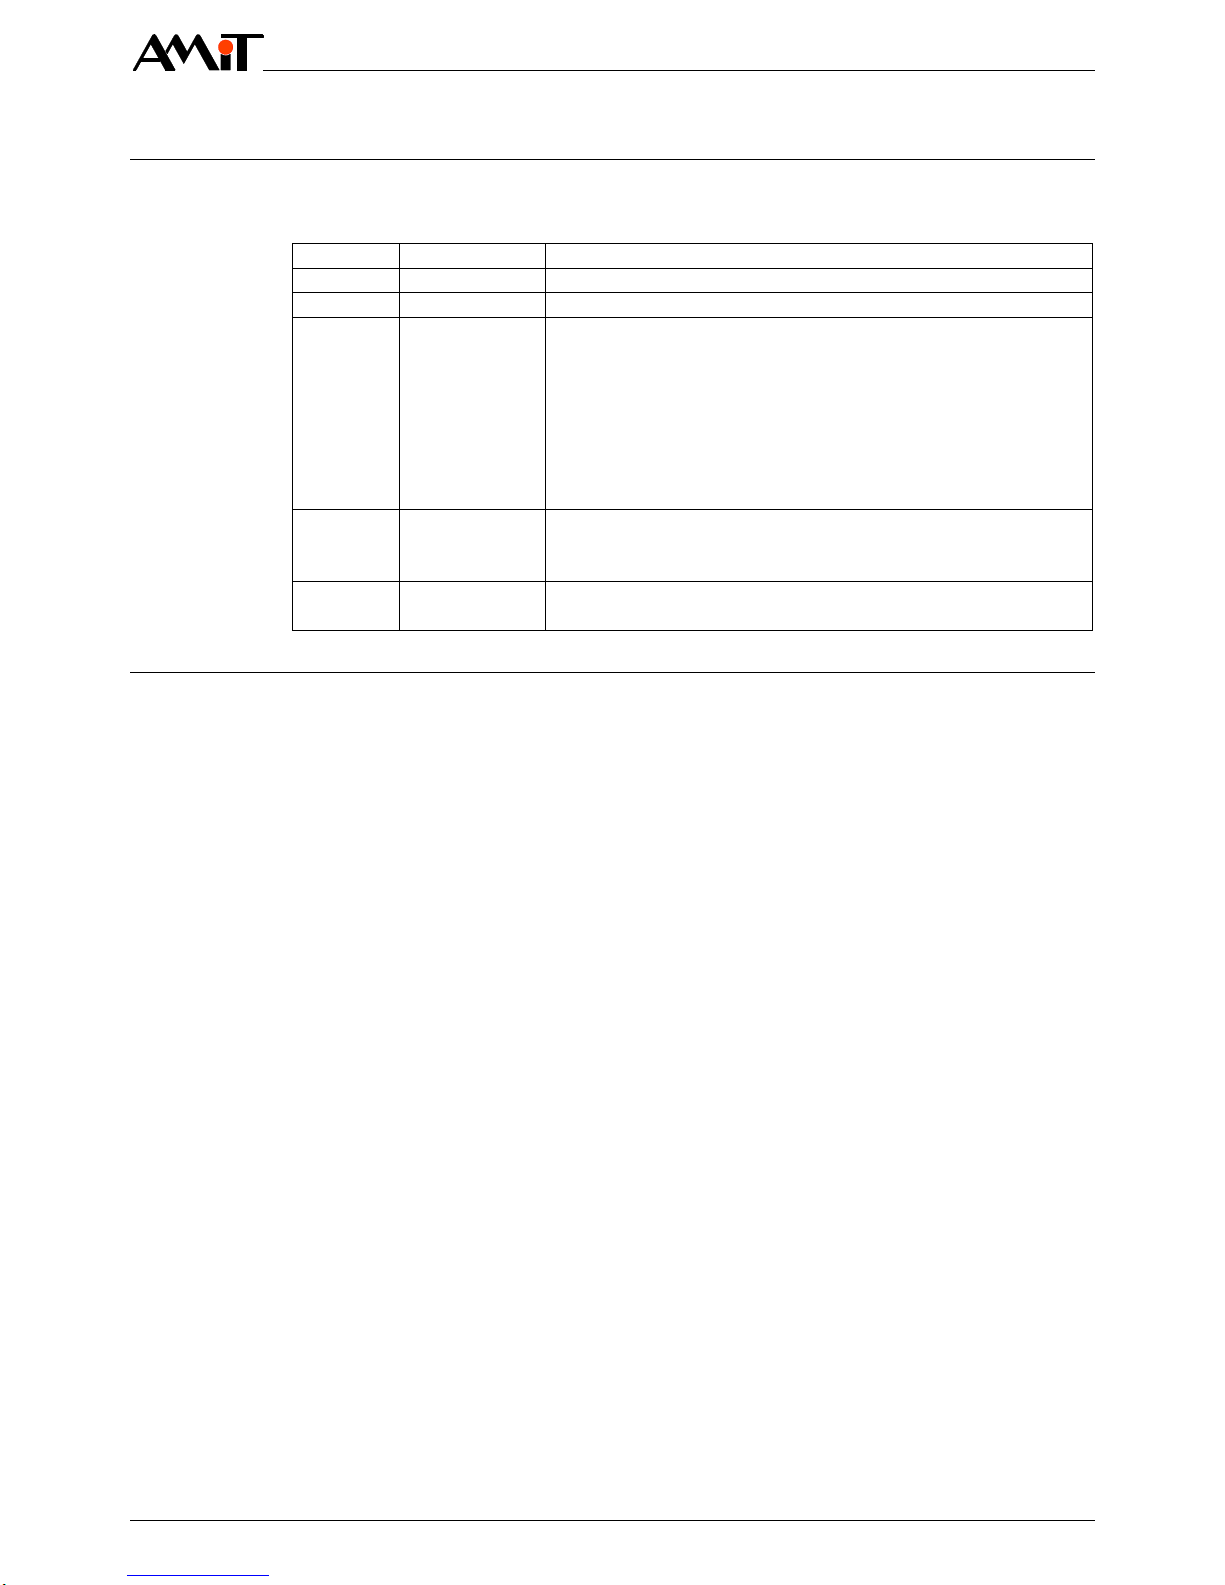
Contents History of revisions.........................................................................................5
Related documentation...................................................................................5
1. Definition of used terms......................................................................6
2. Introduction..........................................................................................7
3. Technical parameters..........................................................................8
3.1. System description.........................................................................................8
3.2. System functions............................................................................................8
3.3. System technical parameters .........................................................................9
3.4. Software.........................................................................................................9
3.5. IP monitor states of viewing..........................................................................10
4. Putting system into operation ..........................................................11
4.1. IP monitors commissioning...........................................................................11
4.1.1 IP address setting up....................................................................................11
4.1.2 Loading the actual version of the application................................................16
Connecting to a FTP server of the IP monitor ..............................................16
Deleting previous application files ................................................................18
Copying of new application files ...................................................................19
Camera system restart.................................................................................19
Verifying of loaded application......................................................................19
4.2. AM3114A cameras commissioning ..............................................................20
4.2.1 Camera identification....................................................................................21
Connect camera to Ethernet.........................................................................21
Finding of connected camera through ACM.................................................21
4.2.2 Firmware upgrade ........................................................................................22
4.2.3 Loading of configuration template.................................................................24
4.2.4 Camera lens setup (positioning and focusing)..............................................28
Viewing the image from camera on service notebook ..................................29
Taking off the camera cover.........................................................................30
Camera lens position setup..........................................................................31
Focusing the camera lens ............................................................................32
Deleting camera from ACM database...........................................................32
4.3. MD8562/B cameras commissioning.............................................................33
4.3.1 IP address setting up....................................................................................33
4.3.2 Parameters setting up ..................................................................................42
4.3.3 Camera lens setup .......................................................................................42
4.4. Recording unit commissioning......................................................................44
4.4.1 Check of power supply connector wiring......................................................45
4.4.2 IP address setting up....................................................................................45
4.4.3 Loading the actual version of an application.................................................47
Connecting to a FTP server of the recording unit.........................................48
Deleting previous application files ................................................................50
Copying of new application files ...................................................................51
Recording unit restart...................................................................................51
Verifying of loaded application......................................................................51
4.5. ERT03/A2 commissioning............................................................................52

KS-630MIL
ks-630mil_mm_en_104 4/74
4.5.1 Update from ERT/A1 to ERT/A2...................................................................52
4.5.2 Parameters setting up ..................................................................................52
4.5.3 Application update........................................................................................52
5. APPENDIX A –Location of components .........................................54
6. APPENDIX B –Scenes ......................................................................55
7. APPENDIX C –Block diagram ..........................................................56
8. APPENDIX D –Program set..............................................................57
IP monitor - AIPM1013/A..............................................................................57
Camera - AM3114-R/A.................................................................................57
Camera - MD8562/B.....................................................................................58
Router - ERT03/A2.......................................................................................58
Acasys Studio Vehicle Profile.......................................................................58
Recording unit - PPM2110/2T ......................................................................59
9. APPENDIX E –Configuration parameters.......................................60
9.1. IP address setting up....................................................................................60
9.2. Cameras.......................................................................................................60
Login data.....................................................................................................61
Network settings...........................................................................................61
9.3. IP monitor.....................................................................................................61
9.4. Recording unit ..............................................................................................61
10. Appendix F –Axis Camera Management (ACM).............................62
Installation....................................................................................................62
First start –password setup .........................................................................62
11. Appendix G –IP cameras..................................................................64
Operation thru web interface of the camera .................................................64
Description of web interface window ............................................................64
Web interface login.......................................................................................65
Live View –live image from camera.............................................................66
Creating of Server Report.............................................................................66
11.1. Restoring the factory setting.........................................................................68
Software way of Restoring the factory setting ..............................................68
Hardware way of Restoring the factory setting.............................................70
11.2. Meaning of camera LED indicators...............................................................71
12. Appendix H - Recording unit OS update .........................................72
12.1. Create bootable USB flash disk....................................................................72
12.2. Run recording unit from USB flash disk........................................................73
12.3. Verifying version of OS.................................................................................73

KS-630MIL
5/74 ks-630mil_mm_en_104
History of revisions
Document name: ks-630mil_mm_en_104.pdf
Author: Václav Krčmář
Revision
Date
Changes
100
22. 05. 2012
New document
101
31. 07. 2012
Language corrections, router ERT03/A2 added
102
01. 08. 2013
Modification:
3.2 System functions, 3.3 System technical parameters,
4.1 IP monitors commissioning, 4.2 AM3114A cameras
commissioning, 4.3 MD8562/B cameras commissioning,
4.4 Recording unit commissioning, 4.5 ERT03/A2 com-
missioning, 8 APPENDIX D –Program set, 9 APPENDIX
E –Configuration parameters, 12 Appendix H - Recording
unit OS update
103
22. 11. 2013
Chapter 12.2 Run recording unit from USB flash disk
modified.
Chapter 12.3 Verifying version of OS added.
104
10. 12. 2013
New program set, change in chapter 12.1 Create bootable
USB flash disk
Related documentation
1. Programmer’s manual
file: 630mil_ms_en_xxx.pdf
2. Operation manual
file: aipm1013a_g_en_xxx.pdf
3. Operation manual
file: ppm21xx_g_en_xxx.pdf
4. Programmer’s manual
file: ppm21xx_ms_en_xxx.pdf
5. User manual
file: acasysstudio_ms_en_xxx.pdf
6. Operation manual
file: kkr-m31_g_en_xxx.pdf
7. Programmer’s manual
file: ert03-a2_ms_en_100.pdf
8. User Manual Vivotek MD8562
file: download from http://www.vivotek.com
9. User Manual Axis M3114-R
file: download from http://www.axis.com

KS-630MIL
ks-630mil_mm_en_104 6/74
1. Definition of used terms
Performs recording of image from cameras on hard disk.
Displays the live image from one or more cameras (maximum four). When more
than one camera is displayed, quadruple (4Q) mode is used, where monitor
screen is splitted into 4 equal rectangular, into which are directed video streams
from cameras.
Performs the image capture and sends the digitized data in MJPEG (Motion
JPEG) video stream form via Ethernet.
Protection of outdoor IP cameras against climate effects.
Switch with possible powering via communication cable (Power Over Ethernet).
Determines the way of viewing information on IP monitor.
Can contain the following items:
1) empty screen
2) camera number to be displayed on IP monitor
3) list of up to 4 cameras, that can be displayed on IP monitor in quadruple
mode (4Q) –where the screen is splitted into 4 equal fields; in every field
is displayed image from one or none camera
Configuration tool for searching camera within network and setting the viewing
parameters; for this purpose is used a Configuration template.
Configuration file, used for setting of camera parameters through ACM.
Recording unit
IP monitor
Camera
Camera
housing
PoE switch
Scene
Axis Camera
Management
(ACM)
Configuration
template

KS-630MIL
7/74 ks-630mil_mm_en_104
2. Introduction
This document describes putting into operation and setting the 630MiL (KS-
630MiL) engine camera system from software point of view.
Document does not care about mechanical assembly, which is solved in Opera-
tion manuals of individual components (see Related documentation).

KS-630MIL
ks-630mil_mm_en_104 8/74
3. Technical parameters
3.1. System description
System functionality is determined by software used in router, IP monitors and
recording unit.
Layout of components in vehicle you can find in APPENDIX A –Location of
components
3.2. System functions
System function is described in ks-630mil_ms_en_xxx.pdf document.

KS-630MIL
9/74 ks-630mil_mm_en_104
3.3. System technical parameters
Quantity
2 pcs.
Monitor type
AIPM1013/A
Address configuration
ADD
Viewed data format.
MJPEG
Image resolution
640 x 480
Viewing frame rate
20 fps
Image delay
Max 200 ms
Viewing type
Max 4 pictures per screen
Quantity
14 pcs.
Camera type
AM3114-R/A
Camera housing type
Indoor cameras without housing
Quantity
4 pcs.
Camera type
MD8562/B
Camera housing type
Outdoor cameras without housing
Quantity
2 pc.
Unit type
PPM2110/2T
Format of saved video
MJPEG
Recording rate
5 fps
Recording resolution
640 x 480 pixels
HDD capacity
2 TB (plug-in module)
Maximum disk utilization
95 % of overall capacity
Timeout at camera disconnection
5 s
SOS state duration
300 s
Service access
FTP
PPM2110/2T
2 x
Recording unit with software
AIPM1013/A
2 x
IP monitor with software
AM3114-R/A
14 x
Indoor camera
MD8562/B
4 x
Outdoor camera
KKR-MD85/C
2 x
Outer Camera Cover
KKR-MD85/D
2 x
Outer Camera Cover
ERT03/A2
1 x
Ethernet TCN router for rolling stock
3.4. Software
Software is published as software package, released at a certain date. Available
to download from web:
http://imp.amit.cz/www/kamerove_systemy/pesa/630mil/index.html
Actual software set involves all files needed for whole camera system installa-
tion.
Content of actual program set is available at APPENDIX D –Program set
IP monitors
Cameras
Recording
unit
System
components

KS-630MIL
ks-630mil_mm_en_104 10/74
3.5. IP monitor states of viewing
In following table are briefly described states of viewing, which can occur on IP
monitor.
Situation
Description of viewing
Application is not loaded
Black screen without camera number.
Wrongly loaded application
Black screen without camera number.
Different version of applications
in IP monitors
Black screen without camera number.
Video stream blackout
Symbol see Fig. 1 - Video stream blackout
symbol
No scene is selected
Black screen without camera number.
Single camera scene
Camera number in the left bottom corner.
Multi camera scene
Mosaic composed from four camera images.
Besides the image itself each mosaic part
contains also the camera number.
Fig. 1 - Video stream blackout symbol

KS-630MIL
11/74 ks-630mil_mm_en_104
4. Putting system into operation
When putting system into operation it is supposed, that all system components
are properly mounted, capable of operating and power supply is correctly at-
tached to all units. The ethernet infrastructure must be properly installed and all
powering and communication cables must be attached to units. For proper op-
eration of camera system must be used only components mentioned below.
Putting system into operation, consist of following steps:
IP monitors commissioning
AM3114A cameras commissioning
MD8562/B cameras commissioning
Recording unit commissioning
ERT03/A2 commissioning
4.1. IP monitors commissioning
IP monitors commissioning consists of following steps:
IP address setting up
Loading the actual version of an application
Service notebook with installed FTP client file manager (Total Commander -
(TC hereinafter) - is recommended).
ks-630mil_aipm1013a_app - application files (see Appendix D).
ks-630mil_aipm1013a_cfg - configuration files (see Appendix D).
Setting of service notebook network adapter:
IP address: “NB_IP_AIPM”
Subnet mask: “NB_MASK”
Default gateway: do not fill
4.1.1 IP address setting up
Connect service notebook to vehicle ethernet and turn-off firewall.
Run ALBDConfig.exe and wait until ethernet scan finish.
Equipment
needed

KS-630MIL
ks-630mil_mm_en_104 12/74
Fig. 2 - Searching for AMiT devices
ALBDConfig will find connected IP monitors.
Fig. 3 - AIPM has been found
Click right mouse button on the first IP monitor and select Assign a profile ... .

KS-630MIL
13/74 ks-630mil_mm_en_104
Fig. 4 - Start profile change dialog
New window will show.
Fig. 5 - Set AIPM to Identification mode
Click on the button Continue and wait about 45 seconds. On the selected IP
monitor you will see „AMiT display device VISUAL identification mode“ graphic.

KS-630MIL
ks-630mil_mm_en_104 14/74
Fig. 6 - Profile selection
Select IP monitor profile and click on Continue button.

KS-630MIL
15/74 ks-630mil_mm_en_104
Fig. 7 - Waiting for device reboot
Wait about 45 seconds. IP monitor is now rebooting.
Fig. 8 - Check new AIPM configuration
Click on Refresh button to search IP monitor with new configuration.
Repeat this procedure for all IP monitors.

KS-630MIL
ks-630mil_mm_en_104 16/74
4.1.2 Loading the actual version of the application
To load a new version of the application into the IP monitor is necessary to per-
form the following steps:
Connecting to a FTP server of the IP monitor
Deleting previous application files
Copying of new application files
Camera system restart
Verifying of loaded application
In following procedure is used TotalCommander 7.5a for connection to FTP, but
files can be loaded through any FTP client.
Connecting to a FTP server of the IP monitor
Launch the Total Commander and select from Main menu
Net --> FTP Connect
Fig. 9 - Total Commander –Main Menu
Click on the button New connection.. in dialog box Connect to ftp server.

KS-630MIL
17/74 ks-630mil_mm_en_104
Fig. 10 - TC –Connect to ftp server
Enter the parameters for connection to the first monitor (APPENDIX E –Con-
figuration parameters, IP monitor):
Session name: Monitor_A
Host (Port): „AIPM_IP_A“
User name: „AIPM_Login“
Password: „AIPM_Password“
Fig. 11 - TC –FTP Connection details

KS-630MIL
ks-630mil_mm_en_104 18/74
Press the button Connect.
Fig. 12 - TC –Connection to Monitor_A
Deleting previous application files
Identify, in which files from connected monitor have been displayed (from head-
ing bar - see figure), and delete them.
Fig. 13 - TC –Identification of FTP contents

KS-630MIL
19/74 ks-630mil_mm_en_104
Copying of new application files
Copy the new version of application.
Thanks to duration of copying process (typically 10 to 20 s), the communication
seems „frozen“ for a short time. This behave is quite common. In case that
„freezing“ takes several minutes, restart the camera system (power supply off
and on) and repeat the procedure from the beginning of chapter 4.1.2 Loading
the actual version of the application).
After completion of copying process press the „Disconnect“ button and repeat
the same process for second monitor.
Parameters for connection to second monitor (APPENDIX E –Configuration
parameters, IP monitor):
Session name: Monitor_B
Host (:Port): „AIPM_IP_B“
User name: „AIPM_Login“
Password: „AIPM_Password“
Camera system restart
Until restart of camera system has been done (power supply off and on) the
new version of application does not manifest itself.
When no image appears on monitors after restart, loading of files were not per-
formed properly. Possible reasons are:
application version in monitors are different
application files was corrupted
When it happens, load the application into both monitors again.
Verifying of loaded application
Application version is saved in the IP monitor in file app_apm.txt. File can be
downloaded through FTP.
Connect to the monitor (Chapter 4.1.2 Connecting to a FTP server of the IP
monitor).
View the app_apm.txt file content.
Application version can be detected from the text.

KS-630MIL
ks-630mil_mm_en_104 20/74
Fig. 14 - Verifying of application version
Verification must be performed for all monitors.
4.2. AM3114A cameras commissioning
Commissioning of IP cameras consists of following steps:
Camera identification
Firmware upgrade
Loading of configuration template
Camera lens setup
Service notebook.
axis_acm_200058 - Axis Camera Management (see Appendix D). ACM installa-
tion is described in Appendix C.
ks-630mil_am3114ra_cfg - configuration templates (see Appendix D).
Tool for dismounting of camera housing.
Tool for loosing of lens thread.
Before start of camera installation is necessary to set camera system into fol-
lowing state:
Powering of all components are switched off
All cameras are disconnected from Ethernet
Service PC with installed ACM is connected
The database in ACM does not involve cameras connected before (oth-
erwise they must be deleted –see chapter 4.2.4 Camera lens setup (po-
sitioning and focusing), section Deleting camera from ACM database).
Setting of service notebook network adapter:
IP address: “NB_IP_AXIS”
Subnet mask: “NB_MASK”
Default gateway: do not fill
Equipment
needed
Initial state
Table of contents