www.amtren.com Page 8
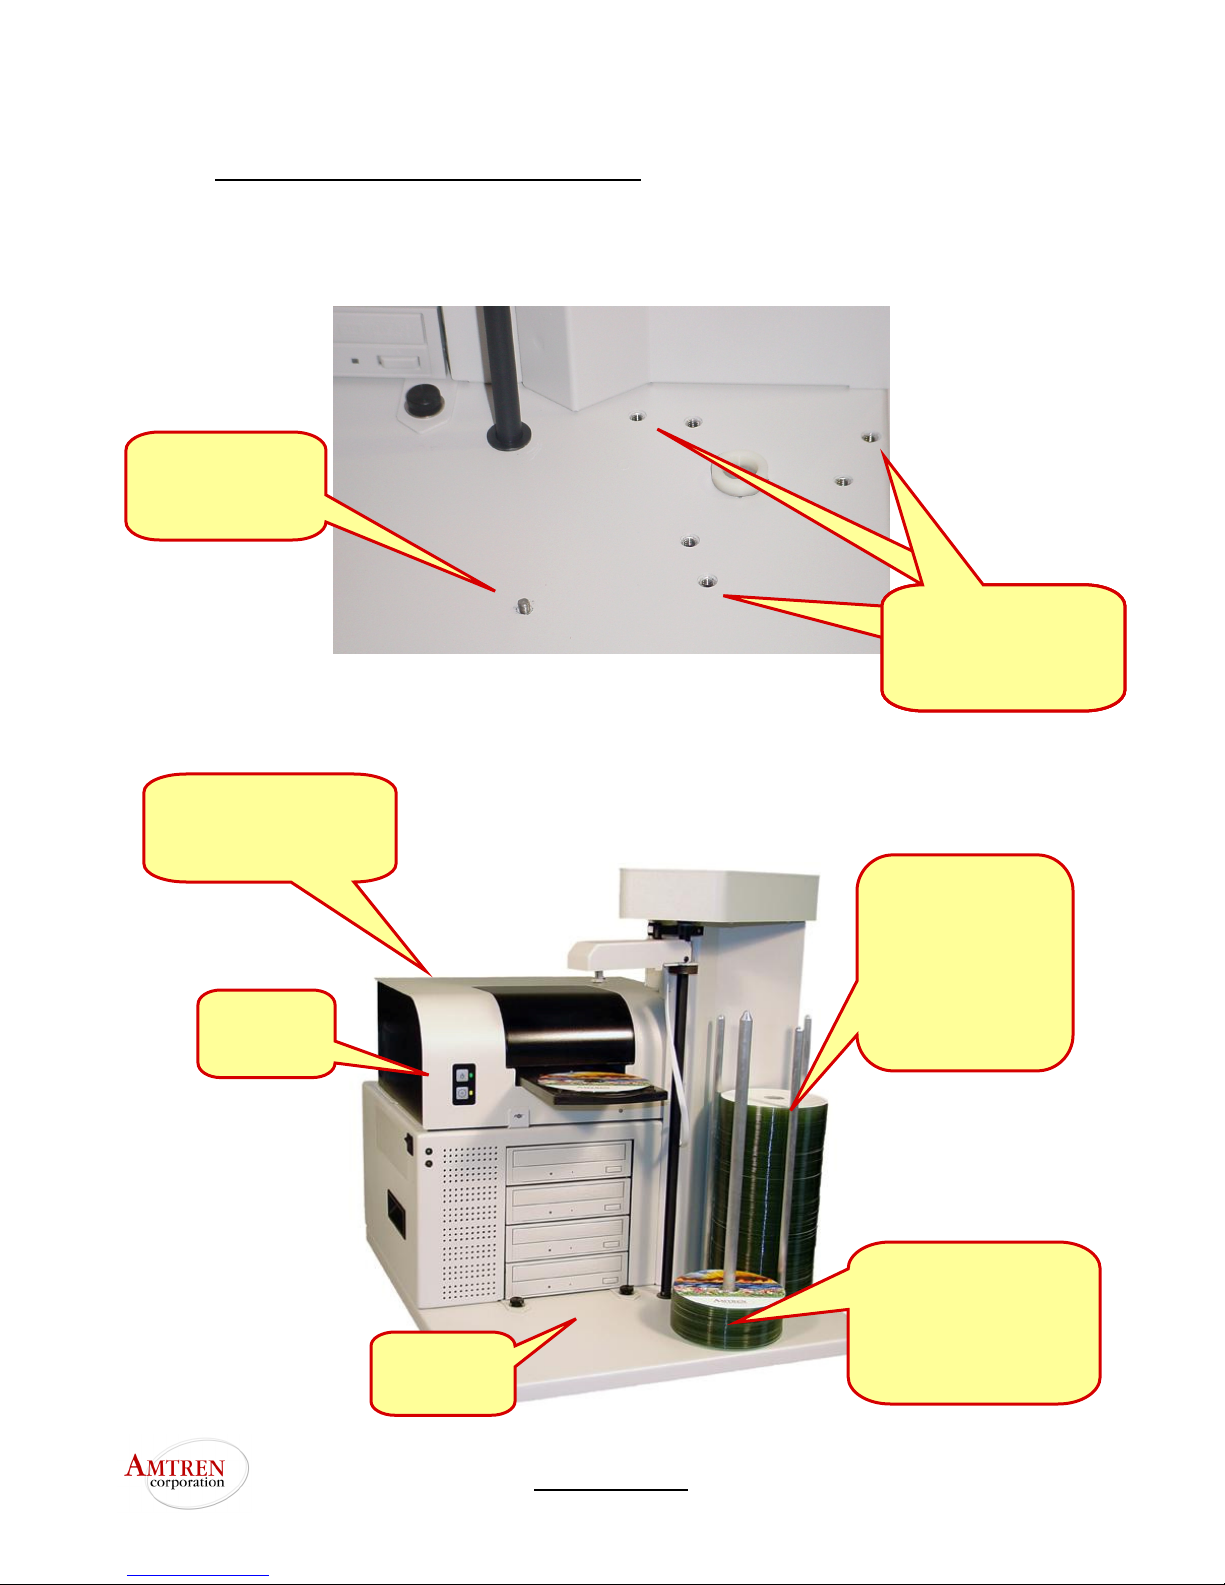
The Disc Printer powers up automatica y, you do not need to press any buttons.
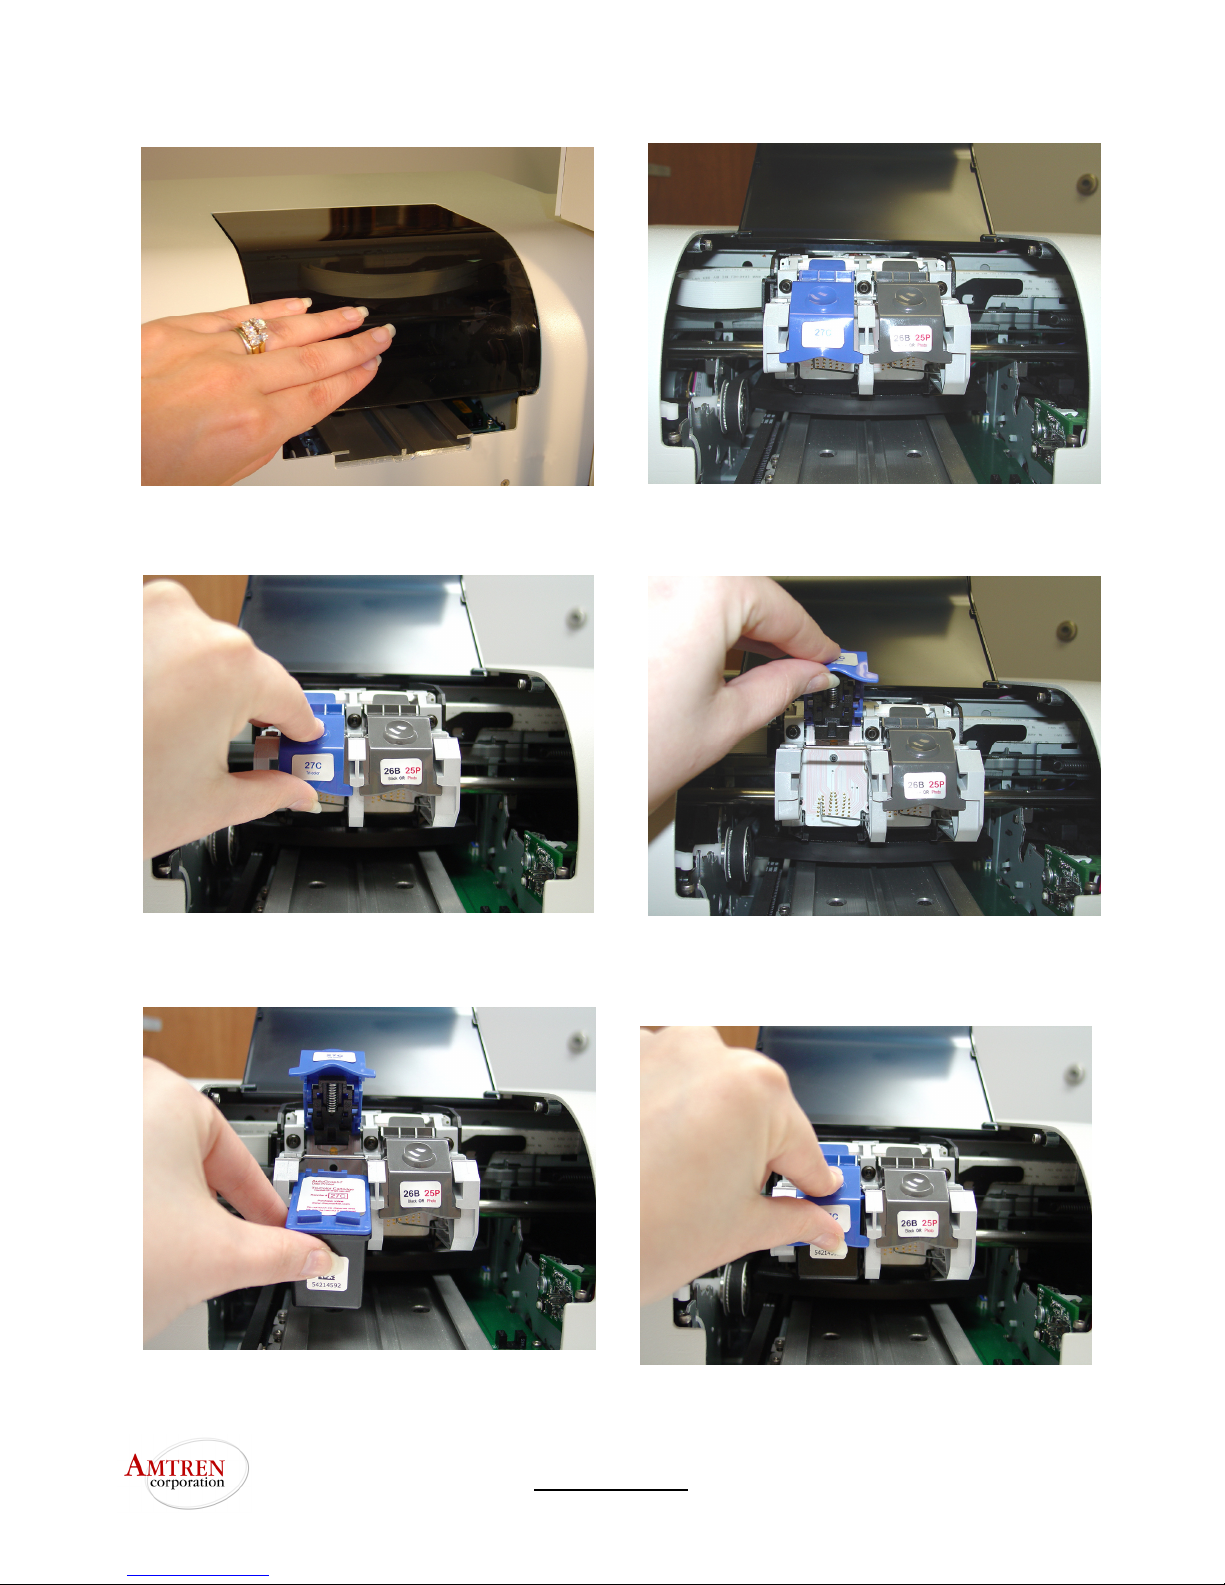
Lifting up the front plastic cover of the printer will cause the ink cartridge holder to slide into the center
of the opening, thus enabling you to replace the ink cartridges.
npack the included ink cartridges. Be sure to remove the tape from the cartridges. DO NOT
TOUCH the meta contacts or ink nozz es.
The color cartridge, 27C slides in the front of the left cartridge holder. The black cartridge, 26B OR the
photo cartridge, 25P, slides in the front of the right cartridge holder. Please see the next pages for car-
tridge installation details.
The Top Button on the Disc
Printer controls power. This
button can be used to RESET
the Printer.
The lower button is to operate
the Disc Tray. This is normally not
required unless you print labels
manually from Discus.
OR
26B black
25P photo 27C color
1.7 Insta ing Ink Cartridges