analogue.co 7 / 23V1.1 March 2019
Setting up your TV for perfect retro gaming
If your TV has a low-lag or Game Mode, enable it.
Otherwise turn o all processing features on your
TV or it may negatively eect gameplay
and latency.
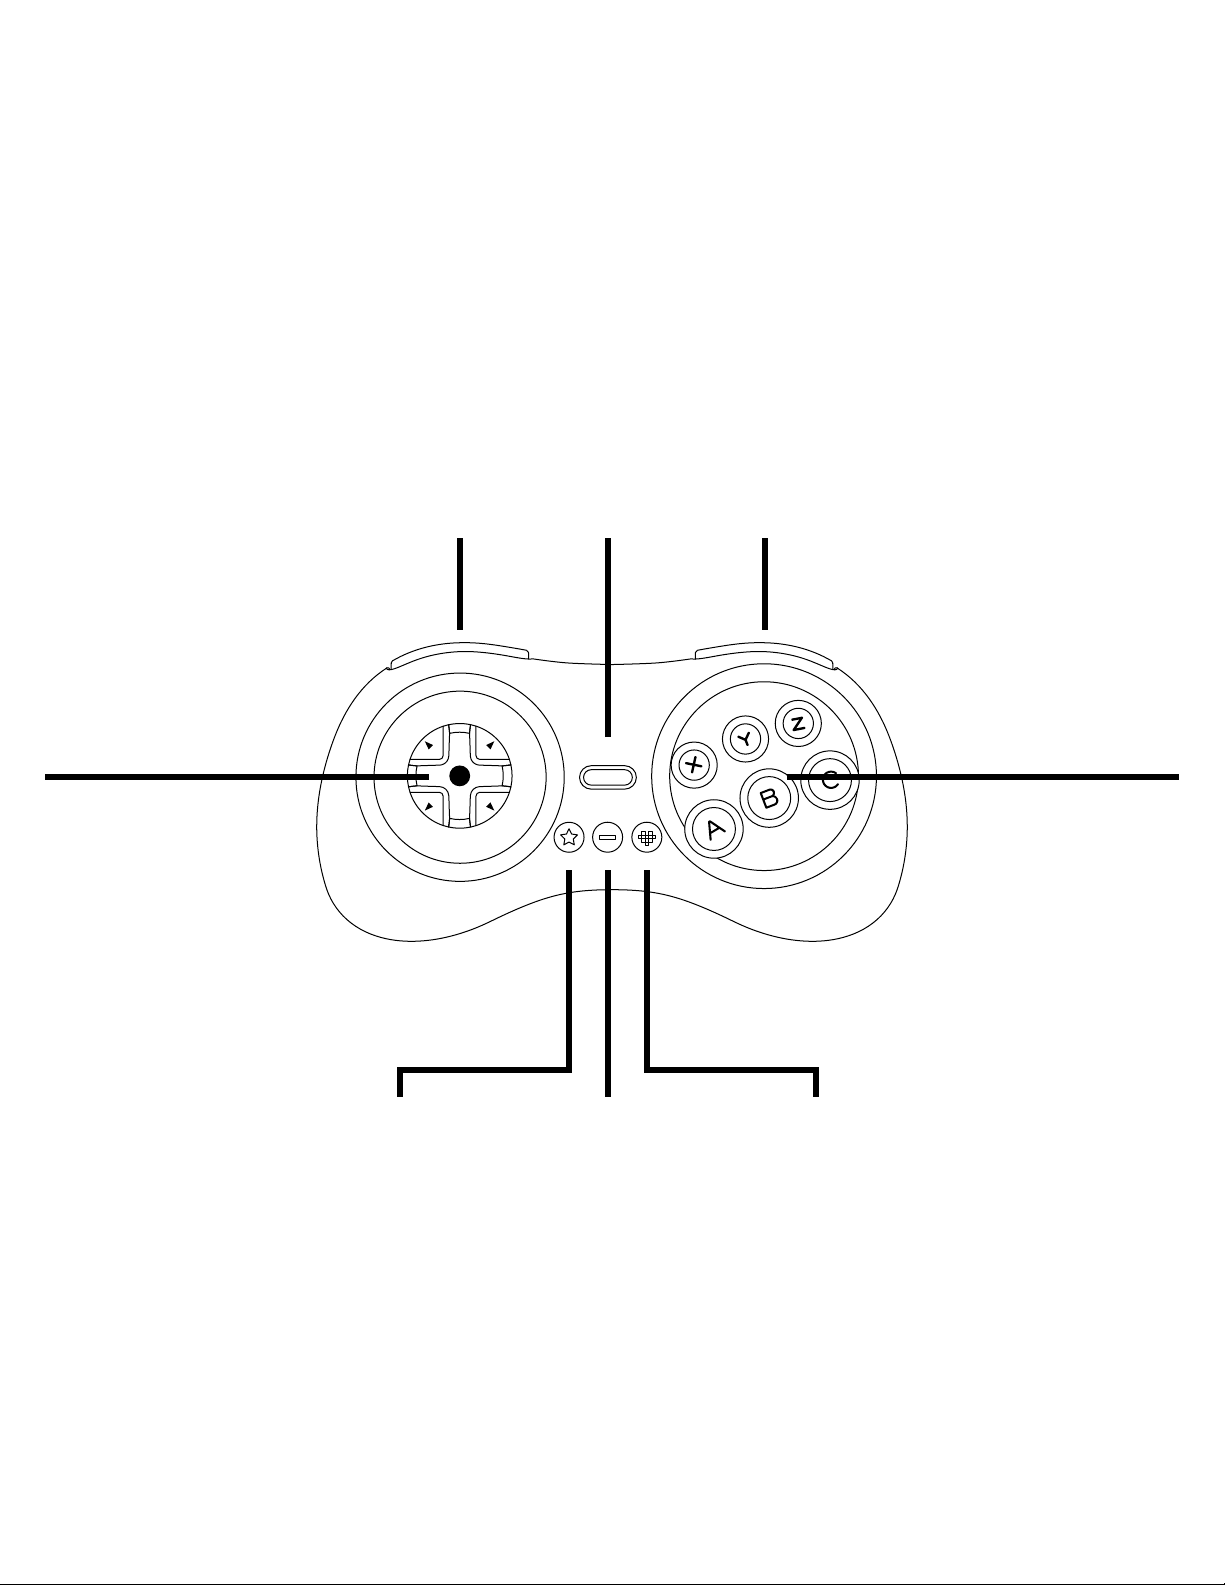
Default Controller Key Assignments & Hotkeys
Down + Start — Enter/Leave Menu
Entering the Menu may not pause a game and
blocks controller inputs to the game, Leaving
the Menu returns to a game in progress and returns
controller inputs to the game.
Up + Start + A + B + C — Reset
Same as pressing the physical reset button, initiates
a soft reset.
A— Conrm/Select Menu Option Key
B— Cancel/Back Key
C— Exit Menu and Return to Game
Main Menu Options
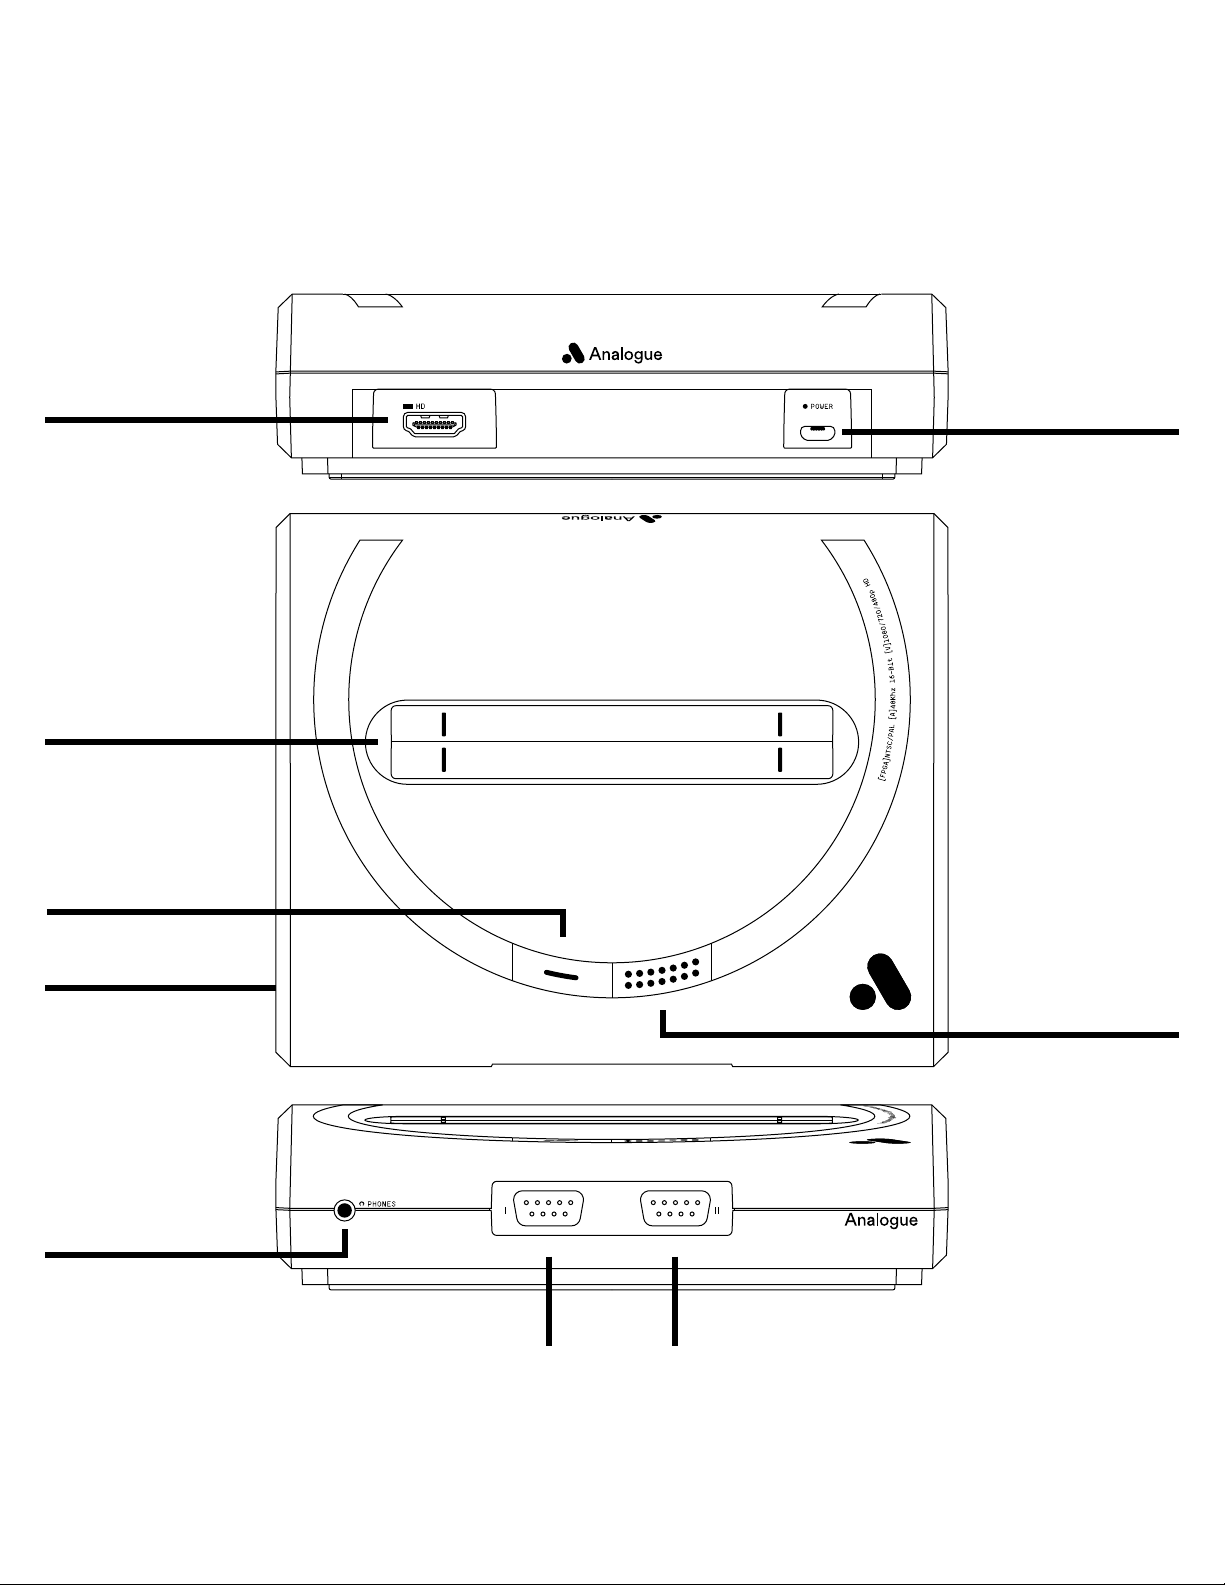
Run Cartridge
Performs a Cold Reset (CPU registers and memory
is reset) and runs the cartridge in the cartridge
slot. This can be a Genesis/Mega Drive cartridge
or, with the appropriate cartridge adapter, a Sega
Master System cartridge, a Sega Card/MyCard, or
a Sega Game Gear cartridge. The system will load
the appropriate core automatically if the cartridge
is not a Genesis cartridge. This option is also used
to startup the Sega CD if one is attached to the
Mega Sg.
Play Ultracore
Allows you to play the previously unreleased game
Ultracore (formerly known as Hardcore) built into
Mega Sg.
Settings
Allows you to adjust the video, audio or system
options, save settings and view the credits.
Tools
Allows you to enter Game Genie-style cheat codes
and test your controllers using the built-in Analogue
controller test program.
Compatible Cartridges
— Ocial Sega/Manufactured and approved
Genesis/Mega Drive cartridges (all regions)
— Codemasters J-Cart Cartridges
— Sonic & Knuckles Lock-On Cartridge
— Virtua Racing
— Unlicensed/Homebrew/Reproduction/Pirate
Genesis/Mega Drive cartridges
— Sega Genesis/Mega Drive Game Genie
— Krikzz Mega EverDrive v1, v2/X7, X5 & X3,
EverDrive MD v1-v3
— Sega Master System Cartridges with
included Master System Adapter, Master
System Converter II, Power Base Mini or
PowerBase Mini FM, Master EverDrive X7
— Sega Game Gear Cartridges with Game Gear
adapter (sold separately)
— Sega Master System and SG-1000 Cards
with Card adapter (sold separately)
Compatible Controllers & Peripherals
— Ocial and aftermarket Genesis/Mega Drive
controllers (all regions, all varieties including
3 button and 6 button controllers)
— Ocial Sega Mouse and Mega Mouse
— Sega Activator
— Sega Team Player & Electronic Arts 4 Way
Play Multi-taps (never attach anything other
than a wired regular Genesis/Mega Drive
controller to a multi-tap)
— 8BitDo Retro Receiver
— Sega CD Models 1 & 2
— Zero Tolerance Link Cable
— Miracle Piano (with Sega Genesis/Mega
Drive Adapter)