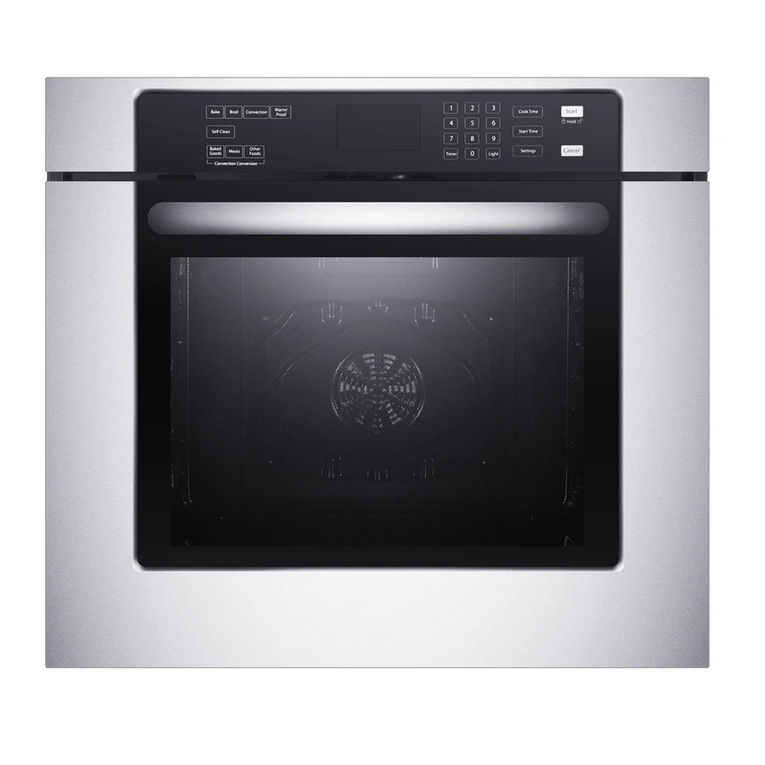
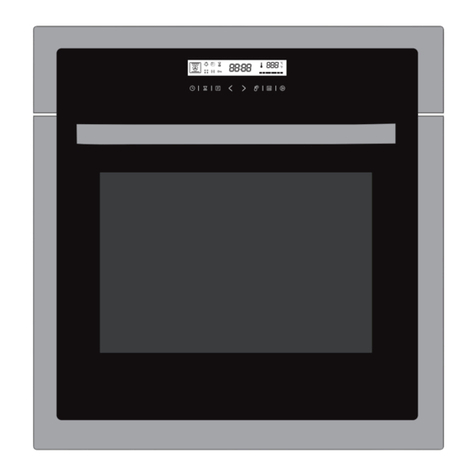
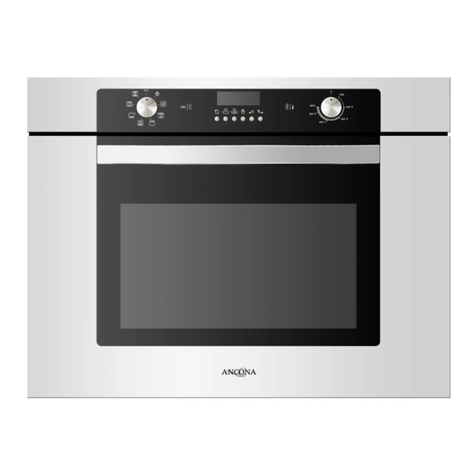
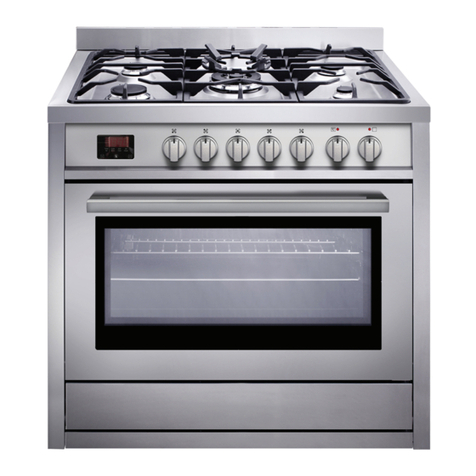
Ancona AN-2710SS User manual

Built-In Combination Oven
with Hot Air and Microwave
User Manual
and
Installation Instructions
IMPORTANT SAFETY INSTRUCTIONS
Carefully read the important information
regarding installation, safety and maintenance.
Keep these instructions for future reference.
MAAN2710SS-01
2022-01-05
Chef Induction Cooktop
30” and 36”
User Manual
&
Installation Instructions
IMPORTANT SAFETY INSTRUCTIONS
Carefully read the important information
regarding installation, safety and maintenance.
Keep these instructions for future reference.
MAAN2402-EN-2
2021-07-05
AN-2710SS

— 2 —
INSTALLERS - Start Here
Safety Instructions are on pages 4 to 6 and
Installation Instructions are on pages 7 to 9.
Please perform these steps:
1. Read the safety instructions.
2. Read all instructions in the Installation section of this
manual BEFORE installing the appliance.
3. Remove all packing materials from the oven before
connecting the gas supply.
4. Observe all governing codes and ordinances.
5. When nished, make sure to leave these instructions with the consumer.
6. Installation is only to be done by a qualied technician, but ultimately proper
installation is the responsibility of the installer.
7. Product failure due to improper installation is not covered under the Warranty.
CONSUMERS - Start Here
Safety Instructions are on pages 4 to 6 and
Operating Instructions are on pages 10 to 27.
Please perform these steps:
1. Read the safety instructions.
2. Read all instructions in the manual BEFORE
operating the appliance.
3. Remove all packing materials from the oven before using.
4. Observe all governing codes and ordinances.
5. Installation is only to be done by a qualied technician, but ultimately proper
installation is the responsibility of the installer.
6. Product failure due to improper installation is not covered under the Warranty.
Before You Begin

— 3 —
Before You Begin..................................................................................................................................... 2
Table of Contents .................................................................................................................................... 3
Important Safety Information .................................................................................................................. 4
Installation ............................................................................................................................................... 7
Included Parts ................................................................................................................................... 7
Dimensions ....................................................................................................................................... 7
Step 1 - Read the Safety Precautions............................................................................................... 8
Step 2 - Plan Desired Location, Unpack the Appliance and Prepare Tools...................................... 8
Step 3 - Preparing the Cabinet ......................................................................................................... 8
Step 4 - Fixing the Unit to the Cabinet ............................................................................................. 9
Step 5 - Connect to AC..................................................................................................................... 9
Operation............................................................................................................................................... 10
Control Panel......................................................................................................................................... 10
Accessories ........................................................................................................................................... 11
Before Using the Appliance for the First Time ...................................................................................... 11
Setting the Oven ............................................................................................................................. 12
The Microwave................................................................................................................................ 13
Express Cooking............................................................................................................................. 14
Multi-Stage Cooking ....................................................................................................................... 15
Automatic Programmes .................................................................................................................. 15
Defrosting Programmes .................................................................................................................. 15
Popcorn .......................................................................................................................................... 16
Beverage ......................................................................................................................................... 16
Frozen Foods .................................................................................................................................. 16
Pizza................................................................................................................................................ 17
Sensor Cooking .............................................................................................................................. 18
Broil ................................................................................................................................................. 20
Setting the Time-Setting Options ................................................................................................... 20
Childproof Lock............................................................................................................................... 21
Expert Cooking Guide..................................................................................................................... 22
Acrylamide in Foodstuffs ................................................................................................................ 24
Energy and Environment Tips ......................................................................................................... 24
Care and Cleaning................................................................................................................................. 25
Cleaning Guide................................................................................................................................ 26
Troubleshooting..................................................................................................................................... 27
Table of Contents

— 4 —
Important Safety Information
READ ALL INSTRUCTIONS BEFORE USE
Read and follow all instructions before using your oven to prevent the risk of re, electric shock, personal
injury, or damage when using the appliance. This guide does not cover all possible conditions that may occur.
Always contact your service technician or manufacturer about problems that you do not understand.
DANGER: When you see this symbol in the instructions, it indicates a hazardous
situation which, if not avoided, could result in death or serious injury.
WARNING: When you see this symbol in the instructions, it indicates a hazardous
situation which, if not avoided, could result in minor or moderate injury.
DANGER
Precautions to Avoid Possible Exposure to Excessive Microwave Energy
• Do not attempt to operate this oven with the door open, since this can result in harmful exposure to microwave energy.
It is important to not break or tamper with the safety interlocks.
• Do not place any object between the oven front face and the door or allow soil or cleaner residue to accumulate on
sealing surfaces.
• WARNING: If the door or door seals are damaged, the oven must not be operated until it has been repaired by a
competent person.
If the appliance is not maintained in a good state of cleanliness, its surface could be degraded and affect the lifespan of
the appliance and lead to a dangerous situation.
SAVE THESE INSTRUCTIONS
If you follow the instructions, your oven will provide many years of good service.

— 5 —
Important Safety Information
WARNINGS
To reduce the risk of re, electric shock, injury to persons or
exposure to excessive microwave oven energy when using
your appliance, follow basic precautions, including the
following:
• Readandfollowthespecic:“PrecautionstoAvoid
Possible Exposure to Excessive Microwave Energy”.
• Donotstoreorusegasoline,liquidpropanecylinderor
other ammable vapors and liquids in the vicinity of this
or any other appliance.
• Ifthesurfaceiscracked,switchofftheapplianceto
avoid the possibility of electric shock.
• Donotrepairorreplaceanypartoftheapplianceunless
specically recommended in this manual. All other
servicing should be done only by a qualied technician.
This may reduce the risk of personal injury and damage
to the appliance.
• Theapplianceanditsaccessiblepartsbecomehot
during use. Care should be taken to avoid touching
heating elements.
• Ensurethattheapplianceisswitchedoffbefore
replacing the oven lamp to avoid the possibility of
electric shock.
•Ifthesupplycordisdamaged,itmustbereplacedby
the manufacturer, its service agent or similarly qualied
persons in order to avoid a hazard.
•WARNING:Itishazardousforanyoneotherthana
competent person to carry out any service or repair
operation that involves the removal of a cover, which
gives protection against exposure to microwave energy.
• Disconnectpowerbeforeservicing.
• Nevermodifyoraltertheconstructionoftheappliance
by removing panels, wire covers or any other part of
the product.
• Injuriesmayresultfromthemisuseofappliancedoors
such as stepping, leaning, or sitting on the doors.
• Keeptheapplianceanditscordoutofreachofchildren
less than 8 years. Children less than 8 years of age shall
be kept away unless continuously supervised.
• Thisappliancecanbeusedbychildrenagedfrom8
years and above and persons with reduced physical,
sensory or mental capabilities, or lack of experience
and knowledge, if they have been given supervision or
instruction concerning use of the appliance in a safe
way, and understand the hazards involved.
• WARNING: When the appliance is operated in the
combination mode, children should only use the oven
under adult supervision due to the high temperatures
generated.
• Childrenshouldbesupervisedtoensurethattheydo
not play with the appliance.
• Cleaningandusermaintenanceshallnotbemadeby
children without supervision.
• Donotallowchildrentogoneartheovenwhenitis
operating, especially when the grill is on.
• Flammablematerialsshouldnotbestoredonthe
appliance or near surface units. This includes paper,
plastic and cloth items, such as cookbooks, plastic
ware and towels, as well as ammable liquids. Do not
store explosives, such as aerosol cans, on or near the
appliance. Flammable materials may explode and result
in re or property damage.
• Maintenance: Keep appliance area clear and free from
combustible materials, gasoline, and other ammable
vapors and liquids.
• Storage in or on the appliance: Flammable materials
should not be stored in an oven or near surface units.
• WARNING:Liquidsandotherfoodsmustnotbeheated
in sealed containers since they are liable to explode.
• When heating food in plastic or paper containers, keep
an eye on the oven due to the possibility of ignition.
• Only use utensils that are suitable for use in microwave
ovens.
• If smoke is emitted, switch off or unplug the appliance
and keep the door closed to stie any ames.
• Microwave heating of beverages can result in delayed
eruptive boiling, therefore care must be taken when
handling the container.
• The contents of feeding bottles and baby food jars
shall be stirred or shaken and the temperature checked
before consumption, in order to avoid burns.
• Eggs in their shell and whole hard-boiled eggs should
not be heated in microwave ovens since they may
explode, even after microwave heating has ended.
• The oven should be cleaned regularly and all food
deposits removed.
• Failure to maintain the oven in a clean condition could
lead to deterioration of the surface that could adversely
affect the life of the appliance and possibly result in a
hazardous situation.
• Donotuseharshabrasivecleanersorsharpmetal
scrapers to clean the oven door glass. They can scratch
the surface, which may result in shattering of the glass.
• Asteamcleanerisnottobeused.

— 6 —
Important Safety Information
Causes of damage
CAUTIONS
• Creationofsparks:Metal-e.g.aspooninaglass-must
be kept at least 2 cm from the oven walls and the inside
of the door. Sparks could irreparably damage the glass
on the inside of the door. Using metal under microwave
mode is not recommended.
• Waterinthehotcookingcompartment:Neverpourwater
into the hot cooking compartment. This will cause steam.
The temperature change can cause damage.
• Moistfood:Donotstoremoistfoodintheclosed
cooking compartment for long periods.
• Donotusetheappliancetostorefood.Thiscanleadto
corrosion.
• Coolingwiththeappliancedooropen:Onlyleavethe
cooking compartment to cool with the door closed. Do
not trap anything in the appliance door. Even if the door
is only slightly ajar, the fronts of adjacent units may be
damaged over time.
• Heavilysoiledseal:Ifthesealisverydirty,theappliance
door will no longer close properly during operation. The
fronts of adjacent units could be damaged. Always keep
the seal clean.
• Operatingthemicrowavewithoutfood:Neverswitch
on the appliance unless there is food in the cooking
compartment. Operating the appliance without food
in the cooking compartment may lead to overload. An
exception to this rule is a short crockery test (see the
section“Microwave,suitableovenware”).
• Donotstandorplaceanythingontheopenappliance
door. Do not place ovenware or accessories on the
appliance door.
• Transportingtheappliance:Donotcarryorholdthe
appliance by the door handle. The door handle cannot
support the weight of the appliance and could break.
• Microwavepopcorn:Neversetthemicrowavepower
too high. Use a power setting no higher than 600 watts.
Always place the popcorn bag on a glass plate. The disc
may jump if overloaded.
• Liquidthathasboiledovermustnotbeallowedto
run through the turntable drive into the interior of the
appliance. Monitor the cooking process. Choose a
shorter cooking time initially and increase the cooking
time as required.
• Theovenshouldbecleanedregularly,andanyfood
deposits removed since they may explode, even after
microwave heating has ended.
• Failuretomaintaintheoveninacleanconditioncould
lead to deterioration of the surface that could adversely
affect the life of the appliance and possibly result in a
hazardous situation.
• This appliance is intended to be used in household and
similar applications such as:
- staff kitchen areas in shops, ofces and other
working environments
- by clients in hotels, motels and other residential type
environments
- farm houses
• Care should be taken not to displace the turntable when
removing containers from the appliance.
• The microwave oven is intended for heating food and
beverages. Drying of food or clothing and heating of
warming pads, slippers, sponges, damp cloth and
similar may lead to risk of injury, ignition or re.
• Surface of a storage drawer can get hot.
• Metallic containers for food and beverages are not
allowed during microwave cooking
• The appliance is intended to be used built-in.
• The appliance must not be installed behind a decorative
door, in order to avoid overheating.
READ AND FOLLOW THIS SAFETY INFORMATION CAREFULLY.
SAVE THESE INSTRUCTIONS!

— 7 —
Installation
Included Parts
Dimensions
2 Mounting screws1 turntable 1 grill rack1 Ceramic plate
Rated Voltage 120 V ~ , 60 Hz
Maximum Power 3400W
Rated Output Power (Microwave) 1000W
Oven Capacity 44L
Turntable Diameter 36 cm
45.4 cm
(17.9”)
59.5 cm
(23.4”) 56.8 cm
(22.3”)
45 cm
(17.7”)
Min. 55 cm (21.6”)
*2 cm for metal fascia
0.4 cm
(0.1”) 45.4 cm
(17.9”)
Min. 1 cm (0.4”)
1.9 cm (0.75”)
*2 cm (0.8”)
External dimensions without handle

— 8 —
STEP 1
Read the Safety Precautions
Please read the safety precautions on pages 4 to 6. Safety instructions pertaining to each step have been outlined in the
installation steps; however it is important to read ALL the safety instructions.
IMPORTANT: It is the installer’s responsibility to comply with installation clearances.
STEP 2
Plan Desired Location, Unpack the Appliance and Prepare Tools
Plan a desirable location that ts all requirements in the Safety and Install sections of this manual. Unpack the appliance
and parts carefully. Make sure all parts are included as shown on page 7 and set aside. DO NOT remove the protective lm
covering the appliance.
Installation
STEP 3
Preparing the Cabinet
• This appliance is only intended to be fully tted in a
kitchen.
• This appliance is not designed to be used as a tabletop
appliance or inside a cupboard.
• The tted cabinet must not have a back wall behind the
appliance.
• A gap of at least 45 mm must be maintained between the
wall and the base or back panel of the unit above.
• The tted cabinet must have a ventilation opening of 250
cm2on the front. To achieve this, cut back the base panel
or t a ventilation grille.
• Ventilation slots and intakes must not be covered.
• The safe operation of this appliance can only be
guaranteed if it has been installed in accordance with
these installation instructions.
• The installer is liable for any damage resulting from
incorrect installation.
• The cabinet into which the appliance is tted must be
heat resistant up 90°C.
• Note: There should be gap above the oven.
WARNING:
DO NOT LIFT THE UNIT BY THE OVEN DOOR HANDLE.
FLOOR
Cupboard feetVentilation grid
Rear ventilation
opening, min. 250 cm²
W
A
L
L
Ventilation area in the
base min. 250 cm²
56 cm (22”)
+0.8 (0.3”)
60 cm (23.6”)
Ventilation area
in the base min.
250 cm²
56 cm (22”)
+0.8 (0.3”)
Min. 55 cm
(21.6”)
Min. 55 cm
(21.6”)
Back panel
opening
Back panel
opening
Min. 4.5 cm
(1.75”)
Min. 4.5 cm
(1.75”)
45 cm
(17.7”)
46 cm
(18.1”)
5 cm
(1.9”)
Figure 1

— 9 —
Installation
STEP 4
Fixing the Unit to the Cabinet
Do not hold or carry the appliance by the door handle. The door handle cannot hold the weight of the appliance and may
break off.
1. Carefully push the microwave into the box, making sure that it is in the centre. Do not kink the connecting cable.
2. Open the door and fasten the microwave with the screws that were supplied.
3. Screw the appliance into place. The gap between the worktop and the appliance must not be closed by additional battens.
45.4 cm
(17.9”)
59.5 cm
(23.4”) 56.8 cm
(22.3”)
45 cm
(17.7”)
Min. 55 cm (21.6”)
*2 cm for metal fascia
0.4 cm
(0.1”) 45.4 cm
(17.9”)
Min. 1 cm (0.4”)
1.9 cm (0.75”)
*2 cm (0.8”)
STEP 5
Connect to AC
Connect AC plug into a grounded AC outlet having 120V, 60Hz.
WARNING:
The appliance is fitted with a plug and must only be connected to a properly installed grounded socket. Only
a qualified electrician who takes the appropriate regulations into account may install the socket or replace the
connecting cable. If the plug is no longer accessible after installation, an all-pole isolating switch must be present on
the installation side with a contact gap of at least 3 mm. Contact protection must be ensured by the installation.
Fuse protection: see specifications on page 7.
Figure 2

— 10 —
Operation
Select Auto Defrost programs
Start cooking programs for frozen
convenience foods
Select Sensor Cook programs
Select Sensor Reheat programs
Cook popcorn
Heat beverages
Select pizza programs
Select auto menu programs
SetBroilmodes(HighorLow)
Set power level for microwave operation
Select Bake Cook programs
Select Roast Cook programs
Select preheat programs
Set temp. or weight of cooking
Set cooking time
Activate/deactivate child lock
Set time of day
Use the number keys to enter customized values
Conrm entered values/Start cooking mode
Add 30 seconds
Clear entered value /turn appliance off
Use this section to familiarise yourself with your new appliance.
The control panel and the individual operating controls are explained. You will nd information on the cooking compartment
and the accessories.
Control Panel
Touch keys and display
The touch keys are used to set the various functions. On the display, you can read the values that you have set.
Parameter adjustment
Use the adjusting keys to set the parameters.
Parameter Function
Auto menu Select 8 automatic programmes
Weight Set the weight of cooking
Time Set the time of cooking
Cooling fan
Your appliance has a cooling fan. The cooling fan switches on during operation. The hot air escapes above the door.
The cooling fan continues to run for a certain time after operation.
• The appliance remains cool during microwave operation. The cooling fan will still switch on. The fan may run on even
when microwave operation has ended.
• Condensation may appear on the door window, interior walls and oor. This is normal and does not adversely affect
microwave operation. Wipe away the condensation after cooking.
WARNING:
Do not cover the ventilation slots. Otherwise, the appliance will overheat.

— 11 —
Operation
Accessories
Turntable
As a surface for the wire rack. Food which particularly requires a lot of heat from underneath can be prepared directly on the
turntable.
The turntable can turn clockwise or anti-clockwise.
Place the turntable on the drive in the centre of the cooking compartment. Ensure that it is
properly tted.
• Never use the microwave without the turntable.
• The turntable can withstand max. 5 kg.
• The turntable must turn when using all types of heating.
Ceramic Plate
For the microwave and for baking and roasting in the oven.
Grill Rack
For grilling, e.g. steaks, sausages and for toasting bread.
As a support for shallow dishes.
Before Using the Appliance for the First Time
Set up your appliance before using your oven to prepare food for the rst time. First read the section on Safety information.
Setting the clock
Oncetheapplianceisconnected,“12:00”willbedisplayedasthetimeofday.Tosetthecorrecttime,followbelowsteps:
1. Touch .
2. Enter the correct time using the number keys. Example: To set the clock to 12:41 type in 1 2 4 1.
3. Touch to conrm.
Heating up the oven
To remove the new oven smell, heat up the appliance when it is empty and closed. One hour with Convection at 350° F (180
°C)isideal.Ensurethatnopackagingremnantshavebeenleftintheovencavity.
1. Touch once to enter bake mode.
2. Enter the numbers 3 5 0 with the number keys.
3. Touch to adjust cooking time.
4. Enter the numbers 6 0 0 0 with the number keys.
5. Touch to start cooking.
The oven light turns on and the appliance starts heating.
Before you use the accessories for the rst time, clean them thoroughly with hot soapy water and a soft dish cloth.

— 12 —
Operation
Setting the Oven
There are various ways to set your oven, to select the desired type of heating and temperature or grill setting. You can also
select the oven cooking time for your dish. Please refer to the section on Setting the time-setting options.
Setting Convection mode
Example: roast 350° F for 20 minutes
1. Touch twice to enter roast mode.
2. Enter the numbers 3 5 0 with the number keys.
3. Touch to adjust cooking time.
4. Enter the numbers 2 0 0 0 with the number keys.
5. Touch to start cooking.
Opening the oven door during operation
Operation is suspended. After closing the door, press the key. Operation continues.
Cancelling operation
Touch to cancel the active oven mode. The appliance turns off and the clock is displayed.
The cooling fans may continue to run for awhile and then switch off automatically.
Rapid Preheating
With rapid preheating, your oven reaches the set temperature faster than usual.
To ensure an even cooking result, only put your food in the cooking compartment when the preheating phase is complete.
1. Touch the key.
2. Enter the temperature setting with the number keys. The input temperature should be within 100 to 450° F.
3. Touch the key.
The oven begins to heat up.
The preheating process is complete
A signal sounds. Put your dish in the oven. Set the cooking mode you need.
Cancelling rapid preheating
While setting the rapid preheating function, pressing the cancel the function
During rapid preheating, touching can cancel the function. You can also open the door to cancel the function.
Note: Only open the door and put food inside after signal goes off and preheating icon is blinking.

— 13 —
Power
level
Microwave
output
Use for
10
High
100% Boiling water
Cooking ground meat
Making candy
Cooking fresh fruit & vegetables
Cooking sh & poultry
Preheating browning dish
Reheating beverages
Cooking bacon slices
990% Reheating meat slices quickly
Sauté onions, celery & green peppers
880% All reheating
Cooking scrambled eggs
7
70% Cooking breads & cereal products
Cooking cheese dishes
Cooking mufns, brownies & cupcakes
Cooking whole poultry
660% Cooking pasta
5
50% Cooking meat
Cooking custard
Cooking spareribs, rib roast & sirloin
roast
440% Cooking less tender cuts of meat
Reheating frozen packaged foods
3
30% Thawing meat, poultry & seafood
Cooking small quantities of food
Finish cooking casseroles, stew &
some sauces
Melting chocolate
220% Softening butter & cream cheese
110% Softening ice cream
Raise yeast dough
Operation
The Microwave
Microwaves are converted to heat foodstuffs. The
microwave can be used on its own, or in combination with
a different type of heating. Follow below guides regarding
ovenware and how to set the microwave.
Note: In the Expert Cooking Guide, you will nd examples
for defrosting, heating and cooking with the microwave
oven.
Notes regarding ovenware
Suitable ovenware
Suitable dishes are heat-resistant ovenware made of glass,
glass ceramic, porcelain, ceramic or heat-resistant plastic.
These materials allow microwaves to pass through.
You can also use serving dishes, to avoid having to transfer
food from one dish to another. Do not use ovenware with
decorative gold or silver trim, unless if the manufacturer
guarantees that they are suitable for use in microwaves.
Unsuitable ovenware
Metal ovenware is unsuitable. Metal does not allow
microwaves to pass through. Food in covered metal
containers will remain cold.
Ovenware test
Do not switch on the microwave unless there is food inside.
The following ovenware test is the only exception to this
rule.
Perform the following test if you are unsure whether your
ovenware is suitable for use in the microwave:
1. Heat the empty ovenware at maximum power for ½ to 1
minute.
2. Check the temperature occasionally during that time.
The ovenware should still be cold or warm to the touch.
The ovenware is unsuitable if it becomes hot or sparks are
generated.
Microwave power settings
You can select from 10 different microwave power
levels. If you do not set a power level, the microwave will
automatically operate at the highest power level 10.
The table below provides suggested power levels for various
types of food that can be prepared in the microwave.
WARNING:
Creation of sparks: Metal - e.g. a spoon in a glass
- must be kept at least 2 cm from the oven walls
and the inside of the door. Sparks could irreparably
damage the glass on the inside of the door.
Using metal under microwave mode is not
recommended.

— 14 —
Operation
Setting the microwave
1. Enter the desired cook time with the number keys. The timer display will ll in from right to left.
Example: To set a microwave time of 20 minutes and 30 seconds, enter the numbers 2 0 3 0.
2. You can start microwave operation with the default power level 10 by touching ,
-or -
you can set a different power level. Press .
3. Enter the desired power level using the number keys.
4. Touch to start microwave operation. The microwave timer will start to count down.
Express Cooking
1. In waiting state, touch number keys 1 to 9 to start 100% microwave cooking in 1 to 9 minutes.
2. If the door is closed, the oven will start to cook automatically after 2 seconds.
Change power level
You can change the power level at any time during microwave operation.
1. Touch .
2. Enter the desired power level with the number keys.
3. Touch .
Microwave operation continues with the new power level.
Opening the appliance door during operation
Operation is suspended. After closing the door, touch the key. Operation continues.
Cancelling operation
Touch Clear/Off to cancel the active oven mode. The appliance turns off and the clock is displayed.
The cooling fans may continue to run for awhile and then switch off automatically.
Speedy microwave cooking
Use the key to quick start your microwave at the highest power level. You can touch the key repeatedly to
increase the microwave time in increments of 30 seconds.
Touching this key during microwave operation will add 30 seconds to the remaining microwave time.
The cooking time has elapsed
A signal sounds. Microwave operation has nished.

— 15 —
Operation
Multi-Stage Cooking
1. Enter the desired cook time with the number keys. The timer display will ll in from right to left.
2. Touch .
3. Enter the desired power level using the number keys.
4. Touch .
5. Enter the desired power level using the number keys.
6. Touch .
7. Enter the desired cook time with the number keys.
8. Touch to start microwave operation.
The buzzer will sound 3 times when the rst stage cooking is nished, and the second stage starts.
Automatic Programmes
The automatic programmes enable you to prepare food very easily. You select the programme and enter the weight of your
food. The automatic programme makes the optimum setting. You can choose from 8 programmes.
Always place the food in the cold cooking compartment.
Setting a programme
When you have selected a programme, set the oven. The
temperature selector must be in the off position.
1. Press .
2. Press repeatedly to scroll through all Auto Menu.
3. Press number keys to adjust weight of food.
4. Touch to start cooking.
Opening the appliance door during operation
Operation is suspended. After closing the door, touch the key. Operation continues.
Cancelling operation
Touch to cancel the active oven mode. The appliance turns off and the clock is displayed.
The cooling fans may continue to run for awhile and then switch off automatically.
Defrosting Programmes
You can select two different defrosting programmes to defrost ground meat and meat pieces.
1.Touch onceortwicetochoose“GROUNDMEAT”or“MEATPIECES”.
2. Enter the weight of the food you want to defrost using the
number keys.
3. Touch to start defrosting.
Program Weight range Food placement
1 - Chicken Breasts 0.5 - 3.0 lbs Wire rack, facing down
2 - Chicken Thigh 0.5 - 3.0 lbs Wire rack, facing down
3 - Whole Poultry 1.5 - 4.5 lbs Turntable
4 - Beef Roast 0.5 - 3.25 lbs Turntable
5 - Pork Tenderloin 1.0 - 3.0 lbs Wire rack, facing down
6 - Pork Chops 0.5 - 3.0 lbs Wire rack, facing down
7 - Meatloaf 1.0 - 3.25 lbs Turntable
8 - Fish Fillets 0.5 - 2.0 lbs Wire rack, facing down
Program no. Defrost Weight range in lbs.
1Ground meat 0.50 - 2.00
2 Meat pieces 0.50 - 3.00

— 16 —
Notes
• Preparing food: Use food that has been frozen at -18 °C and stored in portion-sized quantities that are as thin as
possible.
• Take the food to be defrosted out of all packaging and weigh it. You need to know the weight to set the programme.
• Liquid will be produced when defrosting meat or poultry. Drain off this liquid when turning meat and poultry and under
no circumstances use it for other purposes or allow it to come into contact with other foods.
• Ovenware: Place the food in a microwaveable shallow dish, e.g. a china or glass plate, but do not cover.
• When defrosting chicken and chicken portions, an audible signal will sound on two occasions to indicate that the food
should be turned.
• Resting time: The defrosted food should be left to stand for an additional 10 to 30 minutes until it reaches an even
temperature. Large pieces of meat require a longer standing time than smaller pieces. Flat pieces of meat and items
made from minced meat should be separated from each other before leaving to stand.
After this time, you can continue to prepare the food, even though thick pieces of meat may still be frozen in the middle.
The giblets can be removed from poultry at this point.
Popcorn
The popcorn feature lets you pop 3 different bag sizes of commercially
packaged microwave popcorn. Use the adjacent table to determine the
setting to use.
Setting Popcorn mode
The appliance must be turned off.
1. Touch . The cook time is displayed.
2. Touch repeatedly or touch number key 1 to 3 to choose the desired weight.
3. Touch . The microwave timer starts counting down.
When the microwave time has elapsed, a beep will sound. The appliance turns off and the clock is displayed.
Beverage
The beverage feature heats 0.5 to 2 cups of a beverage. Use the table to determine the setting to use.
Setting Beverage mode
1. Touch . The cook time is displayed.
2. Touch repeatedly or touch number key 1 to 4 to choose the desired amount.
3. Touch .
The microwave timer starts counting down. When the microwave
time has elapsed, a beep will sound. The appliance turns off and the
clock is displayed.
Frozen Foods
Use the Frozen Foods feature to prepare frozen convenience foods, like chicken nuggets, french fries, sh sticks, using
bottom heat and Convection.
WARNING:
Do not leave oven unattended while
popping corn. Popcorn may ignite and
cause fire.
Bag size Touch Popcorn mode
1.2 oz. Once
2.5 oz. Twice
3.5 oz. 3 times
Amount Touch Beverage mode
0.5 cups (about 4 oz.) Once
1 cup (about 8 oz.) Twice
1.5 cups (about 12 oz.) 3 times
2 cups (about 16 oz.) 4 times
Operation

— 17 —
Operation
Place the food you want to cook directly on the metal tray turntable.
Youcansetatemperaturerangefrom200to450°F(100to230°C).
Setting Frozen Foods
The appliance must be turned off.
1. Touch .
2. You can change the temperature by using the number keys. You can enter a temperature between 200 and 450° F (100
-230°C).
3. Touch to adjust cooking time.
4. Touch to start cooking.
Opening the appliance door during operation
Opening the appliance door during operation will interrupt the current mode. When you close the appliance door, operation
will be resumed.
Cancel operation
Touch to cancel the active oven mode. The appliance turns off and the clock is displayed. The cooling fans
may continue to run for awhile and then switch off automatically.
Pizza
You can use the Pizza mode to bake three different types of pizza:
Pizza tips
• Check pizza before minimum time, pizza may cook faster compared to a traditional oven.
• For fresh pizza use a pizza paddle for sliding the pizza on and from the metal turntable.
• If using a pizza paddle, sprinkle the paddle liberally with cornmeal for ease in transferring the dough to the metal
turntable.
• Maximum size is 12 inches for fresh and frozen pizzas.
• Avoid using a pizza stone as it can damage the oven.
• The metal turntable can be used for cutting pizza into slices. Remove the turntable from the oven after the pizza is baked.
Setting Pizza mode for fresh or frozen pizza
The appliance must be turned off. You can bake fresh or frozen pizza directly on the metal tray turntable.
Youcansetatemperaturerangefrom375to450°F(190to230°C)forfreshandfrozenpizzamodes.
1. Press .
2. Press repeatedly to scroll through all pizza modes.
3. Touch .
4. You can change the temperature by using the number keys. Touch to conrm.
The appliance starts preheating. The set temperature is reached once the preheat bar has lled up completely and a beep
sounds.
Mode no. Pizza type Bake on
1Frozen pizza Metal tray
2 Fresh pizza Metal tray
3Microwave pizza Ceramic tray

— 18 —
Operation
Setting Pizza mode for microwave pizza
Place the microwave pizza on the ceramic tray and put it in the oven following package directions.
1. Touch .
2. Touch the number key 3 or touch repeatedly until MICROWAVE PIZZA is displayed.
3. Touch .
4. Touch again. Sensing and the microwave symbol light up on the display.
The appliance starts sensing.
When sensing is complete, a beep will sound and the calculated cook time will start to count down.
After the cook time has run out, a beep will sound. The appliance turns off and the clock is displayed.
Note: Do not open the door during the sensing process, or the program will be cancelled.
Once the calculated cook time is displayed, you can open the door to stir, turn or rearrange the food. Touch
to resume operation.
Opening the appliance door during operation
Opening the appliance door during operation will interrupt the current mode. When you close the appliance door, operation
will be resumed.
Sensor Cooking
You can select two sensor cooking modes. Sensor cooking allows you to cook many of your favorite foods without
selecting cooking times and power levels. The microwave oven automatically determines the required cooking time for
each food item.
For best results for cooking by sensor, follow these recommendations:
• Food cooked with the sensor system should start from normal storage temperature.
• Turntable tray, ceramic tray and outside of container should be dry.
• Foods should always be covered loosely with microwavable plastic wrap, wax paper or lid.
• Do not open the door or touch Clear/Off key during sensing time. When sensing time is over, the oven beeps once and
the remaining cooking time will appear in the display. At this time you can open the door to stir, turn or rearrange the
food.
Sensor Reheat
TheSensorReheatfeatureletsyoureheatdinnerplatesorcasseroles(8-16oz.)foryourcookingconvenience.
Setting Sensor Reheat
1. Touch .
2. Touch . Sensing is displayed. The microwave operates during sensing.
3. When sensing is complete, a beep will sound and the calculated cook time will start to count down.
Note: Do not open the door during the sensing process, or the program will be cancelled.
Once the calculated cook time is displayed, you can open the door to stir, turn or rearrange the food. Touch
to resume operation.
When sensor reheat is nished, a beep will sound and the appliance turns off.

— 19 —
Operation
Reheat cooking suggestions
Sensor Cook
Sensor Cook allows you to cook many of your favorite foods without selecting cooking times and power levels. The
microwave oven automatically determines the required cooking time for each food item.
Setting Sensor Cook
The appliance must be turned off.
1. Touch .
2. Touch repeatedly to scroll through all Sensor Cook modes.
3. Touch .
The program will start sensing with the microwave operating.
Sensor Cook programs
Food Directions Quantity
Dinner plate
Use only pre-cooked, refrigerated foods. Cover plate with vented plastic wrap or waxed
paper, tucked under plate. If food is not hot enough after heating with the Reheat feature,
continue heating using manual time and power level setting.
Contents:
• 3-4oz.meat,poultryorsh(upto6oz.withbone)
• 1/2cupstarch(potatoes,pasta,rice,etc.)
• 1/2cupofvegetables(about3-4oz.)
1 serving
(1plate)
Casserole,
Pasta
Cover plate with lid or vented plastic wrap. If food is not hot enough after heating with
the Reheat feature, continue heating using manual time and power level setting.
Stir foods once before serving.
Contents:
• Casserole:refrigeratedfoods(suchasbeefsteworlasagna)
• Pasta: Canned spaghetti and ravioli, refrigerated foods
1 to 4 servings
Sensor Cook Program Quantity Cooking tips
1 – Baked Potato
1-4potatoes(8-32oz.) Pierce skin with a fork.
Do not cover.
After cooking, allow to stand wrapped in foil for 5 minutes.
2 - Ground Meat 8-24oz.(0.5-1.5lbs) After cooking, allow to stand covered, for 3 - 4 minutes.
3 – Fresh Vegetables 4-16oz.(0.25-1lbs) No water is needed if vegetables have just been washed. Add 2
tablespoons water per 8 ounces of fresh vegetables.
4 - Fish/ Seafood
8-20oz.(0.5-1.25lbs) Roll thin edges underneath. Arrange in a ring around
microwaveable dish.
5 - Frozen Entrees 10 - 20 oz. Follow package instructions for venting, cutting plastic lm, etc.
Notes:
• Cover with vented plastic wrap or wax paper.
• Reheat food on a microwaveable dinner plate.

— 20 —
Operation
When sensing is complete, a beep will sound and the calculated cook time will start to count down.
Note: Do not open the door during the sensing process, or the program will be cancelled.
Once the calculated cook time is displayed, you can open the door to stir, turn or rearrange the food. Touch
to resume operation.
When sensor cook is nished a beep will sound and the appliance turns off.
Opening the appliance door during operation
Opening the appliance door during operation will interrupt the current mode. Close the appliance door and then touch
to resume operation.
Cancel operation
Touch to cancel the active oven mode. The appliance turns off and the clock is displayed.
The cooling fans may continue to run for awhile and then switch off automatically.
Broil
The Broil feature uses intense heat radiated from the upper element.
You can set two intensity levels:
• Broil high
• Broil low
Setting Broil mode
The appliance must be turned off.
1. Touch .
2. Touch again, to change to Broil low mode.
3. Enter the desired cooking time with the number keys.
4. Touch to start operation.
Note: Always use a broil pan when cooking in Broil mode.
Opening the appliance door during operation
Opening the appliance door during operation will interrupt the current mode. When you close the appliance door, operation
will be resumed.
Cancel operation
Touch to cancel the active oven mode. The appliance turns off and the clock is displayed.
The cooling fans may continue to run for awhile and then switch off automatically.
Setting the Time-Setting Options
Your oven has various time-setting options. You can use the key to enter the menu and switch between the
individual functions.
Table of contents
Other Ancona Oven manuals
Popular Oven manuals by other brands

Sharp
Sharp AX-GX2T(R) Service manual

Middleby Marshall
Middleby Marshall TCO21140035 Owner's operating & installation manual

Beko
Beko Beyond BBIM12400XPS installation instructions

Charmate
Charmate CM160-018 instructions

Zanussi
Zanussi FM 5231 Instructions for use

Fisher & Paykel
Fisher & Paykel OB60SD9X1 manual