manuals.online logo
Brands
  1. Home
  2. •
  3. Brands
  4. •
  5. AneX
  6. •
  7. Vacuum Cleaner
  8. •
  9. AneX AG-2095 User manual

AneX AG-2095 User manual

Instructions for use
Best. No... item no... Ref. No.
AG-2095
1
Safety Instructions
Keep the packing film away from children.(Danger of suffocation)
Keep the appliance away from Children
Only use the appliance for the purpose intended!
NEVER leave the device unattended when in operation.
This appliance operates using dangerous voltage levels. Never
switch it on if the power supply cable is damaged, or if any other
damage is visible on the appliance. Never open the housing but
instead contact to carry out repairs. Use our hotline for further
information.
Do not use the device to remove any burning or smoking objects,
such as cigarettes, matches or hot ashes, any sharp objects such
as broken glass, or water or any other any other fluids. Any of the
above could damage the appliance and may cause injury to the
operator. Glowing ashes, burning cigarettes etc. may set the filter
alight, fluids may cause a short circuit and sharp objects will
damage the filter.
Never expose the appliance to the elements (rain etc.)
Always unplug the appliance from the main power supply before
cleaning or servicing (e.g. changing the filter)
When unplug the power cable from the wall socket, please do not
pull on the cable. Instead apply gentle force to the plug housing.
Children are often unable to understand the dangers of using
electrical equipment or may underestimated them. Therefore do
not allow children to work with electrical equipment.
Never sit or stand on the appliance.
This vacuum cleaner is only suitable for use with 220V~240V,
50Hz systems.
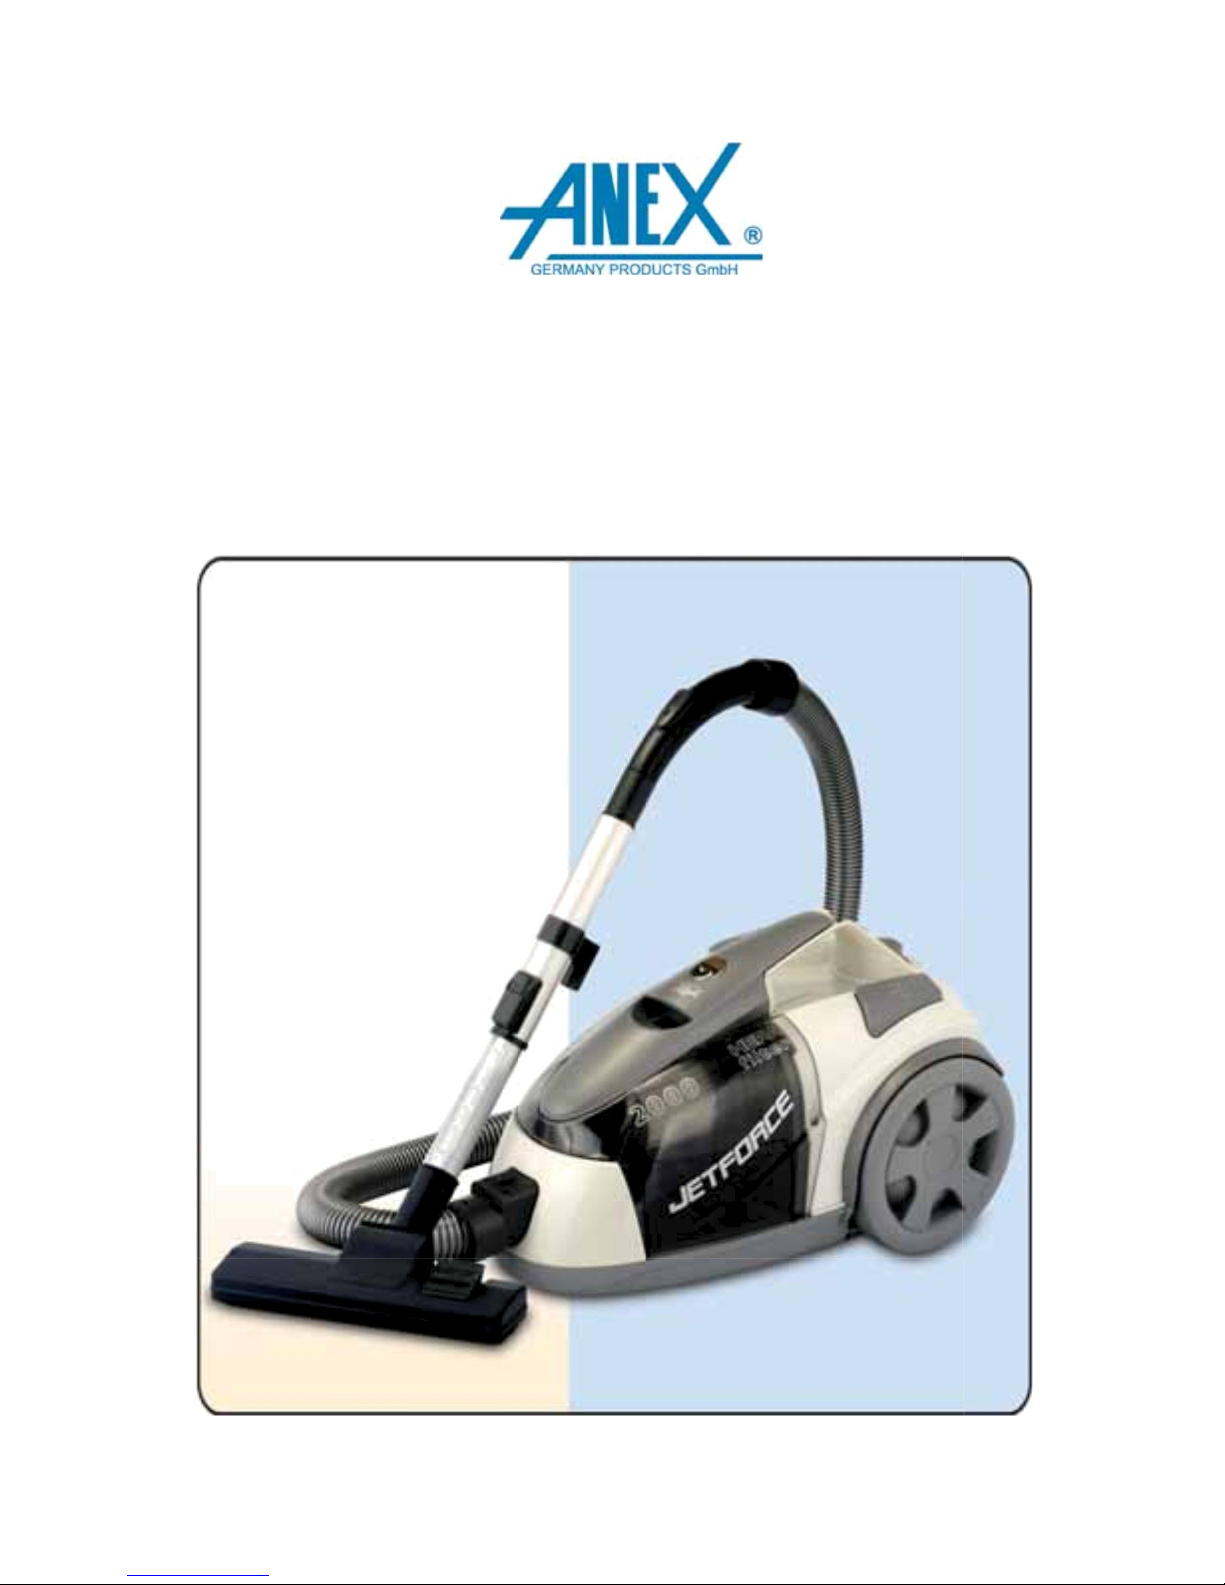
Only use the appliance once it has been fully assembled. The filter
must be undamaged!
If a carpet has been recently shampooed, ensure that it has
completely dry before vacuuming.
Never stand the appliance next to a radiator or an oven.
If you should pass this appliance on to another user, please
provide them with these operating instructions.
In case of damage or repairs, please contact our Customer
Service.
Please keep hair, loose items of clothing, fingers and all other
extremities away from any openings and moving parts.
The guarantee does not cover damage caused as a result of
incorrect handling, nonconformity with the user instructions and
damage caused by / repairs carried out by third parties. This also
2
applies to wear & tear on the parts, e.g. the filter.
Do not push objects into the orifices. The appliance should never
be used if any orifice is blocked. Remove all dust, fluff, hair and
other objects blocking the air intake or exhaust air vent.
Do not use the appliance to remove any burning or smoking
objects, such as cigarettes matches or hot ashes, or any
flammable liquids.
Keep the pipe or tube ends any other orifice away form the face
and body.
Do not use the appliance without the correct dust receiver tank in
place.
Always unplug the appliance before fitting or removing any
accessory parts.
Read through the assembly instructions carefully before
assembling the appliance. The assembly sequence must be
followed precisely.
In the interest of your own safety please check the appliance
carefully for damage before use. In case any faults do not use the
appliance until it has been repaired by and expert.
Only use the original accessories.
Always remove the plug from the main power supply before fitting
or removing any accessory parts.
In order to avoid an electric shock never immerse the power
supply cable, plug or any other parts of the appliance in water or
any other fluid.
ONLY use the appliance for the purpose intended.
Only use the appliance once it has been completely assembled and
is ready for use!
NEVER immerse appliance parts in water.
NEVER use the appliance close to water.
NEVER clean the appliance using a sourcing pad or abrasive cloth.
DO NOT use cleaning brushes or abrasive agents.
Do not crush or bend the cable, or place it on hot surfaces.
Never cover the air vents as this may lead to overheating. Danger
of fire!
3
Your cyclone vacuum cleaner and its technical data:
Attachments:
Equipments:
Washable long-life filter
Mesh filter
Automatic cable rewind
Motor capacity 2000W
Exhaust air subject to multi-filter process
Variable speed control
1. Floor nozzle
2.Flexible Hose
3.Telescopic Tube
4.Dust Tank
and HEPA filter
、
5. 3 in 1
dusting accessories
4
Technical data:
Main connection: 220V~240V,50Hz
We reserve the rights to make changes to the scope of deliverables,
equipment and the technical data!
Parts:
Take care when unpacking the device and ensure that you keep all
packing materials for the duration of the guarantee period.
5
Explanation of accessories:
You will receive four different nozzles with your cyclone vacuum
cleaner. These allow the device to be utilized for a variety of
applications.
Floor nozzle:
The floor nozzle is the fitting most commonly used. It is perfect for us
on large, even areas. The 360 joint allows the nozzle to gain access to
every corner, with ease and without complication. The toggle switch
provides you with the option of using the floor nozzle with a range of
floor coverings:
For carpets: Push the toggle switch to select the symbol for carpet.
By pressing the toggle switch you will have lowered the brushes.
For polished floor coverings, press the toggle
symbol for smooth flooring. The brushes that
have now been lowered are perfect for cleaning
tiles, parquet flooring and PVC.
Brush nozzle:
The brush nozzle is the best fitting for cleaning sensitive surface
such as picture frames or books.
Crevice nozzle:
The crevice nozzle is well suited to the vacuuming those areas that
you are unable to gain access to tight spaces, material folds (e.g.
crease in armchairs), corners and niches using
the crevice nozzle.
6
Assembling your cyclone vacuum cleaner:
Attention:
Before attaching or detaching any accessories always ensure that you
unplug the power supply from the wall socket!
1. Attaching or detaching the hose:
To attach: Push the vacuum hose into the air
intake opening until it snaps into place.
To detach: Push the button on the vacuum
hose to release the hose.
2. Attaching the telescopic tube and its
accessories:
Mount the telescopic rube onto the
handle
Set the telescopic tube to the desired length. In order to do this,
simply push the slide on the telescopic
tube forwards before pulling on the lower
part of the tube until it has reached the
length required. Once you have selected
the optimum length, let the slide return
to its original position and ensure that it
snaps shut.
Now attach the floor brush to the
telescopic tube as shown in the diagram.
Attach the crevice nozzle and brush
nozzle using the same method.
Operations:
Vacuuming:
Before use ensure that you have released a sufficient length of
cable, and then plug the device into the wall socket. The ideal
cable length is identified on the cable by a yellow marking. When
unrolled, the cable should not exceed the maximum length. This is
7
identified by the red marking.
Turn on the cyclone vacuum cleaner by gently tipping the foot to
press down on the ON/OFF switch.
Note:
On rare occasions it is possible that a “whistling” sound may be heard
when the device is switched on. This will cease after a short period and
does not indicate the presence of fault.
Stop:
Never use the device to vacuum clay, cement, drill or plaster. These
materials will block the filter.
Varying the suction capacity:
You can use the suction capacity regulator to select individual suction
requirements. Turn the regulator in clock-wise direction in order to
increase the suction capacity, back to decrease it.
MIN: This level is ideal when vacuuming sensitive materials such
as curtains.
MIN-MAX: The middle level is suitable for
upholstered furniture, carpets and
mattresses.
MAX: This level should only be used for robust
flooring such as wood and tiles.
Secondary air valve:
The secondary air valve, which is located on the device handle, allows
you to control the suction power of the cyclone vacuum cleaner more
finely. It is recommended that the secondary air valve be opened
when cleaning curtains etc. in order to avoid
them from being drawn in to the device.
To open: push forwards
To close: push backwards
After vacuuming:
Once you have finished vacuuming turn the device
off:
Use either the foot or the hand to press the
ON/OFF switch on the cyclone vacuum cleaner.
Remove the plug from the wall socket. (Never
pull on the cable, always apply light pressure to
8
the plug housing)
Take the plug in your hand in order to avoid the cable flicking up
during the winding process. Press down on the cable rewind button
with the foot until the cable has rewound completely onto the
cable drum, which is inside of the cyclone vacuum cleaner.
In order to place the device in its parking position, shorten the
telescopic tube to the storage mode and use the hook located
above the floor nozzle to guide it into the cyclone vacuum cleaner
nozzle holder.
The HEPA filter, mesh filter and exhaust filter.
The cyclone vacuum cleaner functions without a dust bag. The cyclone
technology directs the dusty intake air into the dust receiver tank
using air turbulence. The mesh filter, washable long-life filter (HEPA
filter) in the dust receiver tank and the exhaust filter combine to
ensure that the air is clean before it is expelled.
Attention: The device must only be used with the filter and exhaust
air filter in place.
Emptying the dust receiver tank:
The dust receiver tank is transparent, which means that you are
always able to see how full it is. You should always empty the dust
receiver tank by the time its contents reach the MAX mark.
Always unplug the appliance before emptying the dust
receiver tank!
You can now remove both the tank and the
cleaning system from their anchored
position by simply pushing the tank
releasing button and pulling out with the
crevice handle located on the dust
receiver tank. Now simply carry the dust
receiver tank to the dust bin with the
carrying handle.
Hold the dust receiver tank over your dust bin and push the interlock
9
device back. This action will open the bottom of the dust receiver tank,
which will release its contents into the bin.
Note if the dust receiver tank is very full, it is recommended that a bag
be pulled over the tank so that the tank can be emptied into the bag
first. This avoids excessive dust being released.
Once the tank is empty it is recommended that the mesh filter
and HEPA filter be cleaned if necessary.
Pull and rotate the filter grille on the back of the dust tank until
you see the HEPA filter.
Carefully turn the HEPA filter in anti-clockwise direction, until it
disengages. Now remove the HEPA filter.
10
The HEPA filter is wrapped with a mesh filter, uncover the mesh
filter first and clean it.
Clean the HEPA filter thoroughly. Never clean the HEPA filter using
soap or any other cleaning fluid. This would destroy the filter!
If the HEPA filter is heavily soiled, and this is leading to a
reduction in suction power, it is recommended that the filter be
replaced with a new one.
Once cleaning is complete, replace the filter by simply reversing
the process outlined above.
Place the HEPA filter back in the dust receiver tank and turn it
carefully in a clockwise direction, until it locks in place.
Now place the reassembled dust receiver tank back in the cyclone
vacuum cleaner, ensuring that it clicks into place. Your cyclone
cleaner is now ready for use.
Exhaust filter:
Remove the plug from the wall socket. (Never pull on the cable,
always apply light pressure to the plug housing)
Remove the exhaust air filter cover by pressing the interlock
release button.
Take out the exhaust air filter and rinse it well
under cold, clean water before leaving to dry.
Never clean the exhaust air filter using soap
or any other cleaning fluid. This would
destroy the filter!
Reposition the exhaust air filter.
If the exhaust air filter is heavily soiled, it is
recommended that the filter be replaced with
a new one.
Replace the exhaust air filter cover.
Cleaning the cyclone vacuum cleaner.
As and when necessary, the cyclone vacuum cleaner may be wiped
clean using a damp cloth and a little mild cleaning fluid. Never use
abrasive cleaning fluids as these could damage the appliance surface.
Ensure the not fluid is allowed to seep inside the cyclone vacuum
cleaner. Never place parts in the dishwasher.
Only connect your cyclone vacuum cleaner to the mains power supply
once all parts are completely dry. From time to time it may also
necessary to remove hair and fluff from the wheels in order to ensure
that the cyclone vacuum cleaner remains comfortable to use. Never
oil or lubricate roller bearing in the cyclone vacuum cleaner.
11
Fault finding:
When using a highly technical device do not assume that every
irregularity is defect. Always consult the table first, in order to assess
whether you are able to solve the problem yourself. If this does not
prove possible, please contact our Customer Service by telephone.
Problem Possible causes Solution / Tip
Suction power is
weak
The secondary air valve
is open
Close the secondary
air valve.
The vacuum hose is
blocked
Check all of the
adapter parts, valves,
vacuum hose tube etc
and remove the
blockage.
The filters are not fitted
correctly or they are
soiled.
Check the filters and
replace them with
new filters where
necessary.
The device does
not switch on
The plug is not correctly
connected to the wall
socket.
Check whether the
wall socket fuse is
intact. It could be that
the wall socket itself
is defective.
Note!
If you experience any other problem, never attempt to repair an
electrical item yourself. Always contact Customer Service or ask a
professional in order to ensure your personal safety. An electric shock
can be life-threatening.
Disposal:
If you wish to dispose of the packaging, please ensure that you do so
in an environmentally friendly manner and take it to a recycling facility.
If you wish to dispose of the device itself at any point, please also do
so in an environmentally friendly manner. This device should not be
disposed of alongside general household waste. Please contact your
local waste collection office or recycling centre. They will be able to
advise you further.
We withhold the rights to make changes to our products, packaging
12
and user instruction manual at any time within the framework of
on-going developments.

Popular Vacuum Cleaner manuals by other brands

Hoover EmPower C1660900 user manual

Hoover

Hoover EmPower C1660900 user manual

POLTI Vaporetto Lecoaspira Parquet manual

POLTI

POLTI Vaporetto Lecoaspira Parquet manual

Sanyo SC-27R parts list

Sanyo

Sanyo SC-27R parts list

Jimmy JV63 instruction manual

Jimmy

Jimmy JV63 instruction manual

VOLTA Gemini 2835 manual

VOLTA

VOLTA Gemini 2835 manual

Eureka 7600 Series owner's guide

Eureka

Eureka 7600 Series owner's guide

Clarke S12 Operating instructions and repair parts list

Clarke

Clarke S12 Operating instructions and repair parts list

Black & Decker VM1000 user manual

Black & Decker

Black & Decker VM1000 user manual

Shark Rocket quick start guide

Shark

Shark Rocket quick start guide

Nobles Quick Clean 1500 Specifications

Nobles

Nobles Quick Clean 1500 Specifications

Samsung Perfectum SC7355 operating instructions

Samsung

Samsung Perfectum SC7355 operating instructions

vacuubrand 20699979 Mounting instructions

vacuubrand

vacuubrand 20699979 Mounting instructions

Shark ION Rocket IR100 Series instructions

Shark

Shark ION Rocket IR100 Series instructions

Hoover BV20PAR user manual

Hoover

Hoover BV20PAR user manual

Dirt Devil BEAT operating manual

Dirt Devil

Dirt Devil BEAT operating manual

Far Tools PRO NET70B Original manual translation

Far Tools

Far Tools PRO NET70B Original manual translation

Shark ION ROBOT RV750C instructions

Shark

Shark ION ROBOT RV750C instructions

LG V-KC902HT Series owner's manual

LG

LG V-KC902HT Series owner's manual

manuals.online logo
manuals.online logoBrands
  • About & Mission
  • Contact us
  • Privacy Policy
  • Terms and Conditions

Copyright 2025 Manuals.Online. All Rights Reserved.