EUFY RoboVac 11c+ User manual

Owner’s Manual
eufy RoboVac 11c+
T2107
1. About Your RoboVac
What's In the Box
eufy RoboVac 11c+
Charging Base
Remote Control ( AAA Battery ×2) Power Adapter

Additional Side Brushes (×2)
Additional High-Performance
Filter
Additional Foam Filter
Cleaning Tool
Safety Leaflet
Owner’s Manual
Quick Start Guide
RoboVac Anatomy
Top & Side

1. Auto cleaning On/Off button
2. Bumper
3. Wi-Fi status light
4. Infrared sensor
5. Main power switch (On/Off)
6. Dust collector
7. Dust collector release button
Bottom
1. Charging contact pins
2. Brush guard
3. Rolling brush
4. Drop sensors
5. Swivel wheel
6. Side brushes
7. Wheels
8. Dust collector
Dust Collector
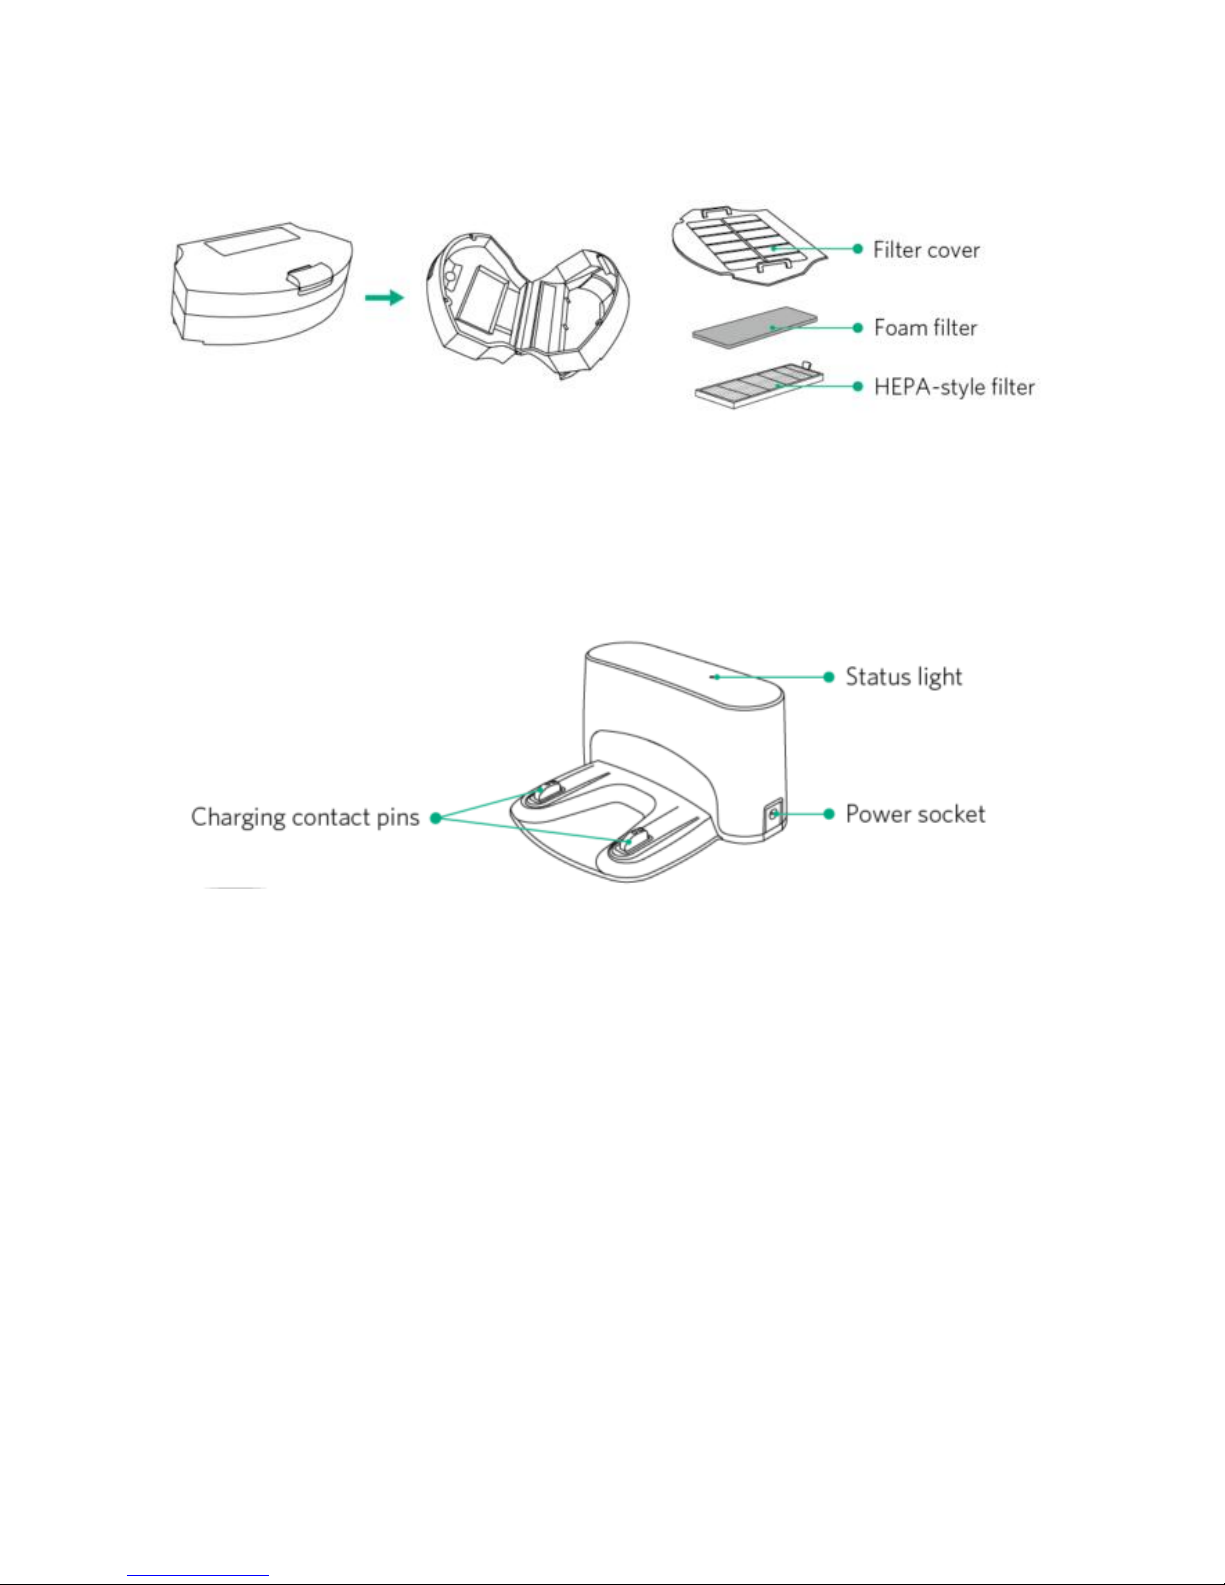
1. Filter cover
2. Foam filter
3. High-performance filter
Charging Base
1. Charging contact pins
2. Status light
3. Power socket
Suction Inlet
1. Dust collector
2. Suction inlet

Remote Control
1. Return RoboVac to the Charging Base
2. Start/Stop Auto cleaning
3. Adjust cleaning direction manually
4. Start Spot cleaning
5. Start Edge cleaning
6. Start Single Room cleaning
- Install 2 AAA batteries before using the remote control for the first time. Make sure the positive and
negative ends are facing the correct polarity direction as marked in the battery compartment.
2. Using Your RoboVac
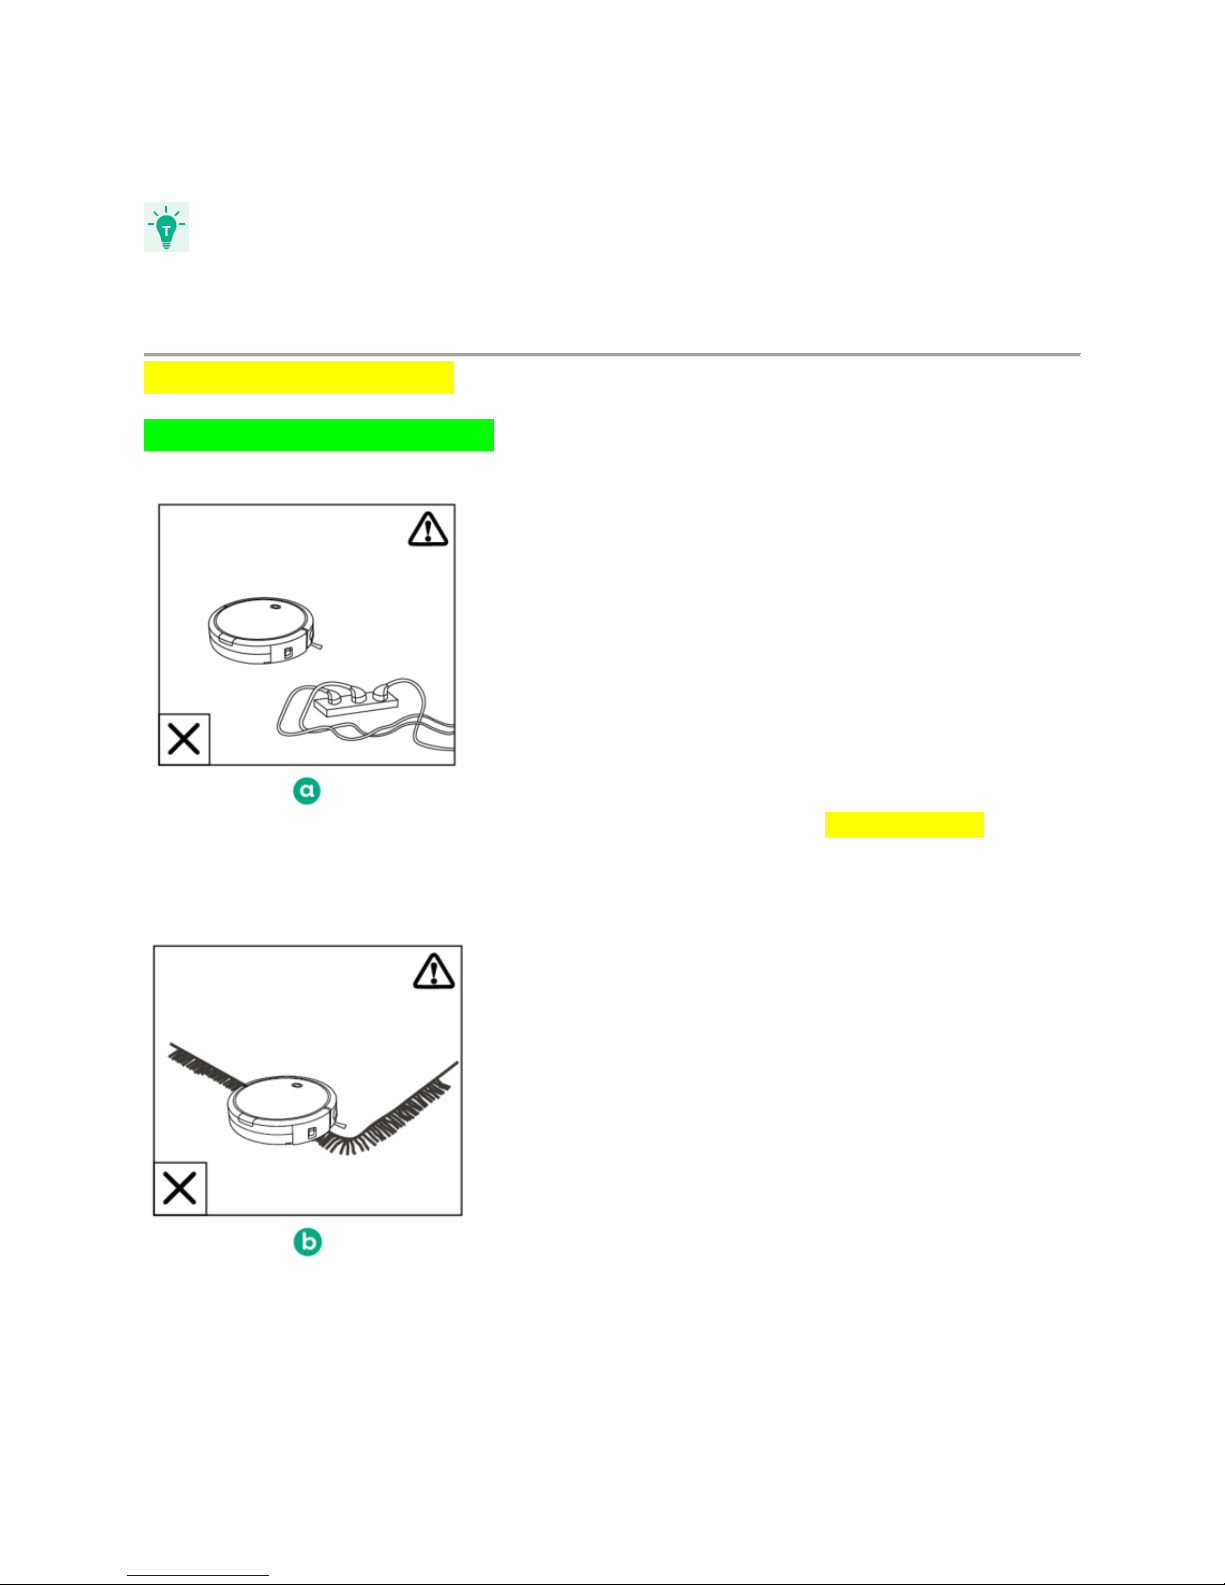
Important Tips Before Use
●Remove power cords and small objects from the floor that may entangle RoboVac.
●Remove rugs that are thicker than 0.87 in/22 mm as RoboVac may get trapped. Fold
tasseled edges of area rugs underneath to prevent tangling RoboVac. Do not use
RoboVac on high-pile carpeting.
●Avoid cleaning spaces lower than 3.9 in/100 mm to prevent RoboVac from getting stuck.

●Keep RoboVac away from wet areas.
●RoboVac may climb on top of objects less than 0.67 in/17 mm in height. Remove these
objects if possible.
●Anti-drop sensors prevent RoboVac from tumbling down stairs and steep drops. They
may work less effectively when they are dirty, or on reflective/dark-colored floors. It is
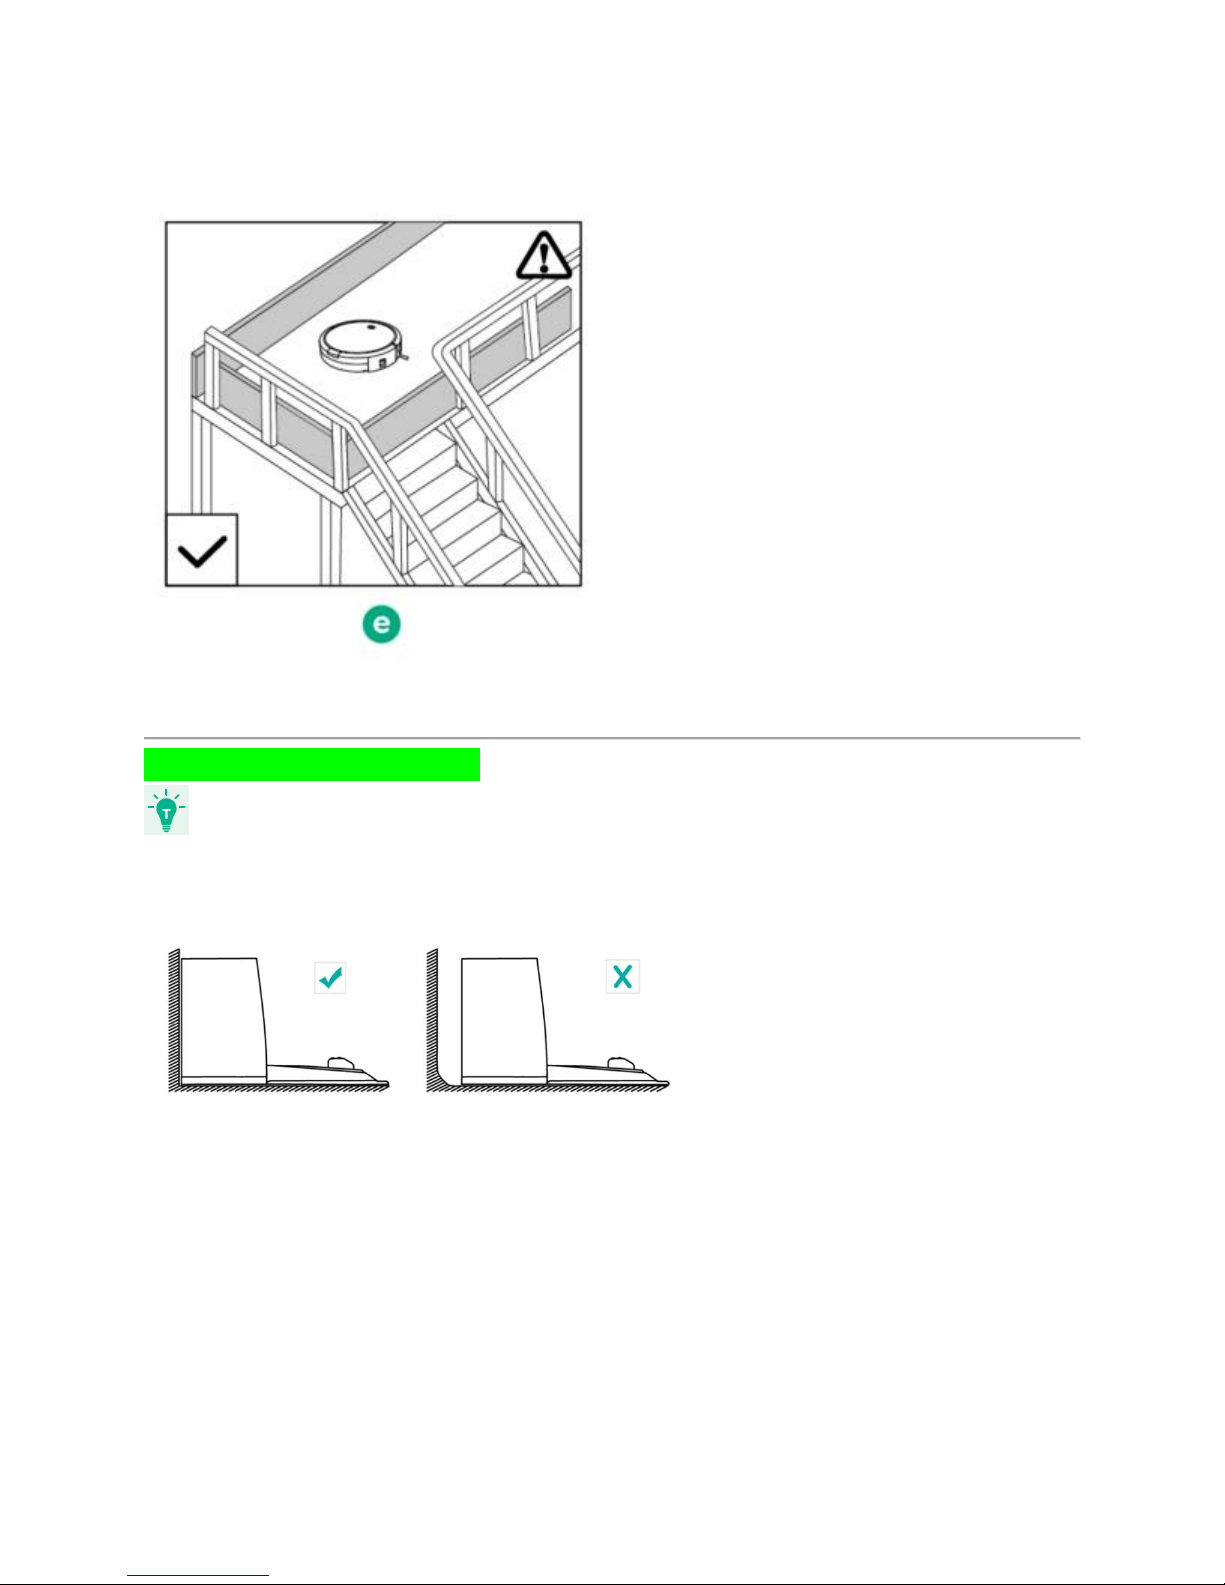
recommended to place a physical barrier to block off problem areas where the device
may fall.
Install the Charging Base
1. Place the Charging Base on a hard, level surface and against a wall.
2. Remove objects within 3 ft/1 m of the left and right side and within 6 ft/2 m of the front of the
charging base.
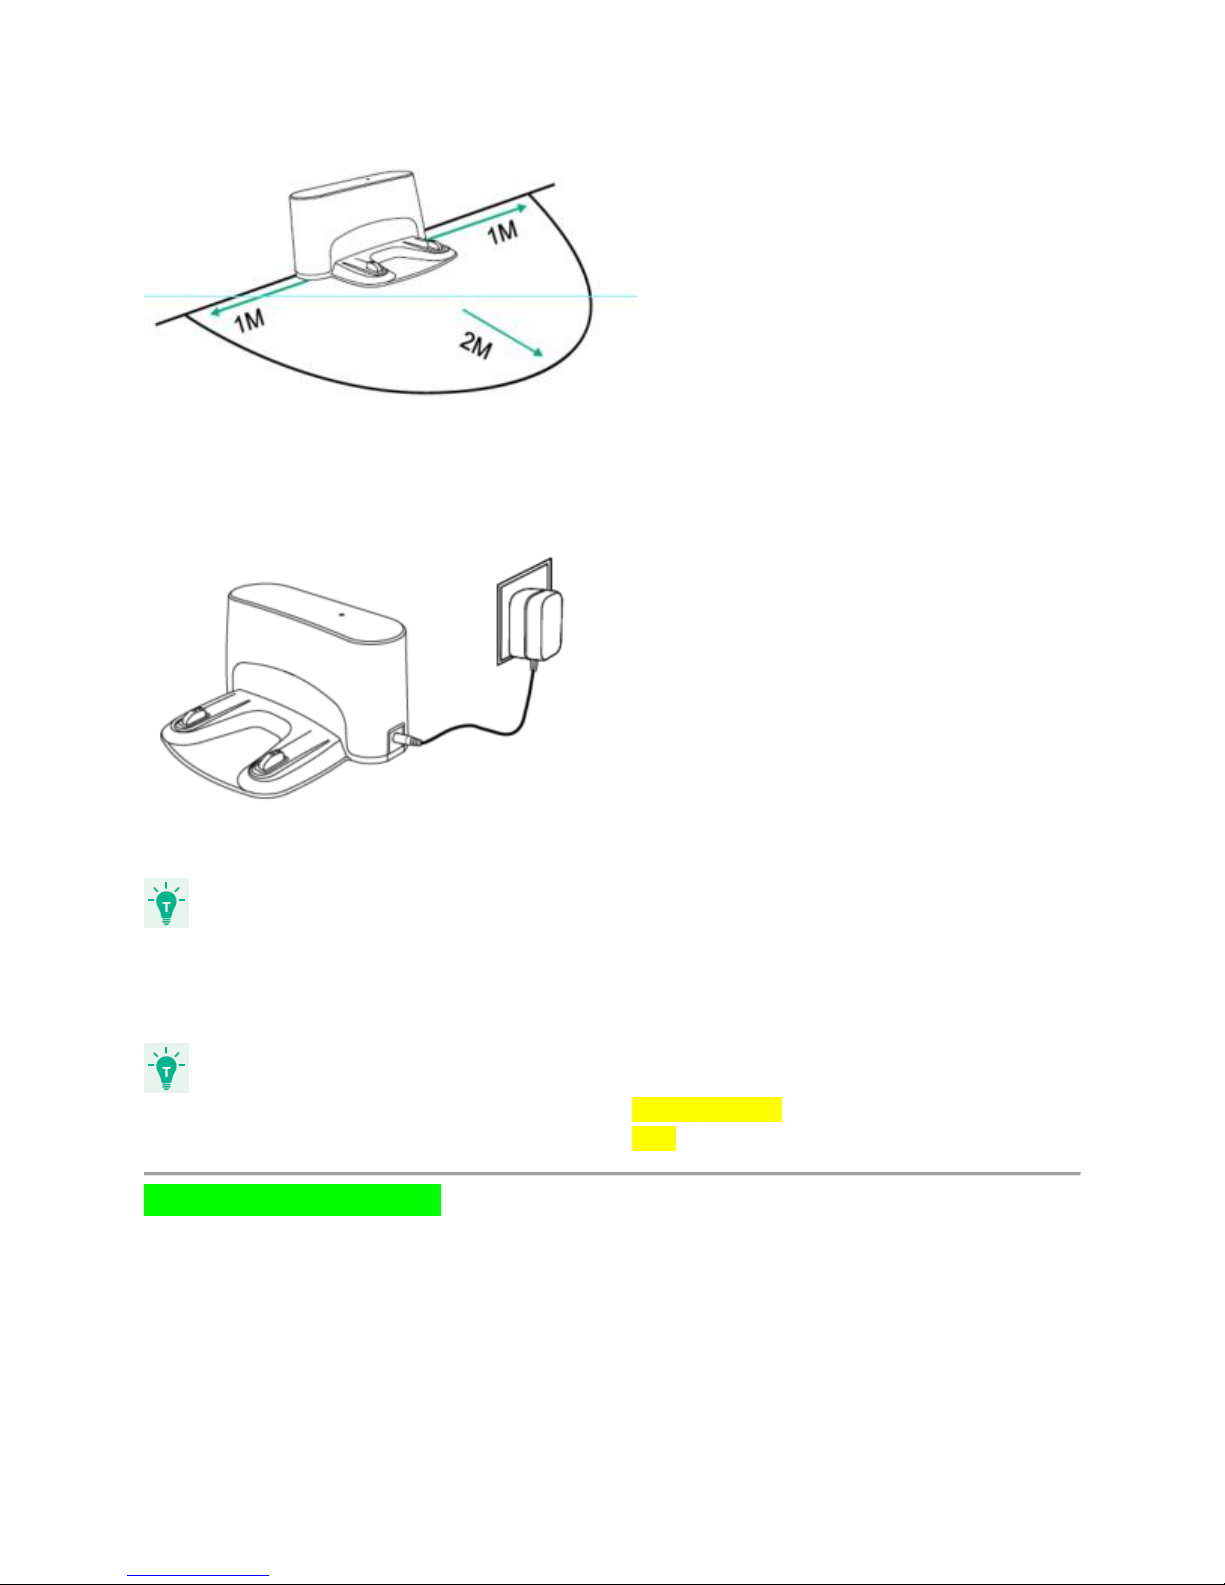
3. Connect the round connector of the adapter into the power socket on the Charging Base and
the other end into a wall outlet.
- Install the Charging Base in a location that RoboVac can easily access.
- Always keep the Charging Base plugged in, otherwise RoboVac will not automatically return to
it.
- The LED indicator on the charging base is SOLID GREEN when RoboVac is not docked.
- The LED indicator on the charging base is OFF when RoboVac is docked.
Charge Your RoboVac
●RoboVac has a pre-installed rechargeable battery that has to be fully charged before
use.
●RoboVac returns to the Charging Base at the end of a cleaning cycle or when its battery
is running low.
●Make sure the main power switch on the side of RoboVac is turned on before charging.
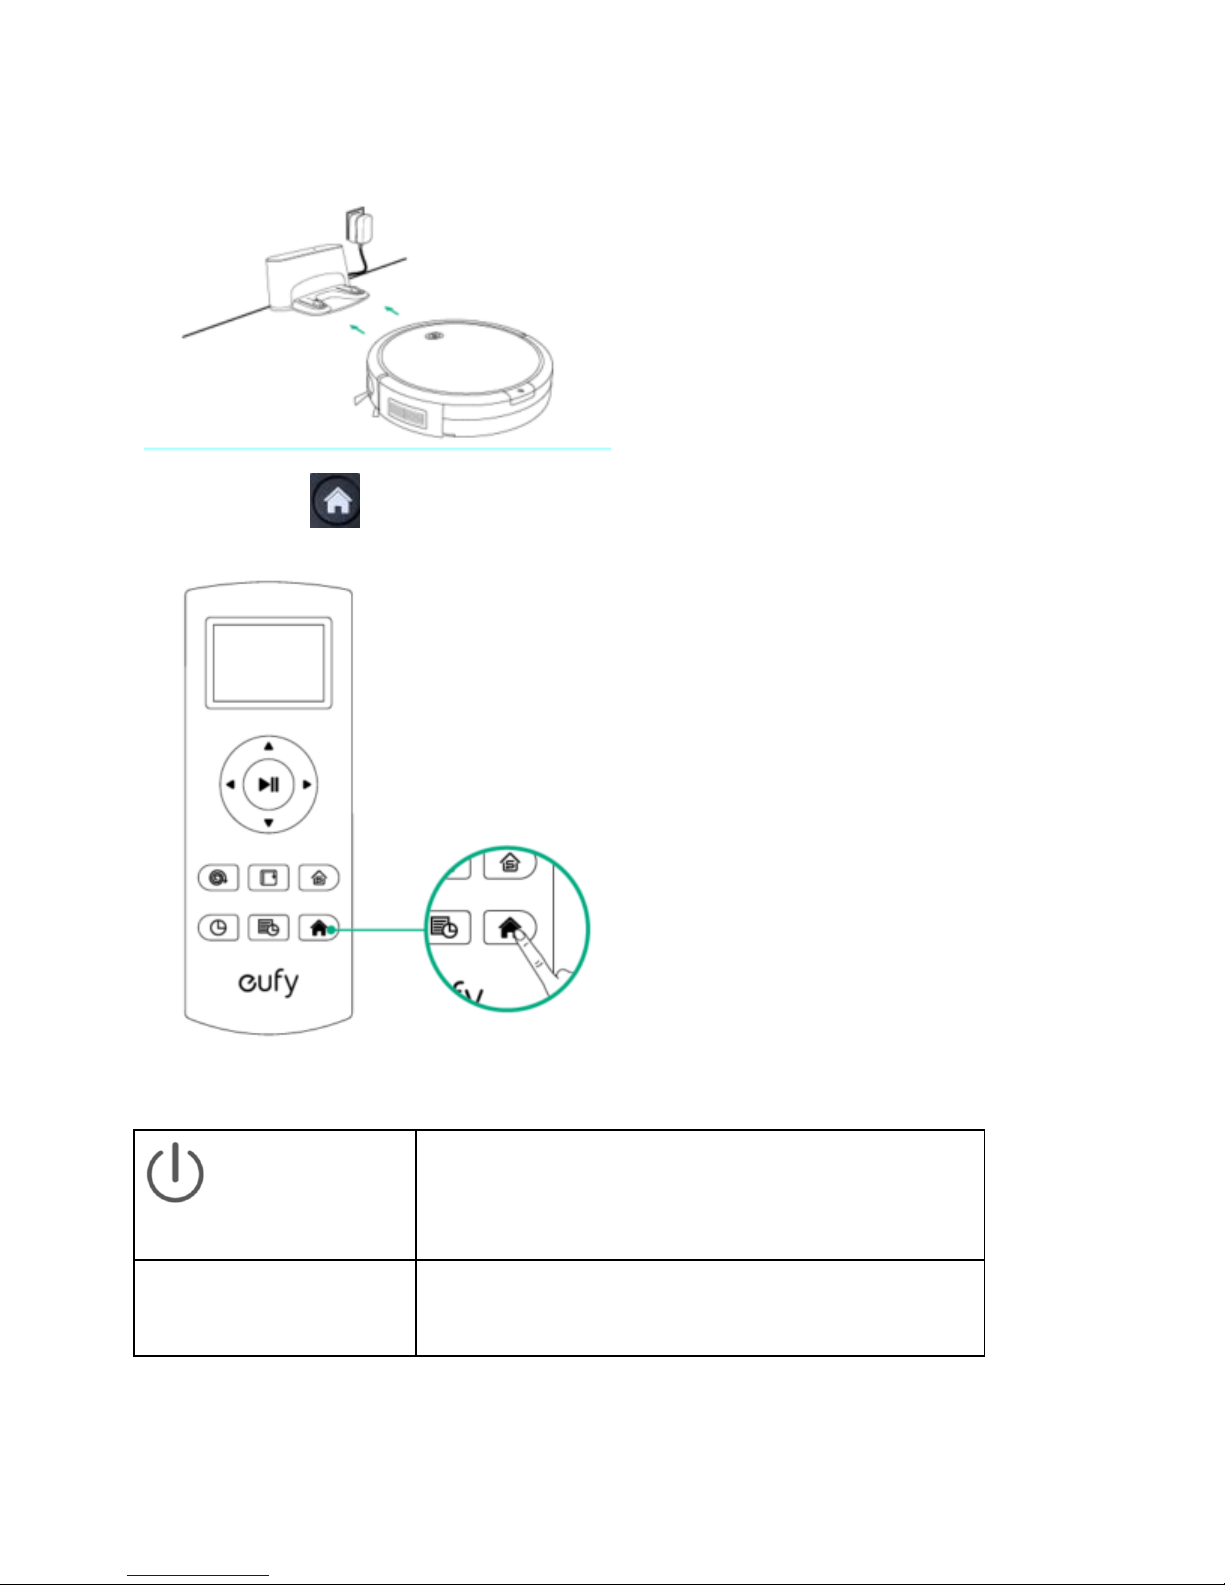
Method 1: Attach RoboVac to the Charging Base by aligning its charging pins with the charging
pins on the base.
Method 2: Press on the remote control to return RoboVac to the Charging Base.
Status Light
Status
Breathing blue
Charging
Table of contents
Other EUFY Vacuum Cleaner manuals

EUFY
EUFY Clean G35 User manual

EUFY
EUFY BoostIQ RoboVac 15C User manual

EUFY
EUFY T2108 User manual

EUFY
EUFY RoboVac 25C User manual

EUFY
EUFY T2103 User manual

EUFY
EUFY RoboVac User manual

EUFY
EUFY RoboVac 11 User manual

EUFY
EUFY RoboVac LR30 Hybrid+ User manual

EUFY
EUFY X9Pro User manual

EUFY
EUFY RoboVac User manual

EUFY
EUFY RoboVac Series User manual

EUFY
EUFY HomeVac S11 Lite User manual

EUFY
EUFY X9Pro User manual

EUFY
EUFY T2108 User manual

EUFY
EUFY RobVac G20 Hybrid User manual

EUFY
EUFY ROBOVAC 20 User manual

EUFY
EUFY T2501 User manual

EUFY
EUFY RoboVac X8 Hybrid User manual

EUFY
EUFY RoboVac Series User manual

EUFY
EUFY T2501 User manual


