protect the image intensifier tube, keep the lens cap on the objective lens when the device
is not in use or when checked out in daylight conditions. You might test the device through
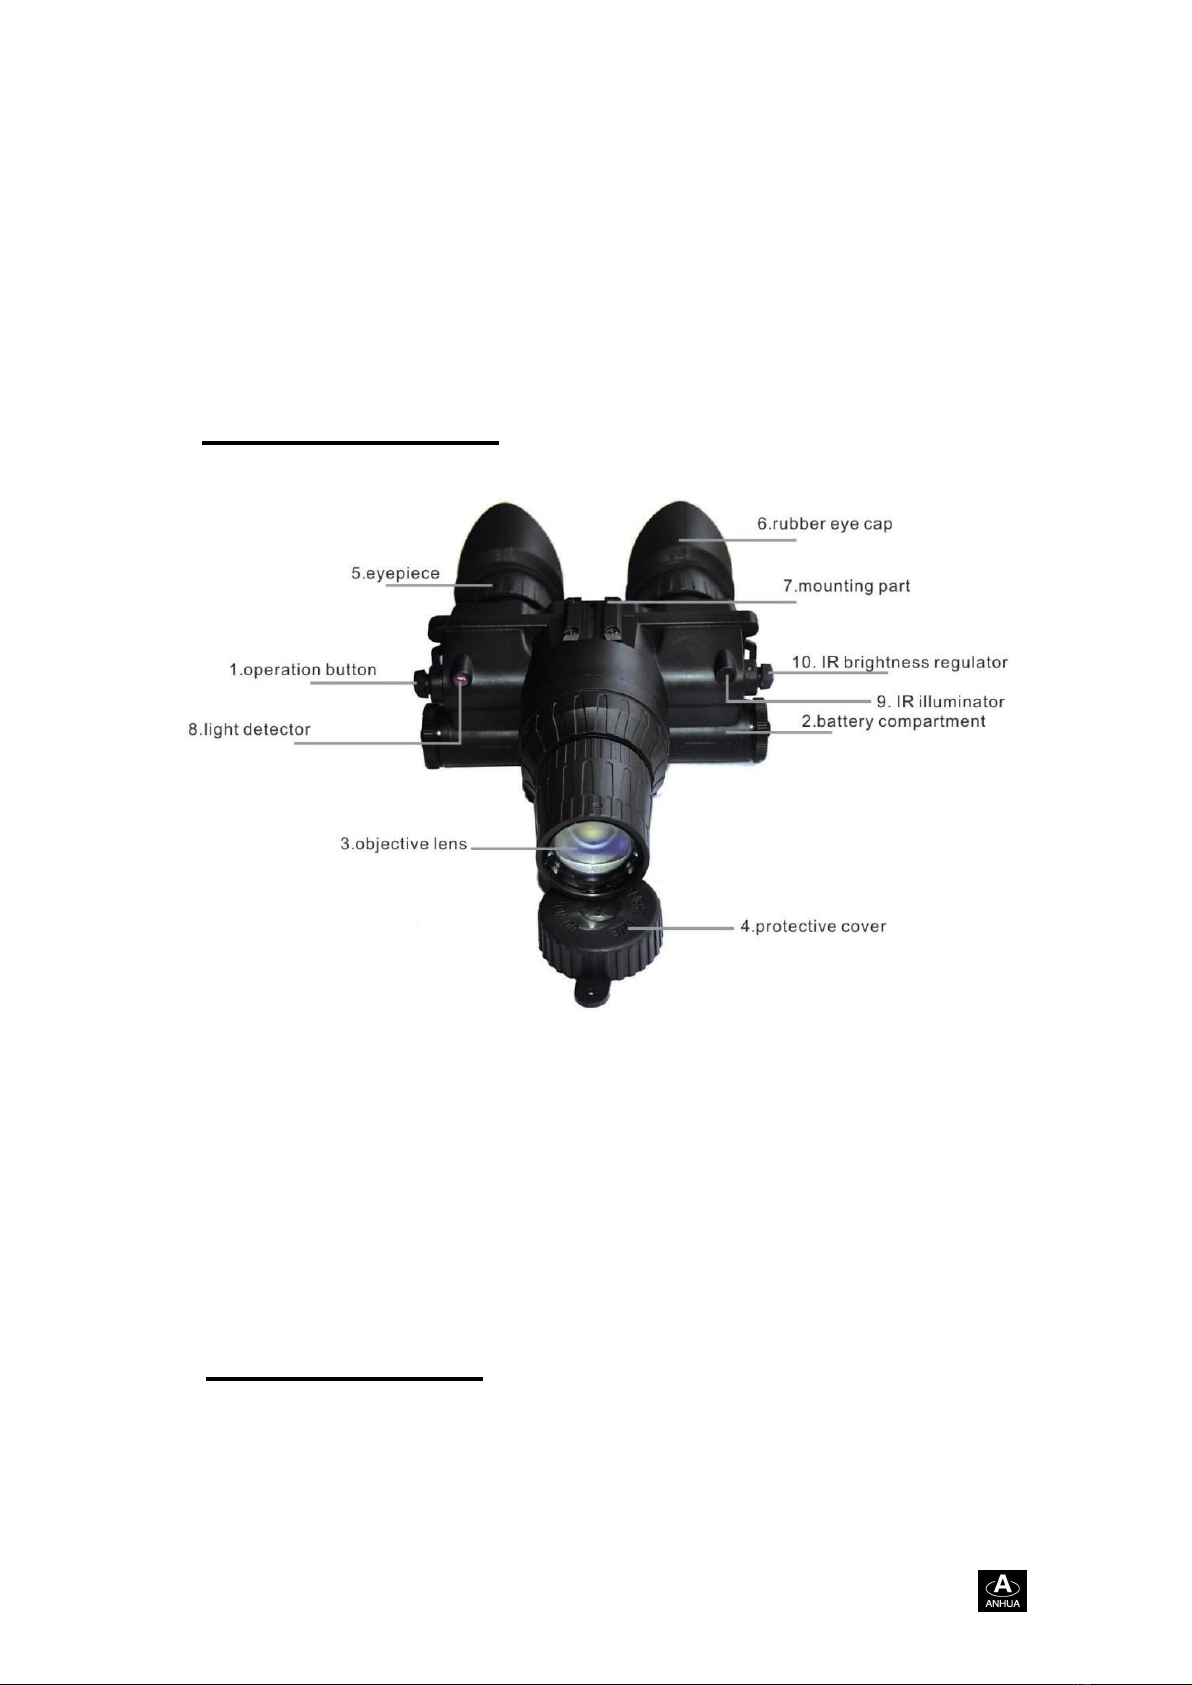
the pinhole in the center of protective cover (4) and the time can’t exceed 10 minutes.
3.
Turn on the device by twisting operation button (1) and moving it to ON. After this, you can
start observing the scene through the eyepiece (5). The greenish-lit screen of the image
tube means that the device is working normally. A green light appears in the edge of
eyepiece at the same time and it serves as the power indicator as well as low battery
indicator. If the indicator light starts flickering, it means the battery is running low. It is the
time to change your battery. Activate the IR by twisting button (1) and moving it to IR when
the device is working in the conditions of extreme low light or total darkness, at the same
time, it starts focusing the light. A red light appears in the eyepiece and is emitted from IR
illuminator (9) to indicate that the IR illuminator is operating. Adjust the IR brightness by
twisting the button of IR brightness regulator (10) if necessary. When twisting the operation
button (1) to Auto, the IR illuminator will turn on automatically when the ambient light is
lower than 0.05Lux and it will turn off automatically when the ambient light exceeds 0.1Lux.
NOTE: The light from the illuminator can be detected by others that are using night vision
devices.
4.
Focus the objective lens (3) by rotating the objective lens ring for sharper image of viewed
object. Adjust eyepiece (5) by rotating the eyepiece ring for sharper image of intensifier
screen. Repeat these two steps for 3 times, then you might gain the sharpest image.
5.
The light detector (8) can detect the surrounding illuminance, the device will be shut off
automatically when the ambient light exceeds 40 Lux in 10 seconds.
6.
When you finish observing, twist the operation button (1) and move it to OFF, then the
device stops working.
H. Flip up head mount installation
A. Fitting the head mount
Adjust the head mount first before attaching the NV unit to it.
7.
Loosen all the straps and place the head mount on your head.
8.
Fit the head mount to your head size and tighten all the straps.
9.
And last you will need to fixate the chin strap with Velcro tape.
B. NV installation and adjustment
Now you are ready to mount the NV monocular onto head mount.
To mount the monocular to a head mount, perform the following:
1.
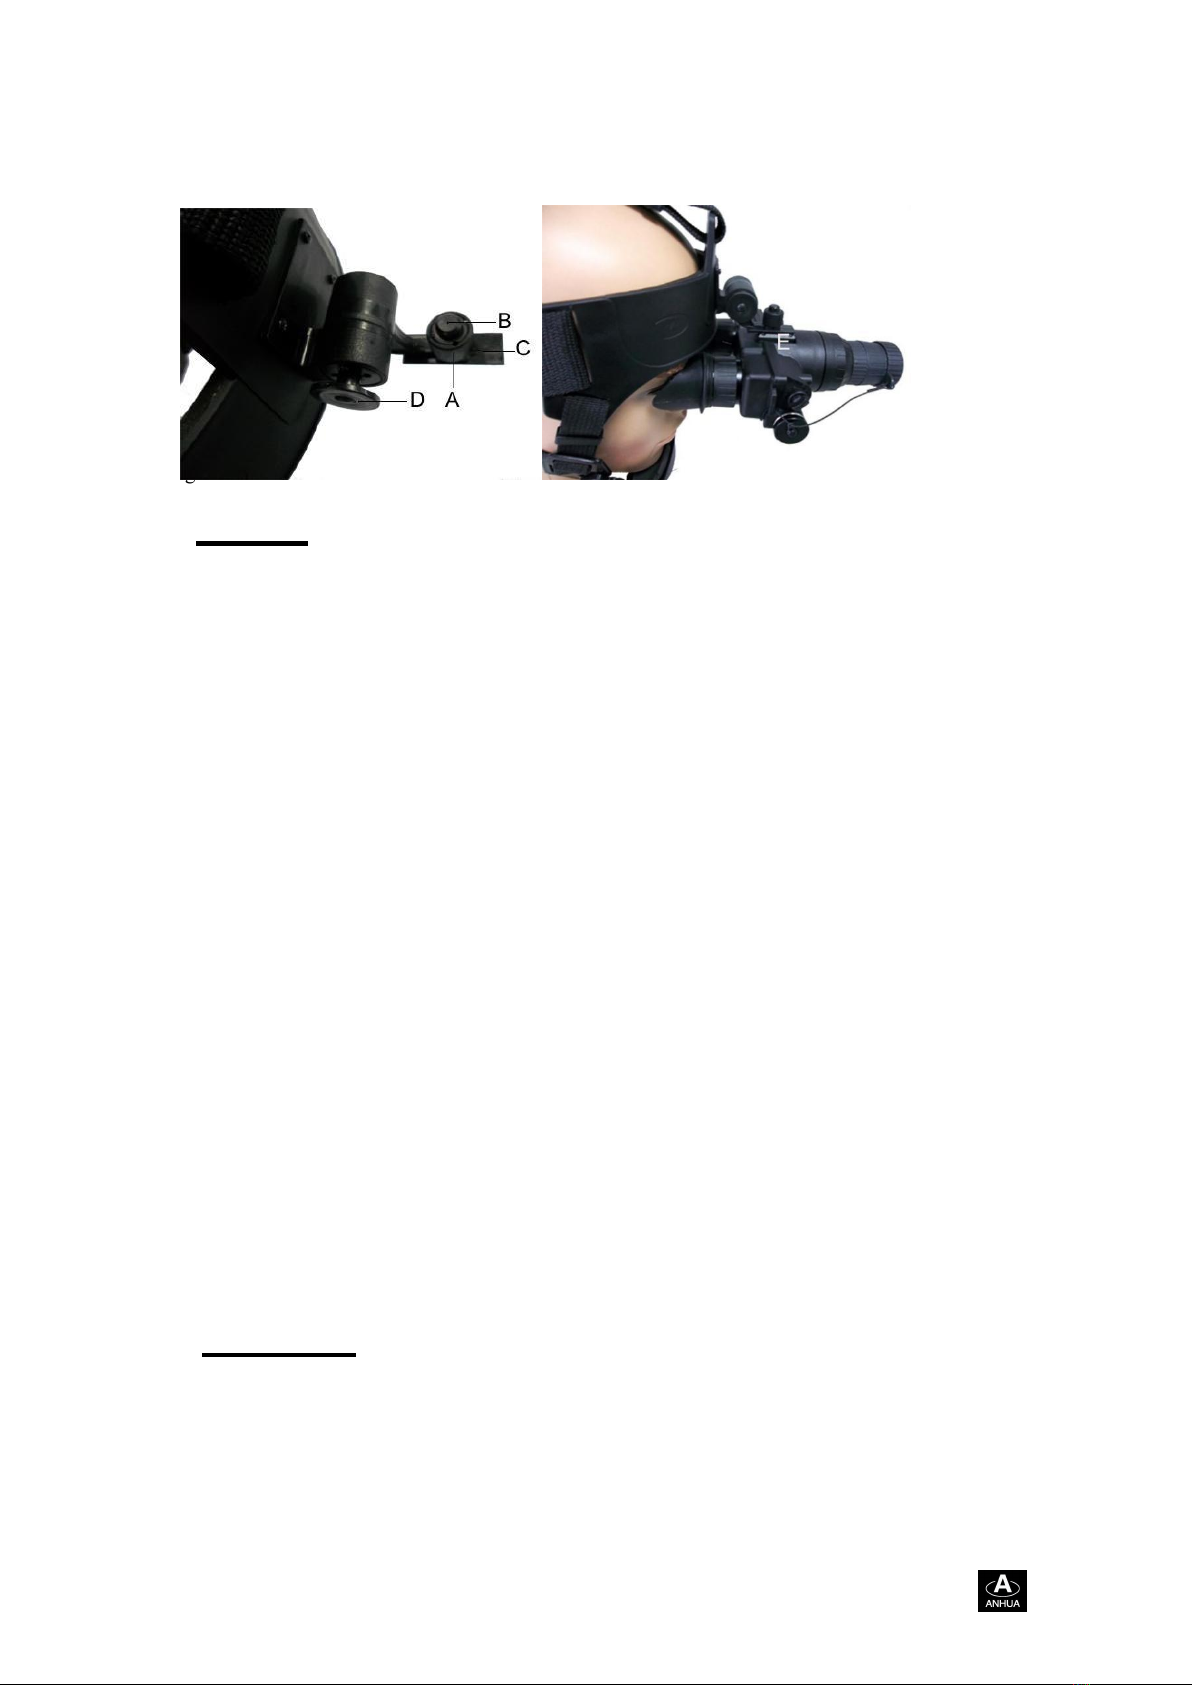
Loosen the screw ( A ). Push down the button ( B ) and insert the mounting part ( E ) of the
night vision device into the socket of the head mount ( C ). Then tighten the screw (A) after
adjusting it to a good position you need. Now the device is fixated onto the head mount
firmly.
2.
Place the head mount with goggle onto your head. (as Figure01 shows)
3.
The monocular head mount has a flip-up mechanism. Push the button ( F ) on the side of
mount and lift the unit up unitl the unit reaches in the top position. When the device is
placed in the top/up position it will turn off automatically.