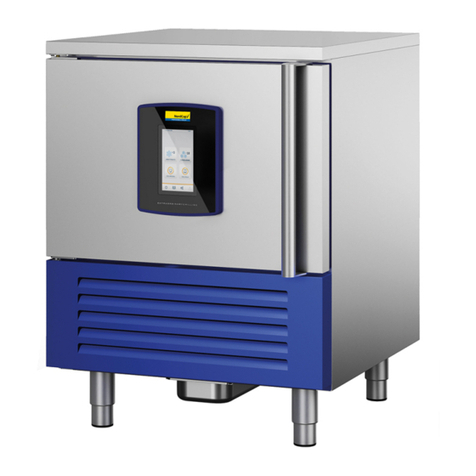
Apach ASH05K User manual

Blast chillers
User Manual
50LIB055
Rev.002
EN

Blast Chillers
2
50LIB055
Dear Customer,
we congratulate and thank you for choosing our devices!
This instruction manual contains all the information necessary to the use and
maintenance of this device so that you can start using it immediately and without
any difculties; we suggest that you to read it carefully before using the device
and to conserve it properly for future reference.
For any further information or if some part of this instruction manual is not clear,
we remain entirely at your disposal.
THE TEXT FOLLOWED BY THIS SYMBOL TREATS AN ARGUMENT OF
PARTICULAR IMPORTANCE OR INDICATES A POTENTIAL DANGER.
THE TEXT FOLLOWED BY THIS SYMBOL CONTAINS INSTRUCTIONS FOR
OPERATIONS STRICTLY RESERVED TO QUALIFIED PERSONEL AND
TRAINED STAFF.
ATTENTION!
READ CAREFULLY THE INSTRUCTION MANUAL

350LIB055
Blast Chillers
Correct Disposal of This Product (Waste Electrical & Electronic Equipment)
(Applicable in the European Union and other European Countries with separate collec-
tion system)
The disposal symbol, placed on the product or its terminology, indicates a separate collection from the
other household wastes at the end of its working life.
In order to prevent possible harm to the environment or the human health from uncontrolled waste
disposal, please separate it from other types of wastes and recycle it responsibly to promote the recy-
cling of goods.
All end users should contact a blast chiller supplier, or their local government ofce for more informa-
tion about the best way to dispose the unit in order to prevent damages to the enviroment.
Business users should contact their suppliers and check the terms and conditions of the purchase
contract.
Ambiental climate class (ISO 23953-2)
Climate Class Temperature Humidity
1 16°C 80%
2 22°C 65%
3 25°C 60%
4 30°C 55%
5 40°C 40%
6 27°C 70%
Maximum load (kg) and measures of trays (mm)
Model Load per shelf Measure of trays
5 Trays 20 Kg
530x325
600x400
455x655
10 Trays 20 Kg
530x325
600x400
455x655
15 Trays 20 Kg
530x325
600x400
455x655

4
Blast Chillers
Index
50LIB055
1-PRODUCT MANUAL 5
2-SAFETY PRESCRIPTIONS 5
3-TRANSPORT AND HANDLING 5
4-UNIT POSITIONING 6
5-INSTALLATION 6
5.1 LEGS INSTALLATION 6
5.2 INSTALLATION OF CONDENSATION TRAY SUPPORTS 7
5.3 ELECTRICAL CONNECTION 8
6-BLAST CHILLER/FREEZER USE PRECAUTIONS: 8
6.1 DANGER IN USE OF THE CORE PROBE 8
7-GENERAL ADVICE FOR USE 8
8-UNIT DISPLAY 9
8.1 SWITCH THE DEVICE ON&OFF 10
8.2 SET THE REAL DATE AND TIME 10
8.3 THE DEVICE WILL OPERATE AS FOLLOWS DURING THE “RUN” STATUS 11
8.4 CHAMBER DISPLAY OPERATE AS FOLLOWS 11
8.5 DISPLAY OF THE TEMPERATURE DETECTED BY THE NEEDLE PROBE 11
8.6 DISPLAY THE EVAPORATOR TEMPERATURE 11
8.7 DEFROSTING ACTIVATION IN MANUAL MODE 12
8.8 SWITCHING THE CABINET LIGHT ON/OFF IN MANUAL MODE 12
8.9 LOCKING/UNLOCKING THE KEYBOARD 12
8.10 SILENCING THE BUZZER 12
9-OPERATION 13
9.1 BLAST CHILLING AND STORAGE 13
9.2 HARD BLAST CHILLING AND STORAGE 14
9.3 DEEP FREEZING AND STORAGE 15
9.4 SOFT DEEP FREEZING AND STORAGE 16
9.5 MANAGEMENT OF THE TEST REGARDING THE CORRECT INSERTION OF THE CORE PROBE 18
9.6 PRE-COOLING START-UP 18
9.6 SWITCHING THE OZONE SANITATION CYCLE 18
9.8 CORE PROBE HEATING 18
10-SUGGESTIONS FOR A CORRECT USE OF THE BLAST CHILLER 19
10.1 SUGGESTIONS ON USE 19
10.2 PRE-COOLING 19
10.3 LOAD OF THE BLAST CHILLER 19
11-”HACCP” FUNCTION (if supported) 20
11.1 DISPLAYING INFORMATION RELATIVE TO THE HACCP ALARMS 21
11.2 DELETING INFORMATION RELATIVE TO THE HACCP ALARMS 21
12-COMPRESSOR OPERATING HOURS COUNT 22
13-LED MEANING 23
14-CODE MEANING 25
15-TROUBLESHOOTING 27
16-MAINTENANCE 28
17-R404-R452 GAS SAFETY BOARD 29
17.1 FIRST AID MEASURES 29
17.1.1 - INHALATION 29
17.1.2 - SKIN CONTACT 29
17.1.3 - EYE CONTACT 29
17.1.4 - INGESTION 29
17.2 FIRE PREVENTION MEASURES 29
17.1.2 - FIRE EXTINGUISHER 29
17.1.2 - TOXICOLOGICAL INFORMATION INHALATION 29
17.2.1 - FLAMMABILITY 29

550LIB055
Blast Chillers
1-PRODUCT MANUAL
The relative manual is intended as an integral part of the product.
Necessary information for correct installation, use and maintenance of the machine are supplied by
the manual.
The user must read this manual carefully and to refer to it always.
It should be kept in a safe place, accessible to all authorized operators (installer, user, maintenance
technician).
The blast chiller is intended for a professional use, therefore, only qualied personnel must use it.
It must be used only for the purpose for which it was designed.
The manufacturer declines all liability for damage caused by improper and unreasonable use, such
as:
• Improper use by untrained personnel.
• Unauthorized modications or interventions not specically for the model.
• Use of non-original spare parts or parts not specically for the model.
• Lack of compliance, even partial, with the instructions in this manual.
2-SAFETY PRESCRIPTIONS
The user responsible and liable for negligence of operations on the machine which do not comply
with the prescriptions in this manual.
The general safety Standards are the following:
• Don’t touch the machine with wet or humid hands or feet
• Don’t operate the machine in bare feet
• Don’t insert any item between the guards and the moving parts before carrying out cleaning or
routine maintenance
• Physically disconnect the machine from the power supply network, turn off the main switch and
pull the plug from the power supply socket
• Do not pull the power cord to disconnect the machine from the power supply network.
3-TRANSPORT AND HANDLING
Before performing any operation check the integrity of the unit external packaging.
Use protective gloves and glasses during all the handling and unpackaging operations.
Loading and unloading the appliance from the transportation vehicle can be performed with a forklift
truck or pallet mover.
The lifting device shall be chosen suitably, based on the dimensions and mass of the packaged
machine, indicated on the packaging labels.
All due safety precautions must be taken to handle the appliance in order not to damage it,
respecting the indications on the packaging.
Remove the pallet upon which the blast chiller is placed.
Lift the blast chiller with a lift truck, if available, and place it in the intended area.
Remove the protective PVC lm on all sides of the unit. Use protective gloves to handle the
packaging and.
All different packaging components must be disposed in accordance with the current Standards in
force in the Country where the device is used.
Never dispose anything that could be dispersed into the environment.

Blast Chillers
6
50LIB055
4-UNIT POSITIONING
• The blast chiller must be installed and
inspected in complete compliance with
accident-prevention Law Standards, with
state of the art rules and with Standards now
in force.
• The installer must check potential re-
prevention prescriptions (contact the nearest
re station for the due indications).
• Place the unit where the air suction from the
front of the unit and air discharge from the
back of the unit is not obstructed in any way.
• Level the unit through of the adjustable feet.
• If the appliances are not leveled, their
operations and condensation outflow can be
affected.
• Do not place the unit in direct exposure to
sunlight.
• Do not place the unit in limited air exchange areas.
• Do not install the unit in proximity of heat sources.
5-INSTALLATION
Installation shall be carried out by authorized and specialized personnel, complying with the
instructions in this manual.
The manufacturer declares and associates a declaration of conformity to machinery Directive 98/37,
to Directive 2006/95 and to Directive 2004/108/CE for each individual machine.
5.1 LEGS INSTALLATION
Lift the unit and tightly screw the legs in the appropriate sockets int base corners. Level the unit
by means of leg regulation screw.

750LIB055
Blast Chillers
5.2 INSTALLATION OF CONDENSATION TRAY SUPPORTS
Insert the racks on the unit base and pull toward the
front side

Blast Chillers
8
50LIB055
5.3 ELECTRICAL CONNECTION
Make sure that the plate data and electrical line features correspond (V, kW, Hz, phase and
available power).
• Install a properly sized differential automatic circuit-breaker switch on every unit upstream, in
accordance with the Standards in force in the installation Country.
• The electrical power supply cables must have the correct size and be chosen depending on
the real laying conditions; The electrical cables must enter and be blocked in the appropriate
cable sleeve and laid adequately depending on the installation ambient.
• The earth conductor must be connected directly to an effective earthing system.
In case of harmed persons or damaged appliances and objects, due to an incorrect
installation adn/or lack of compliance with laws in force, the manufacturing company declines
all liabilities and warranty obbligations.
• If the power supply cable is worn or damaged, it must be replaced by the manufacturer or by
the technical assistance service.
6-BLAST CHILLER/FREEZER USE PRECAUTIONS
In order to avoid burns when loading the machine with hot products, use kitchen gloves
During or at the end of blast chilling and freezing cycles, open the door slowly until the fans stop.
Extract carefully the core probe from the product and position it on the probe-holder.
Use suitable gloves for cold trays.
6.1 DANGER IN USE OF THE CORE PROBE
The use of the probe is allowed only for authorized and trained personnel.
The core probe must be used only for the purpose for which it was designed: to detect the
temperatures at the center of the food products to be chilled and/or frozen.
Handle the probe with care. It’s extremity is sharp to facilitate its insertion in products to be
chilled and/or frozen.
7-GENERAL ADVICE FOR USE
• Pre-cooling before a cycle of blast chilling or freezing, allows to reduce work time and obtain better
results
• Do not leave the hot product inside the chamber while not running a cycle, in order to avoid
damages to the machine.
• As soon as the product to be treated is inserted, start the blast chilling /freezing cycle.

950LIB055
Blast Chillers
• The core probe shall be positioned at the center of the largest cut of the product.
Make sure that the point of the probe does not come out of the product or touch the tray.
The probe must be cleaned and sanitized before each work cycle in order to avoid unwanted
contamination. Correct use of the core probe allows to reduce cycles duration and power
absorption.
• Do not overload the machine beyond manufacturer specication. If not at full load, it’s preferable to
place trays in the middle area of the chamber as close as possible to the evaporator fan.
Distribute the product neatly on the trays to allow the best possible air-flow around the product
surface.
• In order to obtain better results, load the trays with product with a maximum thickness of 8 cm for
blast chilling, or 5 cm for blast freezing. For difcult products characterized by a large quantity of
fats, reduce thickness.
• Do not leave cooked food to be blast chilled/frozen remain for long at room temperature. Start the
blast chilling /freezing as soon as preparation is completed.
• Cooked food can go inside the blast chiller even at temperatures beyond 100°C, as long as the
chamber is pre-cooled.
• Blast chilled and/or shock frozen food must be protected with hermetic cover or even better,
vacuum-packed. Indelibly mark the product with a label where content, day of preparation and the
expiration date are listed.
8-UNIT DISPLAY
Down Button
Up Button
Start/Stop Button
Blast Chilling Button
Blast Freezing Button
Hard/Soft Button
Auxiliary Button
Defrost Button

Blast Chillers
10
50LIB055
The following operating status exist:
• The “off” status (the device is not powered)
• The “stand-by” status (the device is powered and is off)
• The “on” status (the device is powered, is on and is in stand-by for the start-up of an operating
cycle)
• The “run” status (the device is powered, is on and an operating cycle is in progress).
If a power cut occurs during the “stand-by” status or during the “on” status, the device will re-
propose the same status when the power supply is restored.
If a power cut occurs during the “run” status, the device will operate as follows when the power
supply is restored:
• if a temperature-controlled blast chilling or deep-freezing operation was in progress, these will be
started again from the beginning
• if a time-controlled blast chilling or deep freezing operation was in progress the unit will be re-
started from the time the power cut occurs
• if storage was in progress, this will be re-proposed.
8.1 SWITCH THE DEVICE ON&OFF
Operate as follow:
• Make sure that the keyboard is not locked and that no procedure is in progress.
• Hold the START/STOP key down for 1 s: the LED will switch on/off.
• The display is off during the “off” status and during the “stand-by” status. The display shows
the chamber temperature during the “on” status.
8.2 SET THE REAL DATE AND TIME (if supported)
Operate as follows:
• Make sure that the keyboard is not locked and that no procedure is in progress.
• Hold the DOWN key for 1 s: the display will show the rst label available.
• Press and release the UP or DOWN key to select “rtc”.
Operate as follows to set the year:
• Press and release the BLAST CHILLING key: the display will show “yy” followed by the last
two numbers of the year and the LED will flash.
• Press and release the UP or DOWN key within 15 s to modify the value.
Operate as follows to set the month:
• Press and release the BLAST CHILLING key when setting the year: the display will show “nn”
followed by the two numbers of the month.
• Press and release the UP or DOWN key within 15 s to modify the value.
Operate as follows to set the day of the month:
• Press and release the BLAST CHILLING key when setting the month: the display will show
“dd” followed by the two numbers of the month.
• Press and release the UP or DOWN key within 15 s to modify the value.
Operate as follows to set the hour:
• Press and release the BLAST CHILLING key when setting the day of the month: the display
will show “hh” followed by the two numbers of the hour.
• Press and release the UP or DOWN key within 15 s to modify the value.
• The hour is displayed in the 24 h format.
Operate as follows to set the minutes:
• Press and release the BLAST CHILLING key when setting the hour: the display will show “nn”
followed by the two numbers of the minutes.
• Press and release the UP or DOWN key within 15 s to modify the value.
11 50LIB055
Blast Chillers
• Press and release the BLAST CHILLING key or do not operate for 15 s: the display will show
“rtc” again and the LED will switch off.
Operate as follows to exit the procedure:
• Do not operate for 60 s.
8.3 THE DEVICE WILL OPERATE AS FOLLOWS DURING THE “RUN” STATUS
• If a temperature-controlled blast chilling or deep-freezing operation is in progress, the display
will show the temperature detected by the needle probe.
• If a time-controlled blast chilling or deep-freezing operation is in progress, the display will
show the residual duration time.
• If storage is in progress, the display will show the cabinet temperature.
8.4 CHAMBER DISPLAY OPERATE AS FOLLOWS
• Make sure that the keyboard is not locked and that no procedure is in progress.
• Hold the DOWN key for 1 s: the display will show the rst label available.
• Press and release the UP or DOWN key to select “Pb1”.
• Press and release the BLAST CHILLING key: the display will show the chamber temperature.
Operate as follows to exit the procedure:
• Press and release the BLAST CHILLING key or do not operate for 15 s: the display will show
“Pb1” again.
• Do not operate for 60 s.
8.5 DISPLAY OF THE TEMPERATURE DETECTED BY THE NEEDLE PROBE
Operate as follows:
• Make sure that the keyboard is not locked and that no procedure is in progress.
• Hold the DOWN key for 1 s: the display will show the rst label available.
• Press and release the UP or DOWN key to select “Pb2”.
• Press and release the BLAST CHILLING key: the display will show the temperature detected
by the needle probe.
Operate as follows to exit the procedure
• Press and release the BLAST CHILLING key or do not operate for 15 s: the display will show
“Pb2” again.
• Do not operate for 60 s.
8.6 DISPLAY THE EVAPORATOR TEMPERATURE
Operate as follows:
• Make sure that the keyboard is not locked and that no procedure is in progress.
• Hold the DOWN key for 1 s: the display will show the rst label available.
• Press and release the UP or DOWN key to select “Pb3”.
• Press and release the BLAST CHILLING key: the display will show the evaporator
temperature.
Operate as follows to exit the procedure:
• Press and release the BLAST CHILLING key or do not operate for 15 s: the display will show
“Pb3” again.
• Do not operate for 60 s.

Blast Chillers
12
50LIB055
8.7 DEFROSTING ACTIVATION IN MANUAL MODE (open door mode)
Operate as follows:
• Make sure that the keyboard is not locked and that no procedure is in progress.
• Hold the DEFROSTING key for 4s: the LED switch on.
• Open the door and let it open till the end of the cycle.
Attention: If the temperature of the evaporator is above 2°C, the defrosting will not be activated.
8.8 SWITCHING THE CABINET LIGHT ON/OFF IN MANUAL MODE
(Only for models with LED light option)
Operate as follows:
• Make sure that the keyboard is not locked and that no procedure is in progress.
• Press and release the AUXILIARY key: the AUX LED will switch on/off
8.9 LOCKING/UNLOCKING THE KEYBOARD
Operate as follows to lock the keyboard:
• Make sure that no procedure is in progress.
• Hold the DOWN key and the START/STOP key down for 1 s: the display will show “Loc” for
1 s.
Operate as follows to unlock the keyboard:
• Make sure no procedures are in progress
• Hold the DOWN key and the START/STOP key down for 1 s: the display will show “UnL” for
1 s
8.10 SILENCING THE BUZZER
Operate as follows:
• Make sure that no procedure is in progress.
• Press and release any key

13 50LIB055
Blast Chillers
9-OPERATION
The unit manages the following operating cycles:
• pre-cooling
• blast chilling and storage
• hard blast chilling and storage
• deep freezing and storage
• soft deep freezing and storage.
• Ozone sanitation cycle (Optional)
• Needle probe heating cycle (Optional)
The temperature-controlled cycles are preceded by a test to verify the correct insertion of the needle
probe; time-controlled cycles are not preceded by any test.
9.1 BLAST CHILLING AND STORAGE
The temperature-controlled blast chilling and storage cycle is divided into the following two
phases:
• Blast chilling
• Storage on conclusion of a phase
The unit passes automatically to the next.
Operate as indicated to start the cycle:
• Make sure the unit is in the “on” status.
• Make sure that the keyboard is not locked and that no procedure is in progress.
• Press and release the BLAST CHILLING key: the LED and the LED will flash.
Press and release the BLAST CHILLING key to start the cycle with timed-control: the LED
and the LED will flash and the LED will switch off (press and release the BLAST
CHILLING key again to start the cycle with temperature-control).
• The display will show the work set-point during blast chilling.
Press and release the UP or DOWN key within 15 s to modify the set-point value.
• Press and release the START/STOP key: the LED will remain permanently on and the test
to verify the correct insertion of the needle probe will be started; If it has been decided to
start the cycle with timed-control, the LED will remain permanently on and the cycle will
be started with timed-control.
ᴑIf the test is completed successfully, the cycle will be started. The maximum blast chilling
duration count is started on condition that the temperature detected by the needle probe
is below 65°C.
ᴑIf the test is not completed successfully, the cycle will be started with timed-control. During
blast chilling, the display shows the residual time of the blast chilling duration and the
LED is on.
ᴑTo modify the residual time, operate as indicated:
* Press and release the UP or DOWN key again to modify the time value: the display will
flash.
* Do not operate for 4 s: the display will stop flashing and remain on permanently.
Operate as follows to stop the cycle:
• Hold the START/STOP key down.
During blast chilling, the display shows the temperature detected by the needle probe and the
LED is on.
To display the chamber temperature, press and release the BLAST CHILLING, DEEP
FREEZING or the HARD/SOFT key; to restore the normal display, press and release the same
key again or do not operate for 15 s.
If the temperature detected by the needle probe reaches 3°C within 90 minutes, it means that
blast chilling has been completed successfully, the device will automatically pass to storage
and the buzzer will be activated for 5 seconds. Press and release a key to silence the buzzer.

Blast Chillers
14
50LIB055
During storage, the display shows the temperature detected in the chamber and the LED is
on.
If the temperature detected by the needle probe does not reach 3°C within 90, blast chilling will
not be completed successfully but will continue, the LED will flash and the buzzer will be
activated.
Press and release a key to restore normal display and to silence the buzzer.
To display the chamber temperature, press and release the BLAST CHILLING key; to restore the
normal display, press and release the BLAST CHILLING key again or do not operate for 15 s.
When the temperature detected by the needle probe reaches 3°C, the unit automatically passes
to storage in the same way as illustrated previously.
9.2 HARD BLAST CHILLING AND STORAGE
The temperature-controlled hard blast chilling and storage cycle is divided into the following
three phases:
• Blast chilling hard phase
• Blast chilling
• Storage
On conclusion of a phase, the device passes automatically to the next.
Operate as indicated to start the cycle:
• Make sure the unit is in the “on” status.
• Make sure that the keyboard is not locked and that no procedure is in progress.
• Press and release the BLAST CHILLING key: the LED and the LED will flash.
Press and release the BLAST CHILLING key to start the cycle with timed-control: the LED
and the
LED will flash and the LED will switch off (press and release the BLAST CHILLING
key again to start the cycle with temperature-control.
• Press and release the HARD/SOFT key: the HARD LED will flash.
ᴑThe display will show the work set-point during blast chilling.
If it has been decided to start the cycle with timed-control, the display will show the
duration of time-controlled blast chilling.
ᴑPress and release the UP or DOWN key within 15 s to modify the set point value.
• Press and release the START/STOP key: the LED and the HARD LED will remain
permanently on and the test to verify the correct insertion of the needle probe will be started.
If it has been decided to start the cycle with timed-control, also the LED will remain
permanently on and the cycle will be started with timed-control.
ᴑIf the test is completed successfully, the cycle will be started.
The maximum blast chilling duration count is started on condition that the temperature
detected by the needle probe is below 65°C
ᴑIf the test is not completed successfully, the cycle will be started with timed-control.
ᴑDuring the hard blast chilling phase, the display shows the residual time of the blast chilling
duration and the LED is on.
To modify the residual time, operate as indicated:
* Press and release the UP or DOWN key again to modify the time value: the display will
flash.
* Do not operate for 4 s: the display will stop flashing and remain on permanently.
* During blast chilling, the display shows the residual time of the blast chilling duration
and the LED is on.
Operate as indicated to stop the cycle:
• Hold the START/STOP key down.
During hard blast chilling, the display shows the temperature detected by the needle probe
and the LED is on.
To display the chamber temperature, press and release the BLAST CHILLING, DEEP FREEZING

15 50LIB055
Blast Chillers
or the HARD/SOFT key; to restore the normal display, press and release the same key again or
do not operate for 15 s.
When the temperature detected by the needle probe reaches 15°C, the device automatically
passes to blast chilling mode. During blast chilling, the display shows the temperature detected
by the needle probe and the LED is on.
To display the cabinet temperature, press and release the BLAST CHILLING key; to restore the
normal display, press and release the BLAST CHILLING key again or do not operate for 15 s.
If the temperature detected by the needle probe reaches 3°C within 90 minutes, it means that
blast chilling has been completed successfully, the device will automatically pass to storage and
the buzzer will be activated for 5seconds.
Press and release a key to silence the buzzer.
During storage, the display shows the temperature detected by the cabinet and the LED is
on.
If the temperature detected by the needle probe does not reach 3°C within 90 minutes, blast
chilling will not be completed successfully but will continue, the LED will flash and the
buzzer will be activated.
Press and release a key to restore normal display and to silence the buzzer.
To display the cabinet temperature, press and release the BLAST CHILLING key; to restore the
normal display, press and release the BLAST CHILLING key again or do not operate for 15 s.
When the temperature detected by the needle probe reaches 3°C, the device automatically
passes to storage in the same way as illustrated previously.
• To display the chamber temperature, press and release the BLAST CHILLING, DEEP
FREEZING or the HARD/SOFT key; to restore the normal display, press and release the same
key again or do not operate for 15 s.
If the temperature detected by the needle probe reaches 3°C within 90 minutes, it means that
blast chilling has been completed successfully, the device will automatically pass to storage
and the buzzer will be activated for 5 seconds. Press and release a key to silence the buzzer.
9.3 DEEP FREEZING AND STORAGE
The temperature-controlled deep freezing and storage cycle is divided into the following two
phases:
• Deep Freezing
• Storage
On conclusion of a phase, the device passes automatically to the next.
Operate as indicated to start the cycle:
• Make sure the unit is in the “on” status.
• Make sure that the keyboard is not locked and that no procedure is in progress.
• Press and release the DEEP-FREEZING key: the LED, the LED, the HARD LED and
the LED will flash.
• Press and release the DEEP-FREEZING key to start the cycle with timed-control: the LED,
the LED, the HARD LED and the LED will flash and the LED will switch
off (press and release the DEEP FREEZING key again to start the cycle with temperature-
control).
ᴑThe display will show the work set-point during deep freezing.
If it has been decided to start the cycle with timed-control, the display will show the
duration of time-controlled deep freezing.
ᴑPress and release the UP or DOWN key within 15 s to modify the set point value.
• Press and release the START/STOP key: the LED, the LED and the HARD LED will
remain permanently on and the test to verify the correct insertion of the needle probe will be
started.
• If it has been decided to start the cycle with timed-control, LED also the will remain
permanently on and the cycle will be started with timed-control.

Blast Chillers
16
50LIB055
ᴑIf the test is completed successfully, the cycle will be started.
The maximum deep-freezing duration count is started on condition that the temperature
detected by the needle probe is below 65°C.
ᴑIf the test is not completed successfully, the cycle will be started with timed-control.
During deep freezing, the display shows the residual time of the deep-freezing duration and
the LED is on.
To modify the residual time, operate as indicated:
* Press and release the UP or DOWN key again to modify the time value: the display will
flash.
* Do not operate for 4 s: the display will stop flashing and remain on permanently.
Operate as indicated to stop the cycle:
• Hold the START/STOP key down.
During deep freezing, the display shows the temperature detected by the needle probe and
the LED is on.
To display the chamber temperature, press and release the BLAST CHILLING, DEEP FREEZING
or the HARD/SOFT key; to restore the normal display, press and release the same key again or
do not operate for 15 s.
If the temperature detected by the needle probe reaches -18°C within 240 minutes, it means
that deep freezing has been completed successfully, the device will automatically pass to
storage and the buzzer will be activated for 5 seconds.
Press and release a key to silence the buzzer.
During storage, the display shows the temperature detected in the chamber and the LED is
on.
If the temperature detected by the needle probe does not reach -18°C within 240minutes, deep
freezing will not be completed successfully but will continue, the LED will flash and the buzzer
will be activated.
Press and release a key to restore normal display and to silence the buzzer.
To display the chamber temperature, press and release the DEEP-FREEZING key; to restore the
normal display, press and release the DEEP-FREEZING key again or do not operate for 15 s.
When the temperature detected by the needle probe reaches the deep-freezing end
temperature, the unit automatically passes to storage in the same way as illustrated previously.
9.4 SOFT DEEP FREEZING AND STORAGE
The temperature-controlled deep freezing and storage cycle is divided into the following three
phases:
• Deep freezing soft phase
• Deep freezing
• Storage
On conclusion of a phase, the device passes automatically to the next.
Operate as indicated to start the cycle:
• Make sure the unit is in the “on” status.
• Make sure that the keyboard is not locked and that no procedure is in progress.
• Press and release the DEEP-FREEZING key: the LED, the LED, the HARD LED and
the LED will flash.
Press and release the DEEP-FREEZING key to start the cycle with timed-control: the LED,
the LED, the HARD LED and the LED will flash and the LED will switch
off (press and release the-DEEP FREEZING key again to start the cycle with temperature-
control).
• Press and release the HARD/SOFT key: the HARD LED will switch off.

17 50LIB055
Blast Chillers
• The display will show the work set-point during deep freezing. If it has been decided to
start the cycle with timed-control, the display will show the duration of time-controlled deep
freezing.
ᴑPress and release the UP or DOWN key within 15 s to modify the set point.
• Press and release the START/STOP key: the LED and the LED will remain
permanently on and the test to verify the correct insertion of the needle probe will be started.
If it has been decided to start the cycle with timed-control, LED also the will remain
permanently on and the cycle will be started with timed-control.
ᴑIf the test is completed successfully, the cycle will be started.
The maximum deep-freezing duration count is started on condition that the temperature
detected by the needle probe is below 65°C.
ᴑIf the test is not completed successfully, the cycle will be started with timed-control.
During soft deep freezing, the display shows the residual time of the deep-freezing
duration and the LED is on.
ᴑTo modify the residual time, operate as indicated:
* Press and release the UP or DOWN key again to modify the time value: the display will
flash.
* Do not operate for 4 s: the display will stop flashing and remain on permanently.
* During deep freezing, the display shows the residual time of the deep-freezing duration
and the LED is on.
Operate as indicated to stop the cycle:
• Hold the START/STOP key down.
During soft deep freezing, the display shows the temperature detected by the needle probe and
the LED is on.
To display the cabinet temperature, press and release the BLAST CHILLING, DEEP FREEZING
or the HARD/SOFT key; to restore the normal display, press and release the same key again or
do not operate for 15 s.
When the temperature detected by the needle probe reaches 3°C, the device automatically
passes to deep freezing.
During deep freezing, the display shows the temperature detected by the needle probe and the
LED is on.
To display the cabinet temperature, press and release the DEEP-FREEZING key; to restore the
normal display, press and release the DEEP-FREEZING key again or do not operate for 15 s.
If the temperature detected by the needle probe reaches -18°C within 240 minutes, it means
that deep freezing has been completed successfully, the unit will automatically pass to storage
and the buzzer will be activated 5 seconds.
Press and release a key to silence the buzzer.
During storage, the display shows the temperature detected in the chamber and the LED is
on.
If the temperature detected by the needle probe does not reach -18°C within 240 minutes, deep
freezing will not be completed successfully but will continue, the LED will flash and the
buzzer will be activated.
Press and release a key to restore normal display and to silence the buzzer.
To display the cabinet temperature, press and release the DEEP-FREEZING key; to restore the
normal display, press and release the DEEP-FREEZING key again or do not operate for 15 s.
When the temperature detected by the needle probe reaches the deep-freezing end
temperature, the device automatically passes to storage in the same way as illustrated
previously.

Blast Chillers
18
50LIB055
9.5 MANAGEMENT OF THE TEST REGARDING THE CORRECT INSERTION OF THE
CORE PROBE
Temperature-controlled cycles are preceded by a 2- phase test for the verication of the correct
insertion of the needle probe.
The second phase is only performed if the rst is not completed successfully.
The rst phase is completed successfully if the “temperature detected by the needle probe –
chamber temperature” difference is greater than 5°C in at least 3 controls out of 5 (the controls
are performed at 10 seconds intervals, consider the difference without sign).
The second phase is completed successfully if the “temperature detected by the needle probe
– chamber temperature” difference is 1°C higher with respect to the previous control in at
least 6 controls out of 8 (the controls are performed every 8 seconds). If the test is completed
successfully, the cycle will be started; if the test is not completed successfully, the LED
will flash and the buzzer will be activated for 2 seconds.
To start the temperature-controlled cycle, press the BLAST CHILLING key or the DEEP-
FREEZING key.
After 1 min from the signal that the test has not been completed successfully without having
operated, the cycle is started with time control.
9.6 PRE-COOLING START-UP
Every operating cycle can be preceded by pre-cooling.
Operate as indicated to start pre-cooling:
• Make sure the device is in the “on” status.
• Make sure no procedures are in progress
• Hold the BLAST CHILLING key down for 1 s: the LED will flash.
Operate as indicated to cut-off pre-cooling:
• Hold the BLAST CHILLING key for 1 second or start an operating cycle.
When the cabinet temperature reaches 5°C, pre-cooling continues, the LED remains on
permanently and the buzzer is activated for 1 s.
9.7 SWITCHING THE OZONE SANITIZATION CYCLE
(Only for models with Ozone Sanitization option)
Operate as follows:
• Make sure the device is in the “on” status and that the door is closed.
• Make sure that the keyboard is not locked and that no procedure is in progress.
• Hold the AUXILIARY key down for 1 s: the AUX LED will switch on.
The ozone generator is switched on for 5 minutes; opening the door cause the generator to
switch off
9.8 CORE PROBE HEATING
(Only for models with Heated Core Probe option)
Operate as follows:
• Make sure the device is in the “on” status or storage is in progress and that the door is open,
• Make sure that the keyboard is not locked and that no procedure is in progress.
• Hold the AUXILIARY key down for 1 s: the LED flashes and the AUX LED will switch on.
Core Probe is heated until the temperature detected by the needle probe reaches 40°C; closing
the door causes heating to be cut-off.
The buzzer is activated for 1 second on conclusion of heating.

19 50LIB055
Blast Chillers
10-SUGGESTION FOR A CORRECT USE OF THE BLAST CHILLER
10.1 SUGGESTION ON USE
Before using the blast chiller, clean deeply the inner cell, racks and the core probe.
10.2 PRE-COOLING
Before using the blast chiller for the rst time, and/or after a long period of inactivity, it’s
recommended to use the pre-cooling program and then start the desidered cycle after the
machine reached the working temperature.
10.3 LOAD OF THE BLAST CHILLER
It’s important to follow some guidelines in order to obtain a good performance from the unit and
avoid alteration of the stored food:
• Position the product in order to achieve an optimal air flow in the whole cell.
• If possible, avoid frequent and/or prolonged opening of the door while a cycle is running.
• Portion the food so that the tichkness is no more than 60-80 mm and the product are not
stacked to each other.
• Do not overload the racks more than the weight established from the constructor (see page 2
of this manual)
• Check the space between the trays is enough to guarantee a good air flow.
• Evenly distribute the product on all available trays.
• Check the trays are close to the evaporator grids for obtain a better and faster result

Blast Chillers
20
50LIB055
• The core probe must be correctly positioned at the centre of the heavier or greater piece of
product, be carefull that the tip of the core probe does not get out of the chunk and/or touch
the tray. The core probe should be cleaned at every cycle to prevent contamination of food.
• Do not cover the trays,do not use closed recipients and/or plastic lms, in order to avoid cycle
time increase and condensate formation. Use of vacuum bags do not affect the nal result.
11-”HACCP” FUNCTION (if supported)
Using the “HACCP” function, it is possible to memorize up to 9 events for each of the 3 HACCP
alarms, after which the most recent event overwrites the oldest.
The following table illustrates the information relative to the HACCP alarms, which the device can
memorize.
Alarm Code Critical Value
Date and
time of
occurrence
Duration
Temperature controlled
blast chilling or deep
freezing not concluded
within maximum duration
alarm
tiME
The maximum temperature
detected by the needle probe
after temperature controlled
blast chilling of deep freezing not
concluded within the maximum
duration
Yes
From 1 min to 99 h and 59
min, partial if the alarm is
in progress
Maximum temperature
during storage alarm AH Maximum cabinet temperature
during the alarm Yes
from 1 min to 99 h and 59
min, partial if the alarm is
in progress
Power-cut during storage
alarm PF The cabinet temperature at
power supply restore Yes from 1 min to 99 h and
59 min
This manual suits for next models
3
Table of contents
Languages:
Popular Chiller manuals by other brands

Daikin
Daikin WGZ030DW Installation, operation and maintenance manual

BrewBuilt
BrewBuilt IceMaster Max 4 Assembly And Testing Instructions

Haier
Haier CI0193AANB Installation, operation and technical manual

McQuay
McQuay Seasonpak WHR -008A Installation and maintenance data

Solt
Solt GGSBC44B quick start guide

AERMEC
AERMEC ANK installation manual

York
York YLAA0285SE manual

Server
Server SERVE BETTER 85537 manual

McQuay
McQuay AGZ 035A Installation, operation and maintenance manual

LG
LG ACHH017VBAB Installation and owner's manual

Trenton
Trenton TPLP Series Product data and installation instructions

Midea
Midea LSBLG365/MCFN Technical & service manual