manuals.online logo
Brands
  1. Home
  2. •
  3. Brands
  4. •
  5. AperionAudio
  6. •
  7. Speakers
  8. •
  9. AperionAudio A5 User manual

AperionAudio A5 User manual

A5 Immersive Height Module
Owners Manual
An electronic copy of this manual can be downloaded from www.aperionaudio.com.
© 2019 Aperion Audio. All Rights Reserved. Version 190515
Congratulations!
You're moments away from experiencing your new Novus speakers. We're honored that you chose
Aperion Audio to bring your music and movies to life!
Feel free to contact us if we can answer any questions or provide you with setup advice. Above alI, enjoy!
- Aperion Audio Team
Safety instructions
Switch off your amplifier before connecting your new speakers. Make sure that the speaker cables are ti-
ghtened and have a strong connection to the speaker terminal and amplifier terminal.
Listening to high sound pressure levels over a longer period of time may harm your hearing. To avoid he-
aring loss, do not listen to high sound levels over a prolonged period of time.
Quick Setup
The initial set-up of your Novus loudspeaker is relatively easy. Please take your time reading the guideli-
nes and more detailed instructions on the following pages of this manual after completing the first four
steps below.
1. Unpacking. Carefully remove the loudspeaker from the packaging and position it with its underside on
the floor. Do not use any sharp objects for the unpacking since they may scratch the speakers. We stron-
gly recommend that you keep the box and packaging materials for future use.
2. Positioning. Place the loudspeaker facing the listening area at its desired position in the room.
3. Connecting. While the amplifier is switched off, connect each loudspeaker to the amplifier with the sp-
eaker cable. Turn the volume level all the way down and power the amplifier on.
4. Listening. The loudspeaker is now ready to play. Optimal performance will only be realized after care-
ful positioning and running the speakers as described over the course of the following pages. Enjoy your
new Aperion Audio loudspeakers!
Feel free to contact the Aperion gurus with any further questions or for additional assistance.
1
2
Grille and Logo
The cloth grill has a magnetized mounting system to have the flexibility of a subtle look with
the driver covered or a technical look where the drivers are showing with invisible grill mounts.
The logo is also magnetically mounted to allow for customization depending on the speaker
orientation.
Product information
- The Aperion A5 Immersive Height Module can be placed on top of your front left and right
speakers, be mounted on the wall in front and behind, or mounted directly on the ceiling.
- If using the Aperion A5 on top of your existing speakers, the driver is directed in way that
the sound will bounce of the ceiling to the listening position, creating an illusion of a ceiling
mounted speakers.
- Designed as a versatile speaker, it is intended to be used for stereo, surround or as a hei-
ght channel.
- There are mounting points on both sides and underneath to allow for a wide variety of pos-
itioning options.
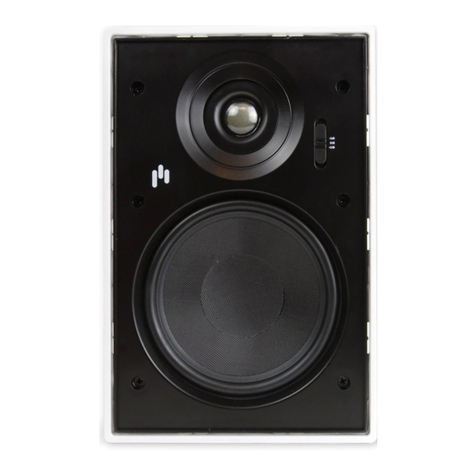
- One 5.25” Aluminum cone woofer.
- One 25mm soft dome coaxial mounted tweeter .
Productfeature
Package
contents
- A5 Speaker
- Manual
- Rubber pads
- Gloves
- Grille
- Polish Cloth
(2)
(2)
(8)
(1)
(1)
(1)
3
When installing your new loudspeakers you should use speaker cables that are a minimum of
2.5mm2 or 14 AWG. It is possible to use a banana plug or fork/spade as connectors, or simply
bare wire.Keep in mind that if you use the loudspeakers as surrounds or as back channels, larger
gauge cable may be necessary because the signal path is longer. Keep the length of cables as
short as possible.
Cable
These loudspeakers cover a broad range of frequencies and have unique dispersion
characteristics that will ease setup in achieving an excellent sounding system. With that said,
please keep in mind that loudspeaker placement will influence the frequency response, sound
stage and imaging as the room has a significant impact on the sound. Placing the loudspeakers
in the wrong location may degrade sound quality, frequency response and substantially reducing
your overall listening pleasure. Many rooms often end up with non-optimal placement, depending
on the size and location of the furnishings within your room. Finding the optimal location usually
requires some experimentation to determine what sound best in your room, from your listening
position(s). We suggest you read the general guidelines below and place the loudspeakers in one
of the suggested locations. We also recommend keeping the speaker`s distance to the listening
position as similar as possible for all channels, then as a fine tune, use your AV Receiver/pre to
adjust delays of each channel individually.
Proceed to listen to the loudspeakers multiple times, trying a few different locations beforesettling
on the final location. To do this, perform basic setup and listen to a familiar music track or movie
scene. Then move the loudspeakers to an alternate location & repeat listening to the same music
track or moviescene. If you have a test CD and SPL meter, performing a basic frequency
response test can help you determine which location provides the best frequency response.
Placement
General
guidelines
The A5’s are intended to be used for stereo, surround or as height channel on the front left and
right speakers, on the wall or on the ceiling. With the A5 used as a surround speaker, the tweeter
should be placed at ear height and the speakers directed towards the listening position, as the
figures below shows. When used as height channels we recommend to optimize the experience
by placing speaker where you want the sound to come from. E.g. Height channels mounted in the
ceiling directed toward the listening area. The speakers can be mounted on the wall or on the
ceiling.
Our recommendation for home cinema is to use them with a dedicated subwoofer to properly
handle the lowest frequencies and improve the overall dynamic range. If your choice is a five
channel (5.1) setup you can experiment with the placement for your surround channel speakers
as shown in the figure to the left. If your choice is a seven channel (7.1) setup you can experiment
with the placement for your surround and back channel speakers as shown in the figure to the
right. If the listening position is against the back wall our recommendation is to go for five channel
setup with the speakers placed beside the listening position as the figure to the left shows or
mounted on the back wall with the speakers tilted in towards the listening position.
0° 22°
30°
135°
150°
22°
30°
135°
150°
5.1 5 Speakers
1 Subwoofer
0° 22°
30°
90°
110°
135°
150°
22°
30°
90°
110°
135°
150°
7.1 7 Speakers
1 Subwoofer
4
Connecting
Mounting
The A5 has three sets of threaded inserts to attach the mounting bracket of your choice, all
with with a distance of 60 mm (2.36”). This spacing is widely compatible with most mounting
brackets. The A5 speaker comes with 4 rubber pads intended for protection and mechanical
isolation from the mounting surface.
5
- Do not place the loudspeaker next to heat sources, such as furnace registers, radiators, etc.
- Do not place the loudspeaker near sources of excessive moisture, such as evaporative co-
olers, humidifiers, etc.
Caution
Connect the same wire of the cable from + on the amplifier to + on the speaker and - on the
amplifier to - on the speaker. If you mix them you will introduce a polarity change resulting in
degraded sound quality.
Examples of mounting possibilities for the Aperion A5 speaker :
On top of the front speakers to reflect of the ceiling, mounted directly on the ceiling, or mounted
directly on the wall.
The picture to the left shows the A5 mounted on top
of a tower speaker.
60 mm 60 mm
Mounted on 5T
Mounted on in ceiling
Directed downwards
Mounted on wall
Directed inwards
Mounted on wall
Directed outwards
Mounted on wall
Directed inwards
Placed on a desk
or TV Stand
Caution
Receiver/Processor
With Automated
Setup &Calibration
Function
6
Calibration
For optimal performance, you should calibrate your system to ensure proper level
matching between all speakers and the proper setting of all controls (including
crossover frequency, phase, and any channel delays your receiver/processor may
offer). This procedure will vary depending on system configuration and the information
below is provided as a basic guide to assist you. Refer to the owner’s manual for your
receiver/processor for information on performing the steps required to enter their setup
mode and adjust any applicable settings.
After all connections have been made, turn on the AC power to your system, starting
with the first piece of source equipment in the signal chain (such as a blueray player or
streaming device), then power on any dedicated equalizer, then power on your
receiver/processor/amplifier(s), and lastbut not leasit, power on the subwoofer. You will
need to enter your receiver/processor’s setup mode and adjust any applicable speaker
settings to properly match your system configuration
After you have verified all speakers are connected and you have measured distances of
each to the listening position, perform the auto-setup routine on your receiver/processor
(if available). Many newer theater receivers/processors combine a measurement
microphone and an automated setup routine to assist you with proper setting of speaker
levels, crossover frequency, speaker delay and phase. Consult the owner’s manual for
your receiver/processor for further instructions on how to perform the setup routine. After
the auto-setup routine is complete, verify the final settings the receiver/processor
selected to ensure there are no erroneous settings (e.g. the settings should match your
system configuration).Some settings to verify may include:
- Number of speakers (e.g. 7.1 or 5.1 system, etc.)
- Type/size of speakers (e.g. small or large front/surround and subwoofer set to yes/on)
- Crossover point should be similar for identical speakers (e.g. if your system using 3 of
the same speakers for all front channels, verify the receiver/processor selected the
same crossover point for all these channels)
- Crossover frequency should be selected. We recommend 80Hz for the A5. Slightly
higher or lower crossover point may yield better results in your system.
- Note: some receivers do not have an adjustable frequency, instead there is only a ice
of “small” or “large”. In this case, we recommend choosing “small”.
- Gain settings for each channel should be reasonably close (e.g. if the speakers are
placed at even distances, the gain setting for each channel should typically be within a
couple dB from channel to channel). If the receiver/processor gain trim setting for the
subwoofer channel is a large value (e.g+12 or -12dB) you may need to increase the
subwoofer’s gain to achieve a better match.
- Low subwoofer gain/trim settings (on your receiver/processor) effect the operation of
the “AUTO ON/OFF” signal sensing circuit. If your receiver/processor gain is set to a
low value (e.g. attenuating the signal -6dB or more) this reduces the signal available to
properly “turn on” the subwoofer when using the “AUTO ON/OFF” feature. If your
subwoofer turns o ffunexpectedly when watching movies at low volumes, you may
wish to increase the receiver’s/processor’s subwoofer gain trim, and manually reduce
In some installations, automated room eq algorithms may make undesired changes to the
subwoofer signal settings trying to obtain what they believe is the best room response
curve. In some systems these changes have been known to degrade the overall sound
quality of the subwoofer. If using a receiver/processor with automated room eq function,
we advise you listen to the system first with the eq disabled, then again with the eq
enabled, to determine if the changes are beneficial.
the volume using the subwoofer’s “BASS LEVEL” control to maintain proper balance.
- Polarity/phase; This should be adjusted for smoothest frequency response near the
crossover point.
- EQ settings; if your receiver/processor allows you to see the eq settings for each
channel, verify that it is not adding any extra “limiter”, or “HPF” to the subwoofer
channel, and that it is not adding a high level of boost (e.g. >+3dB) or cut (e.g. -10db).
7
NOTE:
8
Care of your speaker
Your new speakers do not require any regular maintenance or calibration. Normal dusting or
cleaning of the surface for appearance purposes is all that is required.
Avoid using harsh detergents or chemicals when cleaning the cabinet. Abrasives, detergents,
or cleaning solutions may damage the finish on the cabinet. We recommend using only a
damp cloth or automotive grade “quick detailer” designed for painted surfaces, plastic & metal
trim, to clean the cabinet.
The cloth grill may be carefully cleaned using a vacuum. Animal hair can be removed using
masking tape or similar. Avoid using brushes with stiff bristles that may damage the grill cloth.
DO NOT use liquids, brushes or a vacuum to clean the drive units. Avoid touching the twe-
eter dome as this could result in permanent damage.
Problem: Speaker
has no output
- Check to insure the speaker wire is connected securely at both the amp and speaker connections
- Make sure the binding posts are snug
- If only using 1 set of wires (no bi-wire), make sure the gold plated jumpers are properly connecting HF to
LF for both + and - connections. The binding posts should be snug to the jumper.
- Verify the source is working (try connecting to a speaker you know is working)
- In some cases the source material may not play all 5.1 or 7.1 speakers all of the time (i.e., 2 channel ste-
reo will not have any output at the center channel)
If you should experience a problem with the operation of your speaker, here is a quick trou- ble shooting
guide to help:
Problem: Speaker
has weak bass or
image is poor
- Check to insure the speaker wire is connected with correct polarity (+ to +, - to -)
- If only using 1 set of wires (no bi-wire), make sure the gold plated jumpers are properly connecting HF to
LF for both + and - connections. The binding posts should be snug to the jumper.
Problem:
Intermittent Sound
- Check for loose, frayed or shorted speaker wire. It is possible for frayed wire to touch the other terminal
creating a short or intermittent short.
- Make sure the binding posts and jumpers are snug
Problem: Sound
coming from
woofer or tweeter
only
- Both HF and LF inputs must be connected. Typically, you will use the included jumpers for this If you are
Bi-wiring, check that all wires are connected securely at both the amp and speaker connections.
- If only using 1 set of wires (no bi-wire), make sure the gold plated jumpers are properly connecting HF to
LF for both + and - connections. The binding posts should be snug to the jumper.
- Make sure the binding posts are snug
- The unit has been exposed to excessive liquid.
- The speaker sounds abnormal and there is a “burned” smell .
- You dropped the speaker and you hear something is loose inside. In this case if you use it, you risk da-
maging the amplifier.
- Part of the cabinet, drivers, or electronics have been physically damaged.
Cabinet and baffle
Grille
Woofer/Tweeter
Troubleshooting and service
The following
conditions require
service by qualified
technician:
9
Construction type
Enclosure
Frequency range
Crossover point
Sensitivity
Impedance
Power handling
Terminals
Color
2-way, coaxial drivers
Sealed
120Hz - 40kHz
3 kHz
87 dB
6 ohm
20-100W RMS
5-way Gold-plated binding posts
Stealth Black and Pure White
Warranty 5years
5.1"x 7.1" x 7.9"/ 146mm x 180mm x 200mm (HxWxD)
Dimensions
Specifications subject to change without notice.
Weight 7.7lbs / 3.5 Kg
10
Service & support
To aid service, Aperion products are con-structed and produced using common technology, so that basically most
people are able to “unscrew” the loudspeaker using common tools.
ALWAYS pack the product / part very carefully. Unfortunately damages during transportation are very common.
If the speaker is poorly packed, the shipping company will not compensate damages.Always enclose a copy of the
receipt and and a description of the defect.
We allow a “do-it-yourself” approach on all Aperion products. If you are able to find out what
part of the loudspeaker is defective, you are fully allowed to unmount that part (which would
normally be a driver, a filter or the amplifier) and send it back to us for exchange.
IMPORTANT!
Always contact your dealer or us before taking the loudspeaker apart. It can also help you in
locating the issue. You can of course always choose to return the whole loudspeaker;
therefore you should save the original package.
“Do It Yourself”
- Service
Thank you for your purchase!
Where to send
the product for
a warranty repair
For questions regarding service, contact us by email: [email protected]
Website: www.aperionaudio.com
Support
If you have any question, comments, or concerns, please don`t hesitate to contact any of our
home theater gurus at 888.880.8992 or through a live chat via our website at
www.aperionaudio.com, or we`ll be happy to help you out with anything and everything you
need.
11
Contact Us
Aperion Audio provides a transferable limited warranty of 10 years on all cabinets and 5 years on drivers
Units which have been altered or modified in design, appearance or construction
These warranties cover all defects in material and workmanship with the following specific exceptions:
This warranty covers only the actual defects within the products themselves. IT DOES NOT cover
•Damage caused by improper installation or adjustment
•Damage caused by accident, unreasonable use, or neglect
•Damage caused by an act of God
•Damage from failure to follow instructions contained in the Owner`s manual
•Damage from repairs performed by someone not authorized by Aperion Audio
•Any unit on which the serial number has been effaced, modified, or removed
•Damage occurring during shipment, other than that arranged by Aperion Audio
for Novus speakers.
costs of in-stallation in (or removal from) a fixed installation, or normal set-up, claims based on any
misrepresentation by the seller, or performance variations resulting from installation related
circumstances such as signal quality, AC power or incompatibilities with other system components.
During the warranty period, Aperion Audio will, at its option, either repair the defect, or replace the
defective product, or the defective parts, or components thereof with the then current product/
component in use by Aperion Audio, at no charge to the owner for parts and labor covered by this
warranty. If necessary repairs are not covered by this warranty, or if a unit is examined which is not
in need of repair, you will be charged for the repairs and/or the examination.
If non-warranted repairs are needed, we will notify you of the estimated cost and ask for your
authorization to perform said repairs. You must pay shipping charges incurred in getting your
product to and from Aperion Audio.
Please save the original shipping cartons, as the unit MUST be returned in the original carton and
packing.
Express Limited Warranty
If you have any questions, comments, or concerns, please don't hesitate to contact any of
our Home Theater Gurus at 888.880.8992 or through a live chat via our website at
www.aperionaudio.com - we'll be happy to help you out with anything and everything you
need.
Aperion Audio
www.aperionaudio.com
[email protected]
503-598-8815
12
An electronic copy of this manual can be downloaded from www.aperionaudio.com.
© 2019 Aperion Audio. All Rights Reserved. Version 190515

Other AperionAudio Speakers manuals

AperionAudio Verus Grand Center User manual

AperionAudio

AperionAudio Verus Grand Center User manual

AperionAudio Intimus Series User manual

AperionAudio

AperionAudio Intimus Series User manual

AperionAudio Intimus Series User manual

AperionAudio

AperionAudio Intimus Series User manual

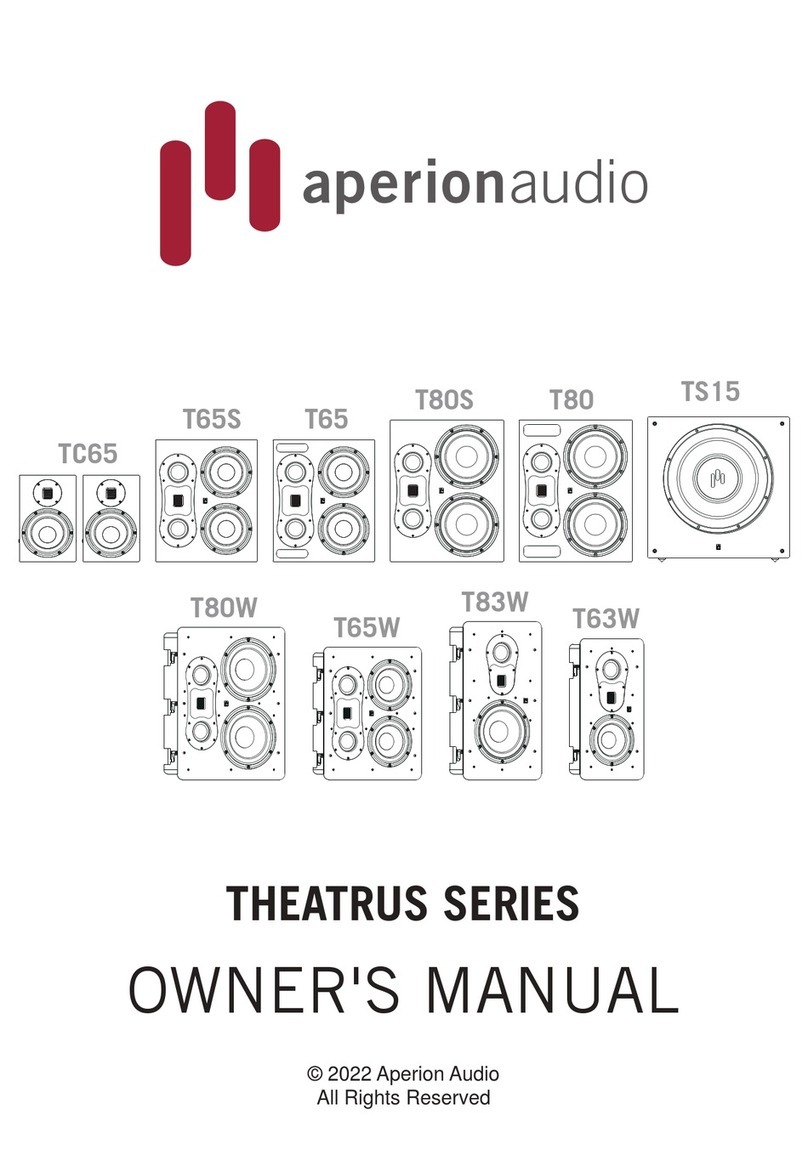
AperionAudio THEATRUS TC65 User manual

AperionAudio

AperionAudio THEATRUS TC65 User manual

AperionAudio Intimus 5B User manual

AperionAudio

AperionAudio Intimus 5B User manual

AperionAudio NOVUS User manual

AperionAudio

AperionAudio NOVUS User manual

AperionAudio Verus Forte User manual

AperionAudio

AperionAudio Verus Forte User manual

AperionAudio VERUS FORTE User manual

AperionAudio

AperionAudio VERUS FORTE User manual

AperionAudio Clearus User manual

AperionAudio

AperionAudio Clearus User manual

AperionAudio 6-IW User manual

AperionAudio

AperionAudio 6-IW User manual

AperionAudio 6LCR User manual

AperionAudio

AperionAudio 6LCR User manual

AperionAudio THEATRUS Series User manual

AperionAudio

AperionAudio THEATRUS Series User manual

AperionAudio 8" In-Ceiling User manual

AperionAudio

AperionAudio 8" In-Ceiling User manual

AperionAudio Verus Grand Bookshelf Speaker User manual

AperionAudio

AperionAudio Verus Grand Bookshelf Speaker User manual

AperionAudio Aluminum True Ribbon Super Tweeter Speaker User manual

AperionAudio

AperionAudio Aluminum True Ribbon Super Tweeter Speaker User manual

AperionAudio Intimus 4B Harmony SA User manual

AperionAudio

AperionAudio Intimus 4B Harmony SA User manual

AperionAudio SW-12 User manual

AperionAudio

AperionAudio SW-12 User manual

AperionAudio VERUS User manual

AperionAudio

AperionAudio VERUS User manual

AperionAudio Verus User manual

AperionAudio

AperionAudio Verus User manual

AperionAudio Intimus 4T User manual

AperionAudio

AperionAudio Intimus 4T User manual

AperionAudio Bravus II 10D User manual

AperionAudio

AperionAudio Bravus II 10D User manual

AperionAudio L6-IC User manual

AperionAudio

AperionAudio L6-IC User manual

AperionAudio Verus Grand User manual

AperionAudio

AperionAudio Verus Grand User manual

AperionAudio Intimus Series User manual

AperionAudio

AperionAudio Intimus Series User manual

Popular Speakers manuals by other brands

Yamaha Ms50dr Service manual

Yamaha

Yamaha Ms50dr Service manual

AudioEngine HD4 quick start guide

AudioEngine

AudioEngine HD4 quick start guide

Bowers & Wilkins Casa AWM 650 Installation notes

Bowers & Wilkins

Bowers & Wilkins Casa AWM 650 Installation notes

Bush CD-78D instruction manual

Bush

Bush CD-78D instruction manual

Boston Acoustics E100 instruction manual

Boston Acoustics

Boston Acoustics E100 instruction manual

LG RM1 Simple manual

LG

LG RM1 Simple manual

Amina Evolution AIW150E installation guide

Amina

Amina Evolution AIW150E installation guide

Atlas SM42T Specifications

Atlas

Atlas SM42T Specifications

Samsung HW-K860 user manual

Samsung

Samsung HW-K860 user manual

Litelink ACC-1004-XLR operating instructions

Litelink

Litelink ACC-1004-XLR operating instructions

Celestion FTR HDX Range FTR15-4080HDX Specifications

Celestion

Celestion FTR HDX Range FTR15-4080HDX Specifications

JBL Link 10 quick start guide

JBL

JBL Link 10 quick start guide

Sony XS-W4021 instructions

Sony

Sony XS-W4021 instructions

Cambridge Audio C11207 manual

Cambridge Audio

Cambridge Audio C11207 manual

Philips AECS7000E/00 user manual

Philips

Philips AECS7000E/00 user manual

Teresonic Ingenium user guide

Teresonic

Teresonic Ingenium user guide

Marten Parker Quintet Diamond Edition owner's manual

Marten

Marten Parker Quintet Diamond Edition owner's manual

Sytech Powergenics Series user manual

Sytech

Sytech Powergenics Series user manual

manuals.online logo
manuals.online logoBrands
  • About & Mission
  • Contact us
  • Privacy Policy
  • Terms and Conditions

Copyright 2025 Manuals.Online. All Rights Reserved.