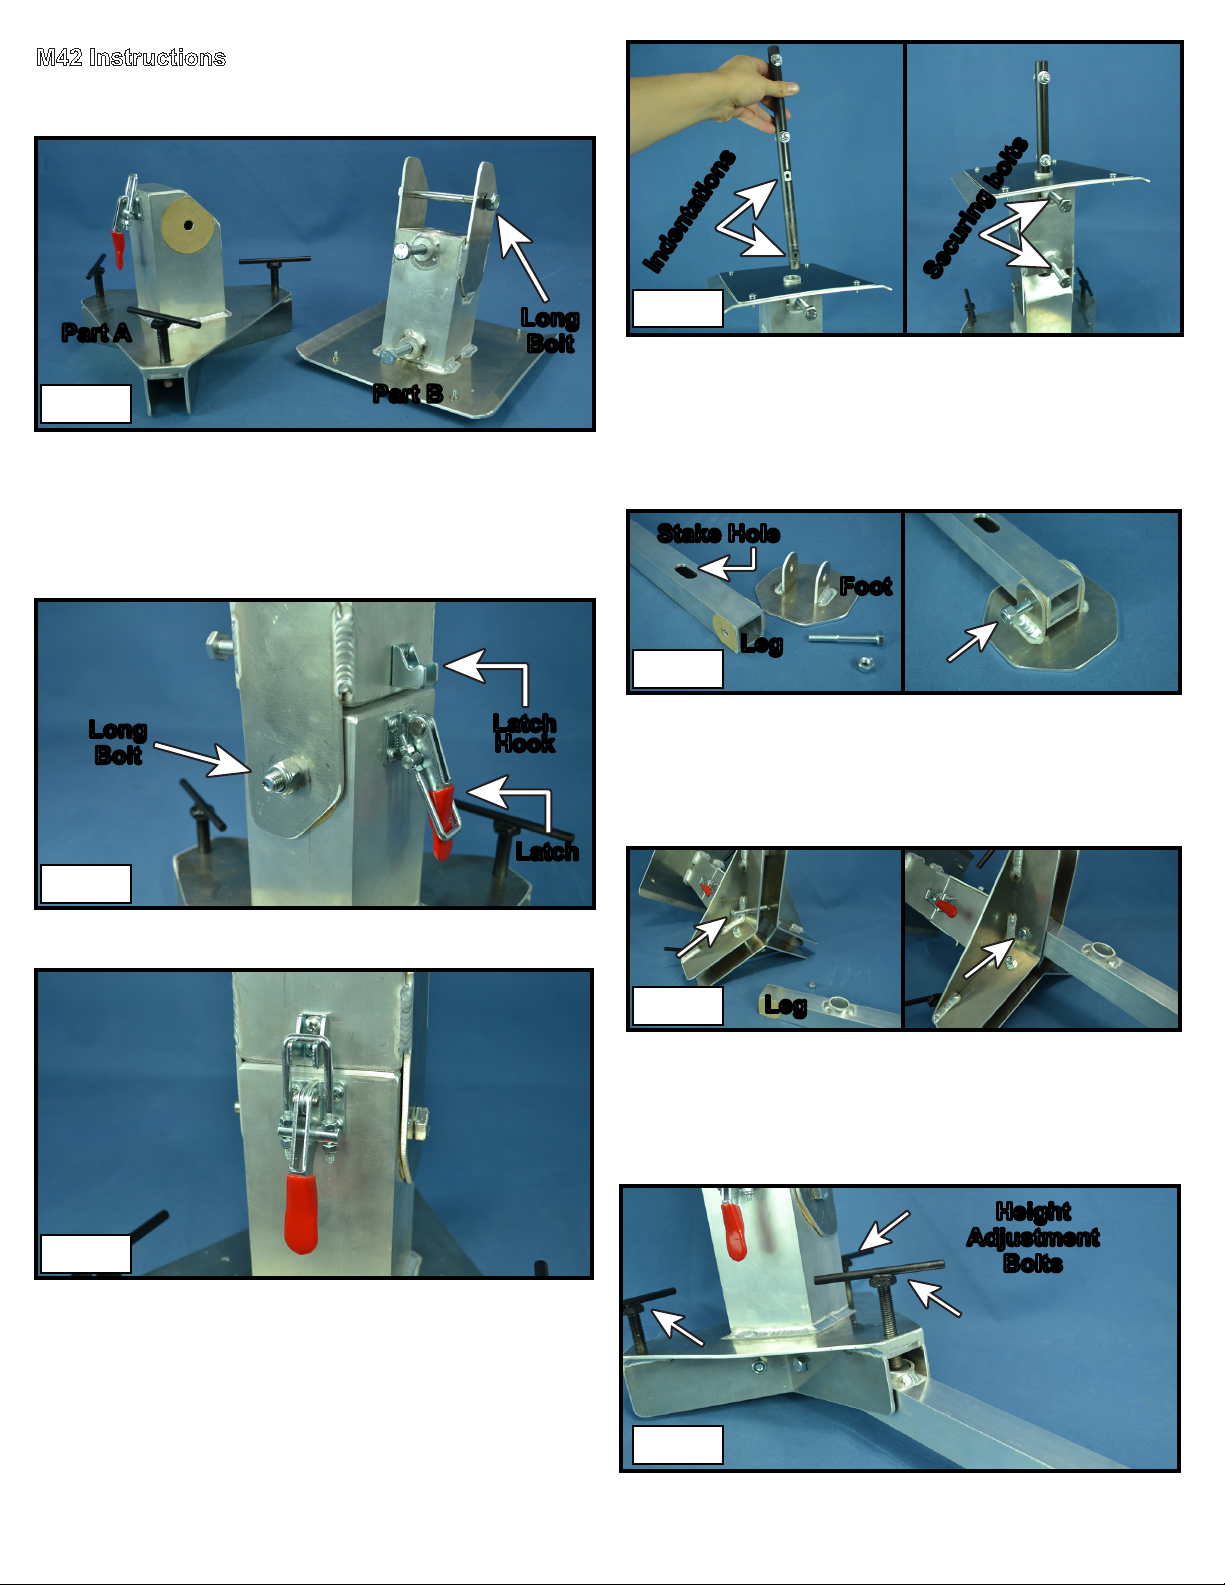
Latch
Latch
Hook
Long
Bolt
Foot
Leg
Leg
Height
Adjustment
Bolts
Stake Hole
Indentations
Securing bolts
Long
Bolt
Part A
Part B
Step 1
Step 4
Step 5
Step 6
Step 7
Step 2
Step 3
1. Unscrew the nut and remove the Long Bolt shown in the
image from Part B.
2. Place Part B on top of Part A. Align the two parts by using
the latch and latch hook as a point of reference and align the
holes on the sides for the Long Bolt. Insert the Long Bolt
through the side holes and use a wrench to attach the nut and
tighten it so it’s ush with the side but not so tight that you can’t
tilt the top piece (Part B).
3. Secure the latch to the latch hook.
4. Insert the Rail Mounting Post into the top of Part B. Face
the indentations on the rod (shown on the left of the Step 4
image) in the same direction as the Securing Bolts (shown
on the right of the Step 4 image). Simultaneously swivel the
Rail Mounting Post slightly back and forth while tightening the
Securing Bolts (by hand) to make sure they align within the
indentations on the post itself. Test this attachment by gently
pulling up on the Rail Mounting Post to conrm that it cannot
be easily removed.
5. Remove the short bolt and nut from the Foot. Place the
Foot on the Leg end nearest to the stake hole (as shown
in the Step 5 image) and align the bolt holes. Insert the bolt
through the bolt holes and screw on the nut. Tighten the nut so
that it is ush with the side of the Leg. Repeat this process for
the remaining 2 legs.
6. Remove the short bolt and nut from the bottom of Part A.
Slide the Leg into the bottom of Part A while aligning the bolt
holes. Insert the short bolt and tighten it so it’s ush with the
frame but keep it loose enough so the Leg moves freely. Re-
peat this process for the remaining 2 legs.
7. Adjust the 3 Height Adjustment Bolts as needed to set
your desired launch angle for the launch pad while on the eld.
You can also insert the stakes (sold separately) into the stake
holes (shown in Step 5) when placing the launch pad in the
eld. The assembly is now complete.
M42 Instructions


