Apricorn Ez backit pro User manual

User Guide

Copyright © Apricorn, Inc 2003. All rights reserved.
Windows and MS-DOS are registered trademarks of Microsoft Corporation.
All other trademarks and copyrights referred to are the property of their
respective owners.
Distribution of substantively modied versions of this document is prohibited
without the explicit permission of the copyright holder.
Distribution of the work or derivative work in any standard (paper) book form for
commercial purposes is prohibited unless prior permission is obtained from the
copyright holder.
DOCUMENTATION IS PROVIDED AS IS AND ALL EXPRESS OR
IMPLIED CONDITIONS, REPRESENTATIONS AND WARRANTIES,
INCLUDING ANY IMPLIED WARRANTY OF MERCHANTABILITY,
FITNESS FOR A PARTICULAR PURPOSE OR NON-
INFRINGEMENT, ARE DISCLAIMED, EXCEPT TO THE EXTENT
THAT SUCH DISCLAIMERS ARE HELD TO BE LEGALLY INVALID

1
Table of Contents
Introduction........................................................................................ 2
What is EZ Backit Pro ........................................................... 2
Software usage conditions ..................................................... 2
Before you Backup ........................................................................... 3
Getting Started ................................................................................. 3
Installation of Hardware ........................................................ 5
Connecting to a Windows 98 SE or ME computer.... 5
Windows 2000 and XP............................................... 5
Using Clone EZ to make a clone backup........................................... 6
Using Image EZ to make an image backup ..................................... 7
Reformatting your EZ Backit Pro .....................................................9
To reformat the drive for Windows 2000 or XP ....................9
Troubleshooting .................................................................................11
Warranty Information.........................................................................12
Appendix – Technical Support Information.......................................13

2
Ez Backit pro Introduction
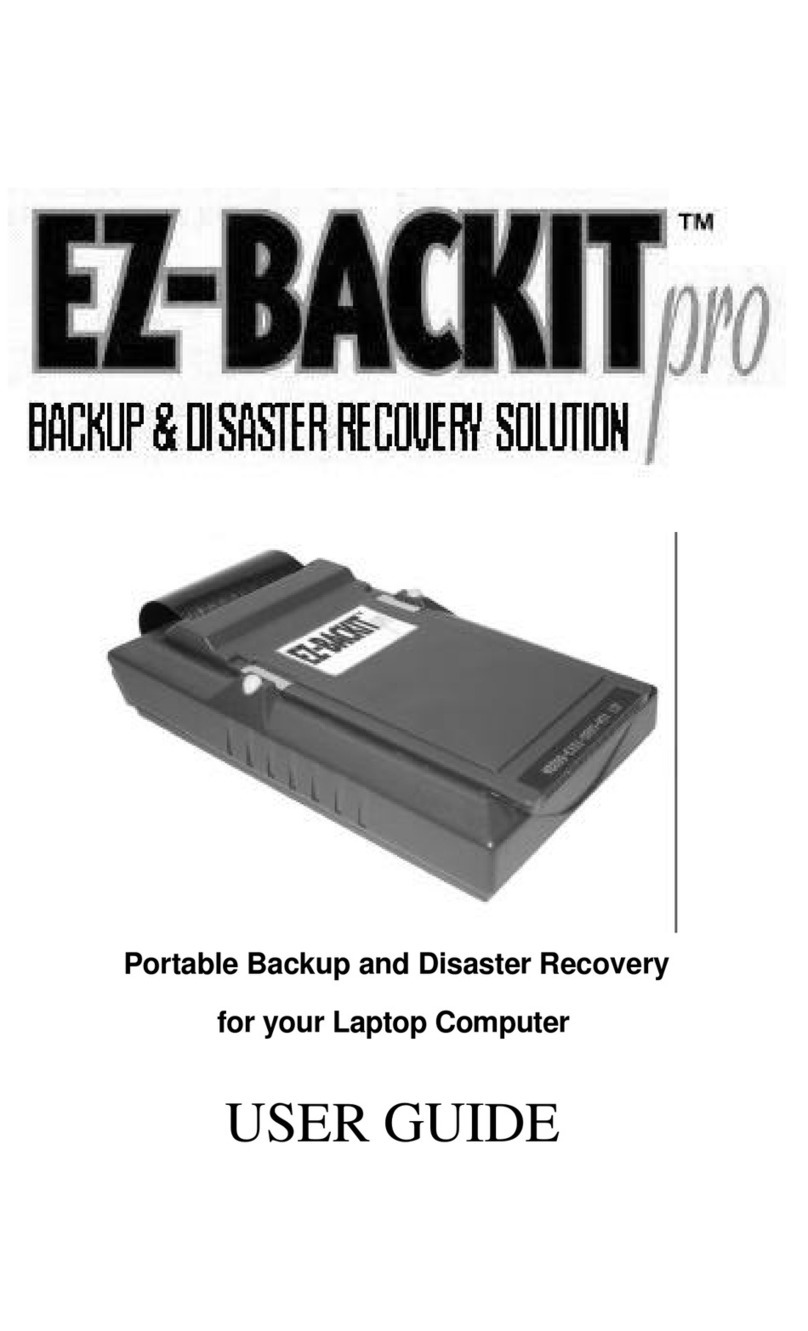
Thank you for purchasing the Ez Backit pro! The Ez backit pro is a self-contained
backup solution for your laptop computer. Ez backit pro was created to make backup
easy for laptops, at home or on the road. The Backit pro is compatible with most
laptop computers. It is small, portable, easy to use, and can be customized to suit
your individual backup needs.
Your Ez backit pro Kit Includes:
The Ez backit pro:
Contains a 2.5” IDE laptop hard drive, with a folding PCMCIA
connector. It is a self-contained, removable hard drive that requires no
additional power outlets. The Ez backit pro installs as a Plug-and-Play
device in most Windows Operating systems.
The EZ Gig II CD-ROM:
EZ Gig II is two separate utilities, Clone EZ and Image EZ on a single CD.
Clone EZ is ideal for users who require an exact bootable clone of their hard
drive. A cloned copy is used for disaster recovery backup, or a hard drive
upgrade. Image EZ is great for users who desire a compressed image of their
entire hard drive (or partition). Since Image EZ compresses its backup, users
have enough space to keep backups from multiple dates or multiple computers.
Software Usage Conditions
The conditions for EZ Gig II software usage are described in the License
Agreement, included with this package. The supplied registration card is the
conrmation of your legal purchase and usage of EZ Gig II on your system.
Each registration card has its own unique registration number. Under current
legislation the License Agreement is considered a contract between a user (you)
and a software manufacturer (Apricorn Inc.). The contract has legal effect and its
violation may result a court examination.
Illegal use and/or distribution of this software will be prosecuted.

3
Before you backup
Read this manual FIRST! Make sure you are familiar with all of the Ez backit pro
procedures before you begin.
Organize a regular backup routine! Hard drive backup works best when it is done
on a regular schedule, so take a moment to come up with a plan that works best for
you. A recommended backup routine might be:
• Run a full backup (using Clone EZ) at the end of each month.
• Perform weekly backups (using Image EZ).
Cleanup the drive! It’s also a good idea to combine your backups with these other
important maintenance tasks:
• Clean up any le-system errors by running Windows ScanDisk (or a
similar disk cleanup utility) on your internal hard drive before you run
backups.
• Check with the laptop manufacturer for any BIOS updates. Most BIOS
updates are available-for-download on the manufacturers’ support
website. If you nd a BIOS update for your laptop, it should be
installed before running backup.

Getting Started
In order to use your EZ Backit Pro you should have:
Hardware:
Pentium CPU
32MBs RAM
CD ROM drive
Floppy Disk drive
Opertating systems:
Microsoft:
Windows 98
Windows Millennium
Windows 2000 Professional
Windows XP Home and Professsional
4

5
Hardware installation:
Ez backit pro will install as a “plug-and-play” removable hard drive in Windows
98SE/ME, Windows 2000 and Windows XP. These operating systems already
contain “built-in” device drivers that will work with Ez backit pro. No additional
driver les are required. Depending on your system and OS, you may have to
install the hardware device drivers using the “Add New Hardware” option inside the
Windows Control Panel:
Windows 98 Second Edition, Windows ME:
During the “Add New Hardware” installation process, the Wizard
should detect the Ez backit pro as a new ATA device. Windows will
install a “Standard IDE/ESDI Hard Disk Controller” as the device
driver.
When installed correctly, you should see this new driver listed under
“Hard Disk Controllers” in the Windows “Device Manager” screen.
Windows 2000:
During the “Add New Hardware” installation process, the Wizard
should detect the Ez backit pro as an ATA device. Windows will install
a “PCMCIA IDE/ATAPI Controller” as the device driver.
When installed correctly, you should see this new driver listed under
“IDE/ATAPI Controllers” in the Windows 2000 “Device Manger”
screen.
Once the device drivers are installed, the EZ-Backit Hard Drive will appear as an
additional hard drive in Windows “My Computer” (If you have already used the EZ-
GIG Drive-Copy, you should see that the Ez backit pro already contains the same
les as your internal drive). Under Windows 98SE/ME, 2000, and XP, the Ez backit
pro is a “hot-swappable” device. You can insert the Ez backit pro connector while
the laptop is powered on, and Windows will automatically detect the new drive.
Remember: use the Windows “PCMCIA Card Services” (98SE/ME) or the “Unplug
and Eject Hardware” (Win2000 and XP) to stop access to the card before physically
removing it!

Creating your rst clone backup using Clone EZ
1. Once the EZ Gig II software is installed, consult the Clone EZ Manual, located
on the EZ Gig II CD, for detailed instructions on using Clone EZ. These
instructions are exclusive for creating a clone of your hard disk using the
Automatic Upgrade Feature.
2. Apricorn EZ Gig II will need to restart your computer. Please save all work
before starting Apricorn EZ Gig II.
3. To Start EZ Gig II, click on the EZ Gig II icon on the desktop or go to
Start�Programs�Apricorn�EZ Gig II, and select Apricorn EZ Gig II.
4. Select Automatic Upgrade from the main screen to open Clone EZ
5. At the rst screen, select the source hard drive. (If the destination hard drive
is completely blank, Clone EZ will automatically congure the source and
destination hard drive. Skip to step 8). Click Next to continue.
6. Select the destination hard drive and click Next to continue.
7. If there is data on the destination drive, you must agree to delete the partitions
on it to continue. If you do not want to overwrite the data on the drive, click
Back and choose another drive. Click Next to continue.
8. Clone EZ presents a layout of the source and destination drive after the upgrade .
Review the layout and conrm the settings. To nd out the model number of the
drive, move the mouse over the picture of the hard drive and keep it there for a
second. When satised, click Next to continue
9. This will open the Clone EZ Script window. Verify the operations listed in the
white box. If there are corrections to be made, click the Back button to change
the selected options. Until the Proceed button is clicked, the selected operations
will not execute. If everything is correct, click Proceed to begin the clone.
10. Click Yes when prompted to reboot.
11. On reboot, after the Windows splash screen appears, Clone EZ will begin the
cloning process. The progress bar on the bottom of the screen will indicate the
progress.
6

7
12. When the transfer is completed, a message appears on the screen. Press any key
to shutdown the computer.
13. Before you restart the computer, disconnect the Ez Backit pro from the
computer.
14. When the computer reboots, it will display a message saying, “Transfer
Successful.” After a couple seconds the computer will continue booting into
Windows.
Create your first backup image using Image EZ.
1. Once the EZ Gig II software is installed, consult the Image EZ manual, located
on your EZ Gig II CD, for detailed instructions on using Image EZ. These
instructions are exclusive for creating a backup image of your hard drive on your
EZ BackIt Pro.
2. Under certain conditions, Apricorn EZ Gig II may need to restart your computer.
Please save all work before starting Apricorn EZ Gig II.
3. To Start EZ Gig II, click the Start button, go to Programs�Apricorn�EZ Gig II
and click on Apricorn EZ Gig II. This will open the main screen of EZ Gig II.
You can also click on the Apricorn EZ Gig II icon on the Desktop.
4. Select “Create Image” from the main screen to open Image EZ.
5. At the rst screen, select the drive or partition(s) you would like to backup. A red
line will appear under the drive or partition(s) chosen. After selecting the drive
or partition(s), click Next.
6. This will open the Image Archive Location window. Select xed hard disk and
click the Next button.
7. At the Image Archive Creation Window, nd your EZ Backit Pro. It will have
the name Apricorn, but the drive letter will vary depending on the conguration
of your computer.

8
8. Enter the image name in the lename text box, located near the bottom of the
Image Archive Creation Window. You can enter any name you wish. It might be
a good idea to use the date, such as Jan2503 for January 25, 2003. Click Next to
continue.
9. This will open the Compression Level window. In this window, you can
optimize the creation of the image le to suit your needs. The lower compression
level increases the speed at which the image le is created. Higher compression
levels create smaller image les. The estimated size and time will be located in
the description section of the window. Choose the compression level and click
Next to continue.
10. The Image Archive Splitting window will open, select Automatic and then click
Next to continue.
11. The Image Archive Protection window will open. If you do not want to password
protect your image, click Next to continue. If you wish to enter a password,
please remember the password for future use. If you forget the password, you
will be unable to access the image le at a later date. Apricorn does not have
the ability to retrieve the password. Click Next to continue.
12. This will open the Image Archive Comments window. You can use this window
to write comments about the image (such as the date you created the image, the
computer, operating system, etc.). Click Next to continue.
13. This will open the Apricorn Image EZ Archive File Creation Script window.
Please verify the operations listed in the white box. If there are corrections to
be made, you can click the Back button to change selected options. Until the
Proceed button is clicked, the selected operations will not execute and nothing
is written to your Ez backit pro. If everything is correct, you can click the
Proceed button to create the image le.
14. Image EZ completes the selected options and the Congratulations screen will
appear.
15. BACKUP COMPLETE!!! The Ez backit pro now contains a complete image of
the selected drive or partition(s).
16. To learn more about the versatility of Image EZ, including restoring an image,
please consult the Image EZ manual located on your EZ Gig II CD.

9
Reformatting your EZ Backit pro
Your EZ Backit pro hard drive is preformatted with the FAT32 Windows File System.
The FAT32 le system is visible to the largest number of operating systems. FAT32 does
have limitations. You can not save a le larger then 4GB and in Windows 2000 and XP,
the partition size is limited to 32GB. The EZ Backit Pro will be usable in your system,
however we recommend that you reformat the hard drive in the following ways for the
following operating systems.
To reformat the drive in the NTFS le system in Windows 2000 or XP:
Caution: This will destroy any data on the hard drive; please back up any data
before you continue with the reformatting of the EZ Backit Pro hard drive.
1. Open My Computer or Windows Explorer
2. Right click on the EZ Backit Pro drive and select format
3. This will open the format window
a. In the File system drop down box, select NTFS
b. Allocation unit size use default allocation size
c. Format options,
i. Select Quick format
ii.Do not enable compression
d. Click on the Start button.
4. The drive will now be reformatted
5. To verify the reformatting of the drive
a. Go to My Computer or Windows Explorer, Right click on the EZ
Backit Pro drive, and select properties from the list.
b. This will open the EZ Backit Pro hard drive properties; the le system
should be NTFS.

10
Troubleshooting
I am unable to format my 40 GB or larger EZ Backit pro with FAT 32 in Windows
2000 or XP.
Windows 2000 and XP limit a FAT32 partition to 32 GB. If you choose to format the
drive in a larger then 32 GB partition, you will need to use the NTFS le system.
I am unable to save a le larger then 4GB to my EZ Backit pro.
Fat32 has a le size limitation of 4 GB. If you are using Windows 2000 or XP, you have
two options to change the le system on the drive. The rst option, as seen on page 9,
will reformat the drive and you will lose your data. If you want to keep your data, you
can use the following method. Press the start menu button, go to run, and type cmd into
the open line and hit enter. The CMD window will open. At the prompt type convert (the
drive letter of the EZ Backit Pro) /fs:ntfs. Example. If your EZ Backit Pro is assigned
the drive letter of E:, then you will type convert E: /fs:ntfs.

11
Warranty Conditions
Three-Year Warranty (on hard drive):
Apricorn offers a 3-year warranty on all notebook-based products (i.e. EZ Backit Pro,
EZ BUS, EZ Gig Notebook Hard Drive Upgrades, CardBus cards), and 12 months on
all desktop-based products (i.e. Videoxb) against defects in materials and workmanship
under normal use. The warranty period is effective from the date of purchase either
directly from Apricorn or an authorized reseller.
Disclaimer and terms of the warranties:
THE WARRANTY BECOMES EFFECTIVE ON THE DATE OF PURCHASE AND MUST BE
VERIFIED WITH YOUR SALES RECEIPT OR INVOICE DISPLAYING THE DATE OF PROD-
UCT PURCHASE.
APRICORN WILL, AT NO ADDITIONAL CHARGE, REPAIR OR REPLACE DEFECTIVE
PARTS WITH NEW PARTS OR SERVICEABLE USED PARTS THAT ARE EQUIVALENT TO
NEW IN PERFORMANCE. ALL EXCHANGED PARTS AND PRODUCTS REPLACED UNDER
THIS WARRANTY WILL BECOME THE PROPERTY OF APRICORN.
THIS WARRANTY DOES NOT EXTEND TO ANY PRODUCT NOT PURCHASED DIRECTLY
FROM APRICORN OR TO ANY PRODUCT THAT HAS BEEN DAMAGED OR RENDERED
DEFECTIVE: 1. AS A RESULT OF ACCIDENT, MISUSE, NEGLECT, ABUSE OR FAILURE
AND/OR INABILITY TO FOLLOW THE WRITTEN INSTRUCTIONS PROVIDED IN THIS
INSTRUCTION GUIDE; 2. BY THE USE OF PARTS NOT MANUFACTURED OR SOLD BY
APRICORN; 3. BY MODIFICATION OF THE PRODUCT; OR 4. AS A RESULT OF SERVICE,
ALTERATION OR REPAIR BY ANYONE OTHER THAN APRICORN AND SHALL BE VOID.
THIS WARRANTY DOES NOT COVER NORMAL WEAR AND TEAR.
NO OTHER WARRANTY, EITHER EXPRESS OR IMPLIED, INCLUDING ANY WARRANTY
OF MERCHANTABILITY AND FITNESS FOR A PARTICULAR PURPOSE, HAS BEEN OR
WILL BE MADE BY OR ON BEHALF OF APRICORN OR BY OPERATION OF LAW WITH
RESPECT TO THE PRODUCT OR ITS INSTALLATION, USE, OPERATION, REPLACEMENT
OR REPAIR.
APRICORN SHALL NOT BE LIABLE BY VIRTUE OF THIS WARRANTY, OR OTHERWISE,
FOR ANY INCIDENTAL, SPECIAL OR CONSEQUENTIAL DAMAGE INCLUDING ANY LOSS
OF DATA RESULTING FROM THE USE OR OPERATION OF THE PRODUCT, WHETHER OR
NOT APRICORN WAS APPRISED OF THE POSSIBILITY OF SUCH DAMAGES.

12
Appendix - Technical Support
This section of the manual will give you instructions on how to obtain technical information
and support for your EZ Backit pro product.
Before you contact technical support
Apricorn is committed to providing you comprehensive technical support. We suggest you
use the following sequence for faster service.
1. Hardware Installation section of the User’s Guide Manual
2. Apricorn’s Website (http://www.apricorn.com) Check for up to date information.
3. Apricorn Technical Support Department (1-800-458-5448)
Apricorn’s Technical Support Specialists are available from 8:00 AM to
5:00 PM Monday to Friday, Pacic Standard Time; or e-mail questions to

13
RMA Policy
If you need to return or replace your EZ Backit pro, Apricorn requires that you
perform the following steps:
In order to return or replace your EZ Backit pro, Apricorn must issue an RMA
(Return Merchandise Authorization) tracking number. Simply call Apricorn’s
technical Support department with your EZ Backit pro part number and a
description of the problem you are experiencing. If the Apricorn representative
nds cause for a return, they will issue an RMA number to reference your product.
You will need to include the RMA authorization form with your package. The
RMA form is available online at http://www.apricorn.com/support/rma.php. It
is the customer’s responsibility to write the RMA number on the exterior of the
package and sent the prepaid package to:
Apricorn
Attn: RMA #
12191 Kirkham Rd.
Poway, CA 92064
The purchaser shall be responsible for any loss or damage to the returned product
until it is received by Apricorn. Purchaser should consider obtaining insurance
with respect to shipping the product.

12191 Kirkham Road, Poway, California, U.S.A. 92064
(858) 513-2000
http://www.apricorn.com
rev 1.2 (July 2003)
Other manuals for Ez backit pro
1
Table of contents
Other Apricorn UPS manuals
