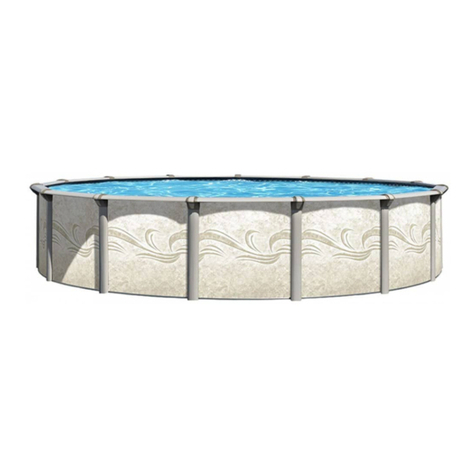
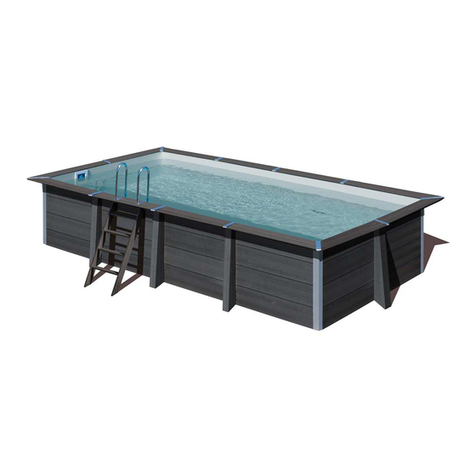
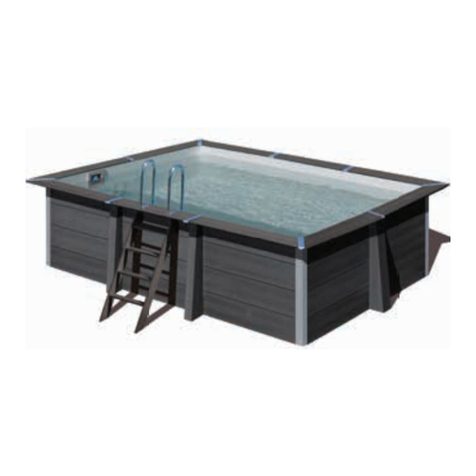
Aqua-world Round Satinwood User manual

Round Satinwood
Assembly / Installation
Instruction Manual
Version 1- March 2015
Smart Phone
Scan Me

CONTENTS
PART 1 INTRODUCTION 2
PART 2 SELECTING A LOCATION FOR POOL INSTALLATION 3
PART 2B PREPARING THE BASE FOR A ROUND POOL 4
PART 3B ASSEMBLING THE BASE OF A ROUND POOL 6
PART 4 ASSEMBLING THE POOL WALL AND LINER 7
PART 5 INSTALLING THE TOP RAILS AND VERTICALS 12
PART 6 SAFETY INSTRUCTIONS 13
PART 7 USING THE POOL 14
PART 8 POOL MAINTENANCE 15
PART 9 WINTERISING THE POOL 16
ANNEXES:
A) FELT PAD – INSTRUCTIONS FOR USE 17
B) INSTRUCTIONS FOR ASSEMBLY AND USE OF THE SKIMMER 18
C) POOL MAINTENANCE 20
Round Satinwood Pool
1

PART 1 - INTRODUCTION
1. READ THE INSTRUCTIONS
Read all instructions completely before you begin.
These instructions explain how to install your pool. Simply follow the step-by-step directions specified in the instructions. Please note
that Part 6 includes Safety Instructions and Parts 7, 8 and 9 include instructions to help you keep your pool clean and in good shape, year
after year. Be sure to read the Safety Instructions carefully and make sure everyone who uses your pool reads and understands them.
Note: The illustrations shown here may not correspond exactly to your pool, but are designed to aid the installation instructions. The
manufacturer reserves the right to make changes.
2. PREPARE THE NECESSARY TOOLS AND EQUIPMENT
Before starting pool assembly, please prepare the necessary tools. You will need:
• A spade, pick, rake, shovel and wheelbarrow for moving soil and sand;
• A wooden block, about 5 x 10 cm, whose length is longer than one half of the pool, wooden pins, wooden stakes 2.5 x 2.5 cm with a
flat upper end and approximately 15 cm long, a bag with flour or fine sand, a ball of twine, knife, spirit level, measuring tape, hammer
and nails for the measurement and preparation of a flat base;
• Paving blocks for reinforcing the base under the pool structure (see Part 2);
• Sieved sand for levelling the base and for creating corner filling (see Part 3 of the instructions);
• Phillips screwdriver and a flat bladed screwdriver, combined pliers, textile adhesive tape (for carpets) with a width of 50 mm, if
possible, knife, clothes pegs for the pool assembly.
Note: With regard to the wooden stakes, we recommend you to pre-bore a sufficiently large and deep hole (See Part 2, Preparing the
base). Wooden pins may be replaced e.g. with large nails.
Before assembling the pool, we recommend you assemble the stepladder, as this will come in handy during pool assembly, when it is
necessary to enter and exit the pool. The instructions for stepladder assembly can be found in the stepladder kit.
3. CHOOSE A SUITABLE DAY FOR POOL ASSEMBLY
Ideally, choose a sunny day for assembly. Do not attempt to assemble the pool when it is windy. You will require the assistance of at least
one adult.
4. REPLACEMENT PARTS AND SERVICING
Should you need advice, or if you require pool servicing, or to obtain a replacement part, please contact your dealer. Use original
replacement parts for maintenance and repairs.
5. WARRANTY TERMS
The Warranty Terms and Conditions are provided for in the Dealer’s Warranty Certificate.
Round Satinwood Pool
2

PART 2 – PREPARING THE LOCATION
SELECTING A LOCATION FOR POOL INSTALLATION
1. TERRAIN
Pay close attention when selecting the right location for your pool:
• Choose an area of the correct dimensions, which is as flat and level as possible.
• Choose a sunny spot on dry, firm earth — do not install the pool on asphalt, tarmac, sand, gravel, peat moss, cultivated ground, wood,
or on a wet surface, or above water reservoirs, cesspools, gully holes, etc.
• Check to see that the site is free of plants which may grow up through your pool liner. If there are plants, we recommend you treat
the site with a herbicide prior to commencing preparation of the ground, or lay a black geotextile liner over the ground.
• Sloping areas must be levelled by digging away high spots, not by filling low spots.
• The pool is designed in such a way that it can be partly embedded into earth, on condition that certain criteria have been met. Your
pool dealer can provide professional advice on the requirements for embedding your pool.
2. PLACES TO AVOID
Do not locate your pool:
• Near to areas and objects accessible to children or animals and by which they might enter
the pool accidentally. Otherwise precautions must be taken to prevent this.
• On top of grass, stones and roots. Grass will rot underneath the pool liner, whilst stones
and roots will damage the pool liner.
• Near to trees and tall shrubs. Leaves and other impurities can fall directly into the pool and
add to contamination.
• Under overhanging power supply lines and clothes line.
• Near areas with poor drainage. The pool area may become flooded with water.
• On areas recently treated with oil-based weed killers, chemicals or fertilizers. In this case it
is necessary to use a pool liner made of geo-textile.
3. PLAN AHEAD
• Will you be adding an adjacent deck later? Be sure to leave room.
• Be sure that any surrounding vegetation (trees, bushes) will not grow and start to shade
your pool.
• Will you be using pool accessories or other appliances that need electricity? Locate your
pool in such a manner that it will be possible to install these systems in accordance with
safety instructions (see the instructions for this equipment). Installations of electrical
sockets and circuit breakers should be performed by appropriately qualified persons only.
YES
NO
Round Satinwood Pool
3

PART 2B
PREPARING THE BASE FOR A ROUND POOL
Important: The area under the pool must comply with the following conditions:
1) It must be level,
This means to a tolerance of maximum of 2.5 cm.
2) It must be covered with a thin layer of sieved sand,
This means that sand will level any small flatness differences in the area arising
after the use of work tools (pick, hoe, etc.). The layer should not exceed 2cm and
must cover the entire area of the pool.
3) It must be compacted,
It should be sufficiently firm that a person weighing at least 80 kg leaves no
visible traces on the surface.
1. MARK OUT THE AREA
a. Drive a pin into the ground at the point which should be the centre of the pool
(Fig. 2B-1).
b. Use a length of string tied between the pin and a can of sand or lime, flour,
etc., and mark a circle on the ground. The radius of the circle will be at least 15
cm bigger than that of the pool. (Image 2B-2). The length of the string for the
corresponding pool size is shown in the table.
Pool size (diameter) String length Block length
4.6 m (15´) 250 cm 250 cm
5.5 m (18´) 300 cm 300 cm
6.4 m (21´) 350 cm 350 cm
7.3 m (24´) 390 cm 390 cm
2. REMOVE THE GRASS SODS
a. Remove carefully all grass sods and plants from the area marked out, to a depth
of 10-15 cm (Image 2B-3).
b. Remove any sticks, stones and roots from the area. marked out.
c. If you intend to embed the pool into the ground, it is necessary to perform
excavation work to the required depth in accordance with the special
embedding requirements.
2B-1
2B-2
2B-3
2B-4
Round Satinwood Pool
4

3. MAKE THE AREA MARKED OUT FLAT, LEVEL AND
COMPACTED
Remember: Your pool must be perfectly level. Any deviation in the level plane must not
exceed 25 mm (Fig. 2B-6).
a. Replace the pin with the flat-topped stake with a cross-section of at least 25x25
mm and a length of at least 15 cm. Drive it down flush with the ground surface.
b. Use a 5x10 cm block whose length corresponds to the size of the pool (see the
above table). Drive a sufficiently long nail into one end. Use the nail to keep the
end of the block on the stake when you are rotating the block in the circle (Fig.
2B-4).
c. Drill a hole in the centre of the stake, sufficiently large and deep so that the nail
can rotate in it. It must be possible to pull out the nail easily from the stake and
enable it to rotate freely around its own axis.
d. Now insert the block with the nail into the stake hole. Put the spirit level onto the
block and shift the block into the circle around the end driven into the stake and
identify the high spots and low areas this way (Fig. 2B-5).
e. Remove all the high spots with a shovel, hoe or rake. Remember, your pool must be
level within a tolerance of 25 mm across the pool (Fig. 2B-6).
f. Do not fill in low areas (Fig. 2B-7). Filling will create an unsafe foundation for your
pool. Holes from small stones and small dips and hollows may be filled in, but the
soil must be hard-packed with a tamping tool.
g. In order to ensure the future stability of the pool it is now necessary to compact
the base by using a tamping tool. If the base is not compacted, it can settle down
under the pressure of the filled pool and thus cause the pool to collapse. Fill in and
compact the low areas.
Hint: Walk on the surface. No traces should be visible on a properly
compacted surface.
Remember: The outer 30 cm of the cleared oval area must be perfectly flat (Image
2B-8). The bottom edge of the pool must rest flat on the ground and have no gaps
under it. Ensure this area is perfectly flat, level and compacted.
Hint: We would recommend that a felt pad is laid on the compacted sand
base prior to assembling the bottom rails.
4. PROCEED WITH THE ASSEMBLY ACCORDING TO
PART 3B OF THE INSTRUCTIONS
2B-5
2B-6
2B-7
2B-8
Round Satinwood Pool
5

PART 3B
ASSEMBLING THE BASE OF A ROUND POOL
1. LAY THE BASE PLATES AND LOWER RAILS ALONG THE CIRCUMFERENCE OF
THE POOL
a. Connect the curved lower rails [13 for a 12ft] & [17 for a 15ft] with the help of connecting pieces [2] and create the round lower
frame of the pool this way (Image 3B-1, 3B-2 and 3B-3).
Note: 3.6m and 4.6m Satinwood pools use plastic rails and plastic joining pieces. The smaller plastic rail is the bottom rail and the larger
plastic rail is the top rail.
Note: We would recommend that the connectors on a cold day are immersed in a bucket of warm water to assist installation.
Note: We would recommend that a felt pad is laid on the compacted sand base prior to assembling the bottom rails.
2. SPREAD FINE SAND
a. Spread a layer of not more than 2 cm of fine sand (washed or sharp sand, if possible) all over the surface of the pool base, in order to
level the internal surface of the pool and cover the base metal sheet (Image 3B-5). Do not put sand near the lower rails, as it could
get into the groove of the rail. Leave an area (width about 15 cm) around the lower rails without sand. Use a rake to ensure that the
layer is flat and smooth.
Note: A deeper layer of sand could adversely affect the future stability of the pool.
b. Put about 0.3 – 0.6 m3 of sieved pit sand into the pool area, depending on the pool size. You will need this to create a corner filling
(see Part 4, point 6, Shaping Corner Filling).
Note: While handling the sand, be careful not to damage the lower frame or fill it with sand.
3. PROCEED WITH PART 4 OF THE INSTRUCTIONS
3B-1 3B-5
3B-2
3B-3
3B-4
Round Satinwood Pool
6

PART 4
ASSEMBLING THE POOL WALL AND LINER
1. MARK OUT THE AREA
a. Ideally, choose a sunny day for assembly. Do not attempt to assemble the
pool when it is windy. You will require the assistance of at least one adult for
smaller pools and several adults for larger pools.
b. Unwind the pool wall and place it in the middle of the pool base on a piece of
plywood (Image 4-1). Make sure that the pre-punched holes for the skimmer are
situated at the top part of the wall.
Important: Before unwinding the wall, make sure you locate the holes for the
skimmer. They should be at the beginning of the wall, as illustrated in Image 4-2. If
this is not the case, the wall has been wound in the opposite way during production.
If so, unwind the wall in the opposite direction to the one shown in Image 4-2, i.e. in a
clockwise direction.
c. Start to unwind the wall and at the same time insert its lower edge into
the curved lower rail. The beginning of the wall must be situated above one
connecting piece [2] (Image 4-2 and Fig. 4-3) and the holes for the skimmer
and return fitting must be situated at the place where the filter equipment is
to be situated.
d. Unwind the wall and install the rails from the upper part [14] (Fig. 4-4).
Leave a clearance of approximately 1 cm between individual rails
e. Continue around the entire base until the entire wall is constructed, inserted into
the lower rails and fitted with the upper rails.
Hint: Please note that the 3.6m (12ft) & 4.6m (15ft) Satinwood Pools have plastic
rails so images on this page may differ
Hint: You may need to trim the plastic rails (bottom & top) to suit the length of the
steel outer to complete the circle.
Note: Dia 4-3 & 4-4 are not applicable to the 3.6m or 4.6m Satinwood Pools.
4-1
4-2
4-4
4-3
Round Satinwood Pool
7

Hint: Attach the top of each vertical support [9] to the wall with the help of
adhesive tape. By doing so, you can temporarily secure the wall against collapse
prior to attaching it to the vertical supports (3.6 and 4.6 pools do not have
vertical supports).
Hint: Attach each rail coupling [12] to the wall with the help of adhesive tape. This
prevents the rails from sliding away from the wall when installing the liner.
4. CONNECT THE POOL WALL ENDS
a. Align the holes in the two ends of the pool wall with each other (Image 4-7).
Hint: Putting a screwdriver through two opposite holes will facilitate alignment.
b. In order that the holes are aligned with each other, make a circle which is formed
by the pool wall. The circle should be larger or smaller; make it in such a way that
you are pushing the base plates with your foot outwards or inwards to the
circle centre.
c. Note: Only on 3.6m and 4.6m Satinwood pool Kits, there is a brown plastic
trimming piece that sits on the outside of the pool and a brown plastic cover that
can slip into it to cover the bolt heads when finished. On larger pools the bolt
heads are covered by a vertical strut member.
d. Connect the ends of the pool wall insert a bolt from inside the pool into each
aligned set of holes, and screw on the nut. The bolt heads should be inside the
pool and all the nuts should be on the outside of the pool (Image 4-8).
e. First hand tighten the connections. When all the connections are made, tighten
them using the appropriate tools.
f. Cover the wall end coverings and bolt heads on the inner side of the pool wall by
using an adhesive tape (Image 4-9), if possible textile adhesive tape.
Hint: We recommend using the assembled pool step ladder for entering and leaving
the pool.
4-7
4-8
4-9
Round Satinwood Pool
8

5. CHECK WHETHER THE POOL WALL IS LEVEL
a. Use tight string with a suspended spirit level (Image 4-10) to check whether the
opposite upper edges of the pool wall are level. Check the wall in several different
directions. The wall must stand on a horizontal plane. If it deviates by more than
25 mm (Fig. 4-11), then put the wall aside and level the pool base again.
Warning: A pool which is not level is dangerous and may collapse.
6. SHAPING CORNER FILLING
a. Using sieved pit sand, shape a rounded corner filling which is about 20 cm wide
and 20 cm high, at the bottom part of the wall, along the entire circumference
inside the pool. Shape the rounded corner and firmly compact it (Image 4-12).
b. Now level the bottom surface using the rake until it is smooth.
c. Place “optional” felt pad on the pool bottom to protect the pool liner from damage.
See Annex A for Instructions for Use.
d. Note: The felt pad for the pool is not included in the pool package. Please contact
your dealer for details.
Lay felt pad, see Annex A
4-10
4-11
4-12
4-13
Round Satinwood Pool
9

7. INSTALLING THE LINER
Note: If you intend to use a filter with the pool, it will be necessary, part of the
skimmer installation will need to be done prior to installing the liner. In this case,
consult the appropriate Instructions for Skimmer Installation for proceed accordingly.
See Annex B for the Instructions.
a. Open the cardboard box. Do not use any sharp tools to open the box.
b. Unwrap and unwind the liner, preferably in the sun, so that it can become warm.
Check the entire surface of the liner and all seams to ensure that they are not
broken.
c. Spread the liner in the pool in such a way that the face part of the seam faces
upwards. The arc-shaped seam should be situated in the middle of the apex of the
corner. The other seams will form lines across the pool base (Fig. 4-14 and 4-15).
d. Smooth any wrinkles in the liner on the pool base.
8. ATTACHING THE LINER
a. Pull the liner over the edge of the pool wall and attach it temporarily with the help
of several plastic clips or pegs (Image 4-16). Leave the liner hanging freely for the
time being. Do not pull the liner too much.
b. Start to fill the pool with water. While the pool is being filled, smooth out any
wrinkles in the liner in a circular movement from the pool centre towards the wall.
You can use a soft brush and your hands). Never press on the liner with excessive
force and do not pull it out. Proceed quickly, because a few millimetres of
water can press the liner towards the base in such a way that it will
not be possible to move it without damaging it – pause filling whilst
you work creases out of base. While working, be sure to keep the arc-shaped
seam in the middle of the corner filling (see Fig. 4-15).
c. After smoothing the bottom, continue to fill the pool and gradually smooth the
liner on the wall. Be sure to avoid straining the liner and creating an air gap
(see Fig. 4-17).
4-14
4-15
4-16
4-17
Round Satinwood Pool
10

d. Gradually remove the plastic clips on the upper edge of the wall, always one at
a time and smooth any wrinkles on the liner. Install the plastic top rail on the
smoothed part immediately one after another (Fig. 4-18).
e. After having smoothed all wrinkles on the liner, cut away the protruding part of
the last plastic bar so that its end sits close to the adjacent bar (Image 4-19).
Note: It is normal for there to be slight waves on the liner during installation. This is
caused by movement of the vinyl material used to protect the liner during packing.
Note: The liner is not a structural part of the pool. Its main function is to prevent
water from flowing out of the pool. Water pressure is maintained by the walls and
structural elements of the pool. The liner must fit properly to the ground, corner filling
and pool wall; it must never bear the weight of the water, as this could damage it.
Note: Depending upon your size of pool the top rails may differ from the picture
shown. The Satinwood 3.6m & 4.6m pool have plastic top rails.
9. PROCEED WITH PART 5 OF THE INSTRUCTIONS
4-18
4-19
Round Satinwood Pool
11

Safety Instructions
Your pool contains a large quantity of water and is deep enough to potentially endanger life and health
unless the following rules are strictly observed. First-time users are the most at risk of injury. Make sure
everyone understands all the safety rules before entering the pool.
No Jumping or Diving
The top rail of your pool is not a walkway and must not be used for jumping or
diving. DO NOT PERMIT jumping or diving into the pool from a deck or the top
rail of the pool. Diving or jumping into the pool can result in serious injury or
even death by drowning.
Never use the pool alone or leave children unattended
NEVER permit the pool to be used unless it is attended by at least one adult other
than the bather. NEVER leave a child unsupervised in or near the pool. Someone
should always be available in case of an emergency.
Restrict access to the pool
DO NOT LEAVE chairs or other furniture beside the pool that could be used by a
child to climb into the pool. Ladders must be removed when the pool is not in use or
unattended. A fence or gate around the pool is strongly recommended and may be
required by law in some countries.
No Horseplay, No Alcohol or drugs
DO NOT PERMIT “Horseplay’ in and around your pool. Surfaces can be slippery and
hazardous when wet. The use of alcohol or drugs with pool activities is extremely
dangerous. Persons who have been drinking alcohol or taking drugs should not be
allowed in the pool and should be carefully supervised in the surrounding area,
Keep away from ladders while swimming
DO NOT swim under or behind the ladders as this can result in entrapment or
drowning. Remove ladders when not in use.
Warning: Do not modify the pool and do not interfere with the structure of
the pool once it is assembled and filled with water. It could result in the pool
collapsing or in serious injury.
!
PART 5
INSTALLING THE TOP RAILS AND VERTICAL
SUPPORTS
This section n/a for Satinwood 3.6m (12ft) or 4.6m (15ft) Pools
a. Place the upper coupling [4] onto the upper edge of the pool wall, so that the flap
of the slip of the upper coupling is situated outside the pool.
b. ONLY ON 5.5m and 6.4m size pools there are vertical supports - Slide one end of
the upper rail [6] into the upper coupling [4]. Align the hole for the screw in the
flap with the hole for the screw in the top part of the vertical support [1]. The flap
of the clip of the upper coupling must be outside the vertical support. The vertical
support must be in a vertical position.
Attach the upper coupling to the vertical support with one self-tapping screw [3].
It is necessary to put heavy pressure on the vertical support Image 5-6).
c. Repeat the steps for each vertical support along the circumference of the
pool wall.
Hint: Use the grooving on the pool wall to check the columns are vertical.
4. APPLY THE WARNING LABEL
a. Apply the warning label near to the point used for entering or leaving the pool.
NB: The pool is not deep enough to jump into safely; any attempt to do so could
result in injury.
5. FINISH FILLING OF THE POOL
a. Fill the pool with water to 5 cm below the lowest hole in the pool wall.
Then proceed according to the Assembly Instructions for your skimmer.
Important: The pool might buckle or shift while being filled with water. This is normal.
b. Attach the filter equipment to the skimmer installed, as per the appropriate
Instructions.
c. Fill water up to the level of the centre of the inflow front plate of the skimmer
and carry out primary disinfection of water (see Annex C). Your pool is now ready
for use.
d. When full we would recommend you leave your pool 2-3 days before trimming
any excess liner
Warning: Anyone using the pool should read the Safety Instructions beforehand
and observe them. The Safety Instructions are included in Part 6.
5-6
Round Satinwood Pool
12

PART 6
SAFETY INSTRUCTIONS
Your pool contains a large quantity of water and is deep enough to potentially endanger life and health unless the following rules
are strictly observed. First-time users are the most at risk of injury. Make sure everyone understands all the safety rules before
entering the pool.
No Jumping or Diving
The top rail of your pool is not a walkway and must not be used for jumping or diving. DO NOT PERMIT jumping
or diving into the pool from a deck or the top rail of the pool. Diving or jumping into the pool can result in serious
injury or even death by drowning.
Never use the pool alone or leave children unattended
NEVER permit the pool to be used unless it is attended by at least one adult other than the bather. NEVER
leave a child unsupervised in or near the pool. Someone should always be available in case of an emergency.
Restrict access to the pool
DO NOT LEAVE chairs or other furniture beside the pool that could be used by a child to climb into the pool.
Ladders must be removed when the pool is not in use or unattended. A fence or gate around the pool is
strongly recommended and may be required by law in some countries.
No Horseplay, No Alcohol or drugs
DO NOT PERMIT “Horseplay’ in and around your pool. Surfaces can be slippery and hazardous when wet. The
use of alcohol or drugs with pool activities is extremely dangerous. Persons who have been drinking alcohol or
taking drugs should not be allowed in the pool and should be carefully supervised in the surrounding area,
Keep away from ladders while swimming
DO NOT swim under or behind the ladders as this can result in entrapment or drowning. Remove ladders when
not in use.
Warning: Do not modify the pool and do not interfere with the structure of the pool once it is
assembled and filled with water. It could result in the pool collapsing or in serious injury.
!
Round Satinwood Pool
13

PART 7
USING THE POOL
When using your pool, please comply with the following instructions to maintain the pool in a clean and good condition.
1. USING THE POOL
a. Before entering the pool, take a shower and ensure you clean your feet.
b. Do not enter the pool with your shoes on, as this could result in damage to the liner.
c. Always use the ladder when exiting the pool. Exiting the pool incorrectly could result in damage to the internal liner.
d. Maintain the water level at the height prescribed, approximately level with the centre of the skimmer front plate. Remember that
water evaporates from the pool under every weather condition, and it is therefore necessary to replenish the pool with water.
Common evaporation is normal and it should not be confused with water loss due to leakage.
e. Check the pool and its accessories regularly to ensure that water does not leak. Repair any possible leakage by retightening or
resealing the connection in question.
2. TAKING CARE OF POOL WATER
a. It is extremely important to take correct care of the pool water to keep the pool in an appropriate sanitary condition.
b. The pool water temperature should not exceed 30°C. An optimum water temperature is about 25°C. Hot water is not refreshing
and, more importantly, it reduces the efficiency of the sanitation substance (chlorine) and produces optimum conditions for algae
formation. A high water temperature also causes softening of the pool liner and the risk of wrinkling to the liner. If the pool water
temperature reaches 30°C, do not use water heating, remove the cover and, if possible, replace part of the water volume with colder
water.
c. The principles of pool operation and important instructions for the use of chemical preparations are shown in Annexe C.
Warning: In the case of an embedded pool, water is not fully drained off. It is only necessary to reduce the water level below
the level of the return fitting as part of the winterising measures, (see Part 9. Winterising). Complete draining of the water
should only be performed for the minimum time possible and only in the event of repairs to the liner or if it is necessary to
replace the liner. If in doubt, please contact your dealer.
Round Satinwood Pool
14

PART 8
POOL MAINTENANCE
1. LINER
a. Check the liner regularly for leaks. A liner with holes may cause a drop in water level, which may result in damage to the pool or the
filter unit.
b. Minor repairs can be made to the liner with a repair kit. Any major damage should be resolved by replacing the old liner with a
new one.
2. POOL WALL, VERTICAL SUPPORTS AND SUPPORTS
a. Keep the pool wall, vertical columns and supports clean. Wash them down with mild soap. Do not use abrasives, chemical solvents or
cleaning powders.
b. Wash off any spilled pool chemicals right away.
Warning: Concentrated chlorine may cause damage to the pool liner and metal parts of the pool. Wash down any
contamination right away.
c. Recoat all exposed screw heads and nuts with clear outdoor varnish.
d. Check regularly all metal parts for possible corrosion, at least once a season. All grooves and corroded areas on metal parts should be
treated with a suitable anti-corrosion coating – follow the instructions provided on the can.
Remember: All corroded areas on the pool wall must be coated with an anticorrosion coating. If the pool is heavily corroded, it
may collapse.
e. Pay special attention to any leaks at the skimmer and return openings. Leaks must be fixed immediately.
3. POOL LADDERS
a. For safety and practical reasons do not leave step ladders in the pool unnecessarily. Only fit them for the period of time which is
absolutely necessary, ie: when the pool is in use.
b. The pool ladders are exposed to the effects of chemicals dissolved in the water. It is therefore necessary to check them for corrosion
from time to time. If you see symptoms of corrosion, treat the areas concerned with the appropriate coating.
Round Satinwood Pool
15

PART 9
WINTERISING THE POOL
At the end of the swimming season, you must follow these directions to prepare your pool for winter. While doing so, it is necessary to
continue regular care of the pool water, including the filter system, until the time of winterising.
Note: A well winterised pool makes the new season start up easier.
1. LOWER THE POOL WATER LEVEL
a. First adjust the pH value and concentration of the sanitation substance in the pool water to the correct parameters.
b. Clean any contamination from the bottom.
c. Reduce water level in your pool to a level of about 10 cm below the return fitting.
d. Use a suitable cleaning agent to remove the tide mark of the original water level from the pool wall before drying.
e. Treat the remaining water by using a suitable preparation for winterising.
Warning: Do not drain all the water from your pool for the winter, and do not remove the liner. An empty pool can collapse
in the winter.
Drain the water from your pool into grass on your own land. When draining water into a land surface water course, this must be discussed
beforehand with the appropriate water management authority.
2. CHECK ALL JOINTS AND SCREWS
a. Make sure all the frame joints are fitting together properly and make sure the pool wall has not shifted from the bottom rail.
b. Make sure all screws and bolts are tight.
3. CHECK FOR RUST
a. Paint any scratches or rusty areas with anti-rust paint.
4. CHECK THE LINER
a. Make sure the top of the liner is still attached to the pool wall with plastic coping. Do not remove the liner from the pool. Removal of
the liner will void the existing warranty.
5. FINDING LEAKS
a. Make sure the liner has no leaks. Leaks in the winter can cause severe damage to your pool.
6. POOL ACCESSORIES
a. Remove all pool accessories from the pool, including the ladder.
b. While winterising the filter equipment, observe the winterising instructions.
c. Leave the skimmer and return fitting installed on the pool wall.
7. COVERING THE POOL WITH A COVER SHEET
a. If you have a cover sheet, install it on the pool. By doing so, you will protect the inner part of the pool from penetration of impurities
(leaves, seeds, etc.) during winterising.
Remember: Incorrect winterising will make the pool warranty void and invalid. Adhere carefully to all the winterising instructions.
Warning: Prevent children, farm animals and pets from accessing to the pool when it is winterised. Do not skate on a winterised
pool and do not climb on to the ice! This could lead to liner damage or physical injury.
Round Satinwood Pool
16

ANNEXES
A) FELT PAD - INSTRUCTIONS FOR USE
Note: The felt pad is not a part of the pool package. Please contact your dealer
for details.
The unwoven textile “NETEX S” (material for felt pads) is made of 100% polypropylene
staple fibres of a white colour. It is used as a filler, drainage and separation geo-textile
during construction of roads and railways, dump areas, airports, storage and parking
areas, etc. It is also used for protecting pool liners and separating them from the base.
Felt Pad Characteristics
The fibres used for producing the pad are subject to aging in the light after a certain time (known as photo degradation). This is why it
is unsuitable to store the felt pad freely. It should be stored in a cardboard box or in the foil which is stabilised from UV radiation.
The unwoven textile is resistant to technical petrol, perchloro-based substances, oil and other chemicals of a similar nature, to fungus
growths and micro-organisms. It is not harmful to health.
Laying the pad for the pool with a corner filling
Install the felt pad after you have assembled the pool wall and made the internal corner filling by using the sieved pit sand. Place the
pad on the bottom inside the pool, centre it and align possible folding pieces. Cut away several centimetres above the corner filling.
While doing so, make sure that no stones or other sharp objects get to the upper side of the pad.
Round Satinwood Pool
17

B) INSTRUCTIONS FOR ASSEMBLY AND USE OF THE SKIMMER
Note: The level skimmer for removing impurities is not included in the pool delivery. Contact your dealer.
1. USE
The skimmer is used for suction of water from the pool level through a filter device. Insects, leaves and other floating impurities are drawn
into the skimmer and caught in the basket.
A reinforced hose (both 5/4“ (32 mm)and 6/4“ (38 mm)) can be connected to the skimmer.
Round Satinwood Pool
18

B) INSTRUCTIONS FOR ASSEMBLY AND USE OF
THE SKIMMER
Note: The level skimmer for removing impurities is not included in the pool delivery.
Contact your dealer.
2. ASSEMBLY
Assembly Instructions for the Skimmer for Above Ground Pools
Note: For assembly you will need a Phillips screwdriver and a sharp-bladed knife.
Note: we would recommend that you apply a bead of silicon sealant to the gasket
seal and skimmer box during installation.
Note: Please note that all Aqua-World Pools have pre-formed cut-outs for
the skimmer.
a. Before installing the liner in the pool, punch holes in the wall for screws and for
the skimmer holes and return fitting. Smooth and grind the edges of the holes
to remove any sharp edges. Install the gaskets supplied with the pool onto the
skimmer hole.
b. Take one hose coupler and screw it into the skimmer housing. Use Teflon® tape
for sealing (do not use adhesives or sealing putties).
c. Before commencing the actual installation, the skimmer housing should be
already partially screwed to the pool wall. Place one gasket and the skimmer
housing to the holes marked out from the external side of the pool. Secure the
position by using a couple of shorter screws in central holes along the sides of
the skimmer. Before doing so, check the flap valve is correctly installed in the
entry front plate of the skimmer housing. The flap valve must move freely.
d. Now install the pool liner and fill the pool with water so that the water level
reaches to 5 cm below the lowest connection hole of the skimmer (i.e. 5 cm
below the return fitting hole).
e. Using a sharp nail, punch the holes for the skimmer housing connection in the
liner from the external side of the pool. Fix the other gasket from the internal
side of the pool and attach the front plate. Insert the remaining 10 longer
screws into the holes in the front plate and tighten them gradually using the
Phillips screwdriver.
f. Using the sharp knife, cut the liner out from the front plate.
g. Now install the return fitting.
h. The ADAPTER and TOP plate is used when you wish to have a suction inlet for
pool cleaning and is only inserted in the skimmer (plate face down) when used
for pool cleaning. It can have a pipe attached to it with jubilee clip and usually
a bottom cleaning brush on the other end of the pipe. After use, remove from
skimmer to allow water flow to return.
Assembly Instructions for the Return Fitting
a. From the external side of the pool wall, using a sharp knife, cut a circular hole out
of the liner for the return fitting connection via the pre-formed hole in the pool
wall. The hole should be about 5-10 mm smaller than the pre-formed hole in the
pool wall.
b. Take the other hose coupler and screw it into the return fitting body. Use Tef-
lon® tape for sealing (do not use adhesives or sealing putties).
c. Insert the return fitting into the circular hole in the wall from the internal side of
the pool so that one rubber gasket can be fitted from inside the pool and that
one cork gasket and the other rubber gasket can be fitted from outside the pool.
Tighten the return spring properly.
d. Screw the locking nut with swivel head into the return fitting hole and align it so
that it can face towards the hole of the skimmer.
e. Connect the skimmer and the return fitting with the filter using the help of
hoses. Secure the connections using the hose couplings.
Round Satinwood Pool
19
Table of contents
