Araknis Networks AN-300-RT-4L2W User manual

CONFIGURING AND USING OPENVPN
IN THE AN-300-RT-4L2W GIGABIT ROUTER
Contents
1 - What is OpenVPN? 2
2 - How It Works 2
3 - Configuring OpenVPN Accounts in the Router 3
4 - Windows Client Setup and Use 4
5 - Mac Client Setup and Use 6
6 - iOS Client Setup and Use 8
7 - Android Client Setup and Use 9
8 - Verifying and Managing Client Connections 10
9 - Troubleshooting 10
10 - Contacting Technical Support 10

Page 2/10© 2016 Araknis Networks®160930-1300
Configuring and Using OpenVPN
1 - What is OpenVPN?
The Araknis Networks AN-300-RT-4L2W router features a built-in OpenVPN server, a free Virtual
Private Network software that provides secure remote access to your local network. This guide explains
the basic operation of OpenVPN and includes instructions for configuring the router and popular client
applications.
Client applications are available for PC and Mac computers and Android and iOS mobile devices. To
learn more about OpenVPN, visit https://openvpn.net/.
2 - How It Works
OpenVPN creates SSL/TLS-encrypted connections called tunnels between the server (in our case, the
router) and remote client (user) devices on the Internet. Remote clients run an OpenVPN client app to
connect to the server, and, once established, they can securely navigate the network as if they were
connected locally.
To grant OpenVPN access to a client device, you must first create a new account for it on the server,
then export a configuration file from the server to the client. The client uses this file to prove its identity
to the server when a connection is requested.
Router 1
192.168.30.1
Router 2
192.168.1.1
OpenVPN Server
Internet
OpenVPN Client Device
(connected to Router 2
OpenVPN server)
Devices communicate over OpenVPN as if they are on the same LAN.
LAN IP Address: 192.168.30.10 LAN IP Address: 192.168.1.10
Note – When the client is connected to the OpenVPN server, there will be one network adapter
controlling the connection to the physical network the PC is on, and one running the VPN
tunnel connection. The router’s internal DHCP server will issue an IP address in the 172.0.0.XXX
range to the PC network adapter for the VPN tunnel. The device will not appear in the router’s
DHCP list.
Also, local DNS addresses configured in the router will not function from VPN client-connected
devices.

Page 3/10© 2016 Araknis Networks®160930-1300
Configuring and Using OpenVPN
3 - Configuring OpenVPN Accounts in the Router
Step 1 – Add New Client Account
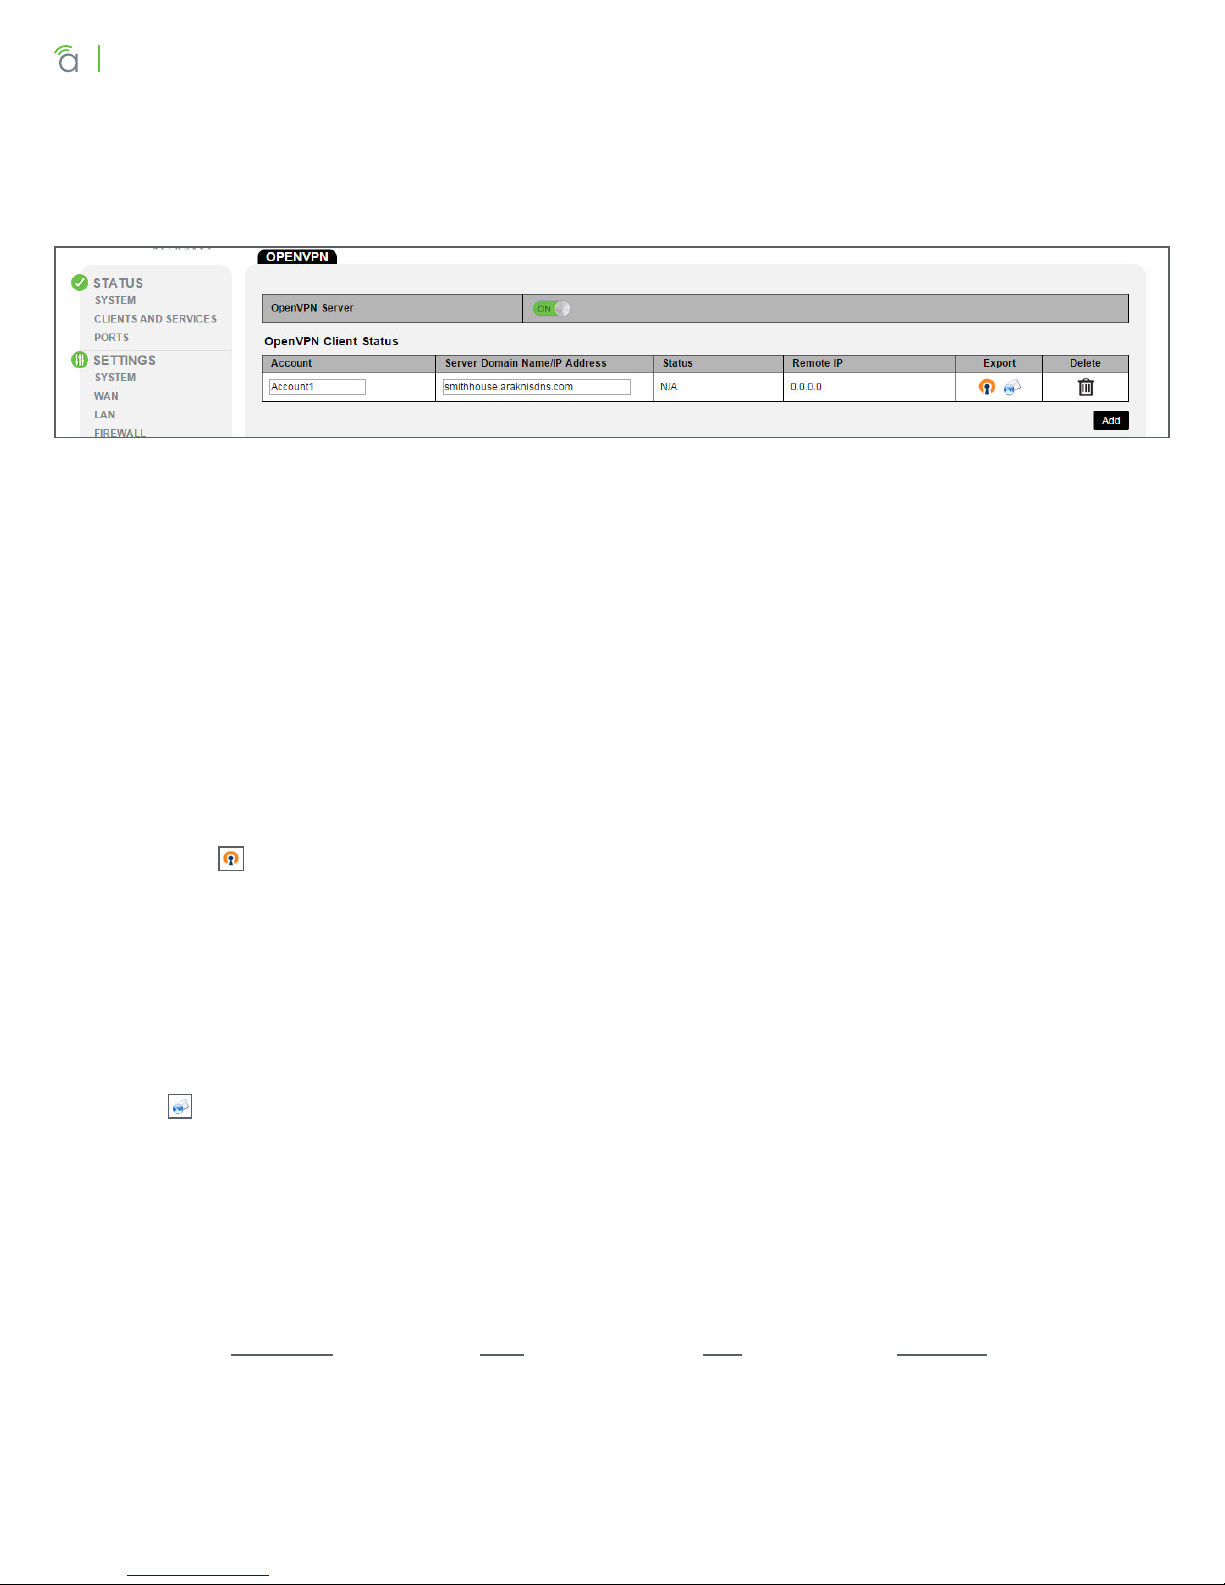
1. Log into the router web interface and navigate to Advanced, VPN, OpenVPN.
2. Click the On/O button to turn the OpenVPN server ON.
3. Click Add to create a new account entry, then complete the following fields:
• Account – Enter a name to describe the account.
• Server Domain Name/IP Address – If DDNS is configured, displays current router DDNS address.
Do not change unless a dierent DDNS service or a static WAN IP address is being used.
4. Click Apply in the bottom right corner to save the new settings.
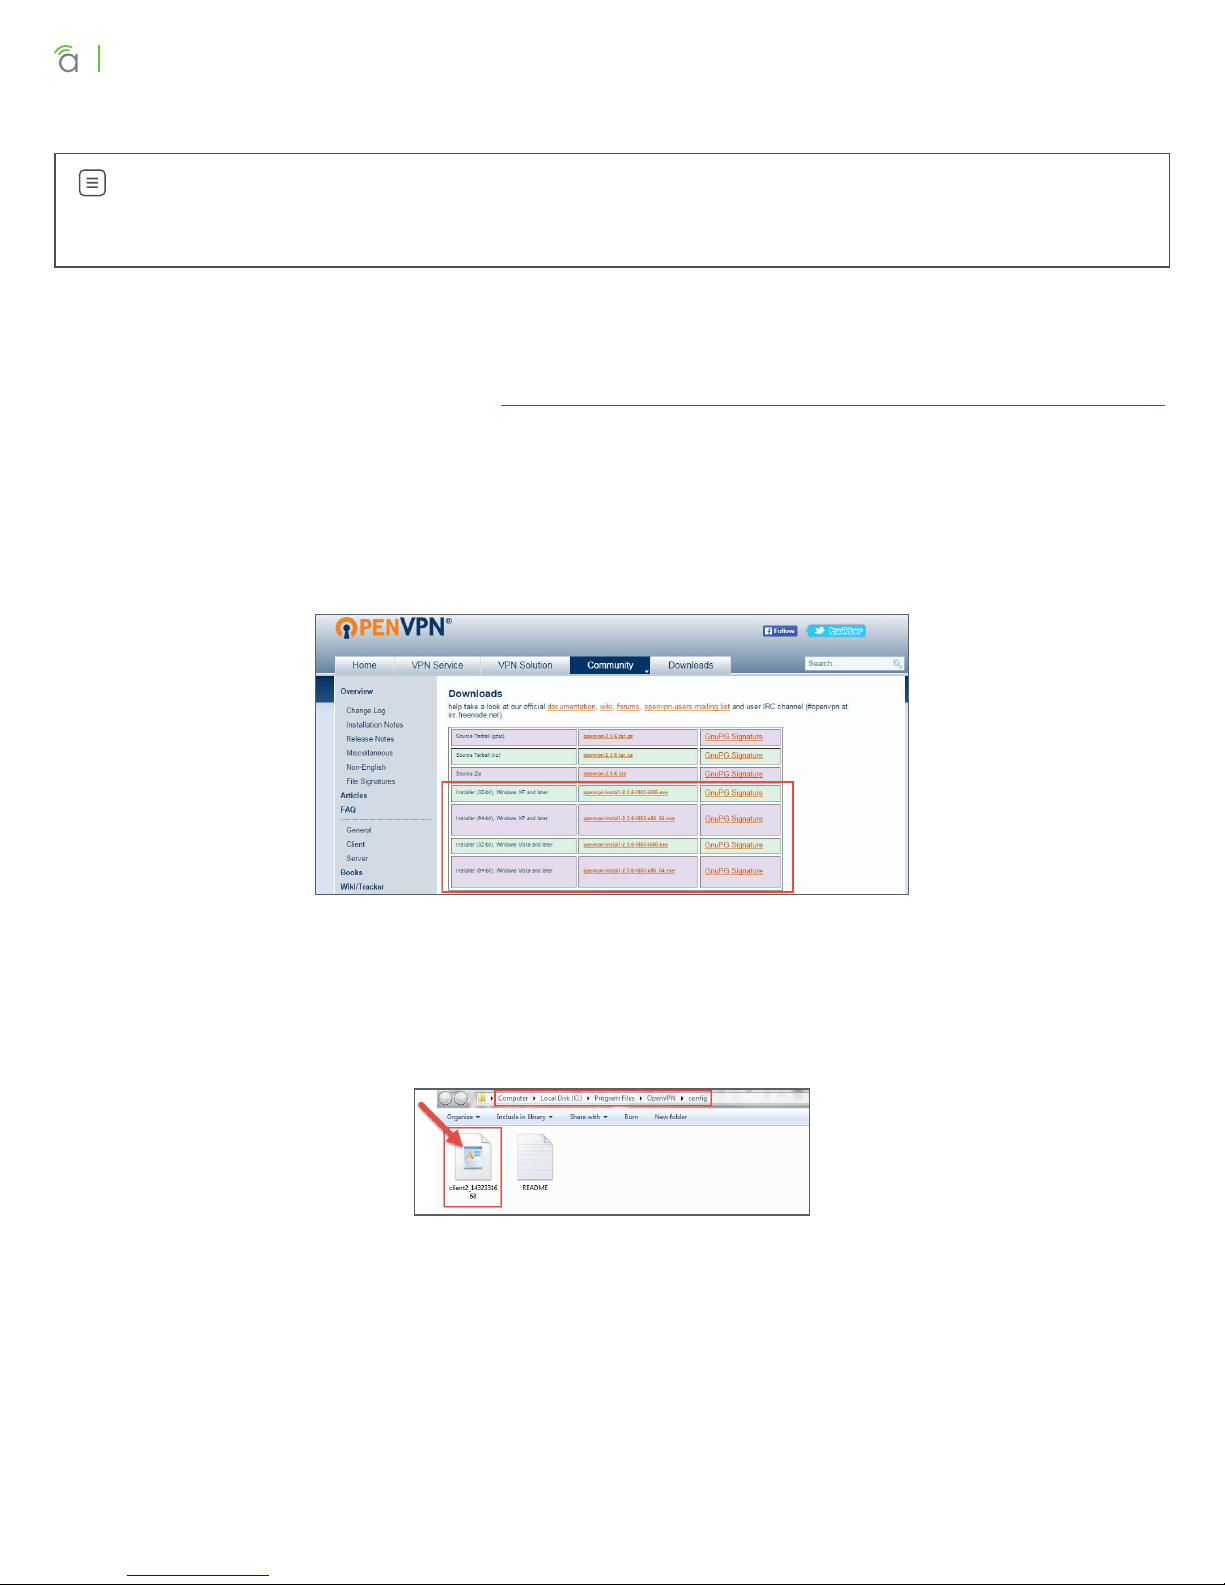
Step 2 – Export Client Configuration File
Files should only be used for one client to guarantee reliable operation. There are two ways to export
the file:
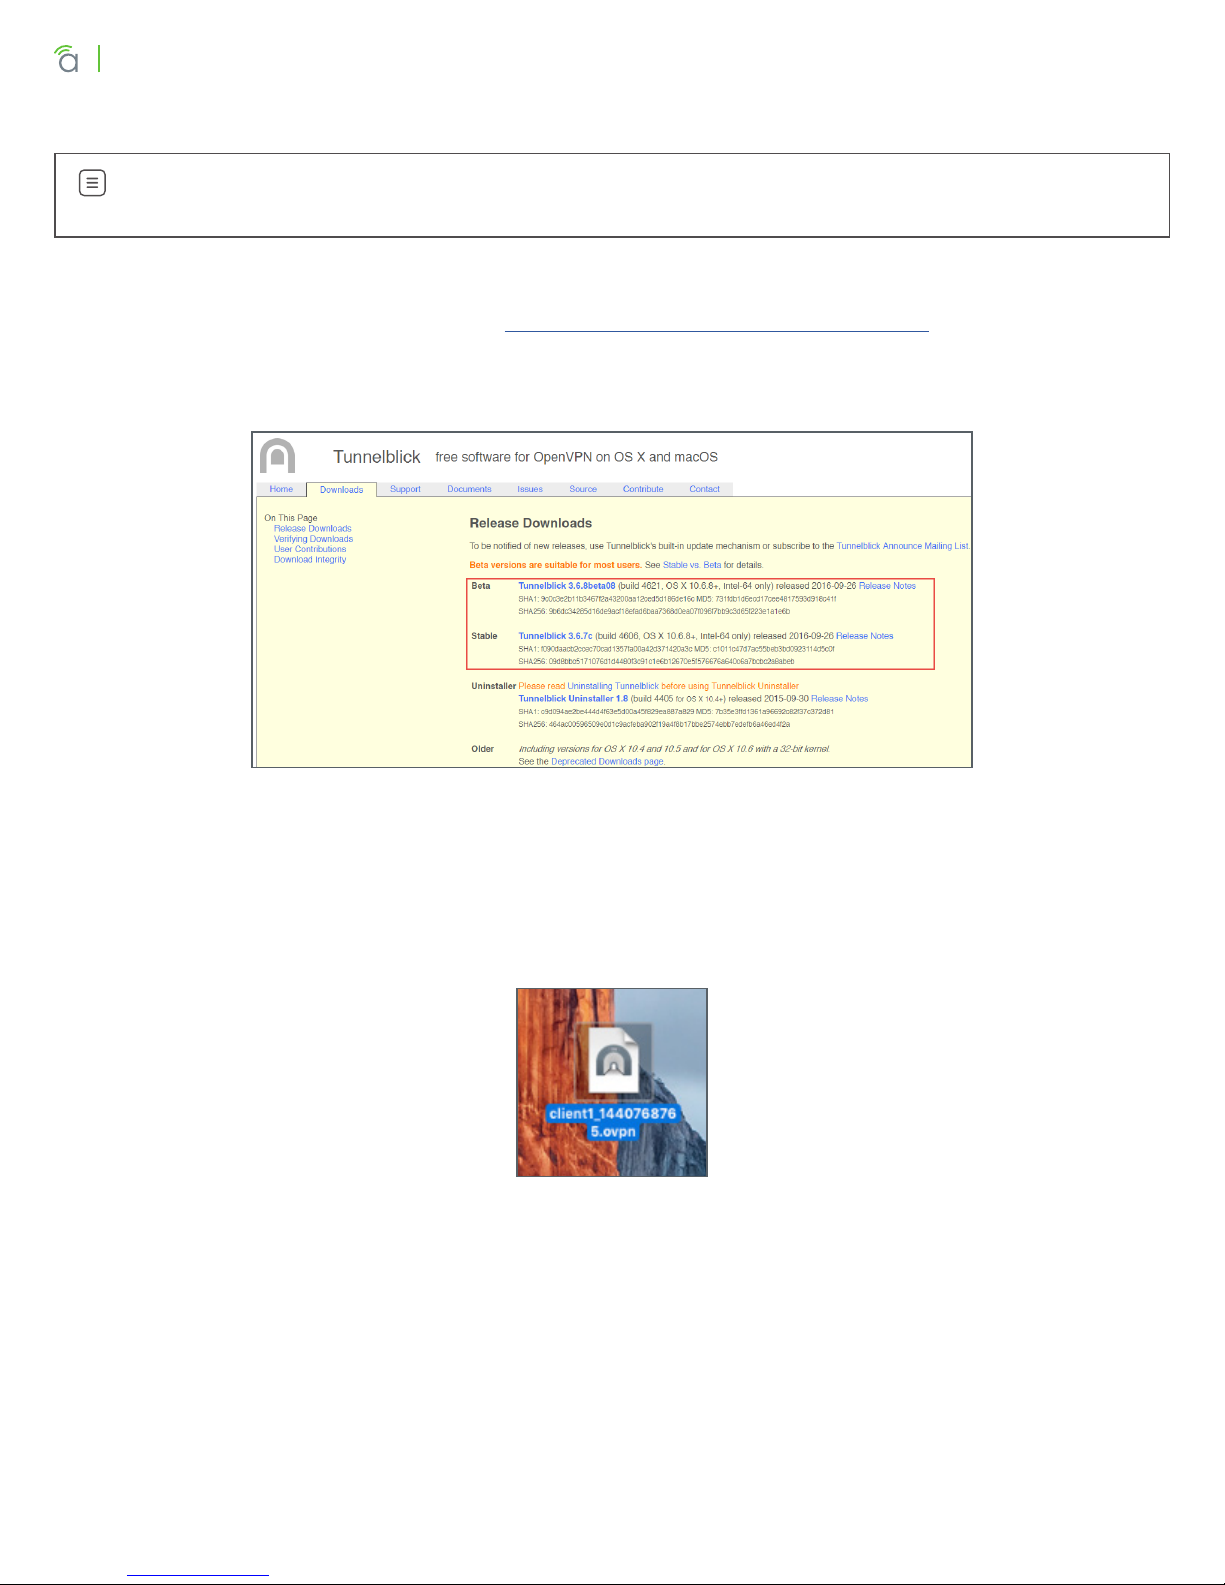
• Download ( ) – Downloads the file to the hard drive. Recommended for most applications.
• Android, Mac, and Windows Clients – Access the router menu and download the file to a known
location on the device, or download the file on your own computer and transfer it to the client
device manually.
• iOS Clients – Download the file to your computer, then either transfer it to the device via iTunes
or email the file as an attachment and open it via the iOS Mail app. See the specific client setup
instructions for full details.
• Email ( ) – Emails the file to the recipient of your choice. Before using this method, you must first
configure the email server feature found the router’s Security menu. See router manual for Security
menu setup.
• All Clients – Email the file to an account accessible from the client device, then save it to a known
location. For iOS, see the specific client setup instructions.
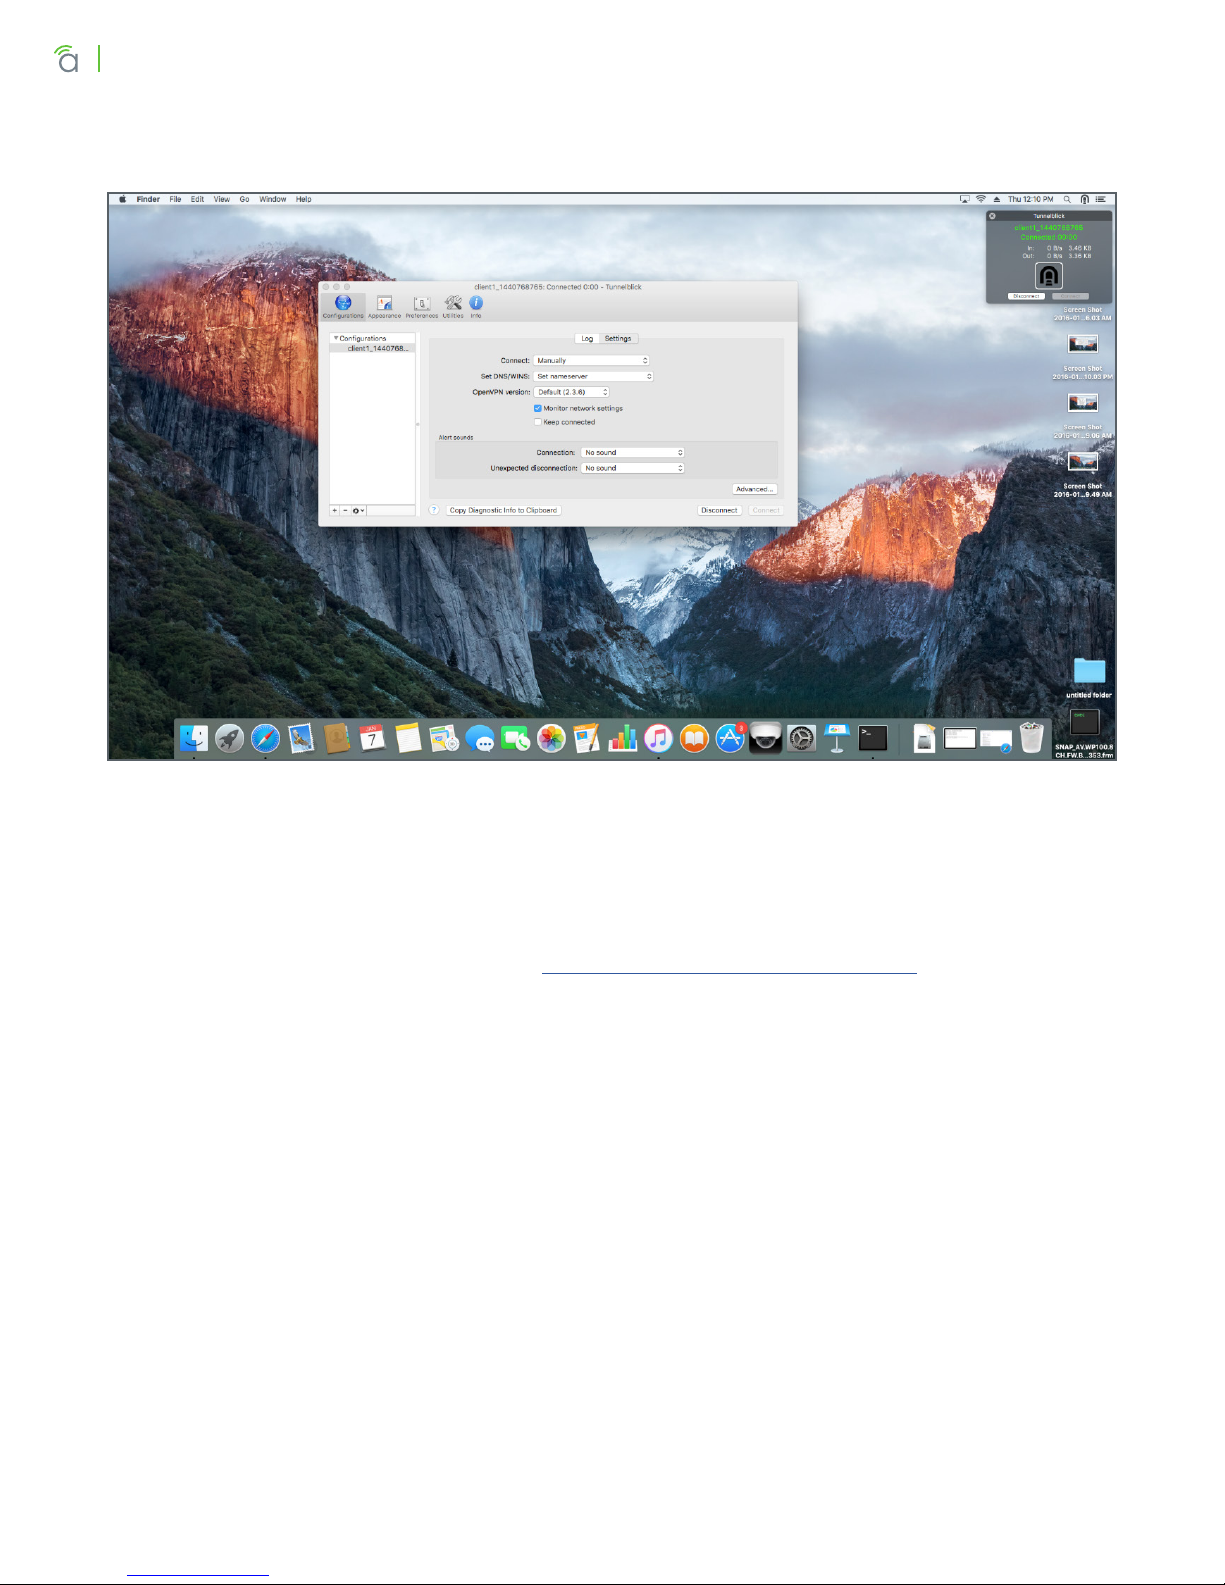
Once you have the file, you can begin setting up your client application. Click to go to section:
Windows Mac iOS Android

Page 4/10© 2016 Araknis Networks®160930-1300
Configuring and Using OpenVPN
4 - Windows Client Setup and Use
Note – You must be logged into an administrator account on the Windows PC to allow the
OpenVPN client to connect to the server. Launching the client from a non-administrator account
will prevent the network card drivers from running correctly.
Step 1 – Install the Client Application
1. Log into an administrator account on the client PC.
2. Open a Web browser and navigate to https://openvpn.net/index.php/open-source/downloads.html.
3. Download the correct installer file (.exe) to your PC from the middle column of the downloads table.
Use the file that corresponds to your operating system and processor type (32- or 64-bit).
• Use the Windows XP and later version for PCs that originally came with Windows XP installed.
• Use the Windows Vista and later version for PCs that originally came with Windows Vista or
newer installed.
4. Install the client using the default settings.
Step 2 – Configure the Client for the Account
1. Locate the configuration file created in section “3 - Configuring OpenVPN Accounts in the Router”
on page 3.
2. In the Start menu, click All Programs > OpenVPN > Shortcuts > OpenVPN configuration file directory.
Or, open Windows Explorer and navigate to the OpenVPN config folder. Do not navigate to the
Program Files (x86) folder.
• Location – C:\Program Files\OpenVPN\config
3. Place the configuration file into the config folder. Do not modify the file name or contents.
4. Setup is complete. The account will now be available for connection in the OpenVPN GUI.

Page 5/10© 2016 Araknis Networks®160930-1300
Configuring and Using OpenVPN
Step 3 – Using the Client
Note – You must be logged into an administrator account on the Windows PC to allow the
OpenVPN client to connect to the server. Launching the client from a non-administrator account
will prevent the network card drivers from running correctly.
1. Right-click the OpenVPN client program shortcut and select Run as Administrator. The OpenVPN
application will open and the icon will appear in the Windows system tray.
2. Right-click the icon and click Connect. A dialog box will appear during the connection process and
disappear after the client successfully connects to the OpenVPN server.
3. As long as the client remains connected, the PC will be able to access IP addresses on your local
network as if you were directly connected.
4. To disconnect from the server, right-click the icon in the system tray and click Disconnect.
5. To verify or troubleshoot the connection, jump to the last page of this guide.

Page 6/10© 2016 Araknis Networks®160930-1300
Configuring and Using OpenVPN
5 - Mac Client Setup and Use
Note – OpenVPN does not maintain their own Mac client and recommends the TunnelBlick
client application for Mac computers.
Step 1 – Install the Client Application
1. Open a Web browser and navigate to https://tunnelblick.net/downloads.html.
2. Download the installer file. The beta version is the best option for most users. Additional details are
available on the download page to help you decide the best version for you.
3. Install TunnelBlick using the self-guided setup and default settings.
Step 2 – Configure the Client for the Account
1. Locate the configuration file created in Section “3 - Configuring OpenVPN Accounts in the Router”
on page 3.
2. Double-click the file to install it. OpenVPN will automatically configure itself for the new connection.
3. Setup is complete. The account will now be available for connection in the OpenVPN GUI.

Page 7/10© 2016 Araknis Networks®160930-1300
Configuring and Using OpenVPN
Step 3 – Using the Client
1. Open Tunnelblick from the Applications folder and select the config file that was installed.
2. Click Connect. A status window will appear showing the progress of the VPN connection.
3. As long as the client remains connected, the Mac will be able to access IP addresses on your local
network as if you were directly connected.
4. Click Disconnect to close the connection.
5. To verify or troubleshoot the connection, jump to the last page of this guide.

Page 8/10© 2016 Araknis Networks®160930-1300
Configuring and Using OpenVPN
6 - iOS Client Setup and Use
Step 1 – Install the Client Application
Log into the App store on your device and search for OpenVPN Connect to find and install the app.
Step 2 – Configure the Client for the Account
1. When the OpenVPN client app is opened for the first time, follow the instructions to import the
configuration file created in section “3 - Configuring OpenVPN Accounts in the Router” on page
3. You can connect the device to a computer running iTunes or use an email app to import the
file.
• iTunes Import – Download the configuration file to a computer, then follow the instructions in the
app to import the file using iTunes.
• Email Import – Email the configuration file and import it using an email app on the device. Open
the message in the email app, then click on the attached file and choose to open it with the
OpenVPN app. See below.
2. Setup is complete. The account will now be available for connection in the OpenVPN GUI.

Page 9/10© 2016 Araknis Networks®160930-1300
Configuring and Using OpenVPN
Step 3 – Using the Client
1. Open the client app and toggle the slider below the Disconnected status bar. Connection details
will be displayed on the screen once the account is authenticated. You will be able to access IP
addresses on your local network as if you were directly connected.
2. Toggle the slider again to end the connection.
3. To verify or troubleshoot the connection, jump to the last page of this guide.
7 - Android Client Setup and Use
Step 1 – Install the Client Application
Log into the Android marketplace on your device and search for OpenVPN Connect to find and install
the app.
Step 2 – Configure the Client for the Account
1. Save the configuration file created in section “3 - Configuring OpenVPN Accounts in the Router” on
page 3 to a known location on the Android device’s SD card.
2. Open the client app and import the config file from the SD card:
3. Setup is complete. The account will now be available for connection in the OpenVPN GUI.

Page 10/10© 2016 Araknis Networks®160930-1300
Configuring and Using OpenVPN
Step 3 – Using the Client
1. To turn on the VPN connection, open the client app and toggle the slider below the Disconnected
status bar. Connection details will be displayed on the screen once the account is authenticated. You
will be able to access IP addresses on your local network as if you were directly connected.
2. Click Disconnect to end the connection.
8 - Verifying and Managing Client Connections
There are two easy ways to verify that the connection is working:
• Access/Ping Device – After connecting the client, try to access or ping a device on the local network
from the client. If it works, everything is functioning perfectly.
• Router Interface – Log in and go to Advanced, VPN, OpenVPN. If a client is connected, you will see
the Remote IP address the device is connecting from.
• Click Disconnect to end a client’s connected session.
• To delete an account, click the trash can icon, then Apply.
9 - Troubleshooting
If a client won’t connect, try recreating the account and exporting a new configuration file. If the client
still won’t connect, try to use the same account and file for a known working client device.
10 - Contacting Technical Support
Phone: (866) 838-5052
Email: support@araknisnetworks.com
Other manuals for AN-300-RT-4L2W
1
Table of contents
Other Araknis Networks Network Router manuals
Popular Network Router manuals by other brands

TP-Link
TP-Link TD-8817 Specifications

NETGEAR
NETGEAR Nighthawk R6700v3 quick guide

xG Technology
xG Technology CN3200-PS-2500-900-1-EXT installation guide

Cisco
Cisco 811 quick start guide

Xiaomi
Xiaomi Mi WiFi Range Extender AC1200 user manual

EtherWAN
EtherWAN 5-Port and 8-Port Pocket Size Fast Ethernet... user guide