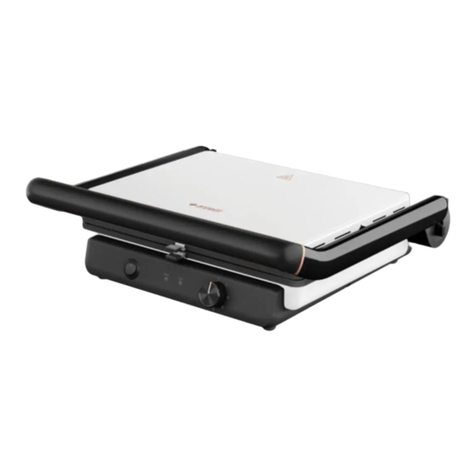
arcelik TM 9046 S User manual

Grill and Toaster
User Manual
TM 9046 S
01M-8819981100-0823-01
EN

Please read this guide first!
Dear Customer,
Thank you for choosing an Arçelik product. We would like you to achieve
the optimal efficiency from this high quality product which has been
manufactured with the state of the art technology. Please make sure you read
and understand this guide and supplementary documentation fully before
use and keep it as a reference. Include this guide with the unit if you hand it
over to someone else. Observe all warnings and information herein and follow
the instructions.
Symbols and their meanings
Following symbols have been used throughout this guide:
Important information and beneficial advices regarding the
usage of the device.
WARNING: Warnings about hazards to life and prop-
erty.
Suitable for contact with food.
Warning of electric shock.
Warning about hot surfaces.
RECYCLED &
RECYCLABLE
PAPER

The values provided with the appliance or its accompanying documents are laboratory readings in accordance with the
respective standards. These values may differ depending on the use and ambient conditions.
Controls and parts
1. Locking bolt
(Off , Half on , On )
2. Level adjustment slider ( )
3. Oil drainage channel
4. Removable oil collection container
5. Cable winding slot (under the device)
6. Program selection button
7. Status indicator light
8. On/Off switch
9. Plate removal button
10. Handle
11. Removable cooking plates
Technical data
Power supply:
230 V ~, 50-60 Hz
Power: 2400 W
The right to make technical and design
changes is reserved.
1
2
3
45
11
678910

4 / EN Grill and Toaster / Instruction Manual
CONTENTS
Controls and parts. . . . . . . . . . . . . . . . . . . . . . . . . . . . . . 3
Technical data . . . . . . . . . . . . . . . . . . . . . . . . . . . . . . . . 3
1Important safety and environmental
instructions 5
1.1 General safety . . . . . . . . . . . . . . . . . . . . . . . . . . . . . 5
1.2 Compliance with the WEEE regulations and waste
disposal . . . . . . . . . . . . . . . . . . . . . . . . . . . . . . . . . . . . . 9
1.3 Packaging information . . . . . . . . . . . . . . . . . . . . . . . 9
1.4 What to do for energy saving . . . . . . . . . . . . . . . . . . . 9
2Usage 10
2.1 Intended use. . . . . . . . . . . . . . . . . . . . . . . . . . . . . . 10
2.2 First operation . . . . . . . . . . . . . . . . . . . . . . . . . . . . 10
2.3 Operation . . . . . . . . . . . . . . . . . . . . . . . . . . . . . . . .10
2.4 Programs table . . . . . . . . . . . . . . . . . . . . . . . . . . . . 11
2.5 Cooking times. . . . . . . . . . . . . . . . . . . . . . . . . . . . . 13
2.6 Toasting and grilling . . . . . . . . . . . . . . . . . . . . . . . . 14
2.7 Grease collection tray . . . . . . . . . . . . . . . . . . . . . . . 18
2.8 Switching off the device . . . . . . . . . . . . . . . . . . . . 18
2.9 Removing / installing the plates . . . . . . . . . . . . . . . .19
3Cleaning and maintenance 20
3.1 Cleaning. . . . . . . . . . . . . . . . . . . . . . . . . . . . . . . . . 20
3.2 Storage . . . . . . . . . . . . . . . . . . . . . . . . . . . . . . . . . 22
3.3 Transportation and shipping. . . . . . . . . . . . . . . . . . . 22

5 / EN
Grill and Toaster / Instruction Manual
This section contains safety instructions to pre-
vent hazards that can result in injury or property
damage.
Any warranty is void if these instructions are not
followed.
1.1 General safety
•This appliance complies with international
safety standards.
•The device is not for commercial use, it is only
suitable for domestic use.
•This device is aimed to be used in household
and similar applications such as the places
specified below:
- Staff kitchen areas in shops, offices and other
working environments,
-Farm houses,
-Places used by customers in motels, hotels and
other residential-type environments,
1Important safety and environmental instructions

6 / EN Grill and Toaster / Instruction Manual
-In hostel-type places.
•Appliance may be used by children above age
of 8, persons with limited physical, perceptual
or mental abilities or persons with a lack of
experience and knowledge if they are super-
vised or given instructions on the operation of
the appliance and any relevant risks they may
encounter. Children should not tamper with the
appliance.
•Cleaning and user maintenance should not be
carried out by children unless they are over 8
years of age and under supervision.
•Keep the appliance and its cable out of the
reach of children under 8 years of age.
•Do not use the appliance if the power cord or
the appliance is damaged. Contact authorised
service.
•Your mains power supply should be in align with
the specified information on the type tag of the
appliance.
•For additional protection, this device must be
1Important safety and environmental instructions

7 / EN
Grill and Toaster / Instruction Manual
connected to a residual current device with a
maximum rated value of 30 mA.
•Use the appliance in a grounding plug.
•Do not use the appliance with an extension cord.
•To prevent damage to the power cord, prevent it
from being pinched, crimped or rubbed against
sharp edges.
•Do not touch the plug of the appliance while
your hands are damp or wet.
•Do not immerse the appliance or its power cord
in water.
•Do not leave the appliance unattended while it
is plugged in.
•The outer surface heats up during use. To avoid
the risk of burns, do not touch hot surfaces.
•Do not leave metal cooking utensils and utensils
on the cooking plates.
•Use and store the appliance on a secured sur-
face.
•Do not disassemble the appliance.
1Important safety and environmental instructions

8 / EN Grill and Toaster / Instruction Manual
•Use only original parts or parts recommended
by the manufacturer.
•Unplug the appliance before cleaning and dry all
parts completely after cleaning.
•Clean only the outer surface and plates accord-
ing to the instructions in the Cleaning and Main-
tenance section.
•The appliance is not suitable for outdoor use.
•Do not operate the appliance with an external
timer or a separate remote control system.
•Food may catch fire due to overheating. Do not
allow the appliance to come into contact with
or be covered by flammable materials such as
curtains, fabrics, walls, etc.
•Do not pour oil or similar liquids on the appli-
ance after it has heated up.
•Do not use the appliance in or near explosive or
flammable environments and substances.
•Charcoal or similar combustible fuels must not
be used in this appliance.
1Important safety and environmental instructions

9 / EN
Grill and Toaster / Instruction Manual
•If you keep the packaging materials, keep them
out of the reach of children.
1.2 Compliance with the WEEE regulations and waste
disposal
This product does not contain the dangerous and prohibited materials
indicated in "Waste Electrical and Electronic Equipment Control
Regulation" published by Ministry of Environment and Urbanisation of
the Republic of Turkey. Complies with WEEE Regulations. This product
was manufactured from recyclable and reusable high quality parts and
materials. Therefore, do not dispose of this product with other domestic wastes at
the end of its life cycle. Take it to a collection point for recycling of electrical and
electronic equipment. You can ask your local administration about these collection
points. You can help protect the environment and natural resources by delivering
the used products for recycling.
1.3 Packaging information
The product's packaging is made of recyclable materials, in accord-
ance with the National Legislation. Do not dispose of the packaging
waste with the household waste or other wastes, dispose it to the pack-
aging collection areas specified by local authorities.
1.4 What to do for energy saving
Turn off and unplug the appliance after each use. Choose appropriate tempera-
tures when cooking your food.
You can choose the "Eco" program for quantities of food suitable for cooking on
one plate.
1Important safety and environmental instructions

10 / EN Grill and Toaster / Instruction Manual
2.1 Intended use
This appliance is intended for home use and food preparation only, it is not suitable
for professional use.
2.2 First operation
Operate the device empty and make sure that the room is well ventilated, as
smoke may be emitted when first used.
2.3 Operation
1
2
Place the device on a flat
surface. Insert the plug of
your appliance into the
socket.
Move the locking slider
(1) to the position suitable
for the program you want
to cook with. (See 2.6)
Set the program selec-
tor switch (6) to your pre-
ferred cooking program.
Switch on your appli-
ance by pressing the on/
off button (8). When your
appliance starts, the sta-
tus indicator light (7) will
turn red. When the light
turns blue, your appliance
is ready for cooking.
WARNING: Make sure that both cooking plates (11) are inserted
before switching on the appliance.
Your product will switch off automatically after 1 hour. If your cook-
ing process continues, you can turn your appliance on again.
2Usage

11 / EN
Grill and Toaster / Instruction Manual
2.4 Programs table
Your grill and toaster has 4 different cooking programs. The table below shows
the cooking plate usage status of the programs in your device and the food types
suitable for the program.
•Eco program: In this program, only the bottom cooking plate works. It can be
preferred for smaller portions.
•Toast: Can be used for all types of toast and sandwiches.
•Grill: Suitable for grilled food types.
•Meat sealing: Suitable for sealing and grilling meat at high temperature without
losing the juices. In the meat sealing program, the upper plate, where the tempera-
ture is higher, should be used for sealing, followed by the lower plate, where the
temperature is suitable for cooking.
2Usage
Bottom Plate
(Cooking)
Bottom Plate
(Cooking)
Top Plate
(Not active in Eco
program)
Top Plate
(Sealing)

12 / EN Grill and Toaster / Instruction Manual
2Usage
Program License Plate Heating Status
(Unilateral / Bilateral) Food Types
ECO It's just
Bottom Plate
Sausage
Bagel
Pastries
TOAST Bottom and Top
Plate
Sandwich
Kumru
Toast with Kashar
Toasting Bread
Toasted Bread with Kashar and Sausage
GRILL Bottom and Top
Plate
Chicken (Drumstick + Wings + Breast)
Salmon
Sea Bream
Sea bass
Green-Red Pepper
Mushroom
Eggplant
Pumpkin
Shrimp
Asparagus
Shrimp
MEAT
SEALING
For sealing Top Plate
Cooking Bottom Plate
Beef Ribeye
Steak
Beef Tenderloin
Meatball

13 / EN
Grill and Toaster / Instruction Manual
2Usage
2.5 Cooking times
The following table gives an overview of the different cooking times. Cooking times
depend on the thickness and consistency of the food. The recommended time and
quantity should be considered as a minimum.
For the best possible and most delicious results, please refer to the recipe book
specially designed for your appliance.
Program Food
Thick-
ness
(cm)
Flip
Repeat
Dura-
tion
(min)
ECO
Sausage
0.5 1.5 3
1 2 4
2.5 2.5 5
Bagel - 2 4
Pastry - 2 4
TOAST
Kumru - - 5
Toast with Kashar - - 2.5
Toasting Bread - - 1.5
Toasted Bread with Kashar and Sausage - - 5
GRILL
Chicken Thigh 3 5 25
Chicken Wings 3-4 5 20
Chicken Breast 2.5-3 3 16
Salmon 2.5-3 5 20
Sea Bream (Whole) 3-3.5 3 11
Sea Bream (Fillet) 1.5 3 10
Sea bass 3-4 5 30
Pepper - 5 15
Mushroom - 5 15
Eggplant - 5 15
Pumpkin - 5 15
Shrimp - 2 5
MEAT
SEALING
Ribeye (Medium Rare) 2 2 10 (4 min
sealing)
T-Bone (Medium Rare) 3 2.5 11 (5 min
sealing)
Tenderloin (medium rare) 2 2 9 (4 min
sealing)
Meatballs (Medium Cooked) - 0.5 6 (1 min
sealing)

14 / EN Grill and Toaster / Instruction Manual
Please refer to the recipe book for the cooking time for different cook-
ing levels (rare, overcooked).
2.6 Toasting and grilling
You can adjust the level adjustment slider (2) to according to
the thickness of the food.
Device plates in closed position
This position is suitable for grilling and toasting using the upper and lower cook-
ing plates in the closed position. It should be preferred for sandwiches, toast,
pancakes, hamburgers, etc.
1
1
2
2
1
2
Before turning on the ap-
pliance, use the program
selection button (6) to
set the desired program.
Then press the on/off
button (8) in the center.
The appliance will start to
operate.
Lift the top cover of the
appliance slightly and
move the locking slide (1)
to the half-open “ ” po-
sition. Open the top cover
of the appliance upwards
by holding the handle
(10).
Place the food to be
cooked on the cooking
plate (11). Close the top
cover of the appliance
downwards by holding
the handle (10).
2Usage

15 / EN
Grill and Toaster / Instruction Manual
Appliance plates in grill oven position
In this position the plates will not touch each other. It
should be preferred for foods such as sandwich, panini that are not pressed but
need to be kept warm from above.
2
1
1
2
1
2
Before turning on the ap-
pliance, use the program
selection button (6) to
set the desired program.
Then press the on/off
button (8) in the center.
The appliance will start to
operate.
Open the top cover of
the appliance upwards
by holding the handle
(10). Place the food to be
cooked on the cooking
plate (11).
Adjust the level adjust-
ment slider (2) of the de-
vice to the level ( )
suitable for the thickness
of your food and
close the handle (10)
downwards.
2Usage

16 / EN Grill and Toaster / Instruction Manual
Device plates in half-open position
The lower cooking plate must be used for cooking food.
2
1
1
21
2
Before turning on the ap-
pliance, use the program
selection button (6) to
set the desired program.
Then press the on/off
button (8) in the center.
The appliance will start to
operate.
Open the top cover of the
appliance upwards by
holding the handle (10).
Turn the locking slide (1)
of the appliance to the
“”position to start
cooking.
Place the food to be
cooked on the cooking
plate (11).
WARNING: The top cooking plate may be hot.
2Usage

17 / EN
Grill and Toaster / Instruction Manual
Two plates in horizontal position
This position provides two large grill areas. It should be preferred for foods that
need to be cooked by heating from one surface.
21
2
1
1
Before turning on the ap-
pliance, use the program
selection button (6) to
set the desired program.
Then press the on/off
button (8) in the center.
The appliance will start to
operate.
Open the top cover of
the device by holding the
handle (10). Then pull it
upwards. Turn the lock-
ing slide (1) to the “
” symbol and tilt the top
cover of the appliance
backwards to a horizon-
tal position.
Place the food to
be cooked (sausag-
es, steaks, etc.) on the
cooking plate (11).
WARNING: Use utensils made of wood or heat-resistant plastic to
turn or remove food from the cooking plates.
WARNING: Be very careful when removing food from the appli-
ance, the metal parts of the appliance and the food may be very hot.
2Usage

18 / EN Grill and Toaster / Instruction Manual
2Usage
2.7 Grease collection tray
•There are grease drainage channels (3) on both plates of the ap-
pliance.
•Use the grease collection tray (4) for food that may leak grease
or other liquids.
•Remove and clean the grease collection tray after the process.
2.8 Switching off the device
1
Switch off your device by
pressing the on/off but-
ton (8) in the center.
Unplug the appliance
from the mains and allow
it to cool down.
You can store your appli-
ance by locking the lock-
ing slide (1) “ ”in the
locked position.

19 / EN
Grill and Toaster / Instruction Manual
2.9 Removing / installing the plates
WARNING: Before touching the cooking plates, make sure that the
appliance has cooled down completely. Do not touch the cooking
plates when they are hot.
Open the top cover of
the device by holding the
handle (10).
Press the plate eject but-
ton (9) on the front of the
product to remove the
plates.
To reinsert the cooking
plates (11), insert the
cooking plates into the
slots on the inside back
of the appliance and
snap them into place.
2Usage

20 / EN Grill and Toaster / Instruction Manual
3.1 Cleaning
1
2
5dk
1
2
Turn off the appliance by
pressing the center on/
off button (8) and unplug
the plug.
Wait for the appliance to
completely cool down.
Remove the cooking
plates (11).
Soak the cooking plates
(11) in warm water for
about 5 minutes.
They can then be cleaned
with liquid dishwashing
detergent and a sponge
with a soft surface.
Use a damp cloth to
clean the outer surface
of the appliance. Dry the
outside of the appliance
completely.
After cleaning, make sure that the plates are thoroughly dry and then
attach them to your device.
3Cleaning and maintenance
Table of contents
Other arcelik Grill manuals
Popular Grill manuals by other brands

Dyna-Glo
Dyna-Glo DGH563CRN instructions

Huntington
Huntington 24025HNT Assembly manual and parts list

GrillBlazer
GrillBlazer GrillGun Replacing the Valve Stem

EFBE-SCHOTT
EFBE-SCHOTT Gourmet RAC 500 operating instructions

ALASKA
ALASKA RG1211G instruction manual

Centro
Centro Stainless 2000 Safe use, care and assembly manual