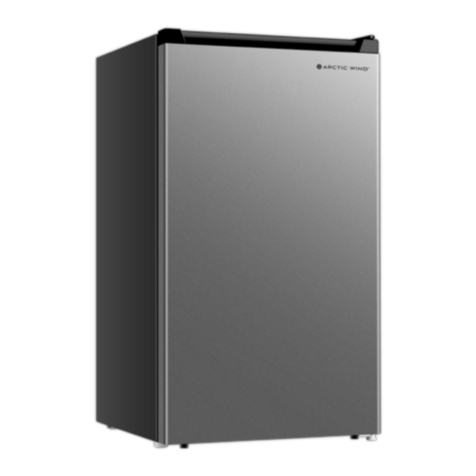
ARCTIC WIND 2AW1BF33A User manual

COMPACT REFRIGERATOR
3.3 CU. FT.
OWNER’S MANUAL
MODEL: 2AW1BF33A, 2AW1SLF33A

3
IMPORTANT SAFETY INSTRUCTION ............................................................................................. 4
ELECTRICAL INFORMATION .................................................................................................................................................... 4
SAFETY FOR CHILDREN AND OTHERS WHO ARE VULNERABLE ............................................................................. 4
GENERAL SAFETY AND DAILY USE....................................................................................................................................... 5
PROPER DISPOSAL OF YOUR REFRIGERATOR RISK OF CHILD ENTRAPMENT .................................................. 5
INSTALLATION..................................................................................................................................... 6
STEP 1: LOCATION.............................................................................................................................................................................................................6
STEP 2: CLEANING.............................................................................................................................................................................................................6
CLEANING AND CARE........................................................................................................................ 7
CLEANING ....................................................................................................................................................................................... 7
DEFROSTING YOUR REFRIGERATOR.................................................................................................................................... 7
DISPOSAL OF THE APPLIANCE ...................................................................................................... 8
PACKAGING MATERIALS: .......................................................................................................................................................... 8
DESCRIPTION OF THE APPLIANCE ............................................................................................... 9
REVERSING THE DOOR ...........................................................................................................................................................10
USING YOUR APPLIANCE ...............................................................................................................11
ACCESSORIES.............................................................................................................................................................................11
TEMPERATURE CONTROL..............................................................................................................13
STARTING UP AND TEMPERATURE REGULATION.........................................................................................................13
ENERGY SAVING TIPS......................................................................................................................13
HELPFUL HINTS ................................................................................................................................14
NOISES DURING OPERATION................................................................................................................................................14
HINTS FOR FRESH FOOD REFRIGERATION .....................................................................................................................14
HINTS FOR REFRIGERATION..................................................................................................................................................14
TROUBLESHOOTING........................................................................................................................15
TABLE OF CONTENTS
IMPORTANT NOTE:
Read the manual carefully. Make sure to save this manual for future reference. Illustrations in this manual
are for explanatory purposes only, your actual product may look slightly dierent.
BASIC PARAMETERS
CONTENT UNIT VALUE
Product Brand Arctic Wind
Compressor UKN35YA
Voltage / frequency V/Hz 115/60
Rated input current/power 1.0A/60W
Net capacity L 94
Energy eciency class E-STAR
Climate class(SN=10~32 C, N=16~32 C,ST=16~38 C, T=16~43 C) 12.8~43.3
Energy consumption / 24h KWh/24h 0.603
Energy consumption (kWh/a) kWh/a 220
Max noise level dB(A) 40
Certications ETL
Kind of coolant / Charge (R600a) /grammes R/g R600a/27g

4 5
IMPORTANT SAFETY INSTRUCTION
For your safety and correct usage, please read
these instructions carefully before using your
new appliance to avoid unnecessary mistakes
and accidents. Please ensure that all people using
this appliance are familiar with its operation and
safety features. Keep these instructions in a safe
place for future reference and be sure that they
are kept with the appliance in the event that it is
moved or sold, so that everyone using it through
its life will be properly informed on its correct
appliance usage and safety. The manufacturer is
not responsible for damages caused by misuse.
The appliance is for indoor and domestic use only.
ELECTRICAL INFORMATION
• The appliance must be plugged into its own
dedicated 115 V, 60 Hz. AC only electrical
outlet. The power cord of the appliance is
equipped with a three-prong grounding plug
for your protection against electrical shock
hazards. It must be plugged directly into a
properly grounded three prong receptacle.
The receptacle must be installed in
accordance with local codes and ordinances.
Consult a qualied electrician. Avoid
connecting refrigerator to a Ground Fault
Interrupter (GFI) circuit. Do not use an
extension cord or adapter plug.
• If the SUPPLY CORD is damaged, it must be
replaced by the manufacturer, its service
agent or similarly qualied person in order
to avoid a hazard.
• Never unplug the refrigerator by pulling on the
power cord. Always grip the plug rmly, and
pull straight out from the receptacle to prevent
damaging the power cord.
• Unplug the refrigerator before cleaning to
avoid electrical shock.
• Performance may be aected if the voltage
varies by 10% or more. Such damage is not
covered under your warranty.
• Do not plug the unit into an electrical outlet
controlled by a wall switch or pull cord to
prevent the refrigerator from being turned
o accidentally.
SAFETY FOR CHILDREN AND
OTHERS WHO ARE VULNERABLE
• This appliance is not intended for use by
persons (including children) with reduced
physical, sensory or mental capabilities,
or lack of experience and knowledge,
unless they have been given supervision
or instruction concerning the use of the
appliance by a person responsible for their
safety. Children should be supervised to
ensure that they do not play with the appliance.
• Keep all packaging away from children to avoid
risk of suocation.
• If you are discarding your old appliance, pull
the plug out of the socket, cut the connection
cable (as close to the appliance as you can).
Cut o the main plug and discard. Break o
any old locks or latches as a safeguard and
remove the door to prevent children playing
from suering an electric shock or from
closing themselves inside it.
FIRE HAZARD
The appliance contains a small
quantity of
refrigerant (R600a) which
is environmentally friendly
but potentially
ammable in the refrigerant circuit.
IMPORTANT SAFETY INSTRUCTION (Continued)
WARNING: Risk of child entrapment. Before
you throw away your old refrigerator or freezer:
• Remove doors.
• Leave shelves in place so children may not
easily climb inside.
• Have refrigerant removed by a qualied
service technician.
GENERAL SAFETY AND DAILY USE
• This appliance is intended to be used in
household and similar applications such as:
- sta kitchen areas in shops, oces and other
working environments;
- farm houses and by clients in hotels, motels
and other residential type environments;
- bed and breakfast environments;
- catering and similar non-retail applications.
• Do not store ammable gases or liquids inside
the appliance. There is a risk of an explosion.
• Do not operate any electrical appliances within
the appliance (e.g. electric ice cream makers,
mixers, etc.).
• When unplugging, always pull the plug from the
main outlet. Do not pull on the cord.
• Do not operate the appliance without interior
lighting lamp cover.
• Do not place hot items near the plastic
components of this appliance.
• Do not place food products directly against
the air outlet on the rear wall.
• Frozen food must not be refrozen once it has
been thawed out.
• Store pre-packaged frozen food in accordance
with the frozen food manufacturer’s
instructions.
• The appliance’s manufacturer storage
recommendations should be strictly adhered
to. Refer to the relevant instructions for
storage.
• Do not place carbonated or zzy drinks in the
freezer compartment as it creates pressure on
the container, which may cause it to explode,
resulting in damage to the appliance.
• Ice lollies (popsicles) can cause frost burns
if consumed straight from the freezer
compartment.
• Do not place food directly against the air
outlet inside the refrigerator. Do not place the
appliance in direct sunlight.
• Do not store explosive substances such as
aerosol cans with a ammable propellant in
this appliance.
PROPER DISPOSAL
OF YOUR REFRIGERATOR
RISK OF CHILD ENTRAPMENT
Child entrapment and suocation are not only
problems of the past. Junked or abandoned
refrigerators are still dangerous - even if they are
sitting “for just a few days”. If you are getting rid of
your old refrigerator, please follow the instructions
below to help prevent accidents.

6 7
INSTALLATION
STEP 1: LOCATION
Position the appliance away from sources of heat
such as stoves, radiators, direct sunlight etc.
Maximum performance and safety are guaranteed
by maintaining the correct indoor temperature for
the class of unit concerned, as specied on the
rating plate. This appliance performs well from
55 to 110°F (12.8 - 43.3°C). The appliance may not
work properly if it is left for a longer period at
a temperature above or below the indicated range.
IMPORTANT!
There is a need of good ventilation around the
fridge for easy dissipation of heat, high eciency
of refrigeration and low power consumption. For
this purpose, sucient clear space should be
available around the fridge. It is advisable for there
to be 3 inch (75 mm) separating the back of the
fridge to the wall, at least 4 inch (100 mm) of space
at its two sides, and a minimum of 4 inch (100 mm)
from its top and a clear space up front to allow the
doors to open 135°.
Appliances must not be exposed to rain. Sucient
air must be allowed to circulate in the lower rear
section of appliance, as poor air circulation can
aect performance.
WARNING: Some models may be shipped with a foam pad above the compressor to protect the unit
during transport. Check to see if your unit has one and remove it before use.
Before installing, follow these important rst steps.
WARNING: Keep ventilation openings, in the
appliance enclosure or in the built-in structure,
clear of obstruction.
WARNING: Do not use mechanical devices
or other means to accelerate the defrosting
process, other than those recommended by
the manufacturer.
WARNING: Do not damage the refrigerant
circuit.
WARNING: Do not use electrical appliances
inside the food storage compartments of
the appliance, unless they are of the type
recommended by the manufacturer.
STEP 2: CLEANING
Wash any removable parts of the refrigerator
interior, and exterior with mild detergent and
warm water. Wipe dry. Do not use harsh cleaners
on these surfaces.
Do not use razor blades or other sharp
instruments, which can scratch the appliance
surface when removing adhesive labels. Any glue
left from the tape can be removed with a mixture
of warm water and mild detergent, or touch
the residue with the sticky side of tape already
removed. Do not remove the serial plate.
CAUTION: Flammable refrigerant used! When
handing, moving and use of the refrigerator, make
sure to avoid either damaging the refrigerant
tubing, or increasing the risk of a leak.
LEVELING
The appliance should be level in order to eliminate
vibration. To make the appliance level, it should
be upright and both adjusters should be in stable
contact with the oor. You can also adjust the level
by unscrewing the appropriate level adjustment in
the front (use your ngers or a suitable spanner).
CAUTION: Any electrical work required to
install this appliance should be carried out by
qualied or authorized personnel.
WARNING: This appliance must be grounded.
The manufacturer declines any liability should
these safety measures not be observed.
CLEANING AND CARE
CLEANING
For hygienic reasons the appliance interior,
including interior accessories, should be cleaned
regularly. The fridge should be cleaned and
maintained at least every two months.
WARNING! DANGER OF ELECTRICAL SHOCK!
• The appliance may not be connected to the
outlet during cleaning! Before cleaning switch
the appliance o and remove the plug from the
mains, or switch o the circuit breaker or fuse.
• Remove the food from the appliance before
cleaning. Store food in a cool place and keep
well covered.
• Never clean the appliance with a steam
cleaner. Moisture could accumulate in
electrical components.
• Hot vapors can lead to the damage of
plastic parts.
• The appliance must be dry before it is
placed back into service.
IMPORTANT!
• Ethereal oils and organic solvents can attack
plastic parts, e.g. lemon juice or the juice
from orange peel, butyric acid, and cleansers
that contain acetic acid. Do not allow such
substances to come into contact with
appliance parts.
• Do not use any abrasive cleansers.
• Clean the appliance and the interior
accessories with a cloth and lukewarm
water. Commercially available dish washing
detergents may also be used.
• After cleaning, wipe with fresh water and a
clean dish cloth.
• Accumulation of dust at the condenser
increases energy consumption. For this reason
carefully clean the condenser at the back of
the appliance once a year with a soft brush or a
vacuum cleaner.
• Check the water drain hole on the rear wall of
the refrigerator compartment.
• Clear a blocked drain hole with the aid of
something like a soft peg. Be careful not
to create any damage to the cabinet by
sharp objects.
• After everything is dry, place appliance back
into service.
DEFROSTING YOUR REFRIGERATOR
WHY DEFROSTING
• Water contained in food or getting into air
inside the fridge be opening doors may
form a frost layer inside. It will weaken the
refrigeration when the frost is thick. While it is
more than 10mm thick, you should defrost.
DEFROSTING IN FRESH FOOD STORAGE
COMPARTMENT
• It is manually controlled by switching the
temperature regulator on or o so that there
is no need of operation of defrosting. Water
from defrosting will be drained into an drip tray
below the evaporator.
GO OUT OF USE FOR A LONG TIME
• Remove all refrigerated packages.
• Switch o the appliance by turning the
temperature regulator to position “0”.
• Remove the mains plug or switch o or
disconnect the electricity supply.
• Clean thoroughly (see section: Cleaning).
• Leave the door open to avoid the build up of
odors.
Note: lf the appliance contains freezer
compartment.
8 9
DISPOSAL OF THE APPLIANCE
It is prohibited to dispose of this appliance as
household waste.
PACKAGING MATERIALS:
Packaging materials with the recycle symbol
are recyclable. Dispose of the packaging into a
suitable waste collection container to recycle it.
BEFORE DISPOSAL OF THE APPLIANCE:
Pull out the main plug from the main socket.
Cut o the power cord and discard with the
main plug.
CORRECT DISPOSAL OF THIS PRODUCT
This symbol on the product or in its packing indicates that this product may not be
treated as household waste. Instead, it should be taken to the appropriate waste
collection point for the recycling of electrical and electronic equipment. By ensuring
this product is disposed of correctly, you will help prevent potential negative
consequences for the environment and human health, which could otherwise be
caused by the inappropriate waste handling of this product. For more detailed
information about the recycling of this product, please contact your local council, your
household waste disposal service, or the shop where you purchased the product.
WARNING: Refrigerators contain refrigerant
and gases in the insulation. Refrigerant and
gases must be disposed of professionally as
they may cause eye injuries or ignition. Ensure
that tubing of the refrigerant circuit is not
damaged prior to proper disposal.
NOTE:
If this appliance, featuring magnetic
door seals, is to replace an older appliance
having a spring lock (latch) on the door or
lid, be sure to make the spring lock unusable
before you discard the old appliance. This
will prevent it from becoming a death trap
for a child.
DESCRIPTION OF THE APPLIANCE
Flip door
Door seal
Upper shelf
Middle shelf
Low shelf
Supporting leg
Crisper
box cover
Glass shelf
Temperature
regulator
Evaporating dish
State of California Proposition 65 Warnings:
WARNING: This product contains one or more chemicals known to the State of California to cause cancer.
WARNING: This product contains one or more chemicals known to the State of California to cause birth defects or other
reproductive harm.
California (U.S.A.) Residents
WARNING: Cancer and Reproductive Harm - www.P65Warnings.ca.gov
NOTE: Features may vary depending on model. Not all models will have features listed.
NOTE: To get the best energy eciency of this product, please place all shelves, drawers on their original
position as the illustration above.
Refrigerator without LED Light

10 11
DESCRIPTION OF THE APPLIANCE (Continued)
REVERSING THE DOOR
The side at which the door opens can be changed
from the right side (as supplied) to the left side, if
the installation site requires.
Tool you will need:
• Wrench (5/16", 8mm)
•Phillips-head screwdriver
•Putty knife or thin-blade screwdriver
Before you start lay the refrigerator on it's back in
order to gain access to the base, you should rest
it on soft foam packaging or similar material to
avoid damaging the cooling pipes at the rear of
the refrigerator.
• Open the refrigerator door and remove all
ttings inside the door.
• Remove the upper hinge cover .
• Remove the two screws that connect upper
hinge on the right side of the cabinet top.
• Carefully lift the door and place it on a padded
surface to prevent scratching.
• Remove the screw hole cover
and transfer it to
the uncovered hole on the right side of the unit.
Be sure to press the button rmly into the hole.
• Remove the two screws that hold the lower
hinge on the right side of the cabinet.
• Remove the Adjustable high foot and
transfer it to the right side of the cabinet.
• Set the door into its new place making sure
the pin enters the bushing at the lower frame
section (hole).
• Secure the upper hinge previously removed
in step 3 on the left side of the unit. Make sure
the pin enters the bushing on the upper frame
section (hole).
Screws
Lower hinge
Adjustable
low foot
Adjustable
high foot
Upper hinge
Screw bolt
Upper
hinge cover
Shelf sleeve
Screw
hole cover
• Loosely secure the lower hinge and do not
tighten the bolts until the door is in the closed
position and leveled.
• Replace the upper hinge cover .
• Turn the door upright again.
• Open the door and attach all ttings.
Refrigerator without cover panel
USING YOUR APPLIANCE
ACCESSORIES
MOVABLE SHELVES/TRAYS
• Various glass or plastic storage shelves or wire
trays are included with your appliance dierent
models have dierent combinations and
dierent models have dierent quality.
• The walls of the refrigerator are equipped with
a series of runners so that the shelves can be
positioned as desired.
POSITIONING THE DOOR SHELVES
• To permit the storage of food packages of
various sizes, the door shelves can be placed
at dierent heights.
• To make these adjustments proceed as follows
gradually pull the shelf in the direction of the
arrows until it comes free, then repositions as
required.
VEGETABLE DRAWER
• The drawer is suitable for storing fruit and
vegetables.
To avoid contamination of food, please respect
the following instructions:
• Opening the door for long periods can cause
a signicant increase of temperature in the
compartments of the appliance.
• Clean regularly surfaces that can come in
contact with food and accessible drainage
systems.
• Store raw meat and sh in suitable containers
in the refrigerator, so that it is not in contact
with or drip onto other food.
• Two-star frozen-food compartments are
suitable for storing pre-frozen food, storing or
making ice cream and making ice cubes.
• One-, two- and three-star compartments are
not suitable for the freezing of fresh food.
• If the refrigerating appliance is left empty
for long periods, switch o, defrost, clean,
dry, and leave the door open to prevent mold
developing within the appliance.
Compliance is checked by inspection.

12 13
Order Compartments
Type
Target storage
temp (°C) Appropriate food
1 Fridge +2~+8 Eggs, cooked food, packaged food, fruits and vegetables, dairy products, cakes,
drinks and other foods which are not suitable for freezing.
2(***)*-Freezer ≤-18
Seafood (sh, shrimp, shellsh), freshwater aquatic products and meat products
(recommended for 3 months, the longer the storage time,
the worse the taste and nutrition), suitable for frozen fresh food.
3 ***-Freezer ≤-18
Seafood (sh, shrimp, shellsh),freshwater aquatic products and meat products
(recommended for 3 months, the longer the storage time,
the worse the taste and nutrition), are not suitable for frozen fresh.
4 **-Freezer ≤-12
Seafood (sh, shrimp, shellsh), freshwater aquatic products and meat products
(recommended for 2 months, the longer the storage time,
the worse the taste and nutrition), are not suitable for frozen, fresh food.
5 *-Freezer ≤-6
Seafood (sh, shrimp, shellsh), freshwater aquatic products and meat products
(recommended for 1 month, the longer the storage time,
the worse the taste and nutrition).
6 0-star -6~0
Fresh pork, beef, sh, chicken, some packaged processed foods, etc.
(Recommended to eat within the same day, preferably no later than 3 days).
Partially encapsulated processed foods (non freezable foods)
7 Chill -2~+3
Fresh/frozen pork, beef, chicken, freshwater aquatic products, etc.
(7 days below 0°C and above 0°C is recommended for consumption
within that day, preferably no more than 2 days).
Seafood (less than 0°C for 15 days, it is not recommended to store above 0°C)
8Fresh Food 0~+4 Fresh pork,beef,sh,chicken,cooked food,etc.
(Recommended to eat within the same day,preferably no more than 3 days)
9 Wine +5~+20 Red wine, white wine, sparkling wine etc.
USING YOUR APPLIANCE (Continued) TEMPERATURE CONTROL
• Do not place warm foods into the appliance.
Allow warm foods to cool rst. Do not install
the appliance near cookers, radiators or other
sources of warmth. High ambient temperatures
cause longer, more frequent operation of the
compressor.
• In order to make the cooling system work
eciently, please make sure the side plates
and back plate of the product are with
some distance from the wall. It is strongly
recommended that its back is 3 inch (75 mm)
away from the wall, its sides are at least have
a space of 4 inch (100 mm) separately and
the height from over its top is no less than
4 inch (100 mm).
ENERGY SAVING TIPS
• When the product works, please do not open
the door too often or leave the door open any
longer than necessary.
• Do not set temperature any colder than
necessary.
• The direct cooling refrigerator (with a freezer)
needs to be defrosted when necessary. This
will improve the cold transfer and reduce
energy consumption.
• The sketch map shows the right combination
of the shelves which can lead to more energy
eciency.
• If users adjust the combination, it may result in
more energy-consumption.
• Store food logically. Do not exceed the storage
period specied.
STARTING UP AND
TEMPERATURE REGULATION
• Insert the plug of the connection lead into an
outlet with protective earth contact.
• The temperature selector knob is located on
the right side of the fridge.
Setting “0” means: O
Clockwise rotate the knob to turn on the appliance.
Setting “1” means:
Highest temperature, warmest setting.
Setting “7” (end-stop) means:
Lowest temperature, coldest setting.
Temperature Control IMPORTANT!
Normally we advise you select setting of 4, if
you want the temperature warmer or colder
please turn the knob to lower or higher setting
accordingly. Though the unit is energy ecient, it
is more ecient at lower position settings.
IMPORTANT!
High ambient temperatures (e.g. on hot summer
days) and a cold setting on the temperature
regulator (position "7") can cause the compressor
to run continuously or even non-stop! When
the refrigerator is in use, the compressor
needs being on and o normally to ensure its
defrosting. Therefore, we should avoid setting
the refrigerator’s notch too high ("7"). If you nd
the refrigerator frosts too much, please set the
refrigerator’s notch lower.
VACATION TIPS: If the appliance will not be used
for several months:
• Remove all food. Unplug the power cord.
• Clean and dry thoroughly.
• Leave the door open slightly to prevent odor
and mold growth .
NOTE: High temperature setting will accelerate
food waste. For optimum food preservation, a
medium setting is generally the most suitable.
NOTE: please store dierent foods according to the compartments or target storage temperature of
your purchased products.

14 15
TROUBLESHOOTINGHELPFUL HINTS
NOISES DURING OPERATION
The following noises are characteristic of
refrigeration appliances:
CLICKS Whenever the compressor switches on or
o, a click can be heard.
HUMMING As soon as the compressor is in
operation, you can hear it humming.
BUBBLING When refrigerant ows into thin tubes,
you can hear bubbling or splashing noises.
SPLASHING Even after the compressor has been
switched o, this noise can be heard for a short
time.
HINTS FOR
FRESH FOOD REFRIGERATION
To obtain the best performances:
• Do not store warm foods or evaporating liquids
in the appliance.
• Do cover or wrap the food, particularly if it has
a strong avor or odor.
• Position food so that air can circulate freely
around.
HINTS FOR REFRIGERATION
• Meat (all types): wrap in polythene bags and
place on the glass shelf above the vegetable
drawer. For safety, store in this way only one or
two days at the most.
• Cooked foods, cold dishes, etc…: these should
be covered and may be placed on any shelf.
• Fruit and vegetables: these should be
thoroughly cleaned and placed in the special
draw(s) provided.
• Butter and cheese: these should be placed in
aluminum foil or polythene bags to exclude as
much air as possible.
• Milk bottles: these should have a cap and
should be stored in the bottle rack on the door.
CORRECTING MALFUNCTIONS
A malfunction may be caused by only a minor fault
that you can rectify yourself using the following
instructions. Do not perform any other work on
the appliance if the following information does not
provide assistance in your specic case.
Please keep refrigerator upright at least 2 hours,
before initial power on, to prevent damage to
the compressor.
Arctic Wind customer service team is available
for troubleshooting assistance.
Please call 855-663-9463 Mon-Fri.
IMPORTANT! Repairs to refrigerators/freezers
should only be performed by qualied service
technician. Improper repairs can give rise to
signicant hazards for the user. If your appliance
needs repairing, please contact your specialist
dealer or your local Service Center.
Problem Possible Causes Solution
Appliance
does not work
Appliance is not switched on. Switch on the appliance.
Main plug is not plugged in or is loose. Insert main plug.
Fuse has blown or is defective. Check fuse, replace if necessary.
Socket is defective. Electrical malfunctions are to be corrected
by an electrician.
Appliance
cools too much Temperature is set too cold. Turn the temperature regulator to a warmer
setting temporarily.
The food
is too warm
Temperature is not properly adjusted. Please look in the
“temperature control” section.
Door was open for an extended period. Open the door only as long as necessary.
A large quantity of warm food was placed in
the appliance within the last 24 hours.
Turn the temperature regulation to a colder
setting temporarily.
The appliance is near a heat source. Please look in the “installation” section.
Heavy build-up of frost,
possibly also on the door seal
Door seal is not air-tight (possibly after
reversing the door).
Carefully warm the leaking sections of the
door seal with a hair dryer (on a cool setting).
At the same time shape the warmed door seal
by hand such that it sits correctly.
Unusual noises
Appliance is not level. Re-adjust the feet.
The appliance is touching the wall
or other objects. Move the appliance slightly.
A component, e.g. a pipe, on the rear of the
appliance is touching another part of the
appliance or the wall.
If necessary, carefully bend the component
out of the way.
The compressor does not start
immediately after changing
the temperature setting
This is normal, no error has occurred. The compressor starts after a period of time.
Water on the oor or
storage shelves
Check that the drip tray is housed properly.
Drip tray is full of water. See the “cleaning and care” section.

Printed in China |0322_M925
855-663-9463 |support@arcticwindac.com |www.arcticwindac.com
5401 Dansher Road
Countryside, IL 60525
This manual suits for next models
1
Table of contents
Other ARCTIC WIND Refrigerator manuals

ARCTIC WIND
ARCTIC WIND 1AW1BF33A User manual

ARCTIC WIND
ARCTIC WIND ABMW141E User manual

ARCTIC WIND
ARCTIC WIND 2AW1BF26A User manual

ARCTIC WIND
ARCTIC WIND 2AW1SLF44A User manual

ARCTIC WIND
ARCTIC WIND 1AW2BF33A User manual

ARCTIC WIND
ARCTIC WIND ATMSL181 User manual

ARCTIC WIND
ARCTIC WIND ATMSL212E User manual