manuals.online logo
Brands
  1. Home
  2. •
  3. Brands
  4. •
  5. Arredaclick
  6. •
  7. Indoor Furnishing
  8. •
  9. Arredaclick Almond Bookcase Installation guide

Arredaclick Almond Bookcase Installation guide

2 persone
2 people
cacciavite
piatto / a stella
screwdrivers
avvitatore
elettrico
electric screwdriver
Fare attenzione
nell’uso di taglierini
Beware the cutter
COSA SERVE
PAG. 1 / 8
3
Libreria Almond
ASPALLA ESTERNA
EXTERNAL PANEL
BASE
BOTTOM SHELF
B
SCHIENALE
BACK PANEL
C
CAPPELLO
TOP SHELF
D
SPALLA INTERNA
INTERNAL PANEL
E
FRIPIANO
SHELF
GANTA
DOOR
A
A
E
C
B
D
F
G
G
1
PERNI (4 / 8 x spalla esterna / interna)
BARILOTTI / COPRIBARILOTTI ADESIVI
(4 x base / cappello)
DOWELS (4 / 8 x external / internal panel)
CROSS DOWELS / CAPS
(4 x top / bottom shelf)
FERMASCHIENALE (4 x schienale)
BACK FIXING SCREW (4 x back panel)
2
SQUADRETTA (1 x spalla)
BRACKET
(1 x hinge)
3
CERNIERA PER ANTA (2 x anta)
DOOR HINGE (2 x door)
4
PUSH-PULL (1 x anta)
PUSH-PULL SYSTEM
(1 x door)
5a
5b
MANIGLIA (1 x anta)
HANDLE
(1 x door)
GOCCE DI SILICONE (1 x anta)
SILICON DROPS
(1 x door)
6
12
5a
5a
4
6
ferramenta standard
ferramenta per ante
5b
Indicazioni per il montaggio
Almond Bookcase - Assembling Instructions
PAG. 2 / 8
FASE 1
Suddividere i colli e la ferramenta in gruppi omogenei secondo le etichette, facendo attenzione
a distinguere i ripiani da basi e cappelli (riconoscibili per la fresata).
Separate parcels and small components in groups, taking care to distinguish between middle shelves,
bottom shelves and top shelves (all recognizable by the furrows).
Predisporre l’area di montaggio in modo da proteggere il pavimento e i colli stessi.
Prepare the assembling area by protecting the floor and the packages, in order to protect the surfaces
from scratching.
Aprire i colli facendo attenzione a non danneggiare le superfici con taglierini o altri oggetti
taglienti.
Open the package with care trying to avoid the use of cutters or other sharp-edged tools.
Tenere sempre a portata di mano lo schema compositivo della propria libreria.
Be sure to keep the bookcase composition plan handy.
È possibile che all’interno della ferramenta siano contenuti più perni e/o barilotti di quanti ne
richieda il montaggio. Consigliamo di conservarli per eventuali utilizzi futuri.
It is likely that an excessive number of dowels and cross dowels may be found in the hardware bag
provided. We suggest to keep them for future use.
Libreria Almond
1.1
1.2
1.3
1.4
1.5
Almond Bookcase - Assembling Instructions
Indicazioni per il montaggio
PAG. 3 / 8
FASE 2
Avvitare 4 perni nella spalla esterna fino a porre il foro verso l’alto.
Screw 4 dowels in the external panel until you have the hole facing upward.
Allentare con un cacciavite le viti dei barilotti ed inserirli nella base.
Use a screw to slightly loosen screws on cross dowels,
then stick them into
the bottom shelf.
Spingere la base verso la spalla infilando i perni nei barilotti, quindi
stringere nuovamente le viti e coprire con i copribarilotti adesivi.
Push the bottom shelf towards the external panel in order to insert the dowels
into the cross dowels. Then tighten the screws on cross dowels and cover with
the proper caps provided.
BBB
A
FASE 3
Inserire lo schienale nella fresata di spalla e base.
Insert the back panel in the furrows which are incised along the external
panel and the bottom shelf.
N.B. Nelle librerie bifacciali o monofacciali passanti questa
operazione non sarà necessaria. Spalle, basi e cappelli sarano
pertanto privi di fresata.
N.B. The assembling operation won't be necessary for free standing
bookcases and wall bookcases. In this case panels, bottom shelves and top
shelves will not have any furrows incised on them.
B
C
A
AA
Libreria Almond
2.2 2.3
2.1
2.2
2.3
3.1
1x 4
Almond Bookcase - Assembling Instructions
Indicazioni per il montaggio
PAG. 4 / 8
FASE 4
E
D
Allentare con un cacciavite le viti dei restanti barilotti, quindi inserirli
nel cappello.
Use a screw to loosen screws on the remaining cross dowels, then stick
them into the top shelf.
Appoggiare il cappello sullo schienale facendolo coincidere con la
fresata.
Stick the back panel into the furrows which are incised along the top shelf.
Spingere il cappello verso la spalla infilando i perni nei barilotti,
quindi stringere nuovamente le viti dei barilotti e coprire con i
copribarilotti.
Push the top shelf towards the external panel in order to insert the dowels
into the cross dowels. Then tighten the screws on cross dowels and
cover
with the proper caps provided.
FASE 5
Avvitare 4 perni sul lato sinistro della spalla centrale fino a porre il
foro verso l’alto.
Screw the 4 dowels which are to be found on the left side of the internal
panel until you see the hole facing upward.
Spingere la spalla centrale verso l’elemento colonna
precedentemente assemblato e riavvitare le viti dei barilotti di base
e cappello.
Push the internal panel towards the column element already assembled.
Tighten the screws on the cross dowels on both the bottom and top shelves.
C
A
B
B
C
A
Libreria Almond
4.1
4.2
4.3
5.1
5.2
1x 4
1x 4
Almond Bookcase - Assembling Instructions
Indicazioni per il montaggio
PAG. 5 / 8
FASE 6
E
D
B
CA
Continuare unendo all’elemento colonna già assemblato le
componenti restanti, mantenendo l’ordine: base + schienale +
cappello, fino alla spalla finale.
Go on by piecing the column element together with the other elements,
following the order: bottom shelf + back panel + top shelf until you reach the
last external panel.
Regolare i piedini sotto ad ogni spalla in modo da mettere in bolla la
libreria.
Adjust the feet underneath each panel in order to level the bookcase with
the groud.
FASE 7
Inserire i ripiani nei vani della libreria e calarli sui reggiripiani
(normalmente già montati sulle spalle) fino alla completa stabilità,
quindi fissare i ripiani avvitando le viti poste nella parte inferiore dei
reggiripiani.
Slide the shelves into the bookcase compartments and place them on top of
the brackets provided. Repeat this until all the shelves are secured to the
structure. Then fix the shelves by screwing the screws placed on the bottom
of each bracket.
Libreria Almond
F
6.1
6.2
7.1
Almond Bookcase - Assembling Instructions
Indicazioni per il montaggio
PAG. 6 / 8
FASE 8
C
C
Allentare le viti dei fermaschienale, quindi appoggiare il lato lungo
dei fermaschienale sul retro dello schienale all’altezza consigliata di
20 cm dalla base e dal cappello.
Loosen the screws on back fixing components. Place the longer side of
these components along the height of the back side of the back panel at 20
cm from the bottom and the top shelves.
Spingere i fermaschienale verso la spalla in modo da incastrare la
linguetta sporgente nella fresata della spalla, quindi stringere la vite.
Push the back fixing screws towards the back panel in order to stick the
small flap on the fixing screw components into the furrow which is incised
along the panel. Then screw the back fixing components in.
Ripetere l’operazione per ogni schienale della libreria fino ad avere
4 fermaschienale su ogni schienale.
Repeat this operation on each back panel of the bookcase until you have 4
back fixing components on each back panel.
FASE 9
Ultimato il montaggio, far aderire la libreria alla parete retrostante.
Once you are done assembling the bookcase, place it towards the wall behind it.
Effettuare un foro nella parete retrostante in corrispondenza di ogni
spalla della libreria ed inserire un fischer per ogni foro. Porre una
squadretta su ogni spalla, con il lato corto in appoggio alla parete.
Make a hole into the wall in correspondance to each bookcase external side
panel. Stick a fischer screw through each hole. Fix a bracket to each external side
panel, making sure the short side of the bracket is placed alongside the wall.
Avvitare la vite più corta nella spalla della libreria e la più lunga nella parete,
in corrispondenza del fischer, come mostrato nello schema sottostante.
Screw the shorter screw into the vertical panel of the bookshelf and the
longer screw into the wall where the fischer screws were previously fixed,
as shown in the picture below.
A
A
A
Libreria Almond
8.1
8.2
8.3
9.1
9.2
9.3
2x 4
x n° spalle
3
8.1 8.2
9.2 9.3
Almond Bookcase - Assembling Instructions
Indicazioni per il montaggio
PAG. 7 / 8
FASE 10 - MONTAGGIO ANTA
Incastrare le cerniere nei supporti già fissati alle spalle, come
mostrato nel disegno sottostante.
Fit the hinges into their grooves which are already fixed onto the panels as
shown in the image below.
Aprire le due leve presenti sulla testa di ogni cerniera, quindi
avvicinare l’anta alle cerniere.
Flip open movable parts on the mounting plate of the hinges, then place the
door close to the hinges.
Spingere la testa della cerniera nei fori già presenti sull’anta fino al
completo fissaggio, quindi richiudere le due leve.
Stick the hinge mounting plate into the holes on the door until the two pieces
fit together. Then close the movable parts on the mounting plate.
Se necessario regolare l’anta in altezza come mostrato nel disegno
sottostante.
If necessary adjust the height of the door as shown below.
Verificare il corretto funzionamento dell’anta.
Test that the door works correctly.
Ripetere le precedenti operazioni per ogni anta.
Repeat the whole assembling operation described above on each of the
doors.
A
Libreria Almond
10.1
10.2
10.3
10.4
10.5
10.6
10.1 10.2
10.3 10.4
4
4
G
G
Almond Bookcase - Assembling Instructions
Indicazioni per il montaggio
PAG. 8 / 8
Accostare la maniglia al lato esterno dell’anta preforata e avvitarla
sul lato interno.
Place the handle onto the external side of the door, then screw the screws
into the holes in the internal side of the door.
Applicare una goccia di silicone sull’angolo superiore interno
dell’anta per proteggerla dagli urti durante la chiusura.
Stick a drop of silicone on the internal upper angle of the door to protect it
from damage when shutting it.
FASE 11 a - ANTE CON MANIGLIA
FASE 11 b - ANTE CON PUSH-PULL
Avvitare la barretta di plastica sul lato inferiore del ripiano che
coincide con la parte superiore dell’anta, facendo combaciare la
linguetta posta all’estremità con il lato frontale del ripiano.
Screw the black plastic bar into the top shelf inside the bookcase cabinet,
placing the small flap in line with the external edge of the shelf.
Spingere il dispositivo push-pull verso la barretta precedentemente
avvitata al ripiano fino al completo fissaggio.
Stick the component of the push-pull system into the black plastic bar until
they fit together properly.
Verificare il corretto funzionamento del push-pull provando ad
aprire e chiudere l’anta.
Test the push-pull system by opening and shutting the door.
Applicare una goccia di silicone sull’angolo superiore interno
dell’anta per proteggerla dagli urti durante la chiusura.
Stick a drop of silicone on the internal upper angle of the door to protect it
from damage when shutting it.
Libreria Almond
FF
F
11.1
11.3
11.1
11.2
11.3
11.4
11.1 11.2
6
6
5a
5b
G
G
Almond Bookcase - Assembling Instructions
Indicazioni per il montaggio

This manual suits for next models

1

Other Arredaclick Indoor Furnishing manuals

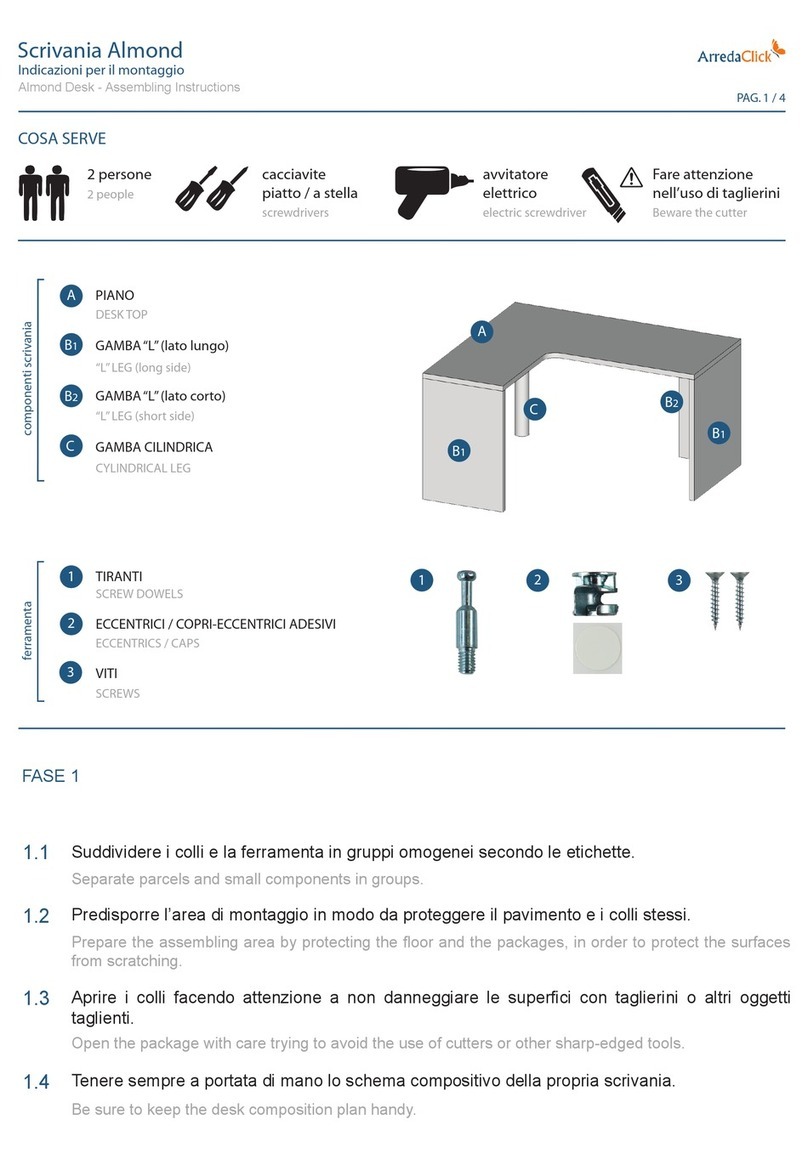
Arredaclick Almond Desk Installation guide

Arredaclick

Arredaclick Almond Desk Installation guide

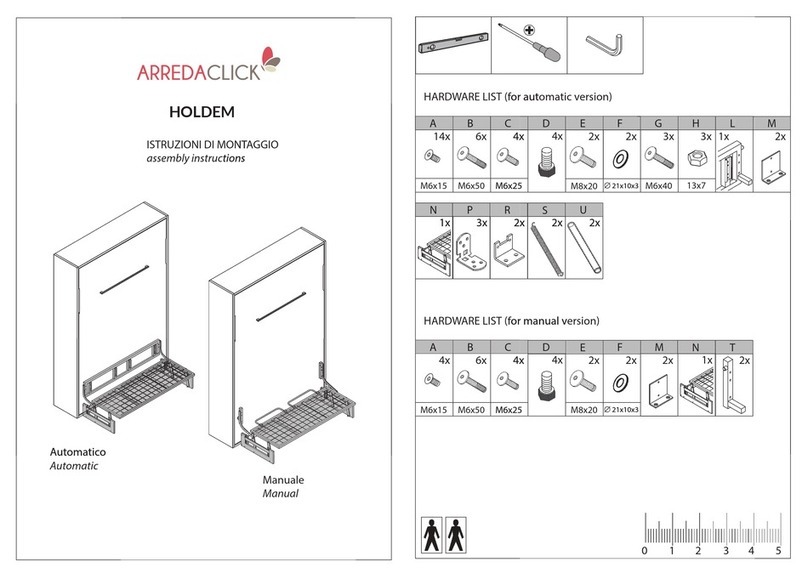
Arredaclick HOLDEM Series User manual

Arredaclick

Arredaclick HOLDEM Series User manual

Popular Indoor Furnishing manuals by other brands

Crosley CF2006 quick start guide

Crosley

Crosley CF2006 quick start guide

Artcobell Discover installation instructions

Artcobell

Artcobell Discover installation instructions

Walker Edison AF44JNCVCT Assembly instructions

Walker Edison

Walker Edison AF44JNCVCT Assembly instructions

Assmann TriASS ST16 Assembly instructions

Assmann

Assmann TriASS ST16 Assembly instructions

Ekornes 1999 Assembly and Repair Instructions

Ekornes

Ekornes 1999 Assembly and Repair Instructions

Style selections SUNBURY 30NO COMBO installation manual

Style selections

Style selections SUNBURY 30NO COMBO installation manual

Epic Office Furniture Axis AXLOC1 Assembly instruction

Epic Office Furniture

Epic Office Furniture Axis AXLOC1 Assembly instruction

Kogan ovela BONITA PINTUCK OVBONPRSBGA user guide

Kogan

Kogan ovela BONITA PINTUCK OVBONPRSBGA user guide

BDI Sequel 20 6101 instruction manual

BDI

BDI Sequel 20 6101 instruction manual

Schreiber 101207 Assembly instructions

Schreiber

Schreiber 101207 Assembly instructions

Home Decorators Collection SK19345H1-S Use and care guide

Home Decorators Collection

Home Decorators Collection SK19345H1-S Use and care guide

Winco Vero Care Cliner Owner's operating and maintenance manual

Winco

Winco Vero Care Cliner Owner's operating and maintenance manual

Costway JV10978 manual

Costway

Costway JV10978 manual

Ergotron SV10 user guide

Ergotron

Ergotron SV10 user guide

BCP SKY3491 instruction manual

BCP

BCP SKY3491 instruction manual

ofichairs Nova manual

ofichairs

ofichairs Nova manual

Safavieh Furniture NST9000 quick start guide

Safavieh Furniture

Safavieh Furniture NST9000 quick start guide

B&M MILLBROOK 374186 Assembly instruction

B&M

B&M MILLBROOK 374186 Assembly instruction

manuals.online logo
manuals.online logoBrands
  • About & Mission
  • Contact us
  • Privacy Policy
  • Terms and Conditions

Copyright 2025 Manuals.Online. All Rights Reserved.