EnglishDeutsch
 logo
Brands
  1. Home
  2. •
  3. Brands
  4. •
  5. Arrow
  6. •
  7. Plumbing Product
  8. •
  9. Arrow LINE User manual

Arrow LINE User manual

Popular Plumbing Product manuals by other brands

Weka 506.2020.00E ASSEMBLY, USER AND MAINTENANCE INSTRUCTIONS

Weka

Weka 506.2020.00E ASSEMBLY, USER AND MAINTENANCE INSTRUCTIONS

American Standard DetectLink 6072121 manual

American Standard

American Standard DetectLink 6072121 manual

Kohler K-6228 Installation and care guide

Kohler

Kohler K-6228 Installation and care guide

Uponor Contec TS Mounting instructions

Uponor

Uponor Contec TS Mounting instructions

Pfister Selia 49-SL Quick installation guide

Pfister

Pfister Selia 49-SL Quick installation guide

Fortis VITRINA 6068700 quick start guide

Fortis

Fortis VITRINA 6068700 quick start guide

Kohler K-12183 Homeowner's guide

Kohler

Kohler K-12183 Homeowner's guide

Maxxus MX-M206-01 instruction manual

Maxxus

Maxxus MX-M206-01 instruction manual

Viega Prevista Pure 8512 Instructions for use

Viega

Viega Prevista Pure 8512 Instructions for use

Kohler Centerset K-15240 Homeowner's guide

Kohler

Kohler Centerset K-15240 Homeowner's guide

Viega Prevista Dry 8522.33 Instructions for use

Viega

Viega Prevista Dry 8522.33 Instructions for use

Sanela Lema SLP 59RB Instructions for use

Sanela

Sanela Lema SLP 59RB Instructions for use

Elkay EDF15AC Installation, care & use manual

Elkay

Elkay EDF15AC Installation, care & use manual

Hans Grohe AXOR Citterio E 36702000 Instructions for use/assembly instructions

Hans Grohe

Hans Grohe AXOR Citterio E 36702000 Instructions for use/assembly instructions

baliv WT-140 manual

baliv

baliv WT-140 manual

Kohler Mira Eco Installation & user guide

Kohler

Kohler Mira Eco Installation & user guide

BELLOSTA romina 0308/CC Installation instruction

BELLOSTA

BELLOSTA romina 0308/CC Installation instruction

Bristan PS2 BAS C D2 Installation instructions & user guide

Bristan

Bristan PS2 BAS C D2 Installation instructions & user guide

https://manuals.online logo
https://manuals.online logoBrands
  • About & Mission
  • Contact us
  • Privacy Policy
  • Terms and Conditions

Copyright 2026 Manuals.Online. All Rights Reserved.

12
Page 1of 2
1
n=1 n=2
LINE: DUO + WALL
LINE: DOOR + WALL
LINE
WALL DOOR / DUO
(UK) Installation manual for shower walls LINE
(SE) Installationsmanual för duschväggarna LINE
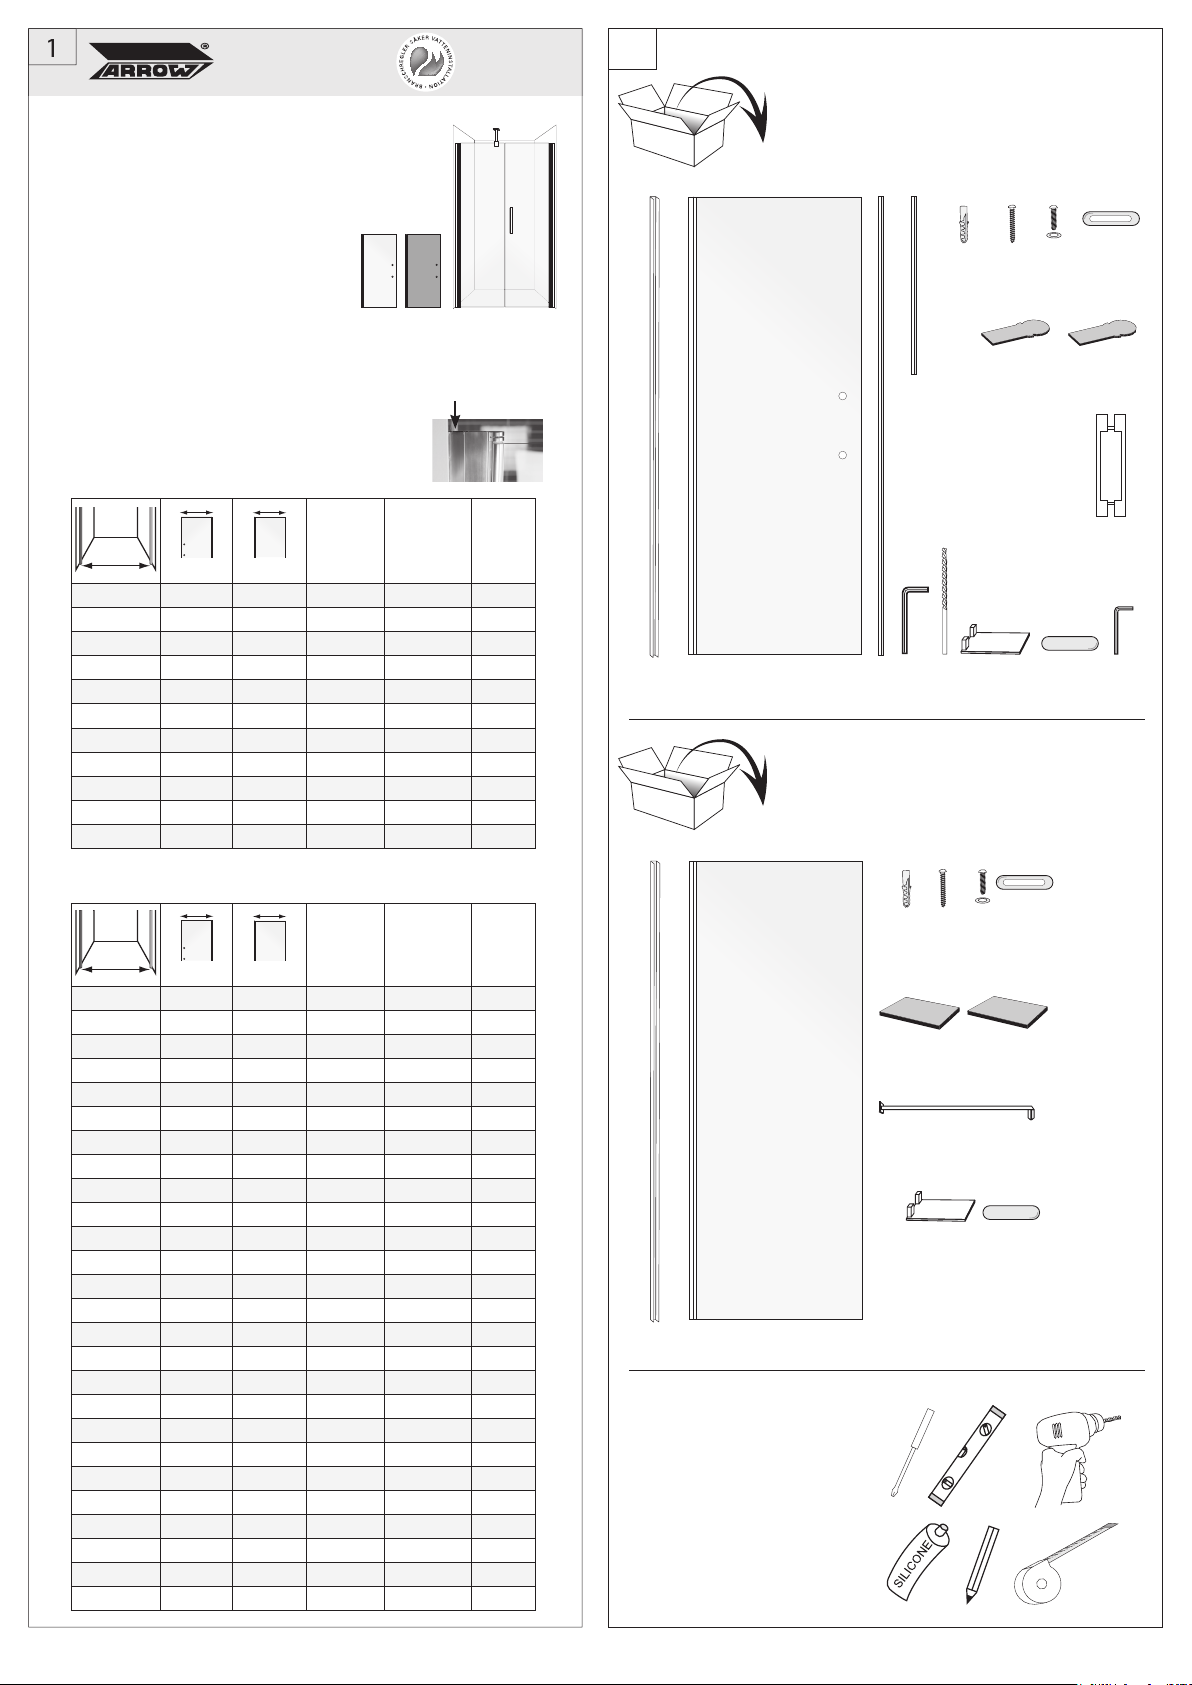
×1
󱂕
󱂖
󱂗 󱂘 󱂙
×4 ×4 ×4
×1
×1×1
5 mm
×1 ×1 ×1
󱂚
2 mm
󱂛󱂜
󱂞
󱂟
󱂠
×1
×1
󱂓
󱂔
×4
×4
󱂡
×1
󱂝
×1
󱂢
󱂗 󱂘 󱂙
×4 ×4 ×4
×1×1
×1
󱂚
󱂥
󱂠
×1×1
5 mm 2 mm
󱂣󱂤
󱂓
󱂢
×4
×4
󱂡
WALL
DOOR / DUO
(UK) You also need (not included)...
(SE) Du behöver även (ingår ej)...
X
DOOR WALL
DOOR
#
WALL
##30908
1350-1400 Door 480 Wall 870 526n-40 522n-90
1440-1490 Door 670 Wall 770 523n-70 522n-80
1440-1490 Door 770 Wall 670 523n-80 522n-70
1540-1590 Door 670 Wall 870 523n-70 522n-90
1540-1590 Door 770 Wall 770 523n-80 522n-80
1540-1590 Door 870 Wall 670 523n-90 522n-70
1570-1620 Door 770 Wall 770 523n-80 522n-80 1×30mm
1600-1650 Door 770 Wall 770 523n-80 522n-80 2×30mm
1640-1690 Door 670 Wall 970 523n-70 522n-100
1640-1690 Door 870 Wall 770 523n-90 522n-80
1640-1690 Door 770 Wall 870 523n-80 522n-90
1640-1690 Door 970 Wall 670 523n-100 522n-70
1670-1720 Door 670 Wall 970 523n-70 522n-100 1×30mm
1700-1750 Door 670 Wall 970 523n-70 522n-100 2×30mm
1740-1790 Door 970 Wall 770 523n-100 522n-80
1740-1790 Door 770 Wall 970 523n-80 522n-100
1740-1790 Door 870 Wall 870 523n-90 522n-90
1770-1820 Door 770 Wall 970 523n-80 522n-100 1×30mm
1800-1850 Door 770 Wall 970 523n-80 522n-100 2×30mm
1840-1890 Door 870 Wall 970 523n-90 522n-100
1840-1890 Door 970 Wall 870 523n-100 522n-90
1870-1920 Door 870 Wall 970 523n-90 522n-100 1×30mm
1900-1950 Door 870 Wall 970 523n-90 522n-100 2×30mm
1940-1990 Door 970 Wall 970 523n-100 522n-100
1970-2020 Door 970 Wall 970 523n-100 522n-100 1×30mm
2000-2050 Door 970 Wall 970 523n-100 522n-100 2×30mm
X
DUO WALL
DUO
#
WALL
##30908
1150-1200 Duo 480 Wall 670 526n-40 522n-70
1180-1230 Duo 480 Wall 670 526n-40 522n-70 1×30mm
1210-1260 Duo 480 Wall 670 526n-40 522n-70 2×30mm
1250-1300 Duo 480 Wall 770 526n-40 522n-80
1280-1330 Duo 480 Wall 770 526n-40 522n-80 1×30mm
1310-1360 Duo 480 Wall 770 526n-40 522n-80 2×30mm
1380-1430 Duo 480 Wall 870 526n-40 522n-90 1×30mm
1410-1450 Duo 480 Wall 870 526n-40 522n-90 2×30mm
1450-1500 Duo 480 Wall 970 526n-40 522n-100
1480-1530 Duo 480 Wall 970 526n-40 522n-100 1×30mm
1510-1560 Duo 480 Wall 970 526n-40 522n-100 2×30mm
1 × #30908 = 30mm
2 × #30908 = 60mm
Denna produkt är anpassad till
Branschregler Säker Vatteninstallation.
Arrow garanterar produktens funktion
om branschreglerna och monterings-
anvisningarna följs.
Arrow Skandinavien AB
Tel: +46 (0)31 330 00 10
www.arrowshower.com
3
5
7
8
6
4
Page 2of 2
󱂓󱂓
X
(UK) The value of X is found on the cover page of this installa-
tion manual. Note that the shower walls are reversible – they
can be mounted either to the left or to the right.
(SE) Måttet för X hittar du på framsidan av denna installations-
manual. Notera att duschväggarna är vändbara, de kan både
höger- och vänsterhängas.
DOOR / DUO
󱂖
≈100mm
≈100mm
(UK) Fixing points must be in solid
construction, such as concrete,
beams, special construction detail
or wet area wall. See image [3].
(SE) Skruvinfästningarna ska göras i
massiv konstruktion såsom betong,
reglar, särskild konstruktionsdetalj
eller i Våtrumsvägg 2012. Se
bild [3].
(UK) Turn the door to the desired angle in relation
to the aluminium wall profile. Then lock the bottom
door hinge by screwing the screw counterclockwise
with the hex key. This can also be done later when
the door is fixed to the wall. Note: The top hinge
should be kept unlocked.
(SE) Vrid dörren till önskad vinkel i relation till
aluminiumväggprofilen. Lås vinkeln genom att
skruva skruven moturs i det nedre gångjärnet med
insexnyckeln. Denna justering kan även göras
senare när dörren sitter fastsatt. Obs: Det övre
gångjärnet ska ej låsas.
5 mm
2 mm
󱂛
󱂜
󱂔
(UK) If floor is slanting.
(SE) Om golvet lutar.
(UK) To adjust the raising/lowering
mechanism of the door: Unlock the
hinges both at the top and bottom by
screwing the screws clockwise with
a hex key.
(SE) För att ställa in dörrens höj-
och sänkmekanism: Lås först upp
gångjärnen både upptill och nedtill
genom att skruva skruven medurs med
en insexnyckel.
(UK) Wet area wall
(SE) Våtrumsvägg 2012
(UK) 1. Only drill through surface and waterproofing
(SE) 1. Borra bara genom yt- och tätskiktet
(UK) 2. Fill the drillhole with sealant
(SE) 2. Fyll hela borrhålet med tätmassa
(UK) 3. Tighten the screw until it attaches to the plywood
(SE) 3. Skruva så att skruven fäster i plywooden
(UK) How to drill/screw
(SE) Hur du bör borra/skruva.
© Säker Vatten AB
(UK) Wall with beams
(SE) Vägg med reglar
© Säker Vatten AB
(UK) Concrete wall
(SE) Betongvägg
(UK) 3. Tighten the screw until it attaches to the plywood
(SE) 3. Skruva så att skruven fäster i plywooden
© Säker Vatten AB
󱂞 󱂞
󱂔
󱂞
󱂔
󱂔
9
10
11
12
13
Page 3of 4
󱂙 󱂚
󱂟
A
A
(UK) If floor is slanting.
(SE) Om golvet lutar.
(UK) Inside of the wall profile.
(SE) Insidan av väggprofilen.
(UK) Inside of the wall profile.
(SE) Insidan av väggprofilen.
(UK) Inside of the wall profile.
(SE) Insidan av väggprofilen.
󱂕
󱂖
󱂢
5 mm
2 mm
󱂣
󱂤
󱂙󱂚
󱂟
A
A
14
A
A
Adjustments
󱂡
WALL
󱂝
16
17
18
19
15
Page 4of 4
B
B
󱂙 󱂚
󱂡
󱂟
24 hr
≈100 mm
≈63-88 mm
24 hr
󱂥
󱂥
(UK) Inside of the wall profile.
(SE) Insidan av väggprofilen.
(UK) Inside of the wall profile.
(SE) Insidan av väggprofilen.
(UK) Outside of wall.
(SE) Utsidan av väggen.
a) b)
(UK) If needed, cut the supporting stay with a metal saw. Note: Only cut the end pointing towards the
wall/ceiling.
(SE) Vid behov, kapa staget till önskad längd med en metallsåg. Obs! Kapa enbart i den ände som är
mot väggen/taket.
󱂟