109 1412 1611 1513 17 18
Settings (continued)
3. To scroll through
Settings options
as shown in the
image, press the
or button until
the symbol you
want is blinking.
10 45 412
4. Press the OK button to select the
blinking symbol.
5. To edit a Setting, press the or button.
YoucanturntheSettingOnorO,or
change the value.
6. To accept the change and return to the
Home screen, press the OK button.
To exit from Settings and return to Home:
1. Press the or button
until the Settings
symbol is blinking.
2. Press the OK button.
If you are in a Setting such as Date and
you need to exit, press the OK button
repeatedly until you get back to the
Home screen.
Set Overall Target Range
If Meal MarkersareO,youcanset
only 1 Target Range. To set Before Meal
and After Meal Target Ranges, see the
Contour next GEN user guide.
1. To highlight the Settings symbol from
the Home screen, press the button.
2. When the Settings symbol is blinking,
press the OK button to enter Settings.
3. To scroll to the Target Range symbol ,
press the or button. When the symbol
is blinking, press the OK button.
4. To set the blinking
Overall Low
Target, press the
or button,
then press the
OK button.
70 -1 80
70
WARNING
Discuss your Target Range settings with
your health care professional.
5. To set the blinking
Overall High
Target, press the
or button,
then press the
OK button.
70 -1 80
180
Turn Meal Markers On
1. To highlight the Settings symbol from
the Home screen, press the button.
2. When the Settings symbol is blinking,
press the OK button to enter Settings.
3. To scroll to the
Meal Marker
symbols, press
the or button.
4. When the Meal
Marker symbols
are blinking, press
the OK button.
10 45 412
5. Press the or button until On is
blinking, then press the OK button.
NOTE: With Meal Markers On, you can set
Before Meal and After Meal Target Ranges
(see the Contour next GEN user guide).
You can also set a Reminder.
Turn Reminder Feature On
When Meal Markers are On, you can set a
Reminder to test your blood glucose after
you mark a reading as Before Meal. If Meal
MarkersareO,seeTurn Meal Markers On
in this guide.
1. To highlight the Settings symbol from
the Home screen, press the button.
2. When the Settings symbol is blinking,
press the OK button to enter Settings.
3. To scroll to the Reminder symbol ,
press the or button.
4. When the Reminder symbol is
blinking, press the OK button.
5. Press the or
button until
On is blinking,
then press the
OK button.
On
Select a Meal Marker During a
Blood Glucose Test
Meal Marker Symbols
Fasting
Before Meal
After Meal
No Mark
NOTE: You must do a blood glucose test
before you can select a Meal Marker. You
cannot select a Meal Marker in Settings.
1. Test your blood glucose. See Fingertip
Testing in this guide.
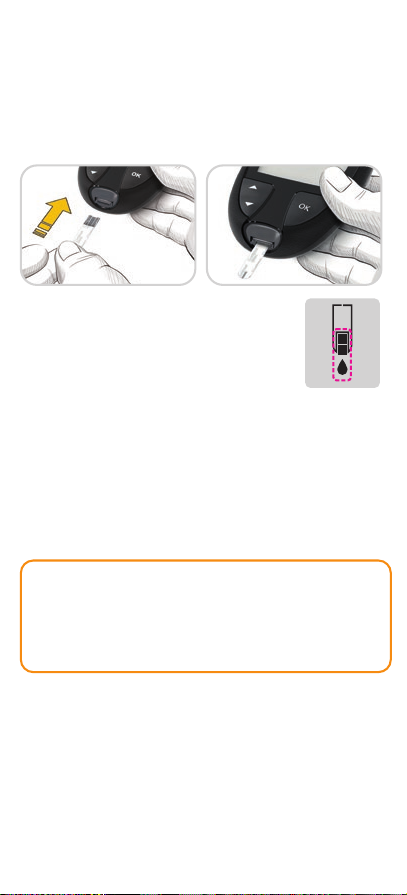
2. Do not remove
the test strip until
you select a Meal
Marker.
A Meal Marker
blinks on the
blood glucose
result screen.
118
3. If the blinking Meal Marker is the one you
want, press the OK button.
ToselectadierentMeal Marker, press
the or button.
4. When the Meal Marker you want is
blinking, press the OK button.
NOTE: If you do not select a Meal Marker
within3minutes,themeterturnsO.Your
blood glucose reading is stored in the
Logbook without a Meal Marker.
Set a Reminder
1. Make sure the Reminder feature is On
in Settings.
2. Mark a blood glucose reading as a Before
Meal reading, then press the OK button.
3. To scroll from
2 hours to
0.5 hours by
half-hour intervals,
press the or
button.
h2
4. To set the Reminder, press the
OK button.
The screen returns
to the Before
Meal reading. The
Reminder symbol
displaystoconrm
the Reminder is set.
10 45 412
i10
LO Results
If your meter does
not display a value
and displays the LO
screen, your blood
glucose reading is
under 20 mg/dL.
Contact your health
care professional
immediately.
10 45 412
l0
HI Results
If your meter does not
display a value and
displays the HI screen,
your blood glucose
reading is over
600 mg/dL. Wash your
hands or the test site
and repeat the test with
a new strip. If the meter
again displays the HI
screen, follow medical
advice immediately.
10 45 412
hi
ToturnthemeterO,removetheteststrip.
Your Meter Display
Symbol What It Means
Your Logbook
Meter Settings
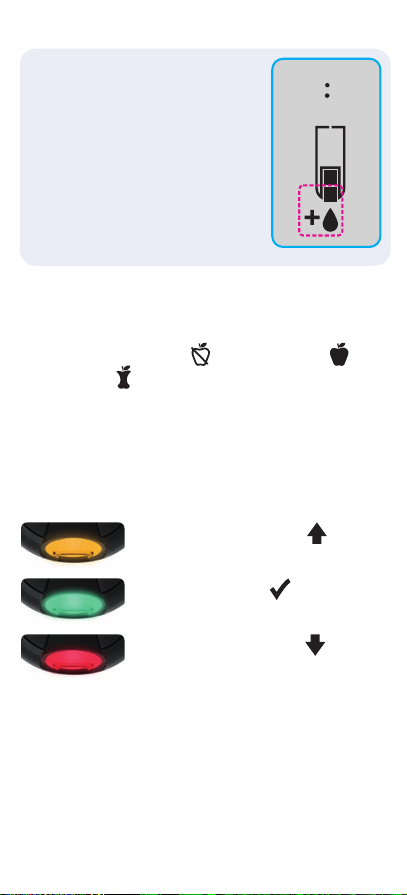
smartLIGHT target range
indicator (Yellow=Above
Target; Green=In Target;
Red=Below Target)
A Target Range or Target
Range setting
Blood glucose test result is
above Target Range
Blood glucose test result is
in Target Range
Blood glucose test result is
below Target Range
Symbol What It Means
Fasting marker; used when
testing after fasting (no
food or drink for 8 hours,
except water or non-caloric
beverages)
Before Meal marker; used
when testing within 1 hour
before a meal
After Meal marker; used
when testing within 2 hours
aftertherstbiteofameal
No Meal marker selected
Reminder feature
Sound feature
Symbol What It Means
Indicates the Bluetooth
wireless setting is On; the
meter can communicate with
a mobile device
Indicates a meter error
Batteries are low and need to
be changed
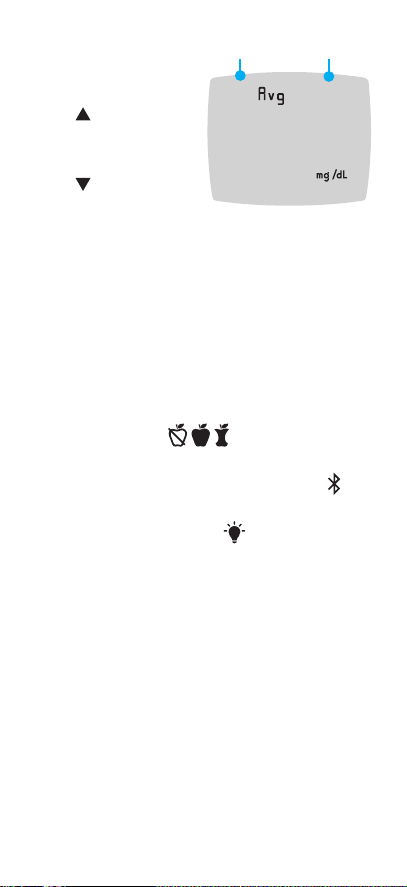
7-, 14-, 30-, and 90-day
averages
Total number of blood
glucose readings used to
calculate averages
Control solution test result
Add more blood to same
test strip
The Contour Diabetes app allows you
to transfer results from your meter to your
compatible smartphone or tablet. See the
meter user guide for instructions and features.