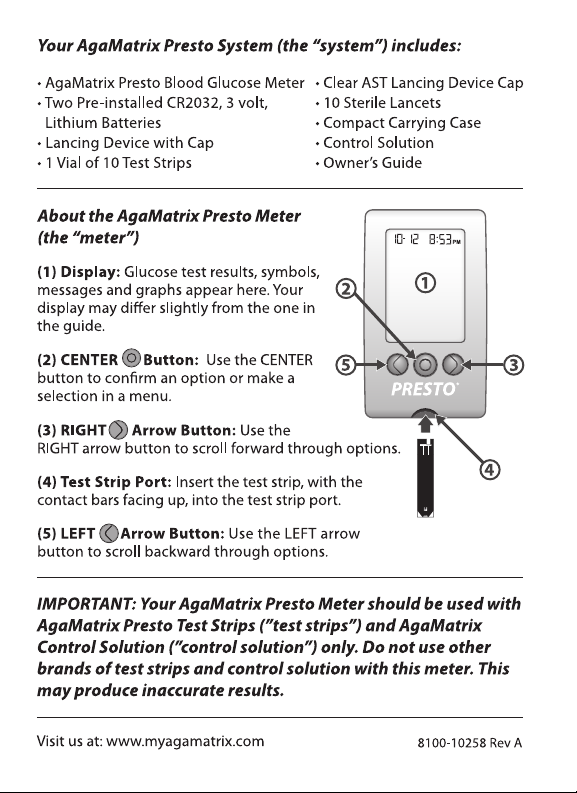
AgaMatrix Presto User manual
Other AgaMatrix Blood Glucose Meter manuals

AgaMatrix
AgaMatrix WaveSense JAZZ User manual

AgaMatrix
AgaMatrix Jazz User manual

AgaMatrix
AgaMatrix Jazz Wireless 2 User manual

AgaMatrix
AgaMatrix JAZZ DoseCoach User manual

AgaMatrix
AgaMatrix WaveSense JAZZ User manual

AgaMatrix
AgaMatrix Presto User manual

AgaMatrix
AgaMatrix WaveSense JAZZ User manual

AgaMatrix
AgaMatrix Liberty User manual

AgaMatrix
AgaMatrix WaveSense JAZZ User manual

AgaMatrix
AgaMatrix WaveSense Keynote User manual

Popular Blood Glucose Meter manuals by other brands


ACONLABS
ACONLABS ON CALL EXPRESS user manual

Higi Technology
Higi Technology iGlucose quick start guide

Bayer HealthCare
Bayer HealthCare CONTOUR NEXT user guide

Accu-Chek
Accu-Chek ADVANTAGE owner's booklet

Sanofi-aventis
Sanofi-aventis BG STAR Brief operating instructions

Abbott
Abbott Precision Xtra user manual