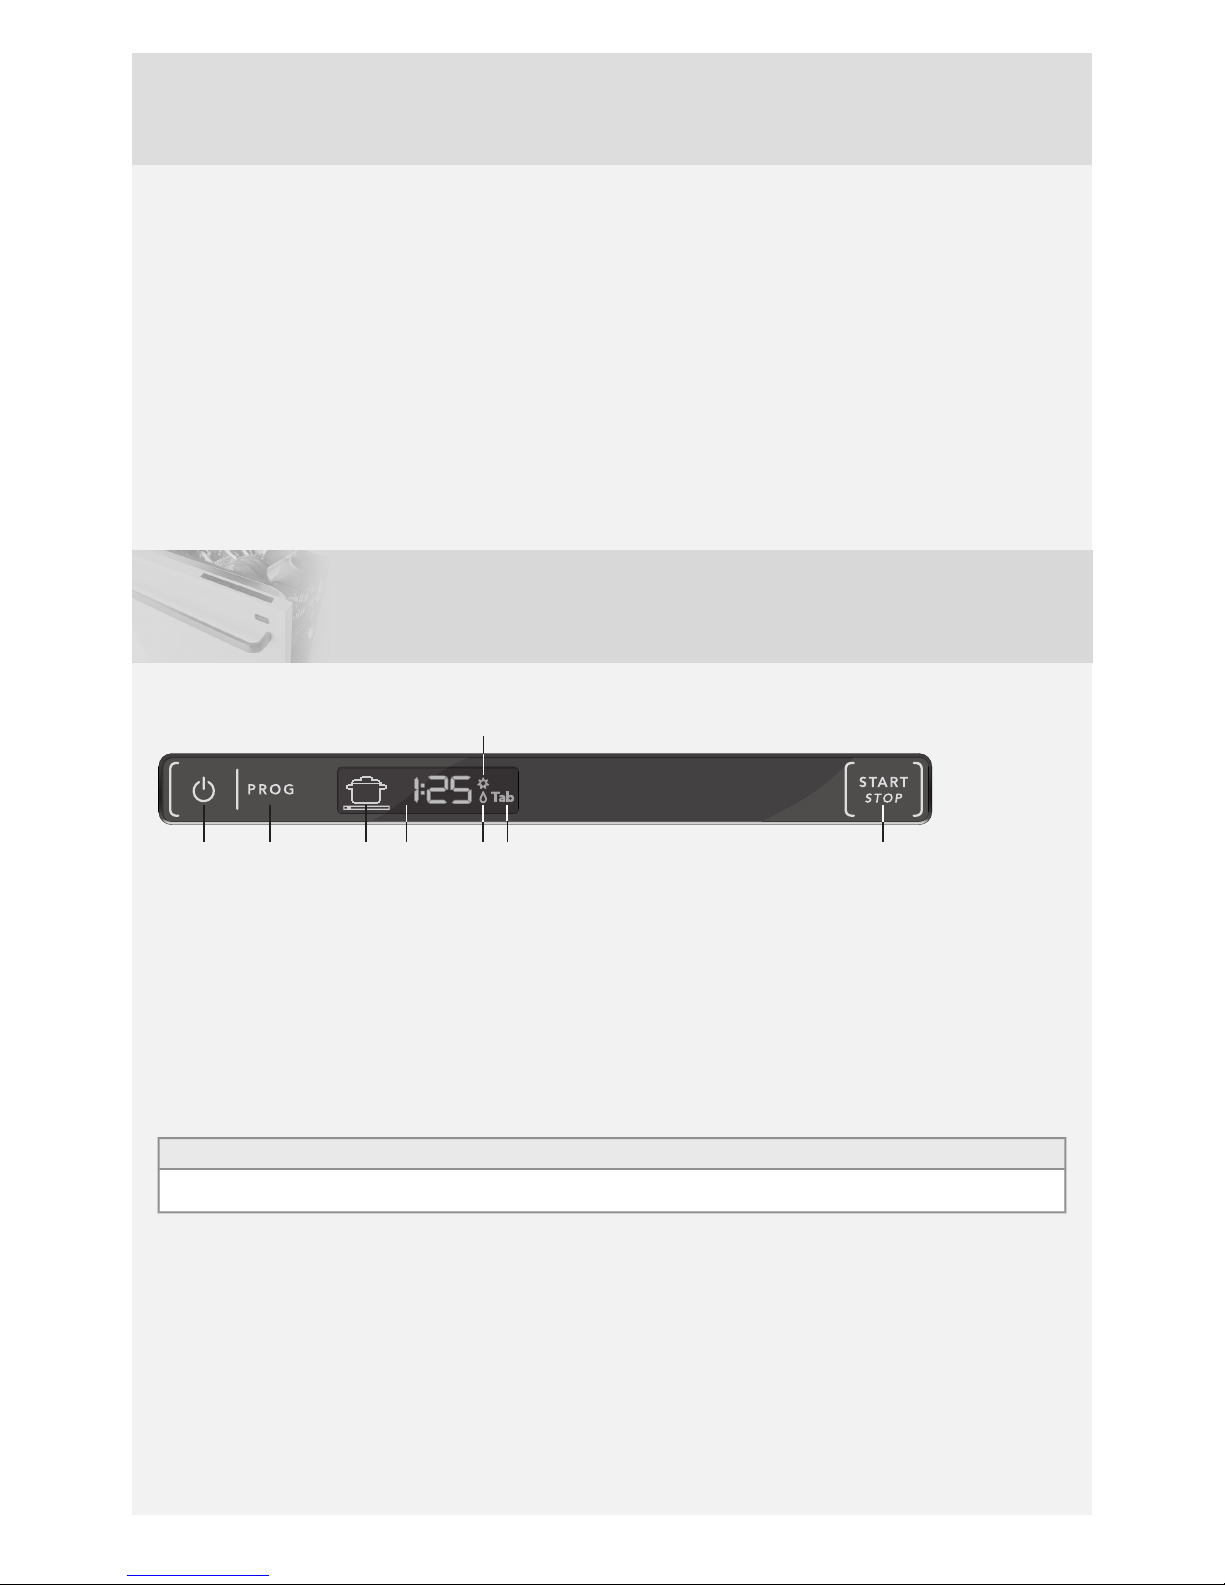
On/Left-on mode
Press and hold the On/Left-on mode button until the display lights
up.
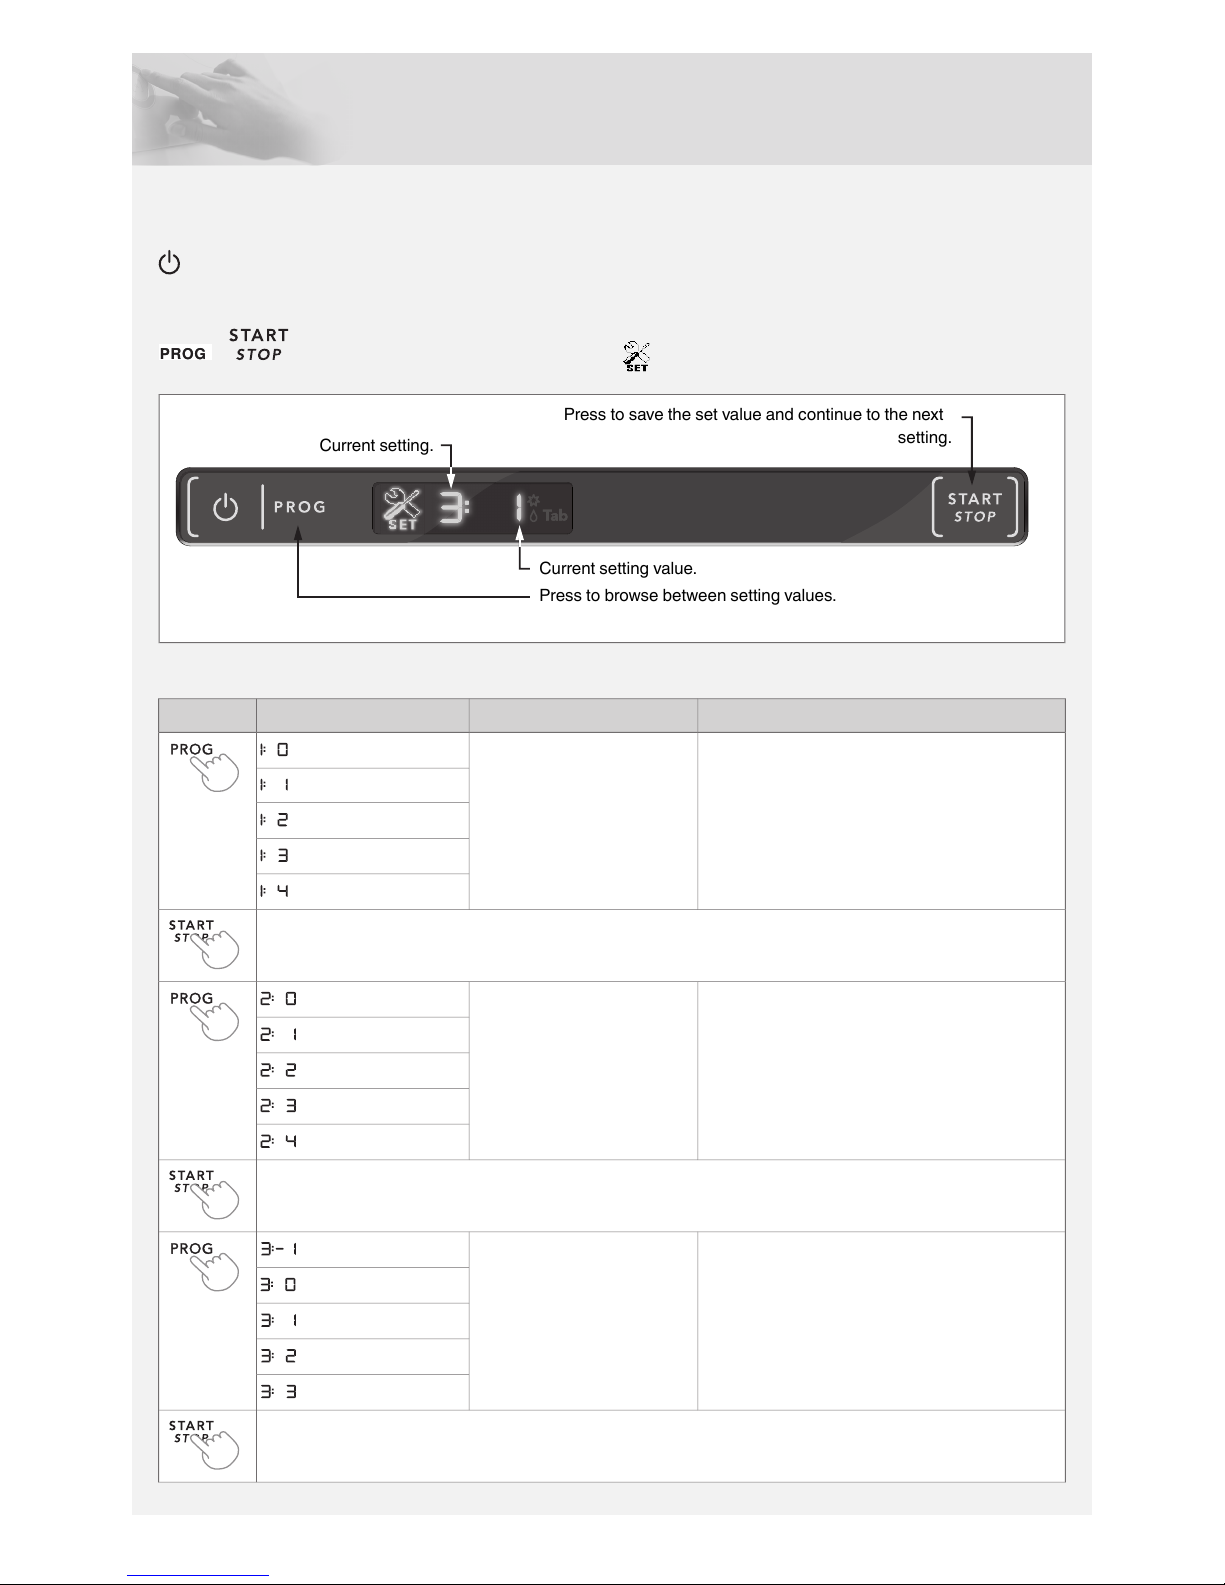
Programme selection
Press the Programme selector one or more times until the desired
programme symbol appears on the display.
Sani A
This programme is ideal to use when hygiene demands are set
high. The temperature of the main wash is 60 °C. The final rinse
is 85 °C for 6 minutes.
Sani B
Choose Sani B if you want a quicker programme that still fulfils
hygiene demands. The temperature of the main wash is 50 °C.
The final rinse is 85 °C for 3 minutes.
Heavy wash
Programme for very dirty dishes, such as pans, casserole dishes
and oven dishes. If these dishes do not completely fill the
dishwasher, you can add plates and the like.
Normal wash
Powerful programme for daily use that can remove dried leftovers,
but is not intended for burnt food, such as on oven dishes. This
programme provides maximum rinse effect, and takes longer
than Daily wash.
Daily wash
This is also an effective programme for daily use for slightly dried
leftovers, but is not intended for burnt food, such as on oven
dishes.
Quick wash
This programme is used for glasses and porcelain that is slightly
dirty, such as coffee cups.
Delicate wash
If the dishes are not very dirty, you can select Delicate wash. This
programme is intended for glasses and porcelain that have just
been used and as such do not require such a powerful
programme.
This programme can be used for fragile dishes. See also the
section Fragile dishes in Chapter Loading the dishwasher.
Eco wash
This programme is intended for cleaning normally dirty dishes
and is the most effective programme in terms of combined energy
and water consumption.
Rinse & Hold
Used to rinse dishes while you wait for the dishwasher to become
fully loaded.
Start the dishwasher
Press and hold Start/Stop until the display shows (the door
open symbol). This indicates that the dishwasher is ready to start.
Close the door properly, otherwise the dishwasher will not start.
The display flashes three times with the remaining time to indicate
that the programme has started.
NOTE!
If the machine does not start within 2 minutes of the last button
press, the display returns to showing the last programme run.
Time remaining
Once you have selected a programme, the display indicates how
long the programme took the last time it was used. Once you
have started the dishwasher, the display indicates how much
programme time remains. The remaining time is updated after
the water for the final rinse has been heated.
This may differ somewhat from time to time depending on the
temperature of the water supply, the amount of dishes, the
ambient temperature and other factors.
While the programme is running, the time counts down and the
remaining programme time is shown on the display. The
remaining time is shown, for example, as 1:15, which means the
programme will run for another 1 hour and 15 minutes.
NOTE!
During the first run of each programme, the remaining time
displayed can be slightly misleading, as the dishwasher is
estimating the time. When you run the programme a second
time, the dishwasher will calculate the remaining time based
on the previous duration of the programme.
Stopping or changing a programme
If you want to change programme after starting the dishwasher,
open the door then press and hold Start/Stop for three seconds.
Add more detergent if the lid of the detergent dispenser has
opened. Then choose a new programme, press Start/Stop and
close the door.
Do you want to add more dishes?
Open the door. The dishwasher stops automatically. Add the
dishes, close the door and the dishwasher continues the
programme.
If the dishwasher is turned off using
the On/Left-on mode button or due
to a power failure
If the dishwashing programme was not finished, the interrupted
programme continues when power is restored.
NOTE!
During drying, the programme is interrupted if the power is cut
or the door is open for more than 2 minutes.
8