Asko TLS752 XXL User manual

Customer Care Center
1-800-898-1879
www.askousa.com
1
Dear Customer,
ank you for choosing this quality product om ASKO.
We hope it will meet all of your expectations and fulll your
needs for many years to come. e Scandinavian design is a
combination of clean lines, everyday functionality and high
quality. ese are the hallmarks for all of our products and
this is why they are so highly appreciated all over the world.
To get the most out of your new ASKO product, we
recommend that you read the installation and operating
instructions before using the machine.
ASKO TLS752 XXL
Operating Instructions
Tumble Dryer
Save these instructions for future reference

2Customer Care Center
1-800-898-1879
www.askousa.com

3
Customer Care Center
1-800-898-1879
www.askousa.com
Caution!
For your safety, the information in this
manual must be followed to minimize
the risk of re or explosion, or to
prevent property damage, personal
injury, or death.
A qualied service person or company
must perform installation and service of this
appliance.
Do not store or use gasoline or other
ammable vapors and liquids in the vicinity
of this or any other appliance.
When discarding or storing your old dryer,
remove the door.
What to do if you smell gas:
Clear the room, building or area of all
occupants.
Do not try to light any appliance.
Do not touch any electrical switch; do not
use any phone in your building.
Immediately call your gas supplier from a
neighbor’s phone. Follow the gas supplier’s
instructions.
If you cannot reach your gas supplier, call
the re department.
For your safety
Do not store or use gasoline or other
ammable vapors and liquids in the vicinity
of this or any other appliance.
Important Safety Instructions For Gas Dryer

4Customer Care Center
1-800-898-1879
www.askousa.com
Important safety instruction for
gas dryer 3
Before using your machine for the
rst time 5
Important safety instructions 6
Grounding instruction 7
Interrupting a program 7
Packing material 7
Recycling 7
California Safe Drinking Water
and Toxic Enforcement Act 8
Child safety 9
Description of the tumble dryer 10
Front panel 11
Advice and tips before you
tumble dry 12
Have the clothes been spun? 12
Laundry labels 12
Do not tumble dry 12
Fire Hazard 12
Explosion Hazard 12
Operating instructions 13
Sensor Dry programs 13
Sensor Dry Preset Program chart 14
Manual Dry programs 14
Steam Breeze 14
Manual Dry Preset Program Settings 15
Programmed setting and options
guide 16
Selecting settings 18
Dry Sensor 18
Temp 18
Dry Time 18
Signal 18
Selecting options 19
Rack Dry 19
More Time / Less Time 19
Damp Signal 20
Anti-crease 20
Delay Start 20
Anti Static 20
Estimated Time Remaining 20
Care and maintenance instruction 21
Cleaning the lint lter 21
Cleaning the door and its opening 2 1
Troubleshooting guide 22
My dryer won’t start 22
My dryer doesn’t heat 22
There are greasy spots on my
clothes 22
My dryer displayed an error code. 22
There is lint on my clothes 23
There is static in my clothes
after drying 23
The drying time is not consistent 23
Water is found around the cabinet
cover when opening the door. 23
It takes too long for my clothes to dry 24
My clothes are wrinkled 24
My clothes are shrinking 24
Steam 25
Installation instructions 26
Positioning the tumble dryer 26
Connecting the exhaust system 29
Alternate exhaust directions 30
Connection of gas supply 31
Electrical plug connections 32
Preparation of the dryer 32
Conrming heat source operation 32
Dryer airow 33
Connecting the inlet water hose
for steam features 33
Additional instructions for installation
of your dryer in a manufactured
or mobile home 34
Gas requirement 35
Gas connections 36
Electrical requirements for dryer 37
Grounding 37
Electrical connections 38
Electrical requirements 39
4-wire connection: Direct wire 40
3-wire connection : Direct wire 41
Option 1: 4-wire connection with a
power supply cord 42
Option 2: 3-Wire connection with a
power supply cord 43
Option 3: Optional 3-wire connection 43
Exhaust requirements 44
User-maintenance instructions 45
Reversing the door 47
Technical information 48
Service and guarantee 49
Quick guide 51
Contents

5
Customer Care Center
1-800-898-1879
www.askousa.com
Do not tumble dry
Certain materials are not suitable for tumble
drying.
Always check and follow the Instructions on
each item’s laundry label.
You can nd more information in the
“Advice and tips before you tumble dry”
chapter.
Note!
When starting the tumble dryer for the rst
time or after a long period without use, you
may hear a slight thumping noise.
This noise is completely normal and will
disappear after a few loads.
Befere Using Your Machine For The First Time

6Customer Care Center
1-800-898-1879
www.askousa.com
Caution!
To reduce the risk of re or
explosion, electric shock, property
damage, personal injury or
death when using this appliance,
please follow all instructions and
information, including those in this
manual and instructions provided
by your gas supplier.
• Read all instructions before using the
appliance.
• Do not run appliance while you are out
of the home.
• Do not wash or dry articles that have
been previously cleaned in, washed in,
soaked in, or spotted with gasoline, dry
cleaning solvents, cooking oils, or other
ammable or explosive substances
because they give off vapors that could
ignite or explode.
• Do not allow children to play on or in the
appliance. Children should be closely
supervised when near the appliance.
• Do not reach into the appliance if the
drum is moving.
• Do not install or store this appliance
where it will be exposed to the weather.
• Do not tamper with controls.
• Do not attempt to repair or replace
any part of the appliance or perform
any servicing unless specically
recommended in this guide.
• Do not use fabric softeners or dryer
sheets unless the manufacturer gives
written assurance that the product will
not damage a tumble dryer.
• Do not use heat to dry items containing:
vinyl, plastic, foam rubber, or similarly
textured rubberlike materials, berglass,
or wool unless the label species
“washable”.
• Clean the lint lter before or after each
load.
• Keep the area around the exhaust
opening and adjacent surrounding areas
free from the accumulation of lint, dust
and dirt.
• The interior of the machine should be
cleaned periodically by an authorized
ASKO service agent.
• Do not place items exposed to cooking
oils in your dryer. Items contaminated
with cooking oils may contribute to a
chemical reaction that could cause a
load to catch re.
• Electrical dryer installation: if required,
must be done by a licensed electrician.
• Do not operate appliance while away
from the home.
• Do not heat dry items that have been dry
cleaned.
• The dryer is made and marked to
facilitate recycling. When it is no
longer useful, contact your local refuse
collection service for advice on how
to properly dispose of the dryer for
purposes of recycling.
• Damaged power cables should only be
replaced by a certied professional.
• Provide sufcient ventilation, otherwise
smoke from open res or fumes from
equipment burning other fuels can be
drawn into the room.
• Place dryer at least 18 inches above the
oor for a garage installation.
Caution!
During the program, the back of the dryer
will get very hot. Let the machine cool
completely before touching the back.
Important Safety Instructions
7
Customer Care Center
1-800-898-1879
www.askousa.com
Caution!
This appliance must be properly grounded.
Grounding instruction
A) Grounding instructions for a
grounded, cord-connected appliance:
In the event of malfunction or breakdown,
grounding will reduce the risk of electric
shock by providing a path of least resistance
for electric current. This appliance (Canadian
market only) is equipped with a cord having
an equipment-grounding conductor and a
grounding plug. The plug must be plugged
into an appropriate outlet that is properly
installed and grounded in accordance with
all local codes and ordinances.
Caution!
Improper connection of the equipment
grounding conductor can result in a risk
of electric shock. Check with a qualied
electrician or service representative or
personnel if you are in doubt as to whether
the appliance is properly grounded. Do not
modify the plug provided with the appliance
(Canadian market only). If it will not t the
outlet, have a proper outlet installed by a
qualied electrician.
B) Grounding instructions for a
permanently connected appliance:
This appliance must be connected to a
grounded metal, permanent wiring system,
or an equipment-grounding terminal or lead
on the appliance.
Note!
This manual does not cover every possible
condition and situation that may occur.
Use common sense and caution when
installing, operating, and maintaining any
appliance.
Interrupting a program
• You can stop a drying program by:
• Opening the door. The drum will then
stop automatically.
• Pressing the main power switch.
• You can also stop a program by pressing
the Stop button.
• When you want to resume tumble
drying, close the door and press the
Start button.
• If a program has been interrupted for 10
minutes the program will be cancelled
and the machine will turn itself off. You
will then have to start the program over
again.
Packing material
Please sort waste materials in accordance
with local guidelines.
Recycling
This machine is manufactured and labeled
for recycling. In order to prevent injuries,
the machine must be made unusable once
the decision has been taken to dispose of it.
Contact your local authority for information
about where and how your machine can be
recycled correctly.
Important Safety Instructions

8Customer Care Center
1-800-898-1879
www.askousa.com
Caution!
California Safe Drinking Water and
Toxic Enforcement Act
This act requires the governor of California
to publish a list of substances known to the
state to cause cancer, birth defects or other
reproductive harm and requires businesses
to warn customers of potential exposure to
such substances.
Gas appliances can cause minor exposure
to four of these substances, namely
benzene, carbon monoxide, formaldehyde
and soot, caused primarily by the incomplete
combustion of natural gas or LP fuels.
Properly adjusted dryers will minimize
combustion. Exposure to these substances
can be minimized further by properly venting
the dryer to the outdoors.
Important Safety Instructions

9
Customer Care Center
1-800-898-1879
www.askousa.com
Caution!
Do not allow children to play with
the Tumble dryer.
The tumble dryer does not start
automatically when the door closes (for
example, if a child closes the door from
inside).
The tumble dryer has a door lock, which
allows the door to be opened from the
inside. The door has a door-switch that
automatically stops the tumble dryer when
the door is opened.
Child Safety

10 Customer Care Center
1-800-898-1879
www.askousa.com
1. Top plate
2. Program panel
3. Front cabinet
4. Lint lter holder
5. Fan (behind the front cabinet)
6. Adjustable legs
7. Glass door
8. Outer door
Accessories
Dryer Rack Pedestal Purchased Separately
Stacking Kit Purchased Separately
2
3
8
4
5
6
1
7
* Design of pedestal is subject to change
without manufactures notice.
2
3
8
4
5
6
1
7
2
3
8
4
5
6
1
7
2
3
8
4
5
6
1
7
Description Of The Tumble Dryer

11
Customer Care Center
1-800-898-1879
www.askousa.com
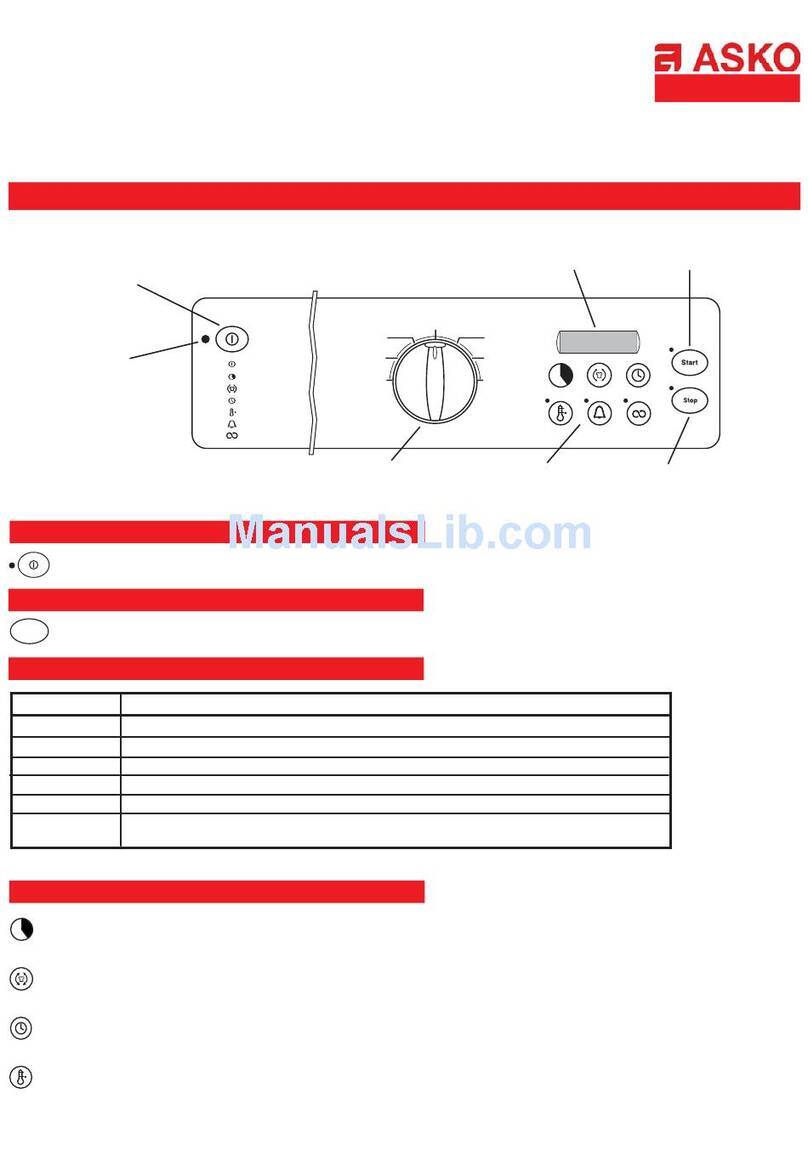
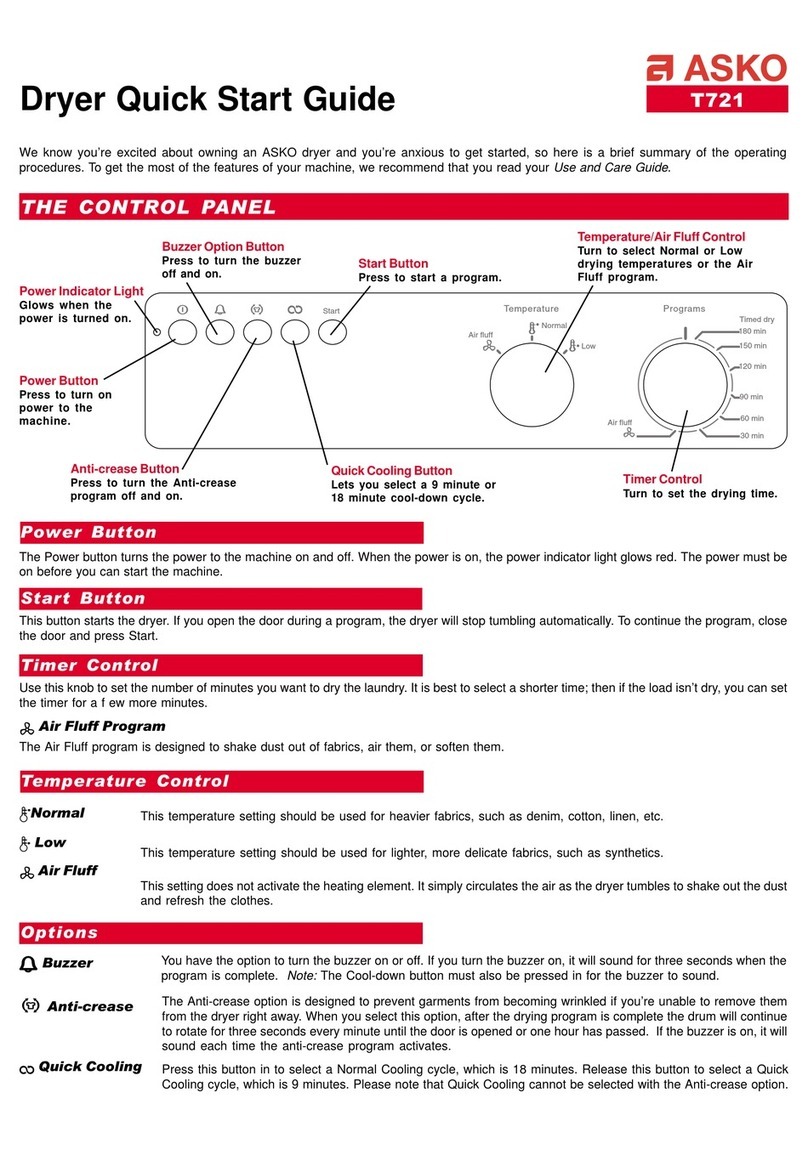
1. Main power button
2. Program selector
3. Display window
4. Setting buttons
5. Option buttons
6. Start/Stop button
1 2 3 6
4 5
Front Panel

12 Customer Care Center
1-800-898-1879
www.askousa.com
Here are some tips that may help you
before you begin tumble drying.
Have the clothes been through a
spin cycle?
Items to be tumble dried should be spun
at 1000 rpm or faster. Higher spin speeds
save both energy and drying time.
Laundry labels
Materials that can be tumble dried
This symbol means that the material
is suitable for tumble drying. Fabrics best
suited to tumble drying are cotton fabrics,
terry cloth, and synthetic bers. Garments
will be softer and lighter when tumbled than
when hung out to dry.
Note!
The tumble dryer does not cause any
signicant wear to fabrics. The lint trapped
in the lint lter consists of dust and ber
residues which gather when the items are
used.
Materials that should not be tumble
dried
This symbol means that the material
is not suitable for tumble drying. Certain
materials may melt or become a re hazard
if exposed to heat and others can lose their
shape or shrink
Do not tumble dry
• Materials labeled “Do not dry near heat”.
• Garments that have been dry-cleaned at
home.
• Plastic foam.
• Fiberglass material.
• Wool must not be tumble dried due to
the risk of piling.
Note!
If the door is opened during the program,
the program will be interrupted and will
return to the start. The clothes may be too
damp or too dry as a result.
Caution!
Fire Hazard
No washer can completely remove oil.
Do not dry anything that has ever had any
type of oil on it (including cooking oils).
Items containing foam, rubber, or plastic
must be air dried. Failure to follow these
instructions can result in death or re.
Explosion Hazard
Keep ammable materials and vapors, such
as gasoline, away from the dryer.
Do not dry anything that has ever had
anything ammable on it (even after
washing). Failure to follow these instructions
can result in death, explosion, or re.
Advice And Tips Before You Tumble Dry

13
Customer Care Center
1-800-898-1879
www.askousa.com
Caution!
To reduce the risk of electric shock or injury,
read the “Important Safety Instructions”
selection before operating this appliance.
Below are step-by-step instructions to help
you achieve the best possible tumble drying
results.
1Sort your fabrics.
You will achieve the most uniform
drying results if the items are made
of the same type of material. Close zippers
and fasten button or belts; sort the items
and adjust load and temperature.
2Turn on the main power button.
3Open the door, load the items, and
close the door.
4Select the program.
Choose a program that is suitable for
the type of load you are drying.
1. Sensor Dry program
Sensor Dry programs allow you to match
the program to the load you are drying.
Each program dries certain fabrics at the
recommended temperature. A sensor
detects the moisture in the load and
automatically adjusts the drying time for
optimal drying.
Bulky items
This program is used for drying heavy
fabrics such as quilts and blankets.
Towels
This program is used for drying heavy
fabrics such as towels, corduroys or work
clothes.
Everyday Wear/Normal
This program is used for drying jeans, shirts,
most cotton items.
Synthetics
This program is used for drying permanent
press, synthetic items.
Gentle
This program is used for drying lingerie,
sheets, blouses and delicate items
Ultra Gentle
This program used for drying workout
clothes, spandex, and no-iron nishes.
Iron Dry
This program is used for the load which
needs to remain just damp enough for
ironing or pressing.
Operating Instructions
14 Customer Care Center
1-800-898-1879
www.askousa.com
Sensor Dry Preset Program chart
2. Manual Dry programs
Use Manual Dry programs to select a
specic amount of drying time and a drying
temperature. When the manual dry program
is selected, the estimated time remaining
display shows the actual time remaining in
your program. You can change the actual
time in the program by pressing More Time
or Less Time.
Quick Dry
This program is used for small loads or
loads that need less drying time.
Steam Breeze
This program is used for removing wrinkles
and odors from items such as clothes
packed in a suitcase or items wrinkled from
being left in the dryer too long “STEAM
BREEZE” brings new life to wrinkles that
have been stored for an extended time.
Note!
Steam Breeze Functions
• Do not use STEAM BREEZE with item
such as wool, blankets, leather jackets,
silk, wet clothes, lingerie, foam products.
• For best results, load articles of similar
size and fabric type. Do not overload,
(Max. 5 Standard dress shirts: 2.2 lb.)
*shirt : 60~70% cotton / 30~40% poly-
blend.
• When the lter/duct is clogged, the
Steam option may not have optimal
results.
• When the Steam function is operating,
the drum will stop to allow steam to stay
in the drum.
Caution!
• Do not open the dryer door during steam
cycles. Steam can cause severe burns.
• Do not touch the steam nozzle in the
drum during or after the STEAM cycle.
Sensor Dry Programs
Load Type Temperature Time
(Minutes)
Bulky Items
(Bulky, Heavy weight) High 55
Towels
(Towel, Heavy weight) High 50
Everyday Wear
(Towel, Denim pants) Mid. High 59
Synthetics
(Prem. press, Synthetic) Medium 47
Gentle
(Lingerie, Blouses) Low 40
Ultra Gentle
(Race, workout clothes,
Spandex)
Low 35
Iron Dry
(Shear, Workout wear,
Lace items)
Ultra Low 25
Operating Instructions

15
Customer Care Center
1-800-898-1879
www.askousa.com
Air Dry
This program is used for items that require
drying without heat such as rubber, plastic
and heat-sensitive fabrics.
When using Air Dry
This chart shows examples of items that
can be dried using Air Dry.
• Check to see that coverings are securely
stitched.
• Shake and uff pillows by hand
periodically during the cycle.
• Dry item completely. Foam rubber
pillows are slow to dry.
Manual Dry Preset Program
settings
Type of Load Time
(Minutes)
Foam rubber-pillows, padded bras,
stuffed toys 20 - 30
Plastic shower curtains, tablecloths 20 - 30
Rubber-backed rugs 40 - 50
Olen, polypropylene, shear nylon 10 - 20
Manual Dry Programs
Load Type Temperature Time
(Minutes)
Quick Dry
(Small loads) High 30
STEAM BREEZE
(Remove wrinkles and odor) Medium 17
Air Dry -59
Operating Instructions
16 Customer Care Center
1-800-898-1879
www.askousa.com
5Programmed setting and options guide
Cycles Dry Sensor Temperature More Time
Less Time
Rack dry
Anti crease
Delay start
Damp signal
Bulky items
Default Normal High
X O O
Select All X
Towels
Default Normal High
X O O
Select All X
Everyday wear
Default Normal Mid. High
X O O
Select All X
Synthetic
Default Normal Medium
X O O
Select All X
Gentle
Default Normal Low
X O O
Select All X
Ultra gentle
Default Normal Low
X O O
Select All X
Iron dry
Default Damp dry Ultra low
X O O
Select X X
Quick dry
Default —High
O O X
Select XUltra low~high
Steam Breeze
Default —Medium
XXX
Select — X
Air dry
Default — —
O O X
Select X X
A. If you select Rack Dry, the previous course and operation will be cancelled.
B. If you select Rack Dry, Anti-crease and Damp signal is not available.
Operating Instructions

17
Customer Care Center
1-800-898-1879
www.askousa.com
6Press the Start button
Remaining drying time
The remaining drying time will be
shown on the display. For example, 1:35
means it will take approximately 1 hour and
35 minutes for the load to dry. If the Anti-
crease option has been selected, the drum
will rotate until you press the Power button
or Start/Stop button.
Note!
• The program will not be affected if you
change the program selector after the
program has started.
• The program will continue from where
the program was interrupted if you close
the door and press the Start button
within 10 minutes. If the program is
interrupted for more than 10 minutes,
the dryer will be shut off. Select new
program settings before restarting the
dryer.
Loading or removing laundry
If you want to load or remove laundry once
you have started the machine, open the
door and the program will stop. Add more
laundry or take out the items you want,
close the door, and press the Start/Stop
button
7Dry program nished
The text “END” appears on the
display when the program has ended.
If the Anti-crease option has been selected,
the drum will periodically rotate until you
press Power button or Start/Stop button.
Note!
Clean the lint lter after each load.
Caution!
If the lint lter becomes clogged, the
machine’s automatic overheating cut-off
may be triggered.
Cleaning the lint lter
1. Open the door and pull the lter straight
up.
2. The lter may need to be cleaned if it
has lime-scale deposits. See the “Care
and maintenance” chapter.
8Once drying has nished
Turn off the power switch. Remove
the clothes and close the door to
prevent small children from climbing into the
machine
Operating Instructions
18 Customer Care Center
1-800-898-1879
www.askousa.com
Dry Sensor
• Use these buttons to set the desired dry
level.
• First, select the Sensor Dry program.
• Select the dry level to adjust how
much you want to dry the load. As the
program runs, the control senses the
dryness of the load and adjusts the time
automatically based on the selected
dryness level.
Note!
Dry Sensor selections can only be made
while using the Sensor Dry programs.
Selecting “more dry” or “less dry”
automatically adjusts the preset times for the
manual dry programs.
Temp
Use the Temp. option to select temperatures
for the Manual Dry programs.
Press Temp. until the desired temperature
setting glows. You can’t change
temperatures on sensor dry programs.
Temperature is set by the program.
Dry Time
Use Dry Time option to change drying time
per your preference.
When choosing Dry Time, the temp is always
set to “High” by default however temperature
can be changed per your desired setting.
You can select the desired operation time
manually by pressing the Dry Time button
between 20 to 60 minutes.
Signal
The Signal controls the volume of the beep
that is made at the end of the cycle.
Press Signal to adjust the sound level or turn
off the signal.
Selecting Settings

19
Customer Care Center
1-800-898-1879
www.askousa.com
Rack Dry
Rack Dry is designed to use for items which
are not suitable for tumble drying such as
sweaters, silk and lingerie. This option may
be used for drying sneakers
Note!
During the Rack Dry cycle
• Time remaining goes to 55 min. and no
default temperature.
• Only LOW and ULTRA LOW temperature
can be selected.
• MORE/LESS time can be used to change
dry time.
• ANTI CREASE and DAMP Signal options
are disabled.
1. Open the door. Hold the dryer rack with
both hands.
2. Put the dryer rack into the drum.
3. Make sure the dry rack is setting evenly
on the front and rear of the drum inside
the machine.
Don’t use the rack for normal tumble drying.
The rack is shipped in place in your dryer.
Please remove the rack before using this
dryer for the rst time.
More Time / Less Time
Press More Time or Less Time until the
desired drying time is set.
Suggested Items for
Rack Drying
Temperature
Setting
Time
(Minutes)
Washable wool items Low 20
Stuffed toys with
cotton or polyester
ber lling
Low/Ultra
Low 20 - 30
Stuffed toys, foam
rubber lled
Air Dry/ Ultra
Low 50 - 30
Foam rubber pillows Air Dry 50
Athletic shoes Air Dry 20
Selecting Options
20 Customer Care Center
1-800-898-1879
www.askousa.com
Note!
Time change is available only with Manual
dry, Dry Time and Rack dry programs.
Damp Signal
When you select the Damp Signal option,
a beep will alert you when your load is just
damp enough for ironing or pressing. This
notice will allow you to remove lightweight
items that are dry or other items that you
may wish to iron.
Anti-crease
This option helps to prevent wrinkles on
your laundry. When you select the Anti-
crease option, the drum will periodically
rotate until you press the Power button,
Start/Stop button, or open the door. You can
use this option in case you cannot remove
laundry immediately after drying is done.
Delay Start
When you select Delay Start, the machine
will start between 1 and 12 hours after you
press the Start/Stop button.
• Press the Delay Start button the same
number of times as the number of hours
by which you want to delay the start
(1~12 hours).
• The number of hours of delay start
you have selected will be shown in the
display.
• Press the Start/Stop button.
• The number of hours to start is
displayed with a countdown one hour at
a time.
• Cancel Delay Start by pressing the
power button and turning the machine
off.
• Turn the power back on, select a
program and press the Start/Stop button.
Note!
Remember to press the Start/Stop button to
start the program.
Anti Static
This option injects steam late in the drying
cycle to reduce the static electricity caused
by dry fabrics rubbing together.
The programs where this option is available
are; Everyday Wear/Normal, Towels, and
Bulky items.
Caution!
• Do not open the dryer door during
Steam cycles. Steam can cause severe
burns.
• Do not touch the steam nozzle in the
drum during or after the STEAM cycle.
Estimated Time Remaining
The display shows the estimated time
remaining. In addition to this, if the dryer has
some problem, it displays error messages.
Refer to Troubleshooting guide.
Selecting Options
This manual suits for next models
1
Table of contents
Other Asko Dryer manuals