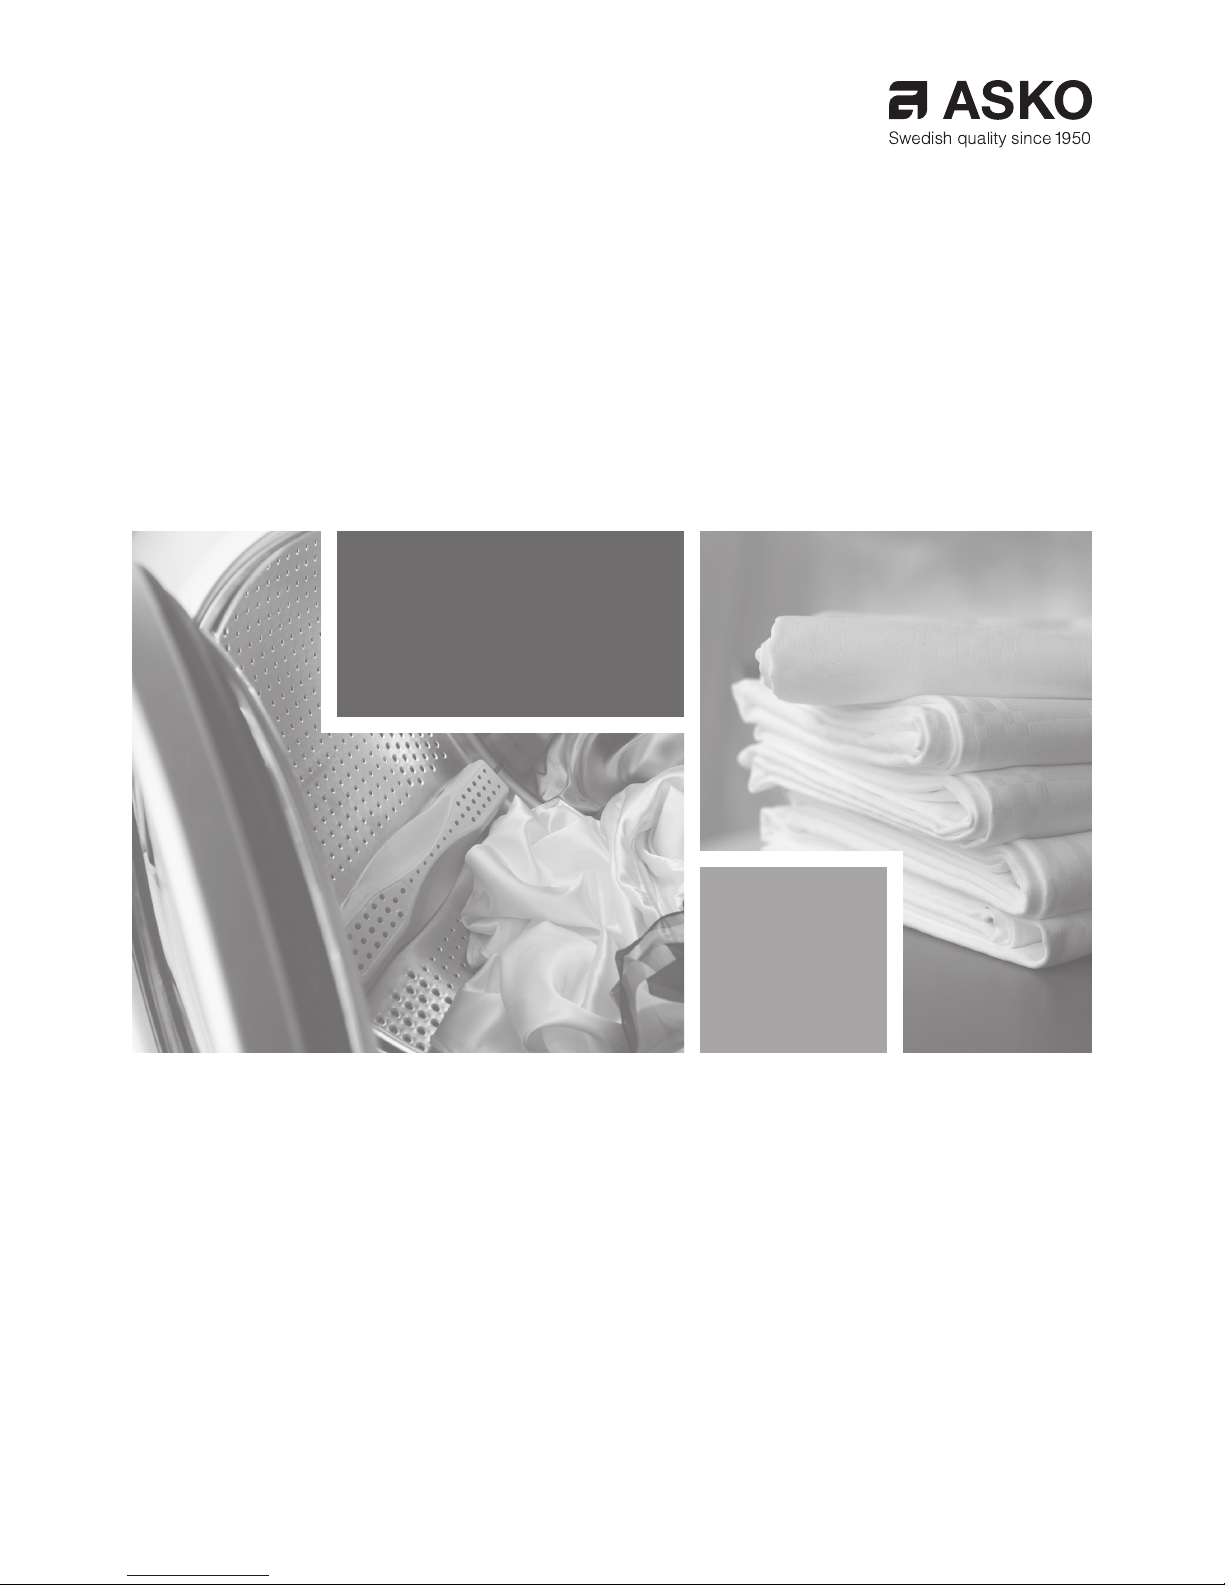
Asko W6444A User manual

Dear Customer,
Thank you for choosing this quality product from ASKO.
We hope it will meet your expectations and full your needs for many years to
come. Scandinavian design combines clean lines, everyday functionality and high
quality. These are key characteristics of all our products and the reason they are
greatly appreciated throughout the world.
To get the most out of your new machine, we recommend that you read the
operating instructions before using the machine. The operating instructions also
include information on how you can help protect the environment.
Operating Instructions
Washing Machine
ASKO W6444A

2
Contents
WARNING: Read the instructions before using the machine.
Before using your machine for
the rst time 4
Transport protection 4
Packing material 4
Washer door 4
Checking water hardness 4
Safety instructions 5
General 5
Installation 5
Overow guard function 5
Transport/Winter storage 5
Recycling 5
Child safety 6
Keep an eye on children! 6
Description of the washing machine 7
Dispenser 8
Advice and tips before washing 9
Sorting your laundry 9
Clothing 9
Laundry labels 9
Coloured cotton 9
Laundry label symbols 9
Advice and tips before washing 10
Wool 10
Rayon bres and synthetic bres 10
Reducing allergic reactions 10
Save time and energy 10
Economy and eciency 10
Detergents 10
Dyeing fabrics 10
Washing 11
Sort your laundry. 11
Turn on the main power switch 11
Open the washer door and load
the washing 11
Add detergent and fabric softener, as
required 11
Program selection 12
Selecting options 15
Close the washer door and press the Start/
Stop button 16
Once the program has nished 16
Settings 17
You can change the following settings 17
Door opening 17
Extra rinses 17
Care and cleaning 18
Cleaning the trap and the drainage 18
pump 18
Cleaning the detergent compartment 18
Cleaning the outside of the machine 18
Cleaning the inside of the machine to avoid
unpleasant smells 18
Rinse holes under the agitator 19
If you have hard water 19
Troubleshooting 20
The washer door will not open 20
The machine will not start 20
After power failure 20
Wet washing still in the machine 20
Error messages 21

3
Contents
Technical information 22
Information for test institute 22
Energy labelling 22
Technical data 24
Transport protection 25
Installation 26
Positioning the washing machine 26
Adjusting the feet 26
Connection to water supply 26
Drainage connection 26
Electrical installation 27
Service 28
Before contacting the service division 28
Quick guide 32

4
Transport protection
Remove any transport protection devices before
installing the machine. See the "Transport
protection" chapter.
Packing material
Sort waste materials in accordance with local
guidelines.
Washer door
• The washer door will not open until the
machine is connected to the electricity
supply.
• To open the door manually, see "The washer
door will not open" in the "Troubleshooting"
chapter.
• The machine cannot be started when the
door is open.
• To open the washer door while a program is
running, see "Close the door and press the
Start/Stop button" in the "Washing" chapter.
Checking water hardness
The quantity of detergent needed depends,
amongst other things, on how hard the water
is. See the detergent pack for details. Phone
your local water company to check the water
hardness in your area.
NOTE!
Each machine is tested before leaving the
factory.
A small amount of water may remain in the drain
pump, though this does not aect quality or
damage the machine.
See Quick guide on the last page
Before using your machine for the rst time

5
General
• Read the operating instructions and keep
them in a safe place.
• Installation should be carried out by qualied
ASKO technicians.
• The machine should only be used for
washing items as described in these
instructions. It is not intended for dry
cleaning.
• Use only detergent intended for machine
washing!
• Use only detergents and softeners for
machine wash. Manufacturer may not
assume responsibility for any damage and
eventual discolouring of gaskets and plastic
components as a consequence of incorrect
use of bleach and/or colouring agents.
• Never use detergents containing solvents,
since there is a danger of creating toxic
gasses which may damage the machine and
result in ignition or explosion.
• Remove any transport protection devices
before using the machine. See the "Transport
protection" chapter.
• Repairs and maintenance must be carried
out by a qualied professional.
• Damaged mains cables must only be
replaced by a qualied electrician.
• The machine is not designed to be used by
persons (even children) that are physically
or mentally handicapped or lack experience
and knowledge. Such persons must receive
instruction in how to use the machine or be
supervised by a person responsible for their
safety.
• Children must be watched to ensure they do
not play with the machine.
• In the enclosed plastic bag you will nd a tool
for opening the washer door in emergencies.
Installation
See the "Installation" chapter.
Overow guard function
If the machine’s water level rises above the
normal level, the overow guard function begins
to pump water out and shuts o the water intake.
If the water level has not dropped within 60
seconds, the program is terminated.
Transport/Winter storage
If the machine is to be transported or stored in
unheated premises where the temperature can
fall below freezing, do as follows:
• Empty the lter and the drainage pump. See
the "Care and cleaning" chapter.
• Shut o the water to the washing machine,
loosen the supply hose to the intake valve
and let the water run out from the valve and
hose.
• After emptying the pump, a small amount of
water may remain in the machine.This does
not aect quality or damage the machine.
Recycling
This machine is manufactured and labelled
for recycling. In order to prevent injuries, the
machine must be made unusable once the
decision has been taken to dispose of it.
Contact your local authority for information
about where and how your machine can be
recycled correctly.
Safety instructions

6
Child safety
Keep an eye on children!
• Always close the door and start the
programme immediately once you have
added detergent.
• The appliance is not intended for use by
young children or inrm persons without
supervision.
• Young children should be supervised
to ensure that they do not play with the
appliance.
• Store detergent and fabric softener out of the
reach of children!
NOTE!
If this appliance is supplied from a cord
extensions set or electrical portable outlet
device, the cord extension ser or electrical
portable outlet device must be positioned so
that it is not subject to splashing or ingress of
moisture.
Activate child safety catch (for
detergent compartment)
On the inside of the detergent compartment is a
child safety catch.
Activated child
safety catch
Inactivated child
safety catch
When the child safety catch is activated you
must press the release button to pull out the
detergent compartment.

7
Description of the washing machine
1. Main power switch
2. Dispenser
3. Program panel
4. Serial number plate (on inside of washer
door)
5. Drainage pump cover
6. Drainage pump (behind cover)
7. Washer door
1
75,6
2 3 4

8
Dispenser
14
5
6
2 3
1. Pre-wash
2. Main wash with liquid detergent.
Use the separator (A).
3. Main wash with powder detergent.
Do not use the separator.
4. Fabric softener
5. Release button
6. Child safety catch
A
B
C

9
Advice and tips before washing
Here are some tips that may help you before
washing.
Sorting your laundry
Sort items according to:
• how soiled they are
• colour
• material
Clothing
1. Do up zips and close Velcro straps so that
they don’t harm fabrics.
2. New coloured items may contain excess dye
and should therefore be washed separately
the rst few times.
3. Turn delicate items inside out. This reduces
the risk of burling and fading.
4. Empty pockets and wash them inside out if
possible.
Laundry labels
Look at the item's laundry label. The table below
shows suitable wash programmes for dierent
materials and wash loads. Using modern
washing machines and detergents, for example
compact detergents, you can usually wash at
lower temperatures. It is a good idea to use trial
and error to nd out what produces the best
results.
Laundry label symbols
Examples of washing instructions and recommended programs. Always follow the washing instructions for each garment.
Laundry labels Material Program
Cotton, linen, white and light-coloured items. Everyday wash 60 °C to 95 °C
Cotton, linen, cotton/polyester. Light and dark-coloured garments. Quick 60 °C
Acrylic, viscose, modal, acetate, polyester, polyamide and
elastane. Light and dark-coloured garments.
Easy Care 40 °C
or
Wool, silk and other very delicate garments Wool/hand wash 30 °C to 40 °C
Coloured cotton
Coloured cotton items with the washing
instruction 60 °C should be washed at 60 °C for
the rst time in order to remove any excess dye.
If you do not do so, there is a risk that the colour
will run. Use detergent without bleach in order to
preserve the colour of the fabric.
Unbleached linen
Unbleached linen fabrics should be washed at
60 °C, using detergent containing no bleach
or optical whiteners. Heavily-soiled linen can
occasionally be washed at higher temperatures,
but not too often because the heat can destroy
the linen’s shine and strength.

10
Wool
These fabrics are labelled either machine wash
or hand wash.The Wool/hand wash program is
at least as gentle as washing by hand.
Wool is especially sensitive to processes such
as washing.
If you do not wish to spin dry, you can squeeze
out the water using terry towels. In this case
select No spin.
To nd out how to choose this setting, see
the¨"Washing" chapter. However, most garments
can withstand a short spin. Choose a short spin
by selecting a spin speed of 800 rpm or less.
Rayon bres and synthetic bres
Materials made of rayon bres, such as viscose,
and some synthetic bres are very delicate and
require much space so as not to crease. Only
half ll the drum when washing and choose a
spin speed of 800 rpm or lower.
NOTE!
Viscose and acetates are fragile when wet.
Reducing allergic reactions
The washing machine has a Super Rinse option.
Use this for people with sensitive skin, such as
those with allergies and small children.
Save time and energy
Use the Everyday wash program to save time
and energy. This program has a shorter main
wash than Normal, but is often sucient for
lightly soiled washing.
Economy and eciency
You can save energy by not using higher
temperature programs than necessary.
• Select Quick if you just need to freshen up
shirts or exercise clothes, for example. This
will save both water and energy.
• If you select a fast spin speed, this reduces
energy consumption when drying in a tumble
dryer or drying cabinet.
Advice and tips before washing
• Always wash with a full load when using the
Heavy, Everyday wash and Normal programs.
• Avoid pre-washing. Modern machines and
detergents clean eectively without pre-
washing. Pre-washing is only necessary for
heavily soiled washing.
Detergents
Eco-labelled detergents are less harmful to the
environment.
Detergent overdosing does not give better
washing results; it merely causes a greater
impact on the environment; can also hinder the
wash performance.
Try to use less detergent, and increase only if
you are not satised with the results.
Dyeing fabrics
If you want to dye fabrics in the machine, select
the Everyday wash program with the Super
Rinse option. Select temperature according to
the dye manufacturer’s recommendations.
Choose a low spin speed if the fabric to be dyed
is a blended material such as polyester/cotton.
NOTE!
Add the dye directly to the washing drum – not
to
the detergent compartment. After dyeing, you
should run the machine empty using the same
program. Use the normal amount of detergent.
NOTE!
Due to environmental concerns, we discourage
the use of strong chemicals.
When using agents for bleaching or stain
removal, there is a risk of rust (corrosion) and
discolouration of the machine.

11
Washing
1Sort your laundry.
See the "Advice and tips before washing"
chapter.
Place underwired bras in a laundry net.
Empty pockets. Coins, nails and the like can
cause damage to the machine and fabrics. See
the "Advice and Tips" section before washing.
2Turn on the main power
switch
NOTE!
Power on
Press the on/o button for min. 1 sec and max.
5 sec.
Power o
Press the on/o button for min. 5 sec.
If the ON/OFF command is not correctly
accepted by the machine, wait min. 8 sec before
any further press.
3Open the washer door and
load the washing
If the washer door is closed, press the
Door opening button (key symbol).The door
opens once all water has drained from the
machine. Load the washing. The wash program
chart shows how much washing can be washed
with each program.
4Add detergent and fabric
softener, as required
The detergent packaging will have
recommendations for how much detergent you
should use.The machine holds 7 kg of washing.
If you only have a small amount of laundry in
the machine, you can reduce the amount of
detergent used.
Powder detergent
Pour the powder into the compartment for the
main wash, and pre-wash as well if desired.
Liquid detergent
When using a liquid detergent, observe the
detergent manufacturer's recommendations.
We recommend using a laundry ball with thick
detergents. In the main detergent compartment,
use the section wall (A) – see gure in the
section Dispenser. Add the detergent into the
front compartment of the detergent dispenser.
Wash ball or net
If you use a wash ball or net, place it directly
in the drum and select a program without pre-
wash.
NOTE!
Detergent overdosing does not give better
washing results; it merely causes a greater
impact on the environment; can also hinder the
wash performance.
Try using less detergent, and increase only if
you are not satised with the results.
Fabric softener
Pour the fabric softener into the
compartment with the symbol. Follow
the recommendations on the fabric softener
packaging.
NOTE!
Do not ll above the compartment’s maximum
ll level. Otherwise fabric softener will run in too
early, and will impair washing results.

12
5Program selection
You select a programme by turning
the programme selector. The selected
programme is shown in the display. Now use
the option buttons to select any options. See
chapter Selecting Options.
Auto
Heavy
Normal
Quick Easy Care
Synthetics
Wool/hand wash
Rinse
Spin & Drain
Everyday wash
1. Auto
This program automatically adjusts the length of
the main wash and the number of rinses to the
amount of laundry loaded in the machine.
2. Heavy
Program for heavily soiled laundry, with dirt
that needs to be fully dissolved before the
main wash. A pre-wash is used to do this.You
can select the temperature freely, so follow the
washing instructions for each garment. The
highest temperature, 95°C, is suitable for very
heavily soiled laundry. The spin speed can
be selected freely. The machine adapts the
program time and water consumption to the
load size.
3. Normal
Program for normal to heavily soiled laundry,
whites and colours.You can select the
temperature freely, so follow the washing
instructions for each garment. 60°C is a good
temperature for heavily soiled cotton garments,
as well as for garments worn next to the
skin. Select 40°C if the laundry is less soiled.
The spin speed can be selected freely. The
machine adapts the program time and water
consumption to the load size.
Washing
4. Everyday wash
A standard program for lightly to moderately
soiled laundry. The temperature can be selected
freely, so follow the washing instructions for
each garment. Garments worn next to the skin
ought to be washed at 60°C. Very lightly soiled
laundry often comes clean already at 40°C.
The spin speed can be selected freely. The
machine adapts the program time and water
consumption to the load size.
5. Quick
Fast program for laundry that just needs
freshening up. The program can be run at any
temperature, so follow the washing instructions
for each garment.
The lower the selected temperature, the shorter
the program time. Garments worn next to the
skin ought to be washed at 60°C. The spin
speed can be selected freely.
6. Easy Care
Program for synthetic, mixed bre and easy
care cotton. The program has a high water
level and as such is also suitable for cushions,
quilted jackets and the like. Read the washing
instructions carefully and remember, for
example, that fabric softener must not be
used with the membranes found in some
outer garments. A washing temperature up to
60°C and a spin speed up to 1200 rpm can be
selected.
7. Synthetics
Program for delicate garments made of
synthetic bre, mixed bre, rayon and easy care
cotton. The maximum temperature is 60°C,
but follow the washing instructions for each
garment. Many synthetics will come clean at
40°C. Garments worn next to the skin ought to
be washed at 60°C. The maximum spin speed is
800 rpm.

13
8. Wool/hand wash
A gentle laundry program for wool, silk and
garments that should be washed by hand. The
highest temperature is 30 °C. This program has
a short spin. The maximum spin speed is 800
rpm.
9. Rinse
This program performs one cold rinse cycle +
spin. Suitable for laundry that just needs to be
dampened and for cleaning cloths and mops.
10. Spin & Drain
Used to just spin the wash. If you only want to
drain the machine of water, select the symbol
(no spin).
Washing

14
Washing
Programme chart
Program
Pre-
wash Temp. °C
Number
of rinses
Spin Speed
rpm
Max load
(kg)
Water
consumption
(approx. liter)
Energy
consumption
(approx. kWh)
Programme time
(approx. hrs and
min.)
1. Auto
2. Heavy X 95 5 1400 7 85 2.2 2:45
X 60 5 1400 7 75 1.2 2:40
3. Normal 60 2 1400 7 60 1.13 3:21
40 2 1400 7 60 0.47 3:06
4. Everyday wash 60 3 1400 7 60 1.1 1:40
5. Quick 40 2 1400 3.5 25 0.4 0:45
6. Easy Care 40 2 1200 3.5 60 0.6 1:40
7. Synthetics 40 3 800 2.5 30 0.4 1:20
8. Wool/hand wash 30 3 800 2.5 70 0.5 0:50
9. Rinse 1 1400 3.5 15 0.1 0:18
10. Spin & Drain 1400 3.5 0.1 0:15
Consumption data may vary from the given values depending on variations in water pressure, water hardness, water inlet temperature, room
temperature, uctuations in the electricity, type and volume of the laundry and any extra options.

15
Washing
6
Selecting options
You can select options to adjust the wash
program to suit your own specic
requirements. The available options depend on the
selected program. If the option is available for the
selected program, the symbols lights up when you
press the button.
The machine will remember the options you select
for each program (with one exception – Delayed
Start).You can still change the selected options the
next time you select the program in question.
Temperature
• Select the temperature by pressing the button
until the LED by the desired temperature lights.
• You can select temperatures between 20°C and
95°C. For Wool/hand wash you cannot choose
a temperature higher than 40°C. For Synthetics
or Easy Care the maximum temperature is
60°C.
Spin
• Select the spin speed by pressing the button
until the LED by the desired speed lights.
• You can select speeds between 400 and
1400 rpm, No spin or No drain.The maximum
spin speed varies according to the program
selected, so check the LEDs around the button.
• , means that the program does not include a
spin cycle and ends by draining.
• No drain means that the program does not
include a spin cycle and ends with the water
from the nal rinse still in the machine. The
washing will remain covered by the water from
the nal rinse, stopping it from getting creased.
If you have selected "No drain", you must select
the Spin & Drain program and the symbol
(no spin) once the program has ended to drain
the water from the machine before you open the
washer door.
Super rinse
Use the Super Rinse option if you want to
increase the number of rinses. The maximum
number of rinses is seven, and the number of
rinses varies depending on the selected program.
Recommended for persons with extremely
sensitive skin and/or in areas with very soft water.
This option cannot be selected with Rinse or Spin
& Drain.
• Select Super Rinse by pressing the button
under the symbol.
• An LED next to the button lights when this
option is activated.
Delayed start
When you select Delayed Start, the machine will
start 1–24 hours after you press the Start/Stop
button.
• Press the button by the symbol to activate
Delayed Start.
• By pressing the button again you can delay
the start in whole hours up to a maximum of 24
hours.
• Press Start/Stop, and the machine counts down
1 hour at a time and starts after the selected
delay.
If you change your mind and want to cancel
Delayed Start, you must press and hold Start/Stop
for three seconds.
NOTE!
Remember to press the Start button to start the
program..
NOTE!
Make sure the detergent compartment is
completely dry before you add detergent,
otherwise there is a risk that the detergent will
clump before the machine starts.
30°
40°
50°
60°
95°
800
1400
1000
400
Cold

16
Washing
7Close the washer door and
press the Start/Stop button
Time remaining
When the program starts an estimated program
time, in hours and minutes, is displayed. The
remaining time is updated three times during
the program, based on the actual load and
the incoming water temperature. The rst
update takes place after about 15 minutes. The
remaining time is last updated just before the
nal rinse.
To add or remove washing after the
program starts
If you want to add or remove items after the
program has started, you can stop the program
by pressing and holding the Door opening
button (key symbol) for three seconds. The
program time ashes on the display. When you
restart the machine, add any extra detergent
needed and close the washer door. The
machine continues automatically from the point
where the program was interrupted.
Stopping or changing a programme
You can stop a program by pressing the Start/
Stop button for three seconds. To restart the
machine, select a new program, add any extra
detergent needed and press the Start/Stop
button.
NOTE!
Do not open the detergent compartment while
the machine is running.
8Once the program has
nished
The text "End" is shown on the display
for 2 minutes. The machine then turns o.
The washer door opens automatically once the
program has nished. If you want to deactivate
the automatic door opening function, see the
"Selecting settings" section.
• Remove the load.
If you have small children or pets at home, close
the washer door once you have removed the
laundry.
NOTE!
Upon completion of the washing cycle, close the
water faucet and unplug the mains cord.

17
Settings
You can change the following
settings
Automatic door opening.
Extra rinses.
Door opening
If you choose Automatic door opening the
Washer door will open once the program has
nished.
1. Turn o the machine using the main power
switch.
2. Press and hold the Super rinse button and
then switch on the main power switch.
3. “AdO” is shown on the display if Automatic
door opening is activated or “AdF” if the
option has not been activated.
4. Press the Super Rinse button to change the
setting.
5. Press the Door opening button to save the
setting.
Extra rinses
Upon delivery, your washing machine is set to
use three rinses in the Normal and Everyday
wash programs. If you want to increase the
number of rinses to ve for these programs, do
as follows:
1. Turn o the machine using the main power
switch.
2. Press and hold the Delayed start button and
then switch on the main power switch.
3. The display shows "R O" if extra rinses
(5 rinses) is activated or "R F" if it is not
activated (3 rinses).
4. Turn the program selector to change the
setting.
5. Press the Door opening button to save the
setting.

18
Cleaning the trap and the drainage
pump
The washing machine has a trap where smaller
objects such as coins and hairpins can collect.
To clean the trap and the drainage pump, do as
follows:
1. Make sure the machine is empty of water and
switched o at the mains.
2. Open the door.
3. Unhook the drainage hose from the
connector inside the door and drain the water
into a suitable container, such as a shallow
bowl.
4. Turn the cover anti-clockwise to open the
pump. Remove the cover.
5. Remove any items and so forth from the
pump housing and the cover. Also check that
the pump blades right at the back rotate.
6. Screw on the cover, replace the drainage
hose on the hatch pin and close the hatch.
Cleaning the detergent
compartment
Pull out the detergent compartment using the
release button.
Rinse the compartment and scrub it clean. The
cover in the fabric softener compartment can be
removed.
NOTE!
Do not run the detergent compartment through
a dishwasher!
Cleaning the outside of the
machine
Clean the outside of the machine and the
program panel with a mild cleaner. Do not
use any solvents, as these can damage the
machine.
NOTE!
Maskinen må ikke skylles med en vandstråle!
Cleaning the inside of the machine
to avoid unpleasant smells
Modern detergents often allow clothes to be
washed at low temperatures.This means that
small deposits can build up in the machine.
These, in turn, may lead to unpleasant smells
developing.
To avoid this, we recommend running a 95°C
wash programme once a month. When you do
this, use a small quantity of detergent. It is not
necessary to put any washing in the machine.
Care and cleaning

19
Care and cleaning
Rinse holes under the agitator
If you suspect that objects such as nails or
paper clips may have fallen into the wash
drum, you should check the space under the
agitator. Such objects can rust and cause spots
on clothing. Nails and other sharp objects can
cause holes in fabrics.
Do as follows:
1. Insert a screwdriver or the like into the hole
on the agitator as illustrated and carefully pry
to the left.
2. Use your other hand to grasp the agitator and
pull it towards you.
3. Lift the agitator.
4. Remove any objects.
5. Place the agitator in the mounting hole with
the F-mark towards you. Ensure that all the
agitator fasteners are in their holes in the
drum. Push it in until it catches.
If you have hard water
If you live in an area with hard water (high
limescale content), a greyish-white coating may
form on the wash drum. To remove this coating,
pour approximately 20 gram of citric acid into
the wash drum and run any 95°C programme.
Repeat if necessary.

20
Troubleshooting
The washer door will not open
1. Check that the main power switch is on.
2. Is there power? Check your home’s fuses
(circuit breakers). The washer door cannot be
opened with the Door opening button (with
the key symbol) if power is o.
If nothing else works, the washer
door can be opened as follows
WARNING!
The door may only be opened
manually if the electric power is
cut and the machine has been
drained of water.
A Select the Spin & Drain program and the
option with the symbol (no spin) to drain
the water from the machine. If this does not
work the machine must be drained manually.
See "Cleaning the trap and the drainage
pump" in the "Care and cleaning" chapter.
B Ensure that the main power switch is turned
o and that the plug has been removed from
the wall socket.
C Take the emergency door opening key (C)
(see gure in the section Dispenser) and
insert it into the slot on the right-hand side
of the washing machine door latch.The key
is attached on the back wall of the detergent
dispenser. Remove the detergent dispenser
from the washing machine and take the door
opening key.
D Push the tool upwards to open the washer
door.
After use, store the emergency door opening
key (C) in the dedicated compartment (B) (see
image in the section Dispenser).
If in the future the washer door does not open
when the wash program has nished, call the
service division.
The machine will not start
1. Is the washer door properly closed? Push it
rmly.
2. Is there power? Check the fuses and residual
current devices (circuit breakers) in the
building.
3. Check that you have not selected Delayed
Start. To cancel Delayed Start, press the
Start/Stop button for three seconds.
After power failure
Press the main power switch to resume the
current program.
Wet washing still in the machine
A small load can under certain circumstances
cause imbalance (see " Imbalance"). Rearrange
the load and start the spin program, or load
more washing and restart the washing program.
Table of contents
Other Asko Washer manuals

Asko
Asko W8844XL W User manual

Asko
Asko W6863SS User manual

Asko
Asko W4086C W Series User manual

Asko
Asko WT63 Series User manual

Asko
Asko W2096R.W User manual

Asko
Asko WL6511XXL User manual

Asko
Asko W6021 User manual

Asko
Asko PROFESSIONAL WMC84P User manual

Asko
Asko W4114C.W.U User manual

Asko
Asko WM25 User manual

Asko
Asko W6903 User manual

Asko
Asko WL6532 XXL User manual

Asko
Asko W4104C W AU Series User manual

Asko
Asko WM25 User manual

Asko
Asko WM85 C-V Series User manual

Asko
Asko WM75.1 User manual

Asko
Asko W20848/1 User manual

Asko
Asko W6903 User manual

Asko
Asko W6441 User manual

Asko
Asko PROFESSIONAL WMC743VS User manual