Asko W6OO-SERIES User manual

1
W6OOW6OO
W6OOW6OO
W6OO--
--
-SERIES WSERIES W
SERIES WSERIES W
SERIES WASHERSASHERS
ASHERSASHERS
ASHERS
SERVICE MANUALSERVICE MANUAL
SERVICE MANUAL
ASKO
CONTENTSCONTENTS
CONTENTSCONTENTS
CONTENTS
Introduction and Safety RegulationsIntroduction and Safety Regulations
Introduction and Safety Regulations................
................
........ 22
22
2
InstallationInstallation
Installation..................................................................................................................
..................................................................................................................
......................................................... 33
33
3
Motor OperationsMotor Operations
Motor Operations..........................................................................................
..........................................................................................
............................................. 77
77
7
WW
WW
Washer Featuresasher Features
asher Featuresasher Features
asher Features ..............................................................................................
..............................................................................................
............................................... 99
99
9
FF
FF
Fault Tault T
ault Tault T
ault Tracingracing
racingracing
racing..........................................................................................................
..........................................................................................................
.....................................................1010
1010
10
Common Laundry ProblemsCommon Laundry Problems
Common Laundry Problems..................................................
..................................................
.........................1212
1212
12
Components and Measurement VComponents and Measurement V
Components and Measurement Valuesalues
aluesalues
alues....
....
..1313
1313
13
TT
TT
Test Pest P
est Pest P
est Programs and Frograms and F
rograms and Frograms and F
rograms and Fault Indicationsault Indications
ault Indicationsault Indications
ault Indications............
............
......1515
1515
15
Consumption VConsumption V
Consumption Valuesalues
aluesalues
alues..............................................................................
..............................................................................
.......................................1717
1717
17
TT
TT
Toolsools
oolsools
ools..........................................................................................................................................
..........................................................................................................................................
.....................................................................1818
1818
18
Service InformationService Information
Service Information..............................................................................
..............................................................................
.......................................2020
2020
20
IndexIndex
IndexIndex
Index........................................................................................................................................
........................................................................................................................................
....................................................................6464
6464
64

2
INTRODUCTIONINTRODUCTION
INTRODUCTION
You have in your hand the ASKO Service Manual
for our new generation of washing machines that
are friendly to the environment in both their
manufactureandtheiruse.
Thisnewgenerationofwashingmachineshasbeen
designedforeaseofservicing.Bythiswemeanthat
it’sa simplejob,forexample, toreplace adamaged
side panel. That’s why we’ve changed the design
fromaone-piece casingtoasplitcasing.
Tosecureparts,wehavereplacedmanyofthescrews
byplasticsnapfasteners.Wehavealsodesignedthe
machinessothatyoucanperformasmuchservicing
aspossiblefromthefront,allforsimplifyingservice.
We havealso integratedservice aids,such ashooks
tohangpartson,i.e.,theglassdoor,sothatyoucan
usebothhandsforinstallation.
WehopethisServiceManualwillbeapositivetool
in your daily work. If you have any questions
concerningservicingASKOproducts,tocontactthe
ASKO Advisory Center at:
1161ExecutiveDriveWest
Richardson,Texas 75081
972-238-0846
THE DIFFERENT MODELSTHE DIFFERENT MODELS
THE DIFFERENT MODELS
ThetablebelowshowstheModelnumbersandthe
correlatingmodeltype:
Model Type
W600 WM 33 (600–1000 rpm)
W620 WM 44 (600–1200 rpm)
W640 WM 55 (600–1400 rpm)
W660 WM 55 (600–1600 rpm)
W600 and W620 are mechanical, programmer-
controlledwashingmachines.W640andW660are
electronically-controlledwashingmachines.
The W620 has a five-hour delay start feature.The
W640 and W660 can be set to delay starting the
washingprogramforupto12hours.OntheW640
and W660 you can choose from eleven different
languagesonthedisplay,andyoucanprogramthem
todisplaythetemperatureinCelsiusorFahrenheit.
NOTE:
It is important that you put the Model Number on
all NARDA claim forms to expedite your payment.
INTRODUCTION AND SAFETY REGULATIONS
SAFETY REGULASAFETY REGULA
SAFETY REGULATIONSTIONS
TIONSTIONS
TIONS
GENERALGENERAL
GENERALGENERAL
GENERAL
Theelectricalandplumbinginstallationsshouldbe
carried out by a qualified electrician and plumber.
Be sure to follow all/any Federal, State, County,
Cityor Local codesin your area.
WARNINGWARNING
WARNINGWARNING
WARNING
Alwaysswitchoffthemain electricalpowersupply
when dismantling and assembling the washing
machine.
WARNINGWARNING
WARNINGWARNING
WARNING
Always use a grounded EMC wristband when
workingwith electricalcomponents,suchaspanel
and program control printed circuit boards.
TRANSPORT/WINTER STORAGETRANSPORT/WINTER STORAGE
TRANSPORT/WINTER STORAGE
Ifthemachineistobetransportedorstoredforthe
winter in unheated premises, empty the pin trap
and drain pump of water. (See "Cleaning and
Maintenance"onpage55.)
DISPOSALDISPOSAL
DISPOSALDISPOSAL
DISPOSAL
When the machine comes to end of its useful life
and is to be scrapped, it must be immediately
renderedunusable.
The machine is manufactured and labelled for
recycling.Contactyourlocalrefugeauthoritytofind
out how the machine should be scrapped and
recycled properly.This number is normally found
in the “City of” numbers provided in your
telephonebook.
WARNINGWARNING
WARNINGWARNING
WARNING
To prevent children from being accidentally
locked in the tub, the locking washer door must
be removed when discarding the washer.

3
SHIPPING SUPPORTSSHIPPING SUPPORTS
SHIPPING SUPPORTS
The machine is transported with three shipping
supports,asillustratedtotheright.Thesesupports
holdthetubinplaceduringshipment. Whenyou
unpack the machine, you must remove these
supportsbefore yourun thewasher.
WARNINGWARNING
WARNINGWARNING
WARNING
Failure to remove the shipping supports before
you run the washer could damage the unit.
INSTALLATION
Read these instructions carefully and completely
before you install the machine. The installation
should be carried out by a qualified person who is
familiar with all local codes and ordinances for
electricalandplumbingconnections.
NOTE:NOTE:
NOTE:NOTE:
NOTE:
Cosmeticdamage must be reported to yourdealer
within five days from the date of purchase. After
unpacking the washer, thoroughly check the unit
for cosmetic damage.
SPECIFICASPECIFICA
SPECIFICASPECIFICA
SPECIFICATIONSTIONS
TIONSTIONS
TIONS
Height 33-1/2”–34-1/2 (850–876 mm)
Width 23-7/16” (595 mm)
Depth W640/W660: 23-7/16"(595 mm)
W600/W620: 24-7/16”(620 mm)
Withdooropen:
W640/W660: 36-3/8" (923 mm)
W600/W620: 42-3/8”(1075mm)
Weight 167 lbs. (73 kg)
Ratedload Seedataplate
Supplyvoltage Single-phase 208–240 V, 60 Hz
Heatingelement 2000 W
Fuses(2) 15 Ainline
DrumandBarrel Stainlesssteel
Outercasing Stove-enamelledhot-dipped
galvanizedsteel
Mounting Fouradjustablerubber-covered
feet
Inletsupplyhose 5 ft. (1.5 m) PEXtubing with
brassferrules
Supplypressure 15–142 PSI
Outlethose 5.5 ft. (1.7 m) polypropylene hose,
3/4”ID
Power cordsupplied 220V, 20A
You must remove the
shipping supports
before you install the
washer.
WARNINGWARNING
WARNINGWARNING
WARNING
Be careful of sharp edges.
To remove the shipping supports, follow the
instructionsbelow:
1. Unscrewthe5/8”(13
mm) bolts holding
the supports in place
andremovethebolts.
2. Pushtherubberspacer
up then pull it out of
the slot.
3. Rotate the spacer so that the
extruded end points toward
themachine. Insertitintothe
slot and push down to lock it
intoposition.
4. Repeat procedures 1, 2, and 3 for the two
remainingshippingsupports.
REMOVING THE SHIPPING SUPPORTSREMOVING THE SHIPPING SUPPORTS
REMOVING THE SHIPPING SUPPORTS
Beforethemachinecanbeused,thethreeshipping
supports must be removed. Each support consists
of a bolt, a screw, a washer and a shipping sleeve.
The sleeves are used after the supports have been
removed, to plug the holes in the transport beam.
IMPORTIMPORT
IMPORTIMPORT
IMPORTANTANT
ANTANT
ANT
Keep the screws and washers in a safe place in
casethemachinehastobe transported again later
on.

4
WAWA
WAWA
WATER CONNECTIONTER CONNECTION
TER CONNECTIONTER CONNECTION
TER CONNECTION
Because ASKO washers have their own heating
element, you only need to have a cold water inlet.
Themachineisplumbedwiththeconnectionhose
thatcomeswithit.Thewaterpressureshouldbein
the range of 15–146 PSI.
WARNINGWARNING
WARNINGWARNING
WARNING
Do not plumb to hot water because all rinses will
then be hot and wrinkling will occur.
Thewatersupplymusthaveashut-offvalve.Ifthe
pipingisnew,thelineshouldbeflushedthoroughly
toremoveanyforeignparticlesthatmightclogthe
strainerinthewaterinletvalve.
Fill hose: 3/4” garden hose
Machine Connection: 3/4” metric thread
Length: 5 ft. (1.5 m)
NOTE:
The metric end attaches to the washer.
Cold water
supply
Tap
ASKOwasherscanbe installedeitherfreestanding,
built in, or with an ASKO dryer stacked on top of
it.
AA
AA
A. F. F
. F. F
. Freestanding Installationreestanding Installation
reestanding Installationreestanding Installation
reestanding Installation
Thewashingmachinecanbelocatedasafreestanding
unit. It is essential that the machine is leveled and
thelocknutsaretighttopreventexcessivevibration
during the spin cycles. Also be sure to leave a
minimumof1/2”(12.5mm)ofspacebetweenthe
washerandthedryer.
When installing the unit next to a wall, be sure to
leaveatleast 1/2”(12.5 mm) ofspace between the
unit and the wall. Never push the washer flush
againstthewallbecauseitmaydamagethemachine
casingor thewall.
Built-in InstallationBuilt-in Installation
Built-in Installation
ASKOwasherscanbeinstalledbeneathacabinetor
worktop with a minimum height of 34”(863.6
mm).Theremustbeagapofatleast1/4”(.64mm)
allaroundthemachine,includingbetweentherear
edge of the machine top panel and the back wall.
Theopeningwidthmustbeatleast24”(600mm).
Spacemustalsobeavailableforthe inletanddrain
hoses.Seethediagrambelowformeasurementsand
positions.
If the drain outlet is higher than 24”, you
will need to recess the connections.
ADJUSTING THE FEETADJUSTING THE FEET
ADJUSTING THE FEET
It is important that the machine is level so it won’t
vibrateexcessivelyduringthespinningcycles.Each
foot on the washer is adjustable, so you can level
thewasheronanysurface.Onceitislevel,securely
tightenthelocknutsonthefeettopreventexcessive
vibrationduringthespincycles.
INSTALLATION
WARNINGWARNING
WARNINGWARNING
WARNING
ASKO washers should never be stacked on a
counter or a dryer. You can, however, stack an
ASKO dryer on an ASKO washer. Refer to page
6 for instructions on how to do this.
5/8”nut
(16 mm)
47 1/2”

5
INSTALLATION
GROUNDING INSTRUCTIONS
Thisappliancemustbegrounded.Intheevent
ofmalfunction orbreakdown, grounding will
reducetheriskofelectricshockbyprovidinga
pathofleastresistanceforelectriccurrent.This
appliance is equipped with a cord having an
equipment-grounding conductor and a
groundingplug.Theplugmustbepluggedinto
anappropriateoutletthatisproperlyinstalled
andgroundedinaccordancewithalllocalcodes
andordinances.
WARNING! Improper connection of the
equipment-grounding conductor can result
in a risk of electric shock. Check with a
qualified electrician or serviceman if you are
in doubt as to whether the appliance is
properly grounded.
Do not modify the plug provided with the
appliance. If it will not fit the outlet, have a
properoutletinstalledbyaqualifiedelectrician.
DRAIN CONNECTIONDRAIN CONNECTION
DRAIN CONNECTION
Themachineissupplied withtheoutlethosealready
attached.Thehoseshouldbeextendedoverasuitable
sinkedgeordrainpipeataminimumheightof24”to
a maximum height of 60”(610 mm to 1524 mm)
above the floor. (The lower height is preferable.)
Make sure that the hose is not kinked.
Drainhose: 3/4”(18.9 mm) ID
5.5 feet (1.7 m) long
Shouldyourequireanextensionforthedrainline,
the coupling must not be less than 1/2”ID. The
stand pipe for the drain should be 1-1/2”or larger
toprevent avacuum fromoccurring.
ELECTRICAL INSTELECTRICAL INST
ELECTRICAL INSTALLAALLA
ALLAALLA
ALLATIONTION
TIONTION
TION
The electrical installation must be carried out by a
qualifiedelectrician.Themachineisdeliveredready-
fitted with a 220V, 20A plug and is intended for
connection to an ASKO Dryer, which is equipped
withamatchingreceptacle.Theplugsuppliedwith
thewasher can only beused with anASKODryer.
Ifthewasherisusedseparatelyorwithanotherdryer,
itmust be ona separate220V,60Hz single-phase
circuit.
Ifthemachineistobeusedinawetarea,thesupply
mustbeprotectedbyaresidualcurrentdevice.
Assupplied: 208–230 V, 60 Hz
220V, 20A cord
2000Wheatingelement

6
STST
STST
STACKED INSTACKED INST
ACKED INSTACKED INST
ACKED INSTALLAALLA
ALLAALLA
ALLATIONTION
TIONTION
TION
ASKO dryers can be mounted on top of any
matchingASKOwasher.Mountsaresuppliedwith
themachine.
Two metal brackets for
securing the dryer to
the washer Two plastic cups to
secure the dryer legs.
Toinstallthedryerontopofthewasher,followthe
steps below:
1. Remove the two outside screws (20 torx) from
the back of the washer and use them to secure
themetalbrackets,asillustrated.
IMPORTANT
Don’t forget the lock washers.
2. To ensure the dryer is correctly positioned on
top of the washer, align the plastic cups with
the front top edge of the washer.
To position the plastic cups, break off the left
tab (A) on the cup to be placed on the right
side of the washer and break off the right tab
(B) on the cup to be placed on the left side of
thewasher.
3. Remove the protective
paper from the self-
adhesivesurfacebeneath
the cups. Being careful
notto pressthe adhesive
surfaceagainstthetopof
thewashingmachine,use
4. Once the cups are in place, break off the
remaining plastic tabs on the outside edge and
front of the cup.
5. Lift the dryer into
position. Raising the
front edge, push the
dryerbackwardsuntilit
engages with the
bracketsonthebackof
thewasher.
6. Carefully lower the
front of the dryer,
making sure the feet
fit into the plastic
cups.
Tumble dryer
Washer
Stacked InstallationStacked Installation
Stacked Installation
WARNING!WARNING!
WARNING!WARNING!
WARNING!
Never stack a washer on top of a dryer!
Total height 67”.
Adjustable to 69”.
Plastic cups
INSTALLATION
Washer
back
Metal brackets
thetabstopositionthecups(asillustrated)then
pressthemfirmly into place.

7
WASH PROGRAM ACTIONWASH PROGRAM ACTION
WASH PROGRAM ACTION
Theparagraphsbelowexplainthemotoroperations
forthe various washprograms.
PresoakPresoak
PresoakPresoak
Presoak
Notubaction whilefilling.Afterfilling, clockwise
3 seconds on, 27 seconds off, counterclockwise 3
secondson,27secondsoff.Then10minutesofno
tubaction.
PrewashPrewash
PrewashPrewash
Prewash
Clockwise 9 seconds on, 6 seconds off,
counterclockwise 9 seconds on, 6 seconds off, and
so on.
Normal washNormal wash
Normal wash
Clockwise 12 seconds on, 3 seconds off,
counterclockwise12secondson,3secondsoff,and
so on.
Synthetic washSynthetic wash
Synthetic wash
Clockwise 3 seconds on, 27 seconds off,
counterclockwise3secondson,27secondsoff,and
so on.
WW
WW
Wool/Hand washool/Hand wash
ool/Hand washool/Hand wash
ool/Hand wash
Clockwise 3 seconds on, 57 seconds off,
counterclockwise3secondson,57secondsoff,and
so on.
Fluff (at end of program)Fluff (at end of program)
Fluff (at end of program)
Clockwise 12 seconds on, 3 seconds off,
counterclockwise12secondson,3secondsoff,and
so on.
WW
WW
Washing cycleashing cycle
ashing cycleashing cycle
ashing cycle
40 ± 1 rpm Presoak, prewash.
49 ± 1 rpm Main wash, rinses.
SPIN SPEEDSSPIN SPEEDS
SPIN SPEEDS
W600: 800 or 1000 rpm
W620: 600–1200 rpm *
W640: 600–1400 rpm *
W660: 600–1600 rpm *
*Selectablein 100 rpmsteps.
OUTOUT
OUTOUT
OUT--
--
-OF-BALANCE CHECKOF-BALANCE CHECK
OF-BALANCE CHECKOF-BALANCE CHECK
OF-BALANCE CHECK
Therearetwospinsequences,longandshort.Bothconsist
ofapreliminaryspin,thewashingcycleandamainspin.
Before the preliminary spin, the machine runs a
separatingcycleat100rpmandmeasuresthedrum
speed on the way up and down. This checks for
out-of-balance.Duringthiscyclethetubmaymake
violent movements although there is nothing
wrong.
There are three different limit values for out-of-
balancethatpermitdifferentspindryingspeeds.
Limit value 1: 1300 –1600 rpm
Limit value 2: 1000 –1299 rpm
Limit value 3: –999 rpm
Preliminary spin (long and short)Preliminary spin (long and short)
Preliminary spin (long and short)
A preliminary spin dry is performed so that the
machinewillhaveasmootherstartforitsmainspin
dry cycle. It does this by removing over half the
weight in water by spinning at 900 rpm for
approximately one to two seconds.
A maximum of ten restarts are made at limit value
3toreach500rpm.Iftheout-of-balanceisstilltoo
greatinthefinal(tenth)attempt,theprogramwill
continuewithoutthepreliminaryspinormainspin
drycycles.Thisisindicatedonthedisplayafterthe
programhasfinished.
Selected spin speed 1300–1600 (long andSelected spin speed 1300–1600 (long and
Selected spin speed 1300–1600 (long and
short)short)
short)short)
short)
Amaximumoffiverestartsatlimitvalue1aremade
totryto achievetheselected spindryingspeed.
Iftheout-of-balanceistoogreat,amaximumofthree
restartswill be madeat limit value2 to tryto achieve
1200 rpm. If limit value 1 is achieved during any of
thesethreerestarts,theselectedspinspeedwillberun.
If the out-of-balance is still too great, a maximum
of two restarts at limit value 3 will be made to try
to reach 900 rpm. If limit value 2 or limit value 1
isachievedduringeitherofthesetworestarts,1200
rpmorthe selected spin speedwill be run.
If the out-of-balance is still too great in the final
(tenth)attempt,theprogramwillcontinuewithout
spin drying. This is indicated on the display after
theprogramhasfinished.
Selected spin speed 1000–1300 rpm (longSelected spin speed 1000–1300 rpm (long
Selected spin speed 1000–1300 rpm (long
and short)and short)
and short)
A maximum of eight restarts at limit value 2 are
madetotrytoreachtheselectedspindryingspeed.
If the out-of-balance is too great, a maximum of
two restarts will be made at limit value 3 to try to
achieve900rpm.Iflimitvalue2isachievedduring
eitheroftheserestarts,theselectedspindryingspeed
will run.
MOTOR OPERATIONS

8
MOTOR OPERATIONS AND THE GLASS DOOR
If the out-of-balance is still too great in the final
(tenth)attempt,theprogramwillcontinuewithout
spindrying.
Selected spin speed 600–900 rpm (longSelected spin speed 600–900 rpm (long
Selected spin speed 600–900 rpm (long
and short)and short)
and short)
Amaximumoftenrestartsatlimitvalue3aremade
totryto reachtheselected spindryingspeed.
If the out-of-balance is still too great in the final
(tenth)attempt,theprogramwillcontinuewithout
spin drying. This is indicated on the display after
theprogramhasfinished.
Should clothes or other items come out of the
washer not spun properly, check the following:
Size of load. It’s hard to balance loads if only one
item or a few small items are in the drum.
Throwrugs arealsohard tobalance.
Mixing different materials, such as lightweight
permanent press items with terry cloth, towels, or
denimjeans.
Restart point after interrupted startRestart point after interrupted start
Restart point after interrupted start
attemptattempt
attemptattempt
attempt
Ifastarthasbeeninterruptedduetoexcessiveout-
of-balance, the motor runs for one cycle
counterclockwise, and then another attempt is
made.
DRAIN PUMP OPERADRAIN PUMP OPERA
DRAIN PUMP OPERATIONTION
TIONTION
TION
During long spin dryDuring long spin dry
During long spin dry
The drain pump runs continuously for the first 6
minutes and then 50 seconds off, 10 seconds on,
50 seconds off, and so on for the remainder of the
respective cycle. If a restart takes place due to
excessiveout-of-balance,thedrainpumpoperating
time is reset to zero.
During short spin dryDuring short spin dry
During short spin dry
The drain pump runs continuously for the whole
cycle.
OPENING THE GLASS DOOROPENING THE GLASS DOOR
OPENING THE GLASS DOOR
To open the glass door on an ASKO washer, the
power must be on and you must press the Door
Open button ( ). There will be a few seconds
delaybefore the dooropens.
W600 andW620: On these models the Program
Control knob must be at the end of a program (at
the 12:00 or zero position) to open the glass door.
Ifyouneedtostoporinterruptaprogramafteryou
startthemachine,turntheProgramControlknob
to 10 (Drain). Any water in the machine will be
pumpedoutandyoucanthenpresstheDoorOpen
button( )toopenthedoor.Torestartthewasher,
close the door and turn the controls to the desired
settings.
W640 and W660: On these models, if you need
toopentheglassdoorduringawashorrinsecycle,
press and hold the Door Open button ( ) for
three seconds. The machine will stop and
automatically drain enough water so the door can
be opened safely. The program will resume when
youclosethedoor. Theinletvalvewillcomeon to
ensuretheproperwaterlevel.
In case of mechanical failure, you can use the
Emergency Door Opener located by the drain
pump. (See page 10.)To use the Emergency Door
Opener,removethescrewholdingthecordhandle
(loop) and pull the cord down.

9
WASHER FEATURES
Detergent
drawer
Control
panel
Outer door
(W620 and W660)
Lower
cover
Front
cover
plate
Top
Cover
Side
panel
FRONT VIEWFRONT VIEW
FRONT VIEW
Drain pump
cover (closed)
Front
panel
Glass
door
Emergency
drain hose
Emergency
door
opener
Pin
trap
Drain pump
cover (open)
20 torx screw
securing door
opener
REAR VIEWREAR VIEW
REAR VIEWREAR VIEW
REAR VIEW
Cold
water
supply
Tap
Drain
hose
Electrical
cord
Rear
Panel
Top
Cover
Fuses
PEX fill line
Shipping
Supports (3)

10
FAULT TRACING
The machine will not start.The machine will not start.
The machine will not start.
1. Checkthehousebreakerswitch/fuses.
2. Checkthattheglass dooris closedsecurely.
3. Make sure the power switch is turned on and
theindicator lamp islit.
4. Ifthepowerswitchisonandtheindicatorlamp
is not lit, there is no power supply. Make sure
themachineisproperlypluggedintotheelectrical
outlet at the wall or on the back of the dryer.
5. If washer power cord is plugged into the back
ofthedryer,turnthepowertothedryeronand
see if the indicator light is lit. If it is not lit,
unplug the dryer power cord and replace it
firmlyinto thewall receptacle.
6. W620: Check that the Delay Start button is
notpressedin.
W640 and W660: Check that the Delay Start
symbol ( ) is not shown on the display.
The machine will not work.The machine will not work.
The machine will not work.
1. Checkthe main powerswitch.
2. Checkthe door switch.
3. Measure the voltage between PF1 and PF3
(W600/W620) also between E1-1 and E1-2
(W640/W660).The value should be the same
asthemainpowersupplyvoltage(208–230V).
(Seepage 13 for values.)
4. Check the machine and house fuses. If it’s
necessary to change the fuses, investigate why
they have blown.
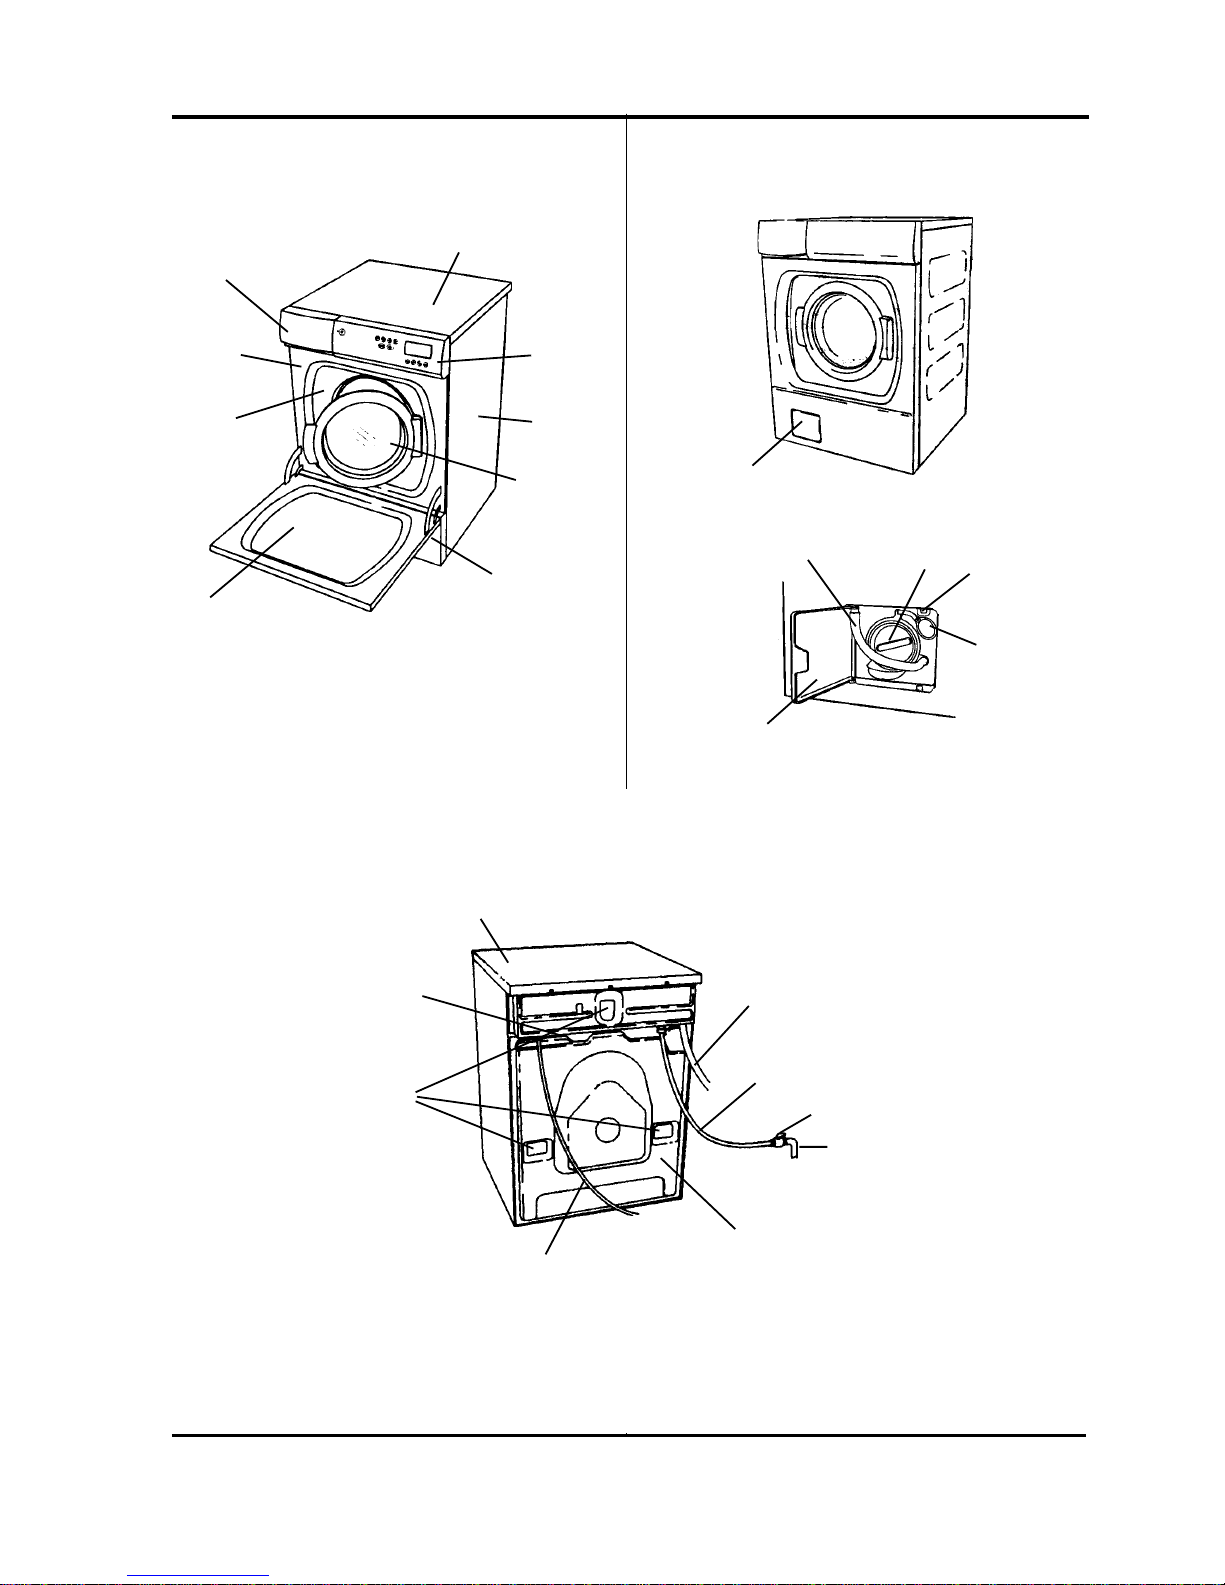
The washer door is difficult to close orThe washer door is difficult to close or
The washer door is difficult to close or
will not close.will not close.
will not close.
1. Make sure nothing is caught in the door, such
asapronstrings,shoelaces,etc.
2. Make sure the power to the machine is on.
3. Checkthat the doorseal fits securely.
4. Checkthe door switch. (Seepage 14.)
The washer door leaks.The washer door leaks.
The washer door leaks.
1. Check that the door seal is in good condition
andfitssecurely.
2. Make sure nothing is caught in the door, such
asapronstrings,shoelaces,etc.
The washer door will not open.The washer door will not open.
The washer door will not open.
1. Make sure the power to the machine is on.
2. Be sure the washer is not still in a cycle.
3. W600/W620:MakesuretheProgramControl
knob is in the proper position (at a red mark).
4. MakesuretheDoorOpenbuttonwaspressed.
5. Checkthemachineandhousefuses.
6. Check the door lock. (See page 14.)
7. Ifthereisnowaterinthemachineandthedoor
won’t open in the normal manner, you should
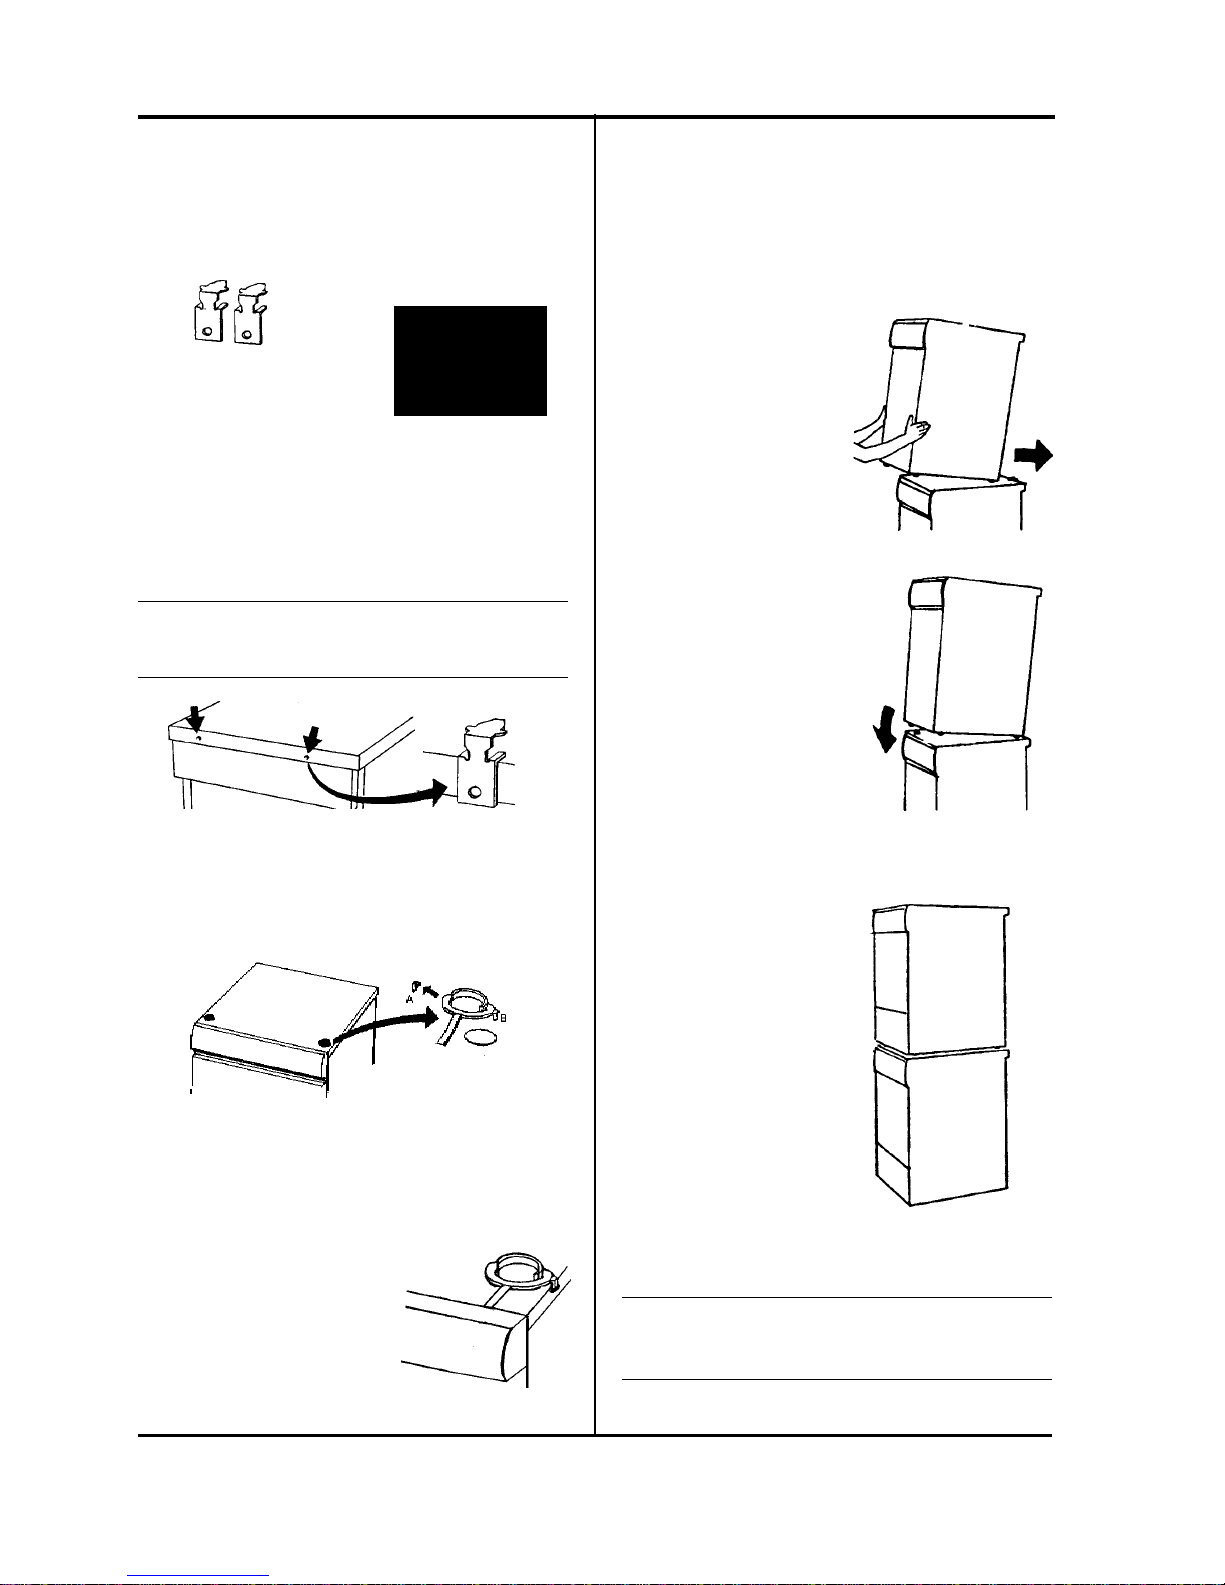
be able to open it manually, as follows:
a. Make sure the power is turned off.
b. Usingaflatheadscrewdriver,gentlypryopen
thedrain pumpcover.
c. Empty out any water that may be in the
machine by disconnecting the drain hose
from the door pin (A).
IMPORTIMPORT
IMPORTIMPORT
IMPORTANTANT
ANTANT
ANT
If there is still water in the drum, make sure you
have a large container ready to catch the water.
d. Unscrew the emergency
door opener handle (B)
andpullitout(C)toopen
thedoor.
e. Replace the emergency
dooropenerhandle.
TT
TT
Temperature and speed cannot be select-emperature and speed cannot be select-
emperature and speed cannot be select-emperature and speed cannot be select-
emperature and speed cannot be select-
ed (W600 and W620).ed (W600 and W620).
ed (W600 and W620).
1. Check the selector knobs. (See the schematic
diagramstofindthemeasuringpoints.)
The machine does not perform washingThe machine does not perform washing
The machine does not perform washing
rotation or does not reverse the direc-rotation or does not reverse the direc-
rotation or does not reverse the direc-
tion of washing rotation.tion of washing rotation.
tion of washing rotation.
1. Checkthat thedrivebelt issecure.
2. Check the programmer (W600/W620) or the
motor control board (W640/W660). (See the
schematicdiagramsformeasuringpoints.)
3. Check the motor. (See page 13.)
4. Checkthe levelswitch. (See page13.)
The washer doesn’t spin dry (W640/W660).The washer doesn’t spin dry (W640/W660).
The washer doesn’t spin dry (W640/W660).
If “0000”is flashing in the top right corner of the
display,themachinedidnotspin.Themachinehas
abuilt-inout-of-balancesensorthatwillreducethe
spin drying speed or stop spin drying altogether if
theloadis toounbalanced.
1. Openthewasherandredistributethelaundry.
2. RunaSpinprogramtocheckthattheproblem
hasbeensolved.
A B
C

11
FAULT TRACING
The drum turns slowly during washingThe drum turns slowly during washing
The drum turns slowly during washing
rotation.rotation.
rotation.rotation.
rotation.
1. Check that the drive belt is tight and that the
adjustment screw for motor suspension is
screwedtight.
The washer does not emptyThe washer does not empty
The washer does not empty.....
1. Besurethedrainhoseisnotblockedorkinked.
2. Checkthe drainpumpandpintrap.
3. Checkthe levelswitch. (See page13.)
4. Check the programmer (W600/W620) or the
motor control board (W640/W660). (See the
schematicdiagramsformeasuringpoints.)
Metallic sounds are heard from the rearMetallic sounds are heard from the rear
Metallic sounds are heard from the rear
of the machine.of the machine.
of the machine.
1. This could be the brushes in the main motor.
Removetherearcoverplateandinvestigatethe
cause.
The programmer does not work (W600The programmer does not work (W600
The programmer does not work (W600
and W620).and W620).
and W620).
1. Make sure the power to the machine is on.
2. Checkthefuses.
3. Checkthattheprogrammer motorruns.
The machine does not fill with waterThe machine does not fill with water
The machine does not fill with water.....
1. Make sure the power to the machine is on.
2. Checkthat thewater valve isopen.
3. BesuretheDelayStarthasnotbeenengaged.
4. Checkforerrormessages(W640/W660).
5. Measure the voltage at the inlet valve and the
outputs from the program control board. (See
page14.)
6. The maximum fill time is five minutes. If the
unithasn’tfilledinfiveminutes,W600/W620
will advance to “C”on the Program Control
knob. W640/W660 will display an error
message.
7. Checkthelevelswitchanditshose.(Seepage13.)
8. Checkthelevelsensor.(Seepage 13.)
The machine continues to fill up withThe machine continues to fill up with
The machine continues to fill up with
water and the program stands still.water and the program stands still.
water and the program stands still.
1. Switch off the power to the machine. If the
washer still continues to fill, the valve is stuck.
In this case, turn the water off immediately.
Remove and clean the valve. Be sure to flush
the water feed line. Also, clean the filter
thoroughly. Before reassembling, inspect the
washersin the fill hose.
2. Checkthelevelswitchandits hose.Besure the
small hose to and from the “Y”pipe is not
blockedorcracked.
3. Checkthelevel sensor(Seepage 13.)
The machine does not pump water out.The machine does not pump water out.
The machine does not pump water out.
1. Make sure the power to the machine is on.
2. Besurethedrainhoseisnotblockedorkinked.
3. Check the voltage and continuity (see page 13
forthesevalues).
4. Make sure the pump rotor in the drain pump
moves freely. (See page 55 for instructions on
emptying water from the drain pump.)
The machine vibrates more than usualThe machine vibrates more than usual
The machine vibrates more than usual
during spin drying.during spin drying.
during spin drying.
1. Make sure the shipping supports have been
removed.(See page3.)
2. Make sure the machine is level and the locking
nutsonthefeetare secure.
3. Makesuretheflooringbeneath theunitis solid.
Ifitisn’t,placea3/4”to1”thickpieceofplywood
underthewasherto strengthenthefloor.
4. Checktheshockabsorbersforsignsofcorrosion.
Foam in the last rinse, water remains inFoam in the last rinse, water remains in
Foam in the last rinse, water remains in
the machine.the machine.
the machine.
1. Check the type of detergent used and the
amount. (See the ASKO Use and Care Guide.)
2. Check that the drain hose is not blocked or
kinked.
3. Check to see if the drain pump is blocked.
WW
WW
Water leaksater leaks
ater leaksater leaks
ater leaks
1. Too much foam can cause a small puddle on
the front left side of the machine.
2. Checkthehosesanddoorsealforsignsofwear.
3. Makesurenothingiscaughtinthedoor,suchas
apronstrings,shoelaces,etc.
TT
TT
Too much foamoo much foam
oo much foamoo much foam
oo much foam
1. Useonlylow-sudsingdetergent.
2. Try using less detergent. Use only one to three
tablespoons(asstatedintheASKOUseandCare
Guide.)
Unit stops in the middle of a programUnit stops in the middle of a program
Unit stops in the middle of a program
It is normal for the machine to "pause" during a
program, especially between cycles and during the
Wool wash program.

12
YY
YY
Yellow laundryellow laundry
ellow laundryellow laundry
ellow laundry
1. Can be caused by body fluids that were not
entirely washed out. Use the highest possible
washtemperature.
2. Tryadding alittlemoredetergentthan usual.
3. Alsocanbecausedbyironormagnesiuminthe
water. If this is the case, the customer should
considerinstallingawaterpurifier.
4. Pretreating some stains and washing at high
temperaturescancauseayellowingeffect.
Grey laundryGrey laundry
Grey laundry
1. If the laundry is very dirty, has oil stains or the
waterisveryhard,putinalittlemoredetergent
thanusual.
2. Choosethecorrecttemperatureforeachwashing
load.Syntheticswashedathightemperaturescan
becomegray.
3. Sortthelaundryaccordingtofabric.Mostfabrics
requiredifferentwatertemperaturesforwashing.
4. Sort the laundry according to its color. Never
mixlightand dark materials inthe same load.
5. Use detergent with whitener for white fabrics
anddetergentwithout whitenerforcolors.
Fluff, stains on the laundryFluff, stains on the laundry
Fluff, stains on the laundry
1. Detergentthatdoesnotcontainphosphatescan,
when combined with minerals in hard water,
buildup asubstance thatcancause "deposits."
Ifpossible, installa waterpurifier.
2. Useadetergentthatcontainsphosphates.
3. Stains on laundry can occur if it comes into
contact with undiluted rinsing agent. Put the
rinsing agent dose into the compartment for
rinsingagents.Never addrinsingagentdirectly
tothe washing.
4. Pilling normally occurs on cotton/polyester
material. For the best results, turn the garment
insideoutandusetheWool/Handwashprogram.
5. Do not use “stain removing”chemicals on the
laundry because it may leave a residue and/or
yellowingat thestain.
Wrinkled laundryWrinkled laundry
Wrinkled laundry
1. Followthecare labelinstructions.
2. Donot overstuff themachine.
3. Do not let the laundry stay for a long time in
themachineaftertheprogramhasfinished.
4. Certainmaterialssuchaslinenandcottonwrinkle
naturally,regardlessofhowtheyarewashed.
5. Make surethe unit is hookedup to cold water.
TT
TT
Torn or damaged materialorn or damaged material
orn or damaged materialorn or damaged material
orn or damaged material
Material can be damaged by sharp objects, such as
metalpartson clothes or objects inpockets.
1. Emptypocketsandturnthegarmentinsideout.
2. Closehooksand zippers.
3. Turn inside out for washing.
ChemicalsChemicals
ChemicalsChemicals
Chemicals
Textiles that have been in contact with chemicals,
such as battery acid, solution for perming hair,
bleach, lavatory cleaner or acne-removing agent,
mustberinsedasquicklyaspossibletopreventholes
orstains.Donotlettheseunrinseditemscomeinto
contactwithotherclothing.Theseitemsshouldalso
bewashedseparately.
PP
PP
Permanent press garmentsermanent press garments
ermanent press garmentsermanent press garments
ermanent press garments
Wash these items in a half-full machine. These
garments should not be mixed in with heavier
washing such jeans or large bath towels.
Overloading or mixing with heavy garments will
causeexcessivewrinkling.
Fading, discolorationFading, discoloration
Fading, discoloration
1. Followthe careinstructionson thegarment.
2. Dark cotton textiles should be washed for the
first time with like colors at 140°F (60°C) to
removeanysurplusdye.
3. Garments should be sorted according to color
andfabrictype,i.e.,darkwithdark,cottonswith
cottons,etc.
4. Empty all pockets. It’s also a good idea to turn
pocketsinsideout.
Stains remaining after washingStains remaining after washing
Stains remaining after washing
1. Stainsshouldbedealtwithasquicklyaspossible.
The longer a stain remains, the harder it is to
remove.
2. Oilstainsareremovedbywashinginthehottest
waterthefabriccantake.Theseitemsshouldbe
washedseparately.
OTHER COMMON QUESTIONSOTHER COMMON QUESTIONS
OTHER COMMON QUESTIONS
Which detergent should I use?Which detergent should I use?
Which detergent should I use?
Any low-sudsing detergent of good quality. Most
powder detergents have a shelf life. If powder
detergentsshouldcakeorstarttolump,ithasusually
losttheeffectivenessforcleaning.
Should I use a fabric softener?Should I use a fabric softener?
Should I use a fabric softener?
Yes, if you use a good quality liquid fabric softener.
Too much fabric softener can cause some garments
tofeelgreasyorslick.Alwaysusetheproperamount.
Should I use bleach?Should I use bleach?
Should I use bleach?
Bleach is not necessary in an ASKO washer. For
whitecottons,higherwatertemperaturesshouldbe
usedforthebestresults.Usedetergentwithwhitener
for white fabrics and detergent without whitener
forcoloredfabrics.
COMMON LAUNDRY PROBLEMS

13
WASHER MOTORWASHER MOTOR
WASHER MOTOR
W600/W620, 60 HzW600/W620, 60 Hz
W600/W620, 60 Hz
Part no.: 80 617 72
Resistances: Pins6-7 69.4 Ω
Pins4-5 5.4 Ω*
Pins2-3 1.7 Ω
Pins1-3 0.7 Ω
*1.7Ω measureddiagonallyacrossthe collector
W640/W660, 60 HzW640/W660, 60 Hz
W640/W660, 60 Hz
Part no.: 80 617 74
Resistances: Pins1-2 68.7 Ω
Pins3-4 1.65 Ω
Pins5-6 1.52 Ω*
Pins5-7 0.58 Ω
*1.9Ω measureddiagonallyacrossthecollector.
The motor is a universal motor controlled by an
externalmotorcontrolboard.
The rotation speed is stepless and controlled by a
tachogeneratoronthemotor.Themaximumspeed
is 1600 rpm.
MOTOR CONTROL BOARD (W640/W660)MOTOR CONTROL BOARD (W640/W660)
MOTOR CONTROL BOARD (W640/W660)
Part no.: 80 613 99
The motor control board is via an external unit
located in the base and connected to the program
control unit (PCU), see the electrical schematic
diagram.
HEAHEA
HEAHEA
HEATING ELEMENTTING ELEMENT
TING ELEMENTTING ELEMENT
TING ELEMENT, 2000 W, 2000 W
, 2000 W, 2000 W
, 2000 W
Part no.: 80 617 06
Resistance: 28.4 W
THERMISTORTHERMISTOR
THERMISTOR
Part no.: 80 616 63
Resistance: 40-60 kW
Room temperature: 68°–86°F (20–30°C)
The thermistor for temperature measurement is
locatedbetweenthemotor cradleand theholder.
The thermistor measures and controls the water
temperature.The heating element is switched out
if the thermistor short-circuits or is disconnected
from the program control board or programmer.
DRAIN PUMPDRAIN PUMP
DRAIN PUMP
, 60 HZ, 60 HZ
, 60 HZ, 60 HZ
, 60 HZ
Part no.: 8801167
Resistance: 76 Ω
Current: 0.3 A, 28 W on load
The drain pump is combined with an integrated
needletrap,whichcanbecleanedbytheuser.
If the drain pump has run for 180 seconds during
emptying,theprogramisstopped,resettozeroand
afault codeis indicatedon thedisplay. Onmodels
W620/W600,this willbe indicatedby “S”on the
ProgramControlKnob.OnmodelsW640/W660,
it will display on the LED window.
LEVEL SWITCHLEVEL SWITCH
LEVEL SWITCH
Part no.: 80 617 47
An electromechanical level switch operates at two
levels,seetheelectricalschematicdiagram.Itchecks
thewaterlevelandstartsthedrainpumpifoverfilling
isindicated.
LEVEL SENSORLEVEL SENSOR
LEVEL SENSOR
Part no.: 80 616 64
ASKO Level sensor type 1166.
Voltage:
To sensor inW620: 0.5 V out from the sensor at
zeropressure and230 Vmains voltage
To sensor in W640/W660: 0.5 V out from the
sensorat zeropressure and230Vmainsvoltage
Measurementatprogram/controlunit
The level sensor is located on the electrical
componentbridge and connectedto thePCU,see
theelectricalschematicdiagram.
RADIO INTERFERENCE FILRADIO INTERFERENCE FIL
RADIO INTERFERENCE FILTERTER
TERTER
TER
50/60 Hz50/60 Hz
50/60 Hz50/60 Hz
50/60 Hz
Part no.: 80 585 58
Leakage Current: 230 V/ 50 Hz 0.3-0.4 mA
Leakage Current: 240 V/ 60 Hz 0.3-0.4 mA
COMPONENTS AND MEASUREMENT VALUES

14
THREE-THREE-
THREE-THREE-
THREE-WW
WW
WAA
AA
AY INLET VY INLET V
Y INLET VY INLET V
Y INLET VALAL
ALAL
ALVESVES
VESVES
VES
Part no.: 80 617 57
Resistance: 3.7 kW ± 0.5 kW
Current: 0.02 A, 5 W
INDICAINDICA
INDICAINDICA
INDICATT
TT
TOR LAMPOR LAMP
OR LAMPOR LAMP
OR LAMP
(W600/W620)(W600/W620)
(W600/W620)
Part no.: 80 070 73
(W640/W620)(W640/W620)
(W640/W620)
Part no.: 80 070 73
Current: 1.7 mA
230 V, 50 Hz
The lamp indicates that the main power switch is
set to on.
DOOR LOCKDOOR LOCK
DOOR LOCKDOOR LOCK
DOOR LOCK
Part no.: 80 616 79
Resistance: 122 Ω
Current: approx. 2 A
The door lock is mechanical and equipped with a
pullmagnet.Thisfunctioniscontrolledbythedoor
openingbuttonandvarioussafetydevices.
COMPONENTS AND MEASUREMENT VALUES

15
W600 AND W620 TEST PROGRAMW600 AND W620 TEST PROGRAM
W600 AND W620 TEST PROGRAM
1. Insert a jumperinto E10 onthe programmer.
2. Start program 3 (Fast wash).
3. EV2 (inlet valve for main wash water) allows
waterintothemachineuptothewashinglevel.
4. PresstheSuper Rinse( )button.
5. Heat up for 10 minutes or by 50°F (10°C).
6. Press the Economy (E2)button.
7. Add more water to the wool level, about 1-1/2”
upthedoor.
8. Wash for 4 minutes.
9. Wash for 16 minutes, or until the # button is
pressedinagain.
10.Run alongspin.
W600 AND W620 FAULW600 AND W620 FAUL
W600 AND W620 FAULT INDICAT INDICA
T INDICAT INDICA
T INDICATIONSTIONS
TIONSTIONS
TIONS
If a fault occurs during a program cycle, this is
indicatedbytheprogramknobstoppinginposition
C or S after the program has finished or been
interrupted.
PP
PP
Position Cosition C
osition Cosition C
osition C
If the program knob stops in position ”after the
program has finished or been interrupted, this
indicates that one of the following problems has
occurredduringtheprogramcycle:
Thermistor faultThermistor fault
Thermistor fault
Thewashingprogramhasfinishedwithoutheating.
1. Checkthefuses.
2. MeasuretheOhms (seepage 12).
Heating element faultHeating element fault
Heating element fault
Thewashingprogramhasfinishedwithoutheating.
1. Checkthefuses.
2. Measurethe thermistorOhms.
3. MeasuretheheaterrelayOhms.
Programmer faultProgrammer fault
Programmer fault
Thewashingprogramhasbeeninterrupted.Check
thefuses.
WW
WW
Water inlet faultater inlet fault
ater inlet faultater inlet fault
ater inlet fault
Indicatesa faultin thewater supply.
1. Makesurethewatersupplytothemachinehas
been turned on (cold fill only)
2. Checkthatthefilterinthemachinewaterinlet
is not blocked.
Draining faultDraining fault
Draining fault
Draininghastakentoolong.Checkthedrainhose
and the drain pump as follows:
1. Make sure an object is not stuck in the drain
hose outlet. Clean out the hose.
2. Make sure the drain pump isn’t blocked by
foreignobjects. Clean out thepump.
3. Make sure the drain hose isn’t kinked.
4. After solving the problem, run program 10
(Drain).
PP
PP
Position Sosition S
osition Sosition S
osition S
Iftheprogram knobstopsinposition“S”after the
program has finished or been interrupted, this
indicatesthatamotorfault,alevelsensorfault,ora
program fault has occurred during the program
cycle.
W600 AND W620 TEST PROGRAM AND FAULT INDICATIONS

16
W640 AND W660 TEST PROGRAMW640 AND W660 TEST PROGRAM
W640 AND W660 TEST PROGRAM
To run a test program, press P1 five times then
press the button for the test program you wish to
run(as listedbelow).Thismustbedonewithin15
seconds.
Press:Press:
Press:Press:
Press: TT
TT
To test:o test:
o test:o test:
o test:
P1 Inletvalve1 (prewashcompartment)
P2 Inletvalve2(mainwashcompartment)
Menu Inletvalve4(softenercompartment)
Doorpull magnet
Heaterrelay(separateorunder
control)
To advance to level 2, press Enter. You can then
runthetest programs listed below:
Press:Press:
Press:Press:
Press: TT
TT
To test:o test:
o test:o test:
o test:
P2 Drainpump
P3 Motor, normal operation
P4 Motor,delicateoperation
Menu Longspin
Press Enter to return to level 1.
PressStart/Stop to endthe testprogram.
W640 AND W660 FAULW640 AND W660 FAUL
W640 AND W660 FAULT INDICAT INDICA
T INDICAT INDICA
T INDICATIONSTIONS
TIONSTIONS
TIONS
If a fault occurs during a program cycle, this is
indicated on the display after the program has
finishedorbeeninterrupted.
FoamingFoaming
FoamingFoaming
Foaming
Indicated after the program has finished. Via the
levelsensorthemachinehas"felt"thatthereisalot
of foam left after the main wash. Run the Rinse
programonce.
OverflowOverflow
OverflowOverflow
Overflow
Too much water in the drum due to a fault in the
levelsensing systemor theinlet valve.
Pressure sensor faultPressure sensor fault
Pressure sensor fault
Adropinpressurehasbeendetectedinthefirstrinse.
This could be due to leakage in the level sensor or
inthehoseleadingtoit.Thewashing programhas
beeninterrupted.
TT
TT
Temperature stopemperature stop
emperature stopemperature stop
emperature stop
Thewashingprogramhasfinishedwithoutheating.
Checkthefusesandtheheatingelement.
ThermistorThermistor
Thermistor
Thewashingprogramhasfinishedwithoutheating.
Thethermistoris faultyorshort-circuited.
WW
WW
Wash motorash motor
ash motorash motor
ash motor
Wiring open-circuit or motor fault has been
indicated and the washing program has been
interrupted.
WW
WW
Water inletater inlet
ater inletater inlet
ater inlet
Indicatesa faultin thewater supply.
1. Makesurethewatersupplytothemachinehas
been turned on (cold fill only)
2. Checkthatthefilterinthemachinewaterinlet
is not blocked.
WW
WW
Water outletater outlet
ater outletater outlet
ater outlet
Draininghastakentoolong.Checkthedrainhose
and the drain pump as follows:
1. Make sure an object is not stuck in the drain
hose outlet. Clean out the hose.
2. Make sure the drain pump isn’t blocked by
foreignobjects. Clean out thepump.
3. Make sure the drain hose isn’t kinked.
4. After solving the problem, run the Drain
program.
W640 AND W660 TEST PROGRAM AND FAULT INDICATIONS

17
CONSUMPTION VALUES
Thefollowingconditionsapplyfortheconsumption
valuesstatedin thechartsbelow:
!Incoming water temperature: 60°F (15°C)
!Heating element power: 2000Watts
!Options: None
W600 AND W620 CONSUMPTION VALUESW600 AND W620 CONSUMPTION VALUES
W600 AND W620 CONSUMPTION VALUES
WATER
WASH WASH LOAD NUMBER CONSUMPTION
PROGRAM FABRIC TEMP SIZE OF RINSES (Gallons) (1)
1 Heavy Cotton,linen 140°F(60° C) Full 5 16.60
2 Normal Cotton,linen 140°F(60° C) Full 5 15.30
3 Fast Cotton,linen 140°F(60° C) Full 5 15.30
6 Synthetic Polyester, cotton/ 105° F (40° C) Half 3 7.28
polyester, nylon
7 Super quick Permanentpress, 105°F(40° C) Half 2 5.72
Polyester, cotton
9 Wool/Hand Washablewool, 85°F (30° C) Third 3 13.78
rayon, acrylics
(1) The water consumption can vary, depending on load size, tolerance of fill valve, and water pressure (PSI).
W640 AND W660 CONSUMPTION VALUESW640 AND W660 CONSUMPTION VALUES
W640 AND W660 CONSUMPTION VALUES WATER
WASH WASH LOAD NUMBER CONSUMPTION
PROGRAM FABRIC TEMP SIZE OF RINSES (Gallons) (1)
P1 Normal Cotton,linen 140°F(60° C) Full 5 15.30
P2 Normal Cotton,linen 140°F(60° C) Full 5 15.30
P3 Super quick Permanentpress, 105°F(40°C) Half 2 5.72
Polyester, cotton
P4 Wool/Hand Washablewool, 85°F (30° C) Third 3 13.78
rayon, acrylics
(1) The water consumption can vary, depending on load size, tolerance of fill valve, and water pressure (PSI).

18
APPLICAAPPLICA
APPLICAAPPLICA
APPLICATION AREASTION AREAS
TION AREASTION AREAS
TION AREAS
ListedbelowarethevariouspartsofASKOwashers
and the tools you will need to service each.
TT
TT
Top lid:op lid:
op lid:op lid:
op lid:
•torx T20
PP
PP
Panelanel
anelanel
anel
•torx T20
•1/2”wide-bladescrewdriver
Front panel (model without front-loadingFront panel (model without front-loading
Front panel (model without front-loading
door)door)
door)door)
door)
•torx T20
Bottom cover (model without front-load-Bottom cover (model without front-load-
Bottom cover (model without front-load-
ing door)ing door)
ing door)ing door)
ing door)
•6.5-7 mm wide blade screwdriver
•torx T20
Front door removing/installingFront door removing/installing
Front door removing/installing
•torx T20
•torx T10
•socket wrench 10 mm
Front panel (model with front-loadingFront panel (model with front-loading
Front panel (model with front-loading
door)door)
door)door)
door)
•torx T20
•socket wrench 10 mm
Listed below are the tools you will need to service
ASKOwashers:
"Torx"screwdrivers:
•T25
•T20
•T10
Socketwrenches
•11/16"
•16 mm
•13 mm
•10 mm
Socketscrewdriver
•10 mm
24 mm extended socket + locking handle
5 mm socket head cap screwdriver + small locking
handle
Starsocketheadscrewdriver
TOOLS
Detergent compartmentDetergent compartment
Detergent compartment
•torx T20
Door (removing/installing)Door (removing/installing)
Door (removing/installing)
•torx T25
Door seal/glass (changing)Door seal/glass (changing)
Door seal/glass (changing)
•torx T25
•torx T20
•socket wrench 10 mm
Cover plateCover plate
Cover plate
•torx T20
•socket wrench 10 mm
LockLock
LockLock
Lock
•torx T20
•socket wrench 10 mm
Front end plate and inner cover plateFront end plate and inner cover plate
Front end plate and inner cover plate
•torx T20
•socket wrench 10 mm
DrumDrum
DrumDrum
Drum
•torx T25
•torx T20
•socket wrench 16 mm
•socket wrench 10 mm
•special tool (Part no. 88 011 52)
•special tool (Part no. 88 011 53)
Drain pumpDrain pump
Drain pump
•torx T20
•Starsocketheadscrewdriver
Change of complete holderChange of complete holder
Change of complete holder
•torx T25
•torx T20
•7/8”extendedsocket+lockinghandle
•1/2”wide-bladescrewdriver
•socket wrench 16 mm
•socket wrench 13 mm
•Socket screwdriver 10 mm
•5 mm socket head cap screwdriver + small
lockinghandle
•special tool (Part no. 88 011 52)
•special tool (Part no. 88 011 53)
Electrical component bridge pieceElectrical component bridge piece
Electrical component bridge piece
•torx T20
CrossmemberCrossmember
Crossmember
•torx T20
•socketwrench11/16"
•socket wrench 13 mm
Side panelSide panel
Side panel
•torx T20

19
SPECIAL TOOLSSPECIAL TOOLS
SPECIAL TOOLS
Drum installationDrum installation
Drum installation
Part no.: 88 011 52
This tool is used for
centeringandisfastened
to the drum edge when
removingandinstalling
thefront endplate.
The hook is fitted
betweentheholderand
the bottom to facilitate
removalandinstallation
of the front end plate.
Bearing and VBearing and V
Bearing and V-ring Cassette-ring Cassette
-ring Cassette-ring Cassette
-ring Cassette
Part no.: 88 011 53
Installing the BearingInstalling the Bearing
Installing the Bearing
Theinnerbearingis
fitted to the tool,
which is then put
into the bearing
housing.
The bolt is then
loaded with the
outer bearing,
washer and nut,
which are put on to
the bolt behind the
bearinghousing.
Installing the V-ring CassetteInstalling the V-ring Cassette
Installing the V-ring Cassette
The tool is first put into the bearing housing from
therearof themachine.Thenthe whitesideof the
v-ring cassette is placed facing the flat side of the
washer, and they are put on the tool, inside the
holder.Thev-ringcassetteisthenforcedintoplace
byputtingthenutontotheboltandtighteningit.
Be careful not to overtighten it.
TOOLS
BottomBottom
BottomBottom
Bottom
•torx T25
•torx T20
•24 mm extended socket + locking handle
•1/2”wide-bladescrewdriver
•socket wrench 16 mm
•socket wrench 13 mm
•Socket screwdriver 10 mm
•5 mm socket head cap screwdriver + small

20
REMOVING THE TOP COVERREMOVING THE TOP COVER
REMOVING THE TOP COVER
1. Remove the threeT20 screws at the rear of the
topcover.Keepthetwostarwashersfortheouter
screws.
2. Lift the cover and pull it backwards.
NOTE:
Be sure to keep the rubber strip with the top. It
helpstoreducevibration.
REPLACING THE TOP COVERREPLACING THE TOP COVER
REPLACING THE TOP COVER
3. Ensurethatthesealingstripispositionedalong
the edge of the top cover.
4. Push the front edge of the top cover under the
paneland lowerthe cover.
5. Makesurethecoverisinside theguides.
6. Replacethethreescrewsattherear,beingcareful
no to overtighten and strip the screws. Don’t
forgetthetwostarwashersfortheouterscrews.
TOP COVER
REPLACING THE TOP COVERREPLACING THE TOP COVER
REPLACING THE TOP COVER GUIDESGUIDES
GUIDESGUIDES
GUIDES
1. Remove the top cover.
2. Squeezethelatchestogetherandpushtheguide
upwards.
3. Pushthenewguideintoplace.(Youshouldhear
itsnapintoplace.)
4. Secure the top cover.
NOISE OR VIBRANOISE OR VIBRA
NOISE OR VIBRATIONTION
TIONTION
TION
If excessive noise or vibration occurs during
operation,checkthe following items:
1. Make sure the top is positioned correctly.
2. Checkthat thesealingstripisintoplace.
3. Makesuretheguidesaresnappedintoplace.
4. Makesurethescrewsaresecurelytightened.
P/N 8061817-0 white
P/N 8061817-95 SS
P/N 8900338
P/N 8061854
P/N 8061763
This manual suits for next models
5
Table of contents
Other Asko Washer manuals

Asko
Asko WMC67 P Series User manual

Asko
Asko PROFESSIONAL WMC947PS User manual

Asko
Asko w6884w eco User manual

Asko
Asko W6424 User manual

Asko
Asko W6222 User manual

Asko
Asko Allergy W6888 User manual

Asko
Asko W6903SS User manual

Asko
Asko W6021 User manual

Asko
Asko W6221 User manual

Asko
Asko W40868C/1/22 User manual