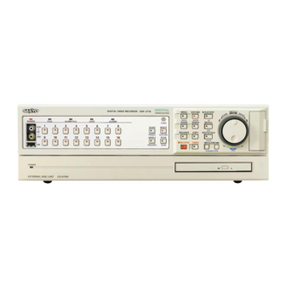
Aspect DVR-2M-4-2 User manual

DIGITAL VIDEO RECORDER QUICK START GUIDE
Technical Documents
DVR-2M-4-2 DVR-8M-4
DVR-2M-8-2 DVR-8M-8
DVR-2M-16-2 DVR-8M-16
DVR-2M-32
DIGITAL VIDEO RECORDER
QUICK START GUIDE

DIGITAL VIDEO RECORDER QUICK START GUIDE
WHAT’S IN THE BOX
*Not required with DVR-2M-4-2 & DVR-8M-4
1. INSTALLATIO N
Rear Panel
1
–
DVR
-
2M
-
4
-
2
DVR
-
8M
-
4
DVR
-
8M
-
8 & DVR
-
2M
-
8
-
2
DVR
-
2M
-
16
-
2
DVR
-
8M
-
16
DVR
-
2M
-
32
No.
Name
Description
1
CAM1 – CAM4 (DVR-2M-4-2, DVR-8M-4)
CAM1 – CAM8 (DVR-2M-8-2, DVR-8M-8)
CAM1 – CAM16 (DVR-2M-16-2, DVR-8M-16)
CAM1
–
CAM32 (DVR
-
2M
-
32)
BNC connectors used for connecting
HD analogue cameras
2
ETHERNET/WAN
Network port for connection to the
Internet, router, network switch &
network IP cameras (no POE from this
port)
3
VGA
VGA display output for connection to
a main display monitor (Max.
1920x1080 display resolution).
4
HDMI (DVR
-
8
M
-
4/8
/16
)
HDMI display output for connection a
main display monitor (Max.
3840x2160 display
resolution).
HDMI (DVR
-
2M
-
4
-
2
/8
-
2
/16
-
2
/32)
HDMI display output for connection a
main display monitor (Max.
Technical Documents
DVR
USB Mouse
Remote Control*
DC 12V PSU (4ch/ 8ch/ 16ch)
HDD Mounting Screws Rack Mount Ears (16ch/ 32ch)
UK Kettle Lead (8ch/ 16ch/ 32ch)* Quick Start Guide
QR Code

DIGITAL VIDEO RECORDER QUICK START GUIDE
1
920x1080 display resolution).
5
ALARM IN
Alarm input terminals (AI1~A16
,
GND).
6
RS
-
485
Communications port for connecting
PTZ camera with
RS
-
485 support
7
ALARM OUT
Alarm relay output port (AO1~8,
COM).
8
POWER INPUT
Power input for the NVR.
9
AUDIO IN/OUT
RCA connectors for the connection of
microphones and speakers
10
USB
For connecting USB devices such as a
mouse or back up device
Front Panel
1 – DVR-2M-4-2
2 - DVR-2M-8-2, DVR-8M-4, DVR-8M-8
3 – DVR-2M-16-2, DVR-8M-16
4 – DVR-2M-32
No.
Name
Description
1
IR REMOTE CONTROL RECEIVER
Receives the control signal from included remote control.
2
USB
For connecting USB devices
such as a mouse or back up device
3
STATUS LED
Displays the status of power, network and hard drive

DIGITAL VIDEO RECORDER QUICK START GUIDE
2. INSTALLATION: SYSTEM TOPOLOGY
ASPECT is designed as an out of the box CCTV system which has been optimised to improve the installation
experience.
Connect the ASPECT AHD cameras to the BNC ports of the ASPECT DVR, display the video and automatically
start recording the camera. The following instructions will outline the set up and operations of the system.
For further information refer to the user manual, available to download by scanning the QR code within this
guide.
Default credentials:
Username: admin
Password: (no password)
[NOTE] For security reasons it is highly recommended each user creates a password that includes
uppercase & lower case letters, numbers, and special characters.

DIGITAL VIDEO RECORDER QUICK START GUIDE
3. START UP WIZARD
1. The startup window will appear after the
enhanced security password has been set
2. The startup wizard will guide the user through the initial setup of the DVR
3. Use the tick box to set whether or not the start-up wizard will open on future boot ups
4. Click <Next Step>
System Login
1. Type user ID in and enter the corresponding
password. The default user ID is “admin”
and the default password is blank
2. Click <OK>.

DIGITAL VIDEO RECORDER QUICK START GUIDE
4. START UP WIZARD: ENHANCED SECURITY PASSWORD
.
5. START UP WIZARD: SET CONTINUOUS, ALARM & SYSTEM ALARM RECORDING
As default all channels are set to record all
types. It is
possible to set 6 periods of recording profiles.
1. Select a channel; define the pre-record time and
which stream to record (main/sub).
2. Select Continuous, Alarm or System alarm
recording types from the right-hand side.
3. Use the mouse to click and drag along the
timeline to turn on or off recording to create the
recording schedule.
4. Use the ‘Copy to’ button to apply these settings
to other channels or repeat steps 1-3.
It is highly recommended that secure passwords
and user accounts are created to increase security
on the CCTV system. Aspect helps protect your
CCTV by encouraging the use of secure usernames
and passwords for users.
1. Enter current password, the default is
blank
2. Enable Enhanced Security
3. Enter new password of upper case &
lower- case letters, numbers and special
characters.
4.
Confirm new password.
5.
Enter an email address where a password recovery code will be sent in the event of a user
forgetting their password
i. It is advised that the email account for password recovery is a generic mailbox that
multiple individuals can access in the event of a forgotten password to reset the
device.
Ensure that this step is repeated for any new users. Remember, if the admin password is changed in this
step the connection details within the ASPECT app will need to be updated.
Depending on the device it is possible to also record the sub stream, bene
fits of recording the sub stream of
any channel, particularly high resolution cameras increases the performance and ability in playback. If the
feature is supported by the device, select the tick box in the top right corner of the window labelled “Sub
Stream”

DIGITAL VIDEO RECORDER QUICK START GUIDE
6. START UP WIZARD: NETWORK SETTINGS
DHCP is enabled by default. Untick DHCP to apply a static IP address, ensure to configure the correct
settings for the network to enable stable connection to IP cameras in the IP same range and the external
network for remote access.
[NOTE] Using the mouse, click into the field to open the on screen keyboard and enter the numbers to
enter the network settings.

DIGITAL VIDEO RECORDER QUICK START GUIDE
7. START UP WIZARD: P2P CONNECTION
Using a smart phone, scan th
e QR codes on screen
for
either the iOS or Android labelled image, this will
direct the phone to the app download store.
1. Open the ASPECT application on the smart phone.
2. Tap ‘Register’ in the top right-hand corner, then register your credentials and log in to the app.
a. Creating an account allows user to connect multiple sites.
3. Open the ‘Menu’ by tapping the top left option.
4. Tap ‘Devices’ then the ‘+’ in the top right and select ‘Manual Adding’.
5. Set a name for the device so the user can easily identify it from a list; the location of the install is a
popular way to name connections.
6. Tap the QR code icon and allow the app access to the devices camera, now scan the QR code. From
the start up wizard labelled ‘Cloud ID’. This will enter the connection information to the device to the
app. Alternatively, manually type in the P2P cloud ID as shown in your device
7. Enter the username and password and set which stream to open by default when connecting to the
device. Choosing sub stream over main will increase video display speeds and reduce mobile data
usage.
8. Tap ‘Save’ in the top right corner, then tap ‘Start Live View’.
http://aspectviewer.net
Note: If the users smart phone is
not recognising the QR code to scan for the information. First of all try
rotating the camera 90 degrees to hold the phone horizontal to scan the code. Secondly, search for and
install Aspect Viewer app from the place where you download and install apps from

DIGITAL VIDEO RECORDER QUICK START GUIDE
8. LIVE VIEW – ENTER THE MENU
9. ADDING IP CAMERAS
It is possible to connect cameras from the local network, by configuring network IP cameras to
the same IP range as the DVR. Refer to step 4 of this guide.
First, the HD channel needs to be changed to
IP, follow these steps:
1.
Right click in Live view to open the menu,
select Main Menu > Setting > Channel >
Channel Type, use the tick boxes to
select channel to change to IP.
2.
Select ‘Apply’ and the DVR will reboot
to apply the changes.
Adding IP cameras from the network;
1.
Ensure the DVR is properly configured
to the local network.
2. Right click from Live view then click ‘IP
channel’.
3.
Use the bottom window to scan the network for compatible IP cameras.
4.
Select the channel position from the top window.
5.
Double click the desired IP address to add the selected channel position above.
From Live View, right click the
mouse to access the menu.
Main Menu – Access to all NVR function and settings
Start-up Wizard – Launch the start up wizard
Auto channel Config – Search and add all compatible
IP cameras
IP Channel – Configure connection to IP cameras
Channel status – View the status of recording of each
channel
Playback – Shortcut to playback functions
Record Control – Open control settings for recording
PTZ Control – Open PTZ controls
UTC Control – Open Coaxitron controls
Colour Setting – Adjust the camera colour settings
Output Adjust – Adjust the display output
Mute – Turn off the sound
Check Version – Opens system version information
Logout – Logout, switch user, restart or shutdown
shortcut
View – Change the Live View layout

DIGITAL VIDEO RECORDER QUICK START GUIDE
10. RESET USER PASSWORD
Aspect devices support password reset function, to be used when a user has forgotten their user account
password. For the function to work, the recorder must be properly configured to a network, if there is no
network available please contact your provider for a resolution.
1. From the login page, enter the username and click ‘Forgot Password’
button
This will open a new window where an email with a password recovery
code
is sent to the email entered when setting the enhanced security password
.
2.
Once the email has been confirmed as sent, click ‘OK’
then monitor the email mailbox for receipt of the
password recovery code on email;
i) Enter the code from the email into the password recovery field on screen and then click ‘OK’, the device will
now reboot.
3. After the device has booted up, the user will be prompted to enter a new secure password and recovery
email (this can be the same as before). Click ‘OK’ and the recorder will show the password change has been
successful and the email will receive confirmation by email

DIGITAL VIDEO RECORDER QUICK START GUIDE
11. PLAYBACK
12. BACKUP
Right click the mouse in Live View then select ‘Playback’.
From the top left drop down list select the type of playback, 6 types
of playback are available:
o Normal playback
o Event playback
o Label playback
o Smart playback
o Time division playback
o Snapshot playback
o
Next select the channel & date.
o Click the play icon to start the video playback.
o Use the control bar to pause, speed up, slow down,
go backward and stop.
o There are options to clip up, label or lock video files
from here too. Refer to the manual for more
detailed information.
Right click
the mouse, enter Main Menu then select the ‘Backup’ tab at the bottom of the screen.
1. Select the channel, record type, time & day to search for video files.
2. Set the video file format before searching.
3. Connect a USB device with sufficient free space.
4. Select the video files to backup and click ‘Start’.
[NOTE] If the USB device doesn’t show, click ‘Detect’.
[NOTE] If there isn’t enough free memory on the USB device, click ‘format’ to clear the USB device
memory.

DIGITAL VIDEO RECORDER QUICK START GUIDE
13. CMS CONNECTION
14. PC PLAYBACK
For anything not covered in this quick start guide, please refer to the manual or contact your provider.
ASPECT
CMS is a computer program design
ed
to connect
to devices on the WAN. From the software; devices can
be quickly added, configured & assigned to an e-Map.
1. Install and launch ASPECT CMS on a computer.
2. To log in to the software the username: admin;
password: admin – this should be modified to
increase security and prevent unauthorised
access.
3. The software will manage, display live video,
search playback video, set up e-map and allows
device setting configurations.
After performing a backup, to play the video on a computer, use the ASPECT video player.
1. Launch ASPECT player, downloaded from the QR code on this document
2. Navigate to Playlist and select ‘+’ then ‘add file’
3. Navigate to backed up video file and click open
4. Press play and/or use the control bar to control the video speed & direction
2
3
This manual suits for next models
6
Table of contents
