Aspira TWLFZ-170 User manual

TWLFZ-170
FREEZER
May 2013

Instructions for Installation
Cautions for Safety
Operation
Cleaning and Maintenance
Reversing the Door
2
3
4
5
6
CONTENTS
Parts and Features
Because of product improvement, your refrigerator
may vary from this user manual
Please read this users operation manual before using.
7
Troubleshooting 9
Warnings 10
Important Disposal Instructions 10
R600a Refrigerant
11

Parts and FeaturesParts and Features
7
8
1
2
3
4
5
6
Cabinet
Compressor(at the back of cabinet)
Adjustable Feet
Worktop
Door Gasket
Door Assembly
Drawer
Thermostat Knob
77
8

Instructions for InstallationInstructions for Installation
Do not tilt the appliance more than 45.
For optimum performance ensure correct ventilation space around the appliance.
1.
3.
4.
Avoid direct sunlight, heat sources and very moist or humid places. Do not install this
appliance near flammable, combustible or explosive materials.
Install the appliance on a strong, level floor. Do not install on soft materials
such as foam or plastic.
5.
The appliance should be left for 2 hours after installation before it is turned
on, in order to allow the refrigerant to settle.
6.
To ensure the cabinet does not become damaged,
do not apply force to any part of the appliance such
as the condenser, the door and its handle. Damage
to the cabinet will result in poor performance.
Force
2.
Avoid installing the appliance in very cold conditions as the performance of the
appliance will be impaired.
7.

1.
Ensure the voltage in the power socket is the same as the rated voltage
of this appliance.
Cautions for SafetyCautions for Safety
Do not splash water on to the appliance, this may cause a malfunction
or electric shock.
Do not store flammable materials such as petrol, LP gas and glue
etc, inside the appliance.
3.
4.
2.
The power plug should have its own separate outlet socket in order to
prevent the outlet socket from being overloaded by other plugs.
Chemical Material
If the power supply cord is damaged, it must only be replaced by the
manufacturer, its service agent or similarly qualified persons.
5.
Under no circumstances should you attempt to repair the machine
yourself. Repairs carried out by inexperienced persons may cause
injury or serious malfunctioning. Contact your local Service Centre.
6.

The temperature of the appliance can be adjusted by turning the
thermostatic dial. Setting of the thermostat dial at normal is the most suitable
for general operation. Max is the coldest setting.
Do not overload the appliance. Where possible
open the door less often in order to maintain the
temperature of the appliance and save electricity.
3.
OperationOperation
2.
When operating the appliance for the first time, set the thermostat dial at normal,
connect to the electricity and turn it on without loading any food.
Then set the thermostat
dial to the desired setting and place foods into the appliance.
Wait for the
appliance to become cold, usually this takes 2 or 3 hours.
1.
CautionsCautions
When defrosting, never use any sharp or metallic objects to remove the frost /
ice on the surface of the evaporator as this will damage the evaporator.
Do not store bottled beverages in the freezer as liquids may expand during
freezing causing the bottle to break and damage the appliance.
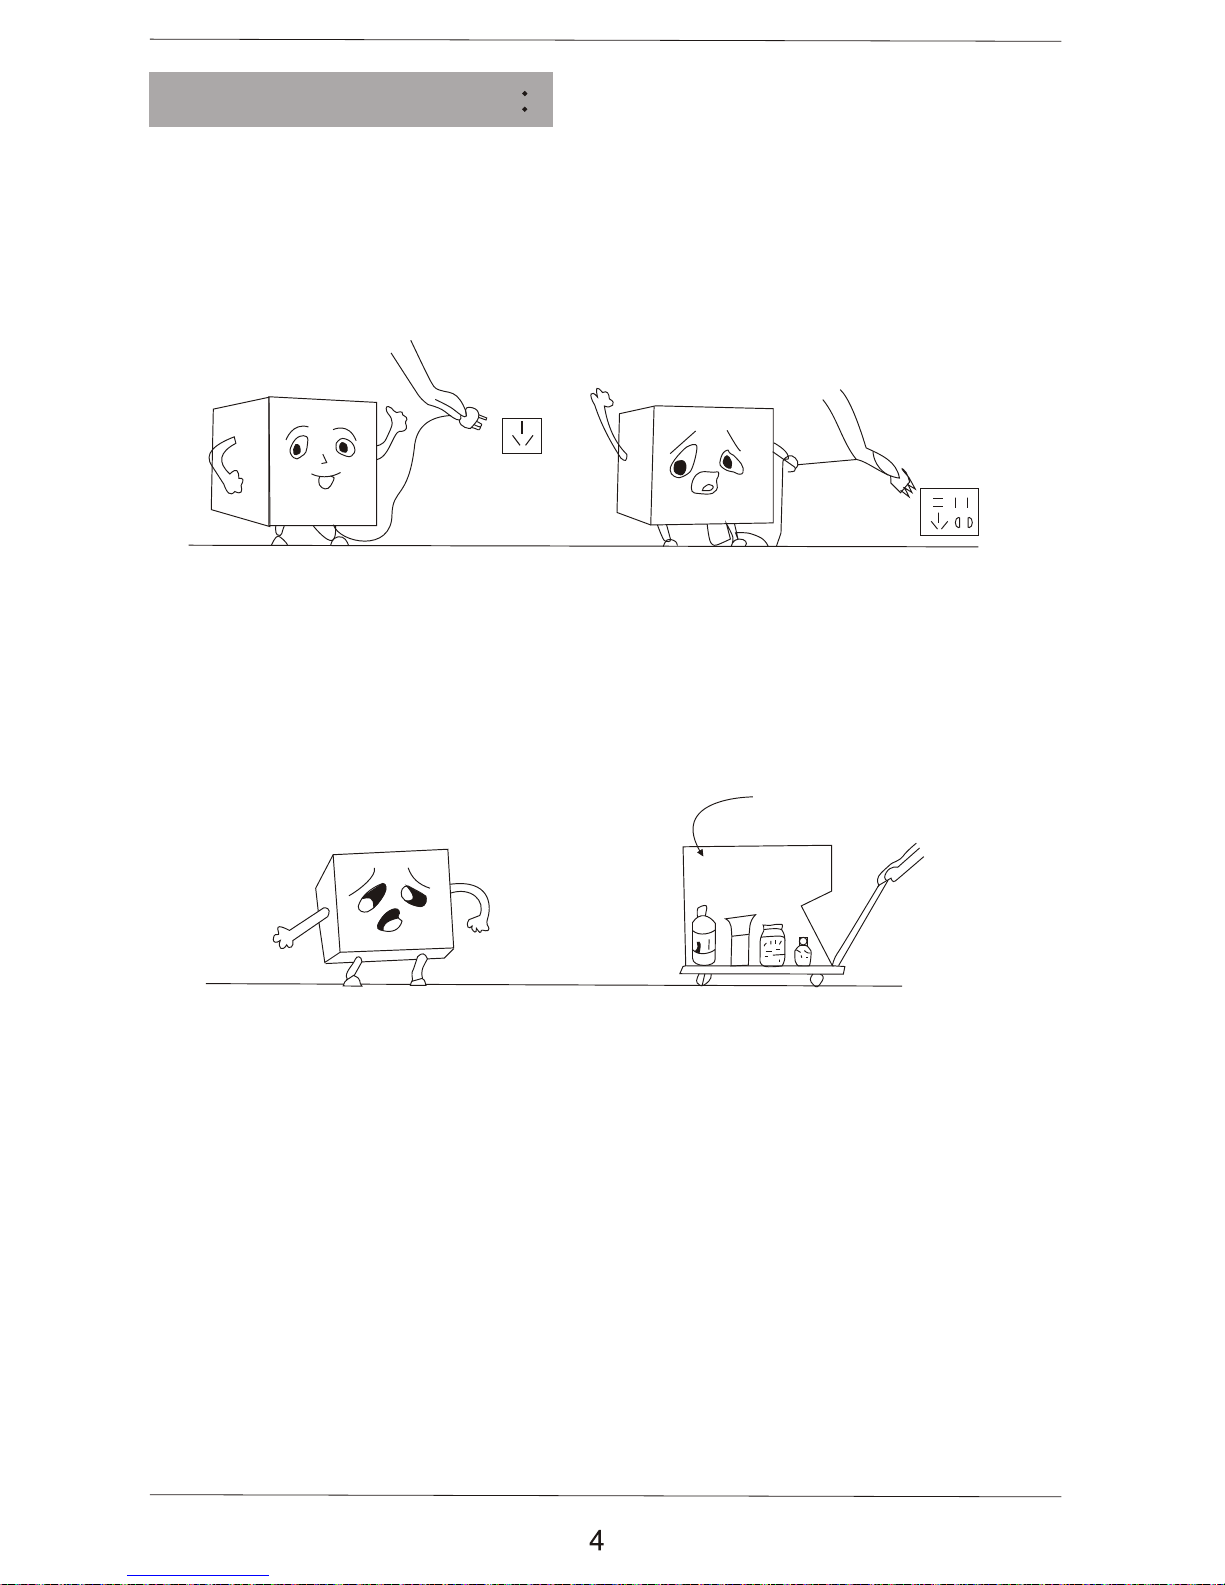
If the power supply is turned off for any reason, wait ten minutes before
switching the appliance on again.
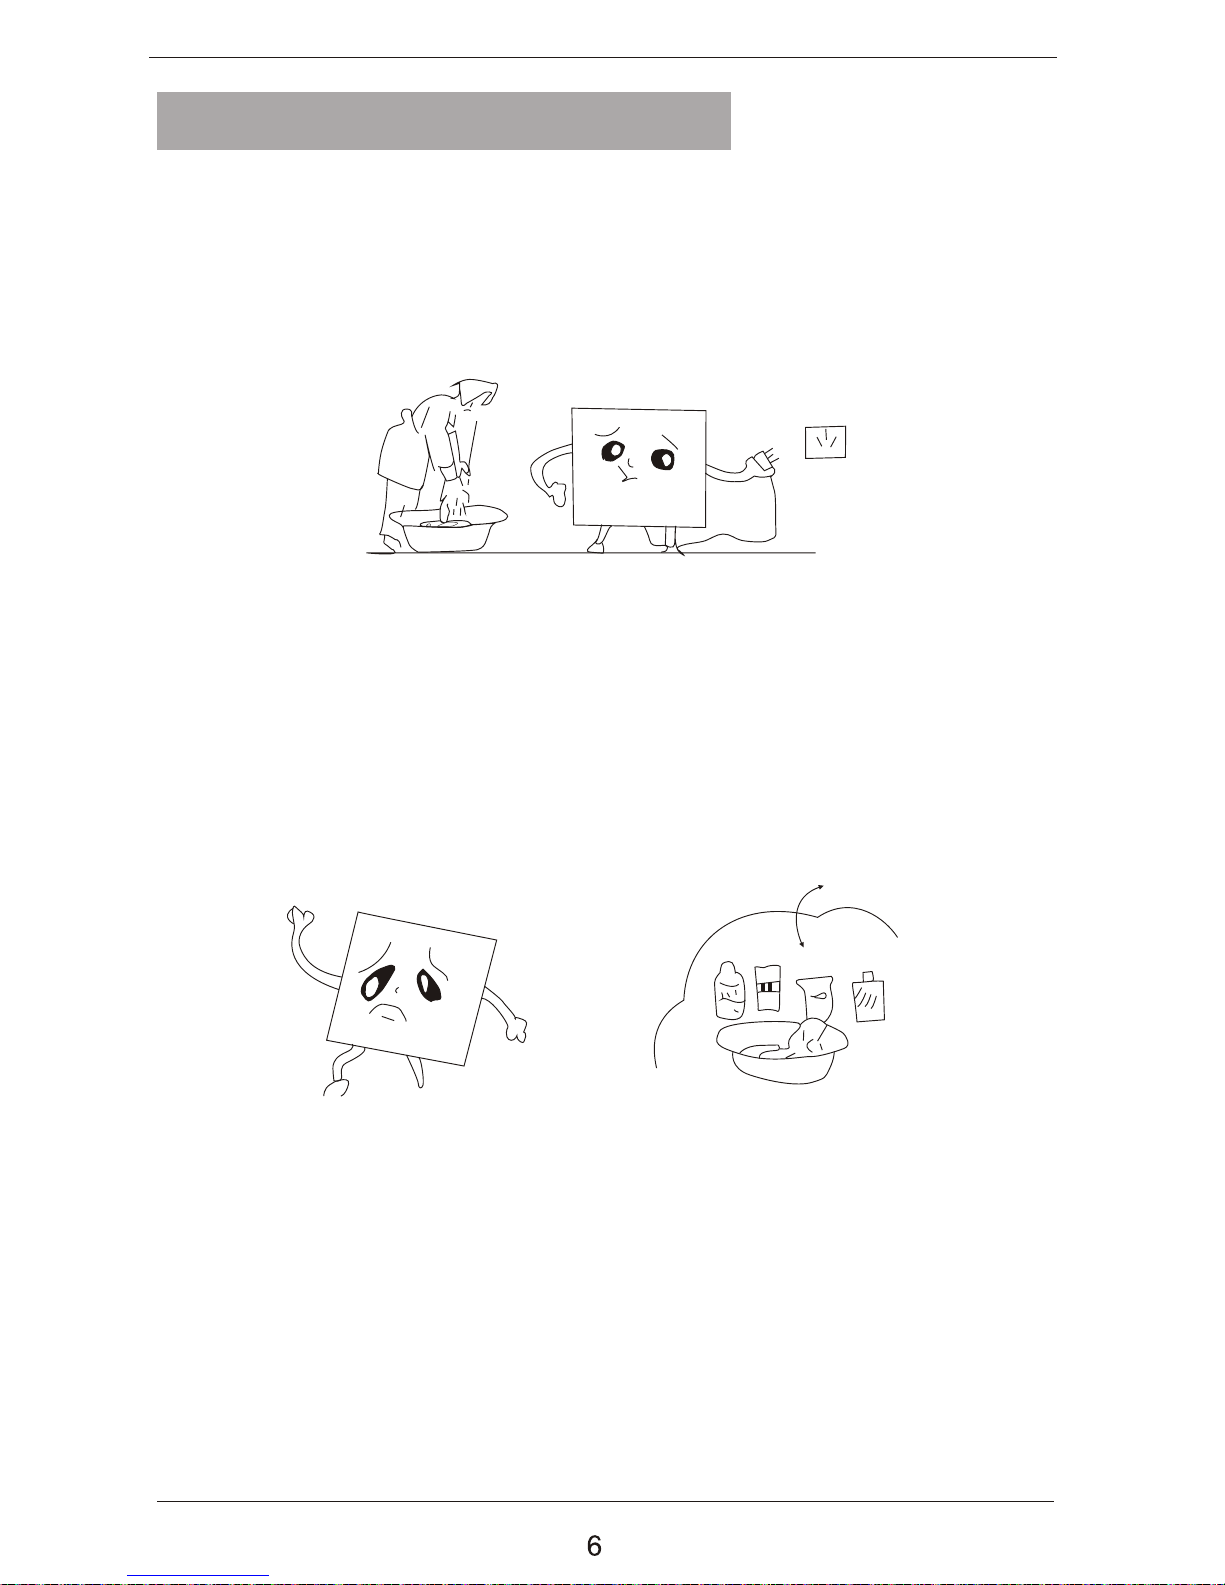
Defrost the freezer compartment whenever the layer of frost on the surface
reaches 3 or 4 mm. When defrosting, remove all foods, unplug the appliance
and open the door. After the frost has melted, discard the water and dry the
interior of the appliance. The appliance can then be restarted.
4.

Cleaning and Maintenance:Cleaning and Maintenance:
Detergent
When cleaning the appliance, first disconnect the appliance from the power
supply by removing the plug. Wipe the appliance carefully with a cloth and
neutral cleaning agent, then wipe it clean with fresh water.
1.
Never use acids, chemical solutions, thinners or the like to clean the appliance
because they may damage the paint work and plastic components of the appliance.
2.

The appliance has the capability of opening the door from either the left or the right side.
The unit is delivered to you with the door opening from the left side. To change the opening
direction, please follow these instructions.
Note: Before reversing the door, unplug the appliance from the mains or disconnect the
electrical power supply.
Reversing the Door:
7

8
Door opening from left side
Door opening from right side
1. Remove the screws (6) which fix the worktop(7) to disassembly the worktop.
2. Remove the two screws (1) that hold the upper hinge (5) (right side) to the frame.
Take away the upper hinge (5).
3. Lift the door and place it on a padded surface to prevent scratching it.
4. Remove the two screws (8) that hold the lower hinge (2) and make sure to remove
the lower hinge (2).
5. Remove the left front leg (4) and transfer it to the right side.
6. Before placing this lower hinge (2), remove the blot-pin (9) and reverse the direction
of the lower hinge (2). Then install the lower hinge (2) onto the left side of the lower
frame with two screws (8).
7. Insert the bolt-pin (9) to the lower hinge (2).
8.
9. While holding the door in the closed position secure the upper hinge (5) in the top
frame of left side with two screws (1). Please remember that do not tighten the two
screws (1) until the top of the door is levelled with the counter top.
10. Install the worktop onto the top of the cabinet with screws (6).
Set the door into place making sure the door seals at the lower hinge (2).

If the appliance is not cool enough ensure that:
The thermostat is at the correct setting.
There is enough space around the appliance.
The doors are not opened too frequently and for too long.
The appliance is not overloaded and hot food has not been placed in the appliance.
The appliance is not in direct sunlight or placed near a heat source.
2.
When the appliance operates too noisily ensure that:
The appliance is properly leveled.
The appliance is not touching objects around it.
The containers or solid packages stored inside are not touching each other.
During periods of high humidity, moisture may form on the surfaces of
the appliance. This is not a fault and maybe wiped away.
If after checking the above suggestions your appliance is still not
functioning properly, please contact Customer Services without delay.
Note:Note:
3.
When the appliance does not operate ensure that:
The electric power is supplied and the voltage is normal.
The fuse or circuit breaker is not out or tripped.
The power plug is plugged in firmly in the outlet socket.
blown
1.
Troubleshooting:
9

This appliance is not intended for use by persons (including children) with reduced
physical, sensory, or mental capabilities, or lack of experience and knowledge, unless
they have been given supervision or instruction concerning use of the appliance by
a person responsible for their safety.
Children should be supervised to ensure that they do not play with the appliance.
If the supply cord is damaged, it must be replaced by the manufacturer, its service
agent or similarly qualified persons in order to avoid a hazard.
Keep ventilation openings, in the appliance enclosure or in the built-in structure
clear of obstruction.
Do not use mechanical devices or other means to accelerate the defrosting
process, other than those recommended by the manufacturer.
Do not damage the refrigerant circuit.
Do not use electrical appliances inside the food storage compartments of the
appliance, unless they are of the type recommended by the manufacturer.
Warnings:
Important Disposal Instructions:
As a responsible retailer we care about the environment.
As such we urge you to follow the correct disposal procedure for your product
and packaging materials, this will help conserve natural resourses
and ensure that it is recycled in a manner that protects health and the
environment.
You must dispose of this product and its packaging according to local laws
and regulations. Because this product contains electronic components and
sometimes batteries, the product and its accessories must be disposed of
separately from household waste when the product reaches its end of life.
Contact your local authority to learn about disposal and recycling.
The product should be taken to your local collection point for recycling.
10
Remove the plug and ensure that any locks or catches are removed, to
prevent young children being trapped inside.

This appliance may contain a small quantity of environmentally friendly, but
flammable, non-synthetic R600a refrigerant:
Upon opening and installing your product, check that the tubing of the refrigerant
circuit is not damaged during transportation.
Leaking refrigerant may cause eye injuries or ignite.
The room for installing appliance must be at least 1m per 8g of refrigerant.
The amount of refrigerant in the appliance can be found on the rating plate the
back of the unit.
Keep ventilation openings in the appliance enclosure or in thebuilt-in structure
cleaer of obstruction.
Do not damage the refrigeration circuit.
If you are unsure of the refrigerant type check the rating plate on the back of the unit.
11
R600a Refrigerant:

CKAPR-F01
Table of contents
Popular Freezer manuals by other brands

Maytag
Maytag MQF1656TEW00 Use & care guide

Miele
Miele KWFN 8706 SE ED-1 Operating and installation instructions

Frigidaire
Frigidaire GLFH21F8HB - Frost Free Upright Freezer Service data sheet

AEG
AEG SCK818E3FS user manual

Frigidaire
Frigidaire FFFH20F3WW0 use & care

Cospolich
Cospolich F41-2M-SN-MLR Technical manual