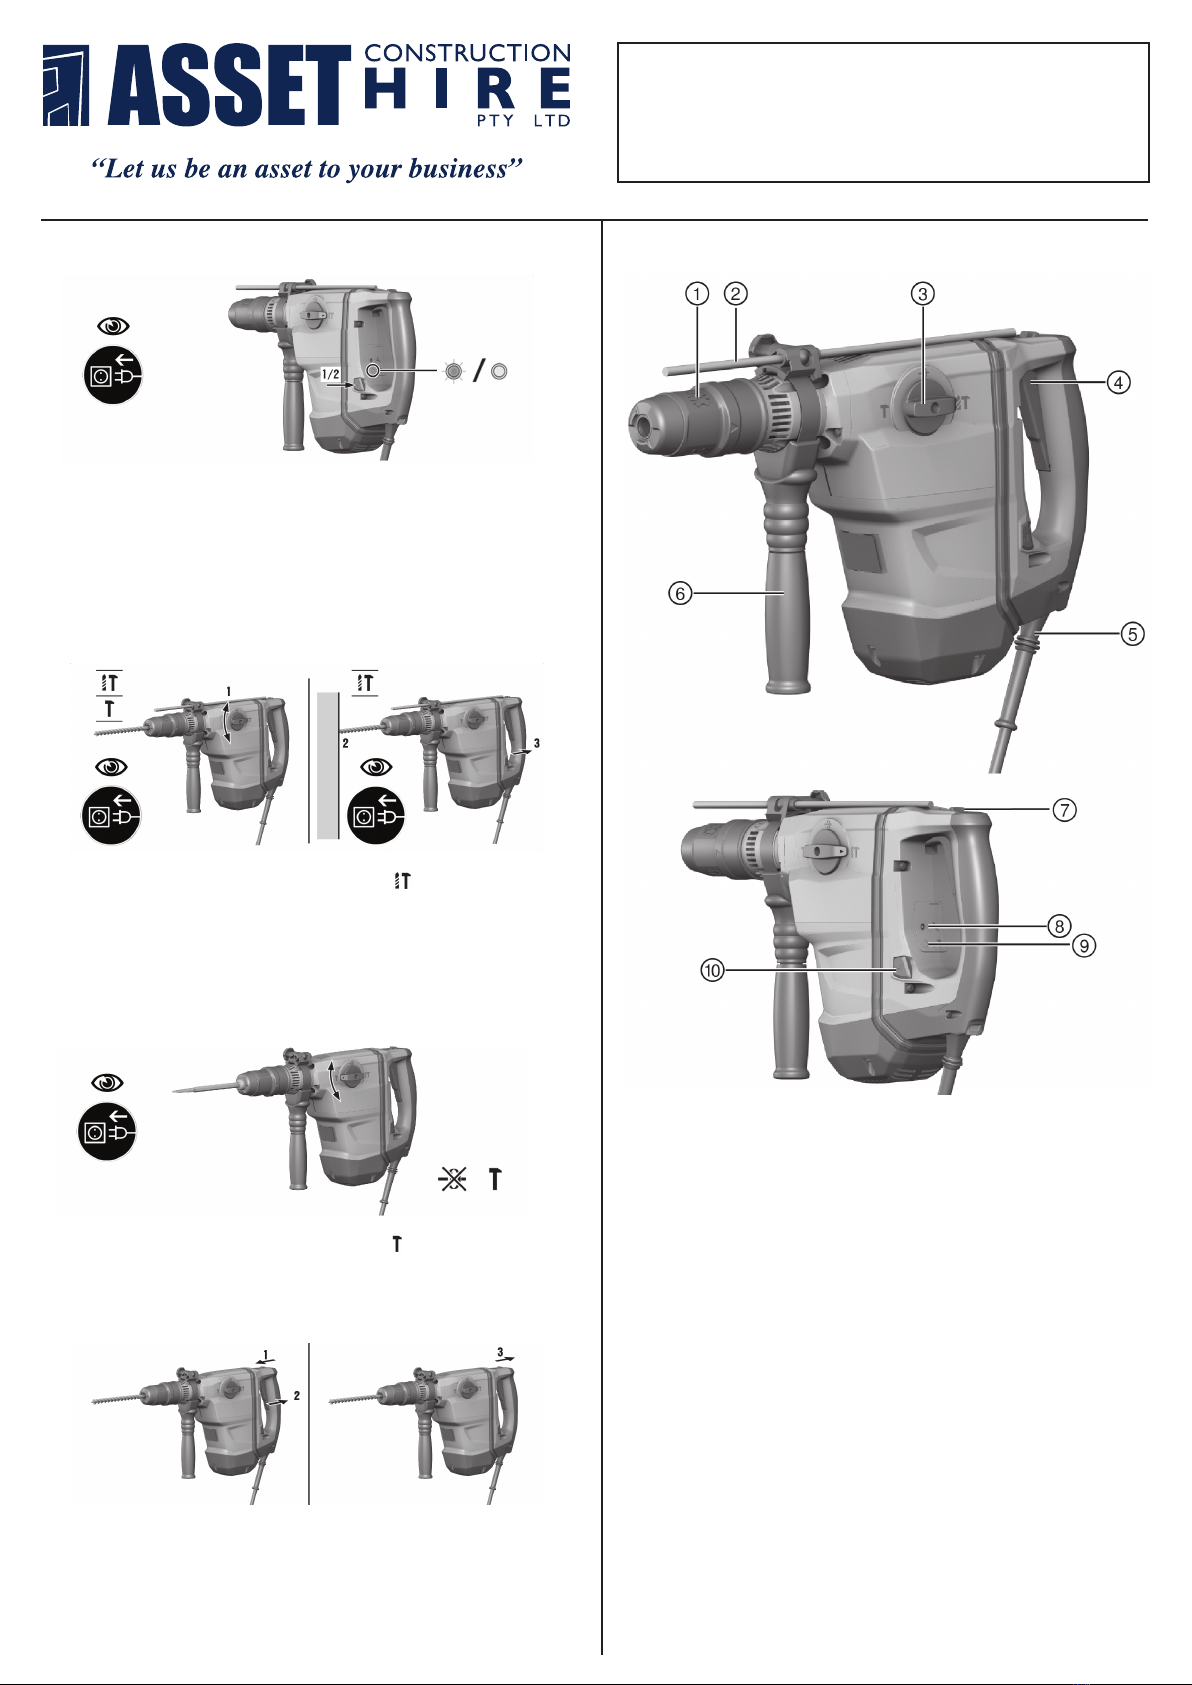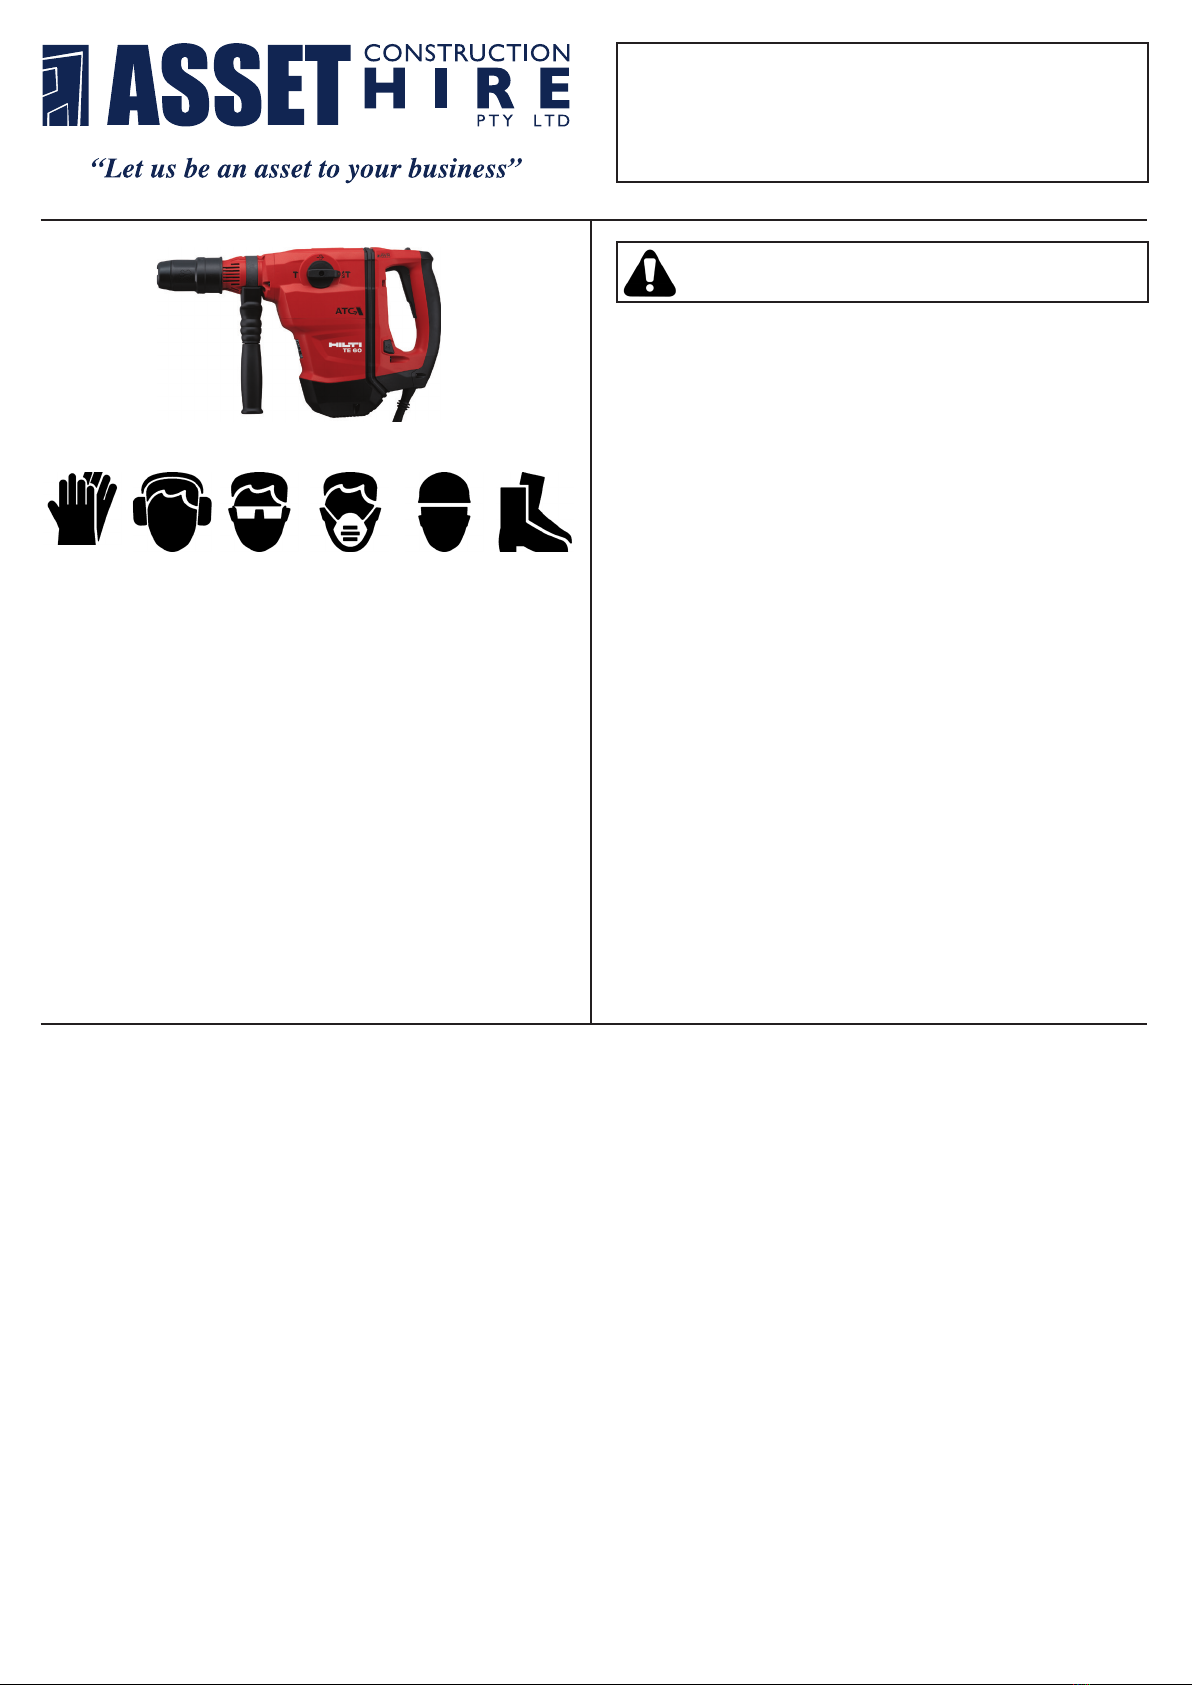
CONCRETE HAMMER DRILL
SAFETY SHEET
(Hilti TE60-ATC/AVR)
PLEASE READ THIS GUIDE CAREFULLY
BEFORE OPERATING THE EQUIPMENT
IMPORTANT - CONDUCT A RISK ASSESSMENT
Before you commence any work at your chosen work area, you should
undertake some preliminary hazard identication and risk control
precautions. Ideally more than one person should do this. This is
undertaken by:
1. Physically inspecting the work site
2. Reviewing the best way/job steps required to complete the task
3. Reviewing the Safe Work Information supplied with the equipment
4. Reviewing other reference documentation and expert advice.
The hazard identication and control process steps are dened as:
1. Identify the Hazards (eg. 240V power drill use around wet areas)
2. Assess the Risk (multi earth paths - possible electrocution)
3. Select the Control Measure (e.g. dry the area; use an RCD; use a
cordless drill etc)
4. Re-assess the Risk (risk of electrocution now negligible). This is
undertaken to ensure that the risk control measures adopted have not
introduced any new risks to the work area.
HELP AND SUPPORT
If the unit does not operate correctly or you are unhappy with its
performance, return it to Asset Construction Hire for an exchange,
or phone for assistance. Do not attempt repairs yourself.
Asset Construction Hire
OPERATION MANUAL
A PDF of the full Operation Manual is available at:
www.assethire.com.au/manuals-specs-safety-sheets/
and must be read before using the equipment.
BEFORE OPERATING THE EQUIPMENT:
• Read this Safety Sheet and any other information provided with the
equipment, including instructions, decals and operation guidelines.
• Check that you understand how and when the use the equipment,
and know how to operate it safely.
• Ensure that it is only used according to the manufacturers and hirer’s
instructions, and only for work that is compatable with its technical
limitations.
• Operate in a clear work area free from nonessential persons, children,
animals or hazards.
• Ensure that you have a secure footing and clear access and egress to
the work area while on the job.
• Do not operate any equipment if you are tired or suering any medical
condition, or if under the inuence of drugs or alcohol which may
cause lethargy or dangers to yourself or others.
• Do not use faulty equipment. If in doubt contact Asset Construction Hire.
SAFETY INFORMATION
• Use the product only when it is in technically faultless condition.
• Never tamper with or modify the power tool in any way.
• Use the auxiliary grips supplied with the tool. Loss of control can
cause personal injury.
• Apply appropriate safety measures at the opposite side of the
workpiece in work that involves breaking through. Parts breaking
away could fall out and / or fall down causing injury to other persons.
• Always hold the power tool with both hands on the grips provided.
Keep the grips clean and dry.
• Hold the power tool by the insulated gripping surfaces when
performing work in which the accessory tool might come into contact
with concealed wiring. If the accessory tool comes into contact with a
live wire, metal parts of the power tool can also become live, resulting
in an electric shock.
• Avoid touching rotating parts – risk of injury!
• Wear suitable protective glasses, a hard hat, ear defenders,
protective gloves and light respiratory protection while using the
power tool.
• Wear protective gloves also when changing the accessory tool.
Touching the accessory tool presents a risk of injury (cuts or burns).
• Wear eye protection. Flying fragments present a risk of injury to the
body and eyes.
• Before starting work, check the hazard class of the dust that will be
produced when working. Use an industrial vacuum cleaner with an
ocially approved protection class in compliance with the locally
applicable dust protection regulations. Dust from materials such as
lead-based paint, certain types of wood and concrete/masonry/stone
containing quartz, minerals or metal can be harmful to health.
• Make sure that the workplace is well ventilated and, where necessary,
wear a respirator appropriate for the type of dust generated. Contact
with or inhalation of the dust can cause allergic reactions and/or
respiratory or other diseases to the operator or bystanders. Certain
kinds of dust such as oakwood and beechwood dust are classied
as carcinogenic, especially in conjunction with additives for wood
conditioning (chromate, wood preservative). Only specialists are
permitted to handle material containing asbestos.
• Take breaks and do physical exercises to improve the blood
circulation in your ngers. Exposure to vibration during long periods of
work can lead to disorders of the blood vessels and nervous system
in the ngers, hands and wrists.
• Before beginning work, check the working area for concealed electric
cables, gas pipes and water pipes. External metal parts of the power
tool can become live, presenting a risk of electric shock, if you
accidentally damage an electric cable.
• Immediately switch o the power tool if the accessory tool jams. The
power tool might twist o-line.
• Wait until the power tool stops completely before you lay it down.
PERSONAL PROTECTION EQUIPMENT (PPE)
PROTECTIVE
GLOVES
HEARING
PROTECTION
SAFETY
GLASSES
RESPIRATORY
PROTECTION
PROTECTIVE
HELMET
PROTECTIVE
BOOTS