ASTE AVO Series User manual

AVO
series
USER MANUAL
EN
Standard
AVO Standard 170-60,AVO Standard 170-60 Coolboard
AVO Standard 170-60 G, AVO Standard 170-87 G

ENEN
Congratulations on the
purchase of your new Aste
premium product!
At Aste we develop products with complete devotion to
quality and ease of use. That’s our passion. To obtain the best
results, we advise you to read this user manual* carefully.
Even though this product has been designed according to
the highest standards, it is important to use and maintain
your appliance correctly.
On behalf of the Aste-team
Jussi Salonen
CEO and Founder, Aste Finland Oy
*Aste constantly works on the further development of all models.
Therefore please understand that we have to reserve the right to
make design, equipment and technical modications.

EN
EN
EN
TABLE OF CONTENTS
1. SAFETY INSTRUCTIONS................................................. 4
2. PUTTING INTO OPERATION.......................................... 7
3. USE OF THE APPLIANCE ................................................ 8
4. CLEANING AND MAINTENANCE ...............................11
5. TROUBLESHOOTING.....................................................13
6. TECHNICAL SPECIFICATIONS.....................................16
7. ENVIRONMENTAL POLICY & RECYCLING................18
8. DISPOSING OF THE APPLIANCE ................................18
9. DETAILED PRODUCT INFORMATION .......................19

4
ENEN 1. SAFETY INSTRUCTIONS
Please read this operating and maintenance manual
carefully. We suggest to keep the guide into your
possession during the entire life cycle of the product.
After delivery, immediately check the appliance for
possible transport damage and make sure it works
properly. All safety devices must be present and
functional before operating the appliance.
Do not leave children without supervision.
Ensure that they do not play with the appliance.
In the case of appliances provided with locks, the key
must be kept at a site where children cannot have
access to it to avoid unintentional locking.
The appliance always has to be transported and
displayed vertically.
The appliance is designed for inside use only.
The surroundings should not transcend the following
conditions (based on a standard environment):
• 25°C temperature
• 60% humidity
• 0,2 m/s air speed
1.1.INSTALLATION AND USE

5
EN
EN
EN
Keep a minimum distance of 10 cm between the
appliance and neighbouring surfaces (walls, roof,
furniture etc.).
Keep clear of obstructions all ventilation openings in
the appliance enclosure or for built-in structure.
Before connecting the device, check:
• The power rating (on the type plate)
• The relevant local electrical safety regulations
Do not use an extension cord to connect the
appliance to the electrical circuit.
Make sure that power cable and plug are
undamaged before connecting the appliance. The
damaged cable can only be replaced with a cable
identical to the original part.
2Hrs
After delivery, keep the appliance in a warm ambient
temperature for 2 hours before starting it.
Do not use electrical appliances inside the storage
compartments of the appliance, unless they are of the
type recommended by the manufacturer.

6
ENEN Do not store explosive substances such as aerosol
cans with a flammable propellant in the appliance.
The user is solely responsible for damages to
properties or products, or injuries to persons resulting
from careless and improper use of the appliance.
Do not expose the appliance into direct sunlight.
Do not heat the appliance to more than 70°C.
1.2.DEFECTS
Only authorised service specialists may perform
work on the electrical and refrigeration systems.
If this is not observed, all warranty and liability claims
become invalid.
Damaging the refrigerant circuit can lead to severe
injuries. Do not damage the refrigerant circuit!
1.3.WHEN OUT OF USE
Make sure that the appliance is thoroughly cleaned
and dried. Proper cleaning prevents corrosion and
mould formation.
Appliances out of use may be dangerous for children,
therefore position the appliance in such manner that no
person can get locked up.
When disconnecting the appliance from the power
supply, always take hold of the plug. Do not pull the
cable.

7
EN
EN
EN
2. PUTTING INTO OPERATION
2.1.INSTALLATION
IMPORTANT!
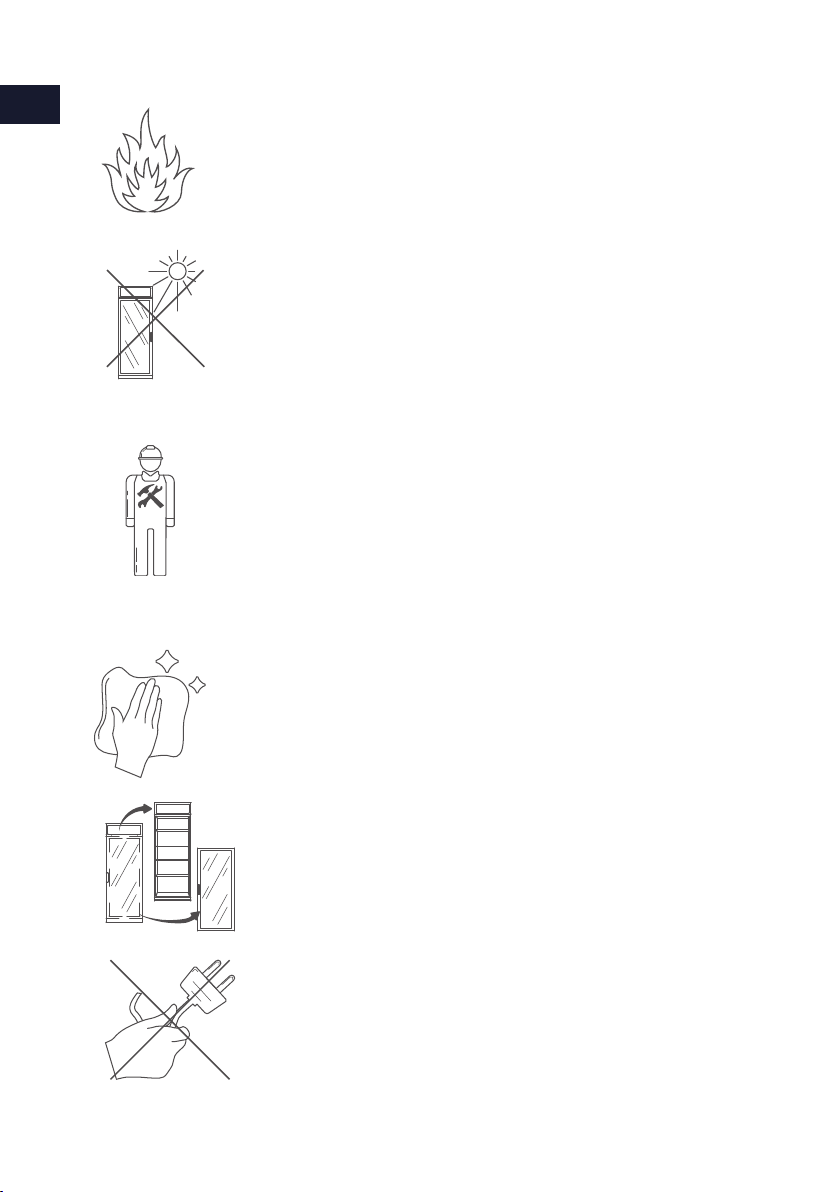
Never move the appliance by grasping the edge of the glass sides.
Position the device where it is protected from sunlight and other heat
sources, since operation may be disturbed if the ambient temperature
exceeds +25°C.
• The appliance should not be operated in rooms where the
temperature drops below +10°C since this disrupts the lubrication
of the compressor.
Leave at least 10 cm space between the appliance’s side walls/roof/back
and neighbouring surfaces such as other devices, walls, furniture and ceiling to
provide free air flow behind the device to enable proper operation.
If the furnishing of the room allows positioning only close to the heat source
the following minimum clearances must be kept:
• Put a 0.5-1 cm thick insulation board between two devices if they
are 3 cm or less apart.
• Min. 30 cm from oil or coal-fired ovens.
IMPORTANT!
If the humidity is above 60%, condensation may occur on the glass.
2.2.ELECTRICAL CONNECTION
The appliance may be connected to 220-240 V,50 Hz mains via properly
mounted grounded socket. Check if the voltage meets the local voltage and
make sure that the connecting cable isn’t stuck anywhere.
A fuse/circuit breaker of 10 A is required for the operation of the appliance.
• If the connection cable is damaged or it has to be extended, the
job must be done by a qualified electrician to avoid the dangerous
situations.
Do not use an extension cord! The appliance must be positioned in a way
that the main plug is easily accessible.

8
ENEN 3. USE OF THE APPLIANCE
3.1.STARTING UP
1. Clean the appliance with detergent before switching it on, dry it with a
soft, clean cloth and let it ventilate for a while.
2. It is advised to keep the appliance in an upright position for at least
2 hours after transport before using it.
3. It is advised to switch on the appliance and check its operation before
positioning it at the final place.
4. Place the shelves on the shelf holders.
5. It is advised to switch on the appliance and check its operation before
positioning it at the final place. Connect the plug into the socket.
6. Leave the appliance connected in an empty state for 2 hours to check
the functioning before adding goods for the first time. Do not load food
to be chilled before the temperature display reads +6°C.
3.2.SHELF INSTALLATION
1. Attach shelf supports to shelf rails at the desired height.
2. Slide the shelf into the appliance and mount it on supports.
3. Make sure the shelf stays stable on its supports.
1
2
IMPORTANT!
Wear safety gloves during the installation.
IMPORTANT!
All packaging materials are recyclable/energy waste.

9
EN
EN
EN
Select the desired target temperature by pressing
or
Turn lights ON/OFF by pressing
Press and hold for 3 seconds to switch ON or
turn OFF the appliance.
Start defrosting by pressing and holding
for 3 seconds.
Thawing is fully automatic. It is recommended to
defrost and clean the appliance every 6 months
(see chapter 4. Cleaning and Maintenance).
3.3.DIGITAL CONTROLLER
HINT!
The digital temperature controller is located behind the ventilation
grating.
3.4.FILLING
To achieve optimal cooling, it is advised to fill up the appliance when it is
less frequently used.
1. Check the maximum load.
2. Do not overload the device with products.
3. Be careful not to block air circulation.
1KG
MAX
2
FILL LINE
3
WARNING!
Do not use mechanical devices or other means to accelerate the defrost-
ing process, other than those recommended by the current user manual.

10
ENEN
Do not place the appliance in direct sunlight, HVAC outlets or near heat-
producing appliances (like ovens, boilers and heaters).
The appliance reaches its top efficiency when it works 24/7, do not switch it
off during the night.
Keep your appliance clean and well maintained: dust on the condenser or
any unsolved problem can cause increased energy consumption.
Fill the appliance according to the prescribed instructions to allow energy-
efficient operation.
Wipe goods dry before placing them in the appliance. This cuts down on
moisture build-up inside the appliance.
Turn off the interior lighting of the appliance for the night.
Maintain and clean the appliance in a proper way. If the condenser coil is
not cleaned at least 2 times per year, the efficiency of the appliance will
decrease significantly.
Use the ECO frame provided with ECO models to increase the efficiency of the
appliance*.
3.5.ENERGY SAVING TIPS
IMPORTANT!
Once the appliance is switched o, or in case the power is cut o, wait
for at least 5 minutes before plugging in again to avoid damaging
the compressor or cooling system of the appliance.
IMPORTANT!
Use the night curtain during the night to save more energy.
*You can upgrade your appliance with ECO frame. To do so please contact the seller, your
local service partner or get in touch with our after-sales service:

11
EN
EN
EN
4. CLEANING AND MAINTENANCE
IMPORTANT!
Lack of maintenance will cause the appliance to break down.
1. Remove or relocate appliance’s contents.
2. Disconnect the appliance from the mains.
3. Open the night curtain to allow free air circulation.
4. Let the appliance defrost for 12 hours.
4.2.PREPARATION
1 2
3
4
4.1.CLEAN INSIDE/OUTSIDE
IMPORTANT!
Do not clean the appliance with high-pressure or steam cleaners.
5. Remove shelves to reach all surfaces.
6. Clean the inside and outside of the appliance with water and
non-aggressive detergent.
7. Dry previously cleaned surfaces with a soft, clean and dry cloth.
5 6 7
IMPORTANT!
Wear safety gloves to avoid the danger of injury during cleaning.

12
ENEN 4.3.CLEAN CONDENSER
IMPORTANT!
Only the ventilation grating to the condenser may be opened.
Only a trained specialist may open other covers of the appliance.
8. Unscrew two knobs holding the ventilation grating.
9. Remove the ventilation grating.
10. The condenser must be cleaned at least 2 times a year with a
brush or vacuum cleaner. Make sure that the fins are not damaged
or bent.
8 9 10
4.4.REINSTALL
1. Install ventilation grating and shelves back.
2. Connect the appliance to the main circuit.
3. Switch on the appliance.
4. Put contents back in after 1 hour.
4.5.TAKING THE APPLIANCE OUT OF SERVICE
Empty the appliance’s contents and pull out the power
plug.
Make sure that the appliance is thoroughly cleaned and
dried. Thus mould formation and corrosion are prevented.
The appliance out of use may be dangerous for children,
therefore position the appliance in such manner that no
person can get locked up.
IMPORTANT!
Secure loose parts of the appliance before moving it to the storage.

13
EN
EN
EN
5. TROUBLESHOOTING
Problem Possible causes Remedy
The appliance does not
operate
The appliance is not
switched ON.
Switch ON the appliance
The power plug is not
plugged in correctly
Reconnect the appliance
to the power supply in a
correct way
Power relay tripped Wait for at least 5 minutes
then restart the appliance
The power cable/plug
is damaged
Contact the seller or your
local service provider
The airflow is restricted Check the distance
between the appliance
and its surroundings /
Nothing blocks the
airflow inlets/outlets /
Condenser is not dirty
The fuse is blown/the
circuit breaker tripped
Replace the fuse/reset the
circuit breaker
The digital controller
may be defective
Contact the seller or your
local service provider
Water condensation on
surfaces
Too high ambient
temperature and/or
relative humidity %
Install the appliance in an
adapted environment
Appliance gets too
cold
Too low ambient
temperature
Install the appliance in an
adapted environment
The temperature
regulation may be
incorrect
Contact the seller or your
local service provider
LED lights do not
operate
The appliance is not
switched ON
Switch ON the appliance
Lights are turned OFF Switch ON lights using
the digital controller
LED lights are burned
out
Contact the seller or your
local service provider

14
ENEN Problem Possible causes Remedy
Unpleasant smell Re-evaporation tray is
dirty
Contact the seller or your
local service provider
Appliance’s
performance level of
cooling is not enough
Too high ambient
temperature and/or
relative humidity %
Install the appliance in an
adapted environment
The airflow is restricted Check the distance
between the appliance
and its surroundings /
Nothing blocks the
airflow inlets/outlets /
Condenser is not dirty
A large number of
goods inserted
Fill the appliance
according to instructions
Wrong temperature
setting
Check settings using
digital controller
The cooling system
may be defective
Contact the seller or your
local service provider
Disturbing noise /
Disturbing vibration
The gurgling sound is
produced by the flow
of refrigerant
Such sound is normal
Popping and cracking
sounds are produced
by the contraction
and expansion of
refrigerant
Such sounds are normal
The surface under the
appliance is not flat
enough
Position the appliance
steadily on a flat surface
The appliance is not
levelled correctly
Level the appliance to
ensure that its position is
steady
The digital controller
does not operate
The appliance is turned
OFF
Switch ON the appliance
The electronic board
may be defective
Contact the seller or your
local service provider

15
EN
EN
EN
Problem Possible causes Remedy
Excessive ice formation
in the evaporator area
Too high ambient
temperature and/or
relative humidity %
Install the appliance in an
adapted environment
The night curtain does
not operate correctly
The night curtain is
released incorrectly
Use the night curtain
according to instructions
The night curtain may
be defective
Please contact the seller
or your local service
provider
*The minimum period during which spare parts, necessary for the repair of the appliance is 8
years after placing the last unit of the model on the market
In case the malfunction is not caused by any of the above-mentioned
factors or persists over a long period of time or in order to order spare
parts*, please contact the seller, your local service partner or get in touch
with our after-sales service:

16
ENEN 6. TECHNICAL SPECIFICATIONS
*You can nd the detailed explanation of product classication according
to applicable standard using the link: www.astecoolers.com/products
Type AVO Standard
170-60
AVO Standard
170-60
Coolboard
AVO Standard
170-60 G
Net Weight 90 kg 93.5 kg 100 kg
Gross Volume 267 l 267 l 267 l
Net Volume 203 l 203 l 203 l
Width (external) 540 mm 540 mm 540 mm
Depth (external) 630 mm 630 mm 630 mm
Height (external) 1700 mm 1700 mm 1700 mm
Power Input 580 W 580 W 580 W
Defrosting Automatic Automatic Automatic
Avg. Consumption 9.6 kWh/24h 9.6 kWh/24h 9.8 kWh/24h
Classication* 3H2 3H2 3H2
Temperature range +2°C … +6°C +2°C … +6°C +2°C … +6°C
Factory Setting +6°C +6°C +6°C
Energy Class F F E
Compressor Danfoss Danfoss Danfoss
Refrigerant R290 R290 R290
Temperature Control Electronical Electronical Electronical
Evaporator Finned Coil Finned Coil Finned Coil
Condenser Material Aluminium Aluminium Aluminium
Condenser Type Low Maint. Low Maint. Low Maint.
Lighting LED LED LED
Cable Length 3 m 3 m 3 m
Service Frequency 36 months 36 months 36 months

17
EN
EN
EN
6. TECHNICAL SPECIFICATIONS
Type AVO Standard
170-87 G
Net Weight 150 kg
Gross Volume 426 l
Net Volume 324 l
Width (external) 865 mm
Depth (external) 630 mm
Height (external) 1695 mm
Power Input 680 W
Defrosting Automatic
Avg. Consumption 14 kWh/24h
Classication 3H2
Temperature range +2°C … +10°C
Factory Setting +6°C
Energy Class E
Compressor Danfoss
Refrigerant R290
Temperature Control Electronical
Evaporator Finned Coil
Condenser Material Aluminium
Condenser Type Low Maint.
Lighting LED
Cable Length 3 m
Service Frequency 36 months

18
ENEN
Environmental awareness is key throughout the complete life cycle of our
products: from designing to producing it to finally recycling it.
We keep a close eye on the economical and effective use of new
environmentally friendly materials in our products and production. Our target
is to minimise the use of non-renewable natural resources.
We are convinced that sustainable production is the only correct way of
working with respect for our customers, consumers and our planet today and
in the future.
We strongly advise you to visit www.astecoolers.com/products to
check the optimal storing temperatures for food and beverages. Incorrect
temperature setting may result in spoilage and food waste.
7. ENVIRONMENTAL POLICY & RECYCLING
8. DISPOSING OF THE APPLIANCE
The warranty** terminates upon:
• outside & wrong usage
• not following the instructions
• negligence of maintenance
WARNING!
Thermal insulation material is EPP.
The appliance contains some reusable materials and should be disposed of
properly — not simply with unsorted household refuse. Appliances which are
no longer needed must be disposed of in a professional and appropriate way,
in accordance with the current local regulations and laws.
Please check your obligations in accordance with the national WEEE*
provisions and the local WEEE disposal partner. Ensure that the piping is not
damaged in the process.
Both insulating material and the coolant of the appliance bought by you are
environment-friendly materials, which do not damage the ozone layer around
the globe in any form.
*Waste Electrical and Electronic Equipment Directive
**The minimum duration of the warranty is 12 months. For more information, please contact the
seller, your local service partner or get in touch with our after-sales service:

9. DETAILED PRODUCT INFORMATION
Detailed product information is available from European product
database (EPREL).
1. Use the QR code on the rating plate to find the product information
from EPREL.
2. You can also access the EPREL using the link:
https://eprel.ec.europa.eu/
3. You will be asked to enter the model ID. You can find the model ID on
the rating plate.
HINT!
You can nd product specications, hints, recommendations, product
cards and other helpful information from www.astecoolers.com
This manual suits for next models
4
Table of contents