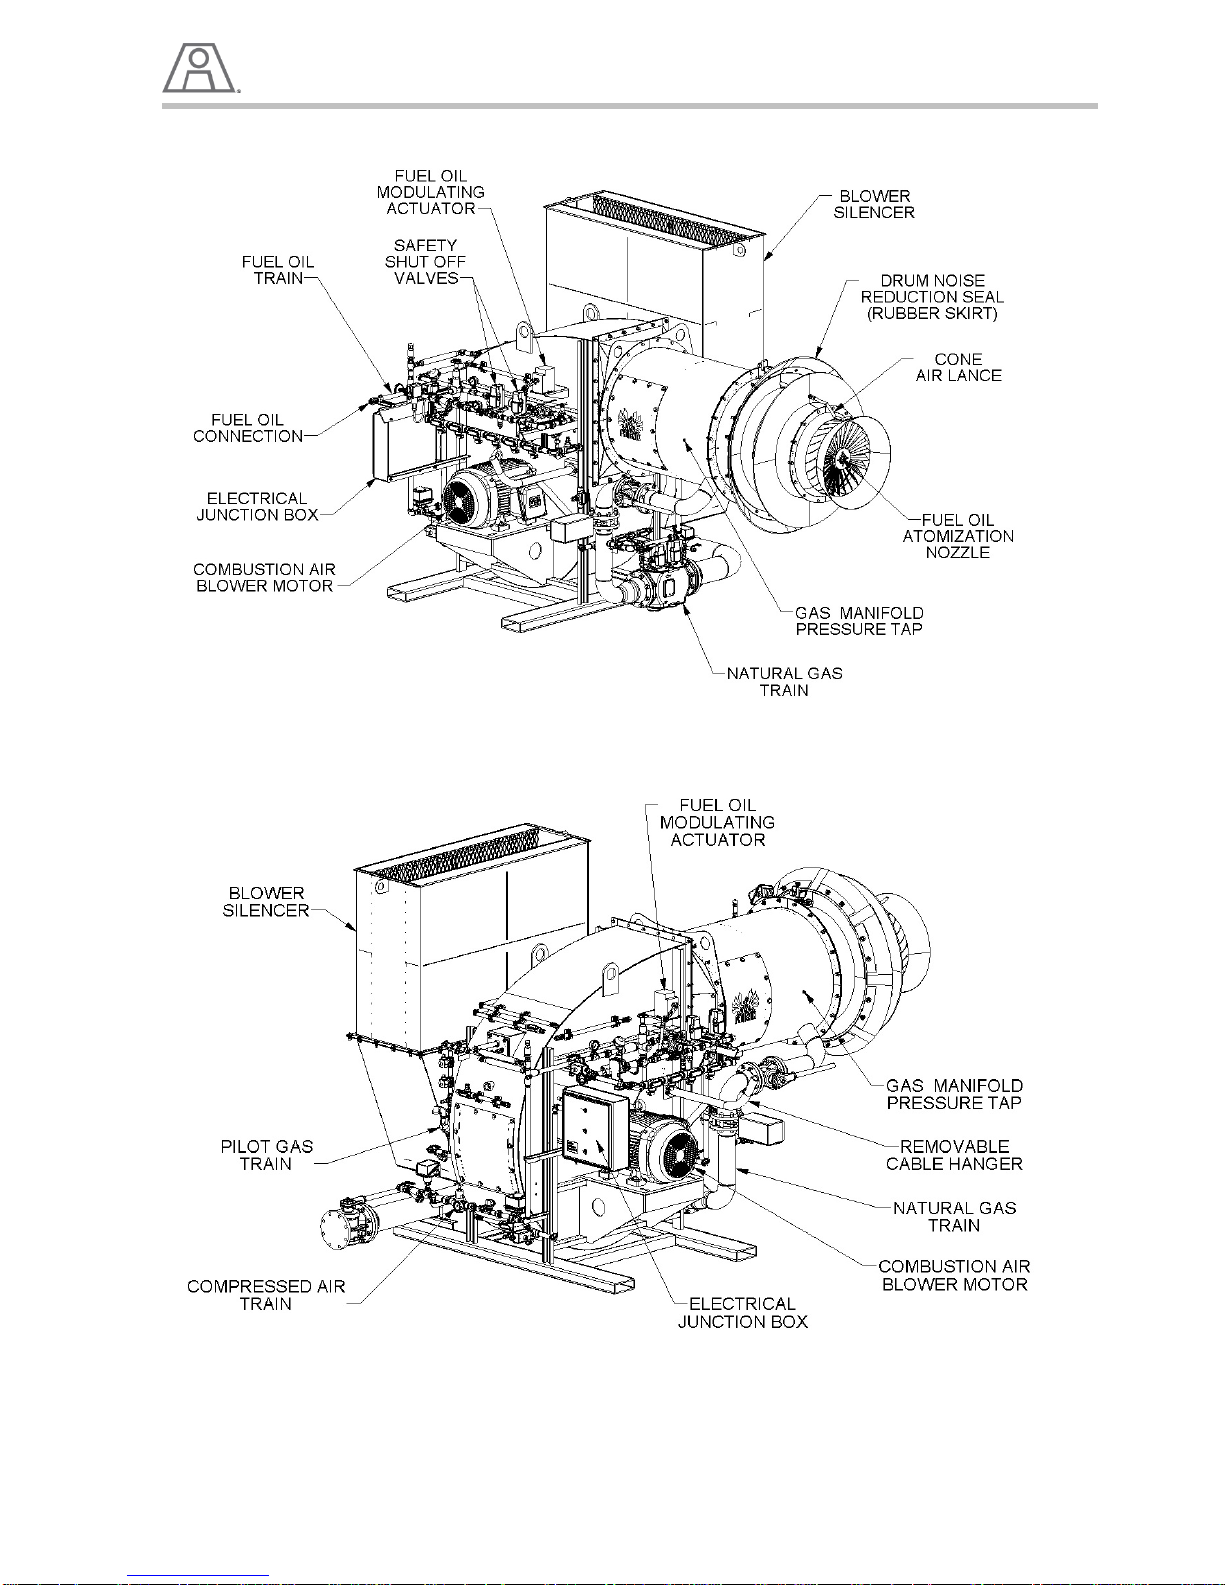
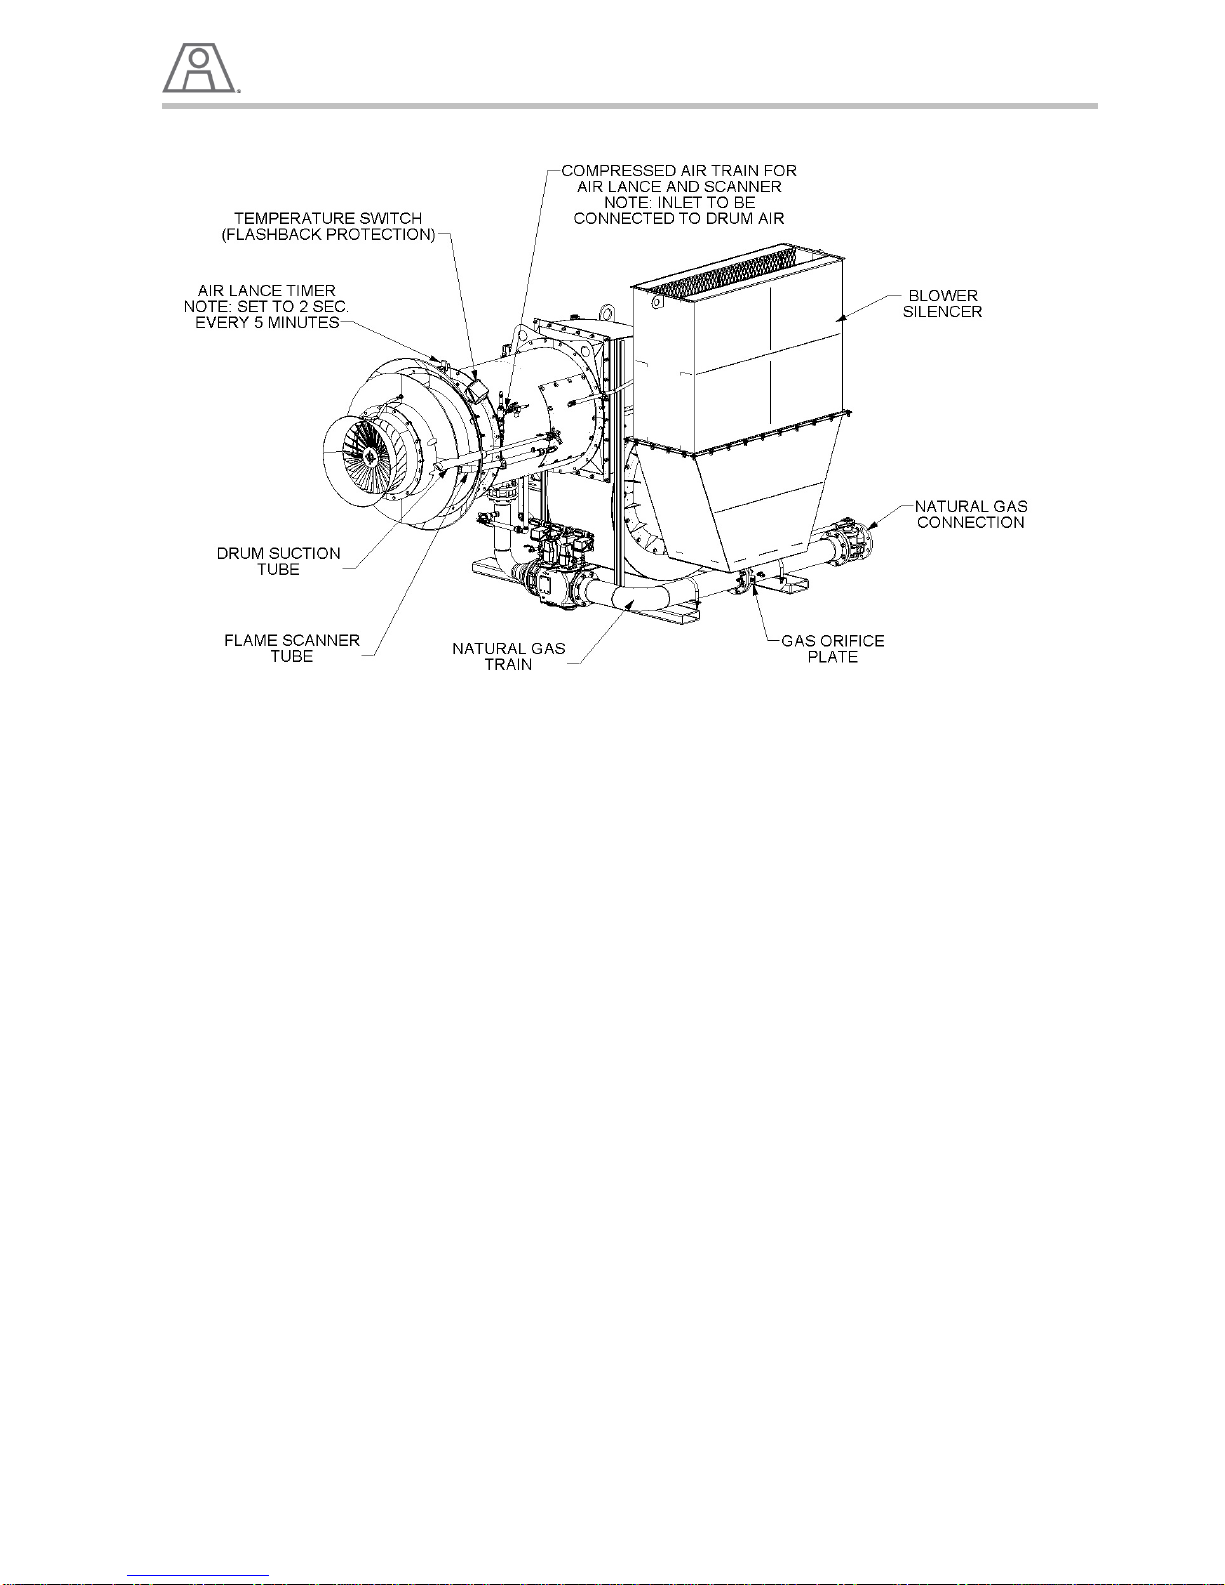
PHOENIX Talon - Operation and Service Manual
5
Introduction
Operation and Service Statement
These instructions are intended to serve as guidelines covering the installation, operation, and
maintenance of ASTEC Burner Systems Group equipment. While every attempt has been made to
ensure completeness, unforeseen or unspecified applications, details, or variations may preclude
covering every possibility. If there is any information that is unclear, contradictory, or absent from this
manual, please contact ASTEC Burner Group for clarification before proceeding.
Scope of this Manual
The objectives of this manual are to document the installation, operation, and maintenance of ASTEC
Burner Systems Group equipment. It provides policies, procedures and references for assuring and
controlling quality and compliance to requirements.
Danger Safety and Warnings
DANGER Combustion Equipment
Operating this Burner outside its design parameters, and/or removing, disabling, or bypassing any
PHOENIX Talon safety device can cause an explosion, serious injury, or death.
Basic Safety instructions
1. Always lockout power to any plant equipment before working on it.
2. Equipment that is de-energized can still retain residual energy, or may be susceptible to gravity or
other potential energy sources.
3. Keep away from power driven parts, even if they are not moving, unless they are locked out or
chained down.
4. Use extreme caution if you must approach running equipment.
5. Check that all fuel sources are shut off, and locked out prior to working on the burner.
6. All the drive guards, handrails, and other safety devices must be in place before starting the
equipment.
7. Prior to start up check that all plant components are in good working condition.
8. Never remove, disable, defeat, or bypass any safety device on this equipment.
9. Make no modifications to your PHOENIX Talon Burner without the recommendation or approval of a
representative of ASTEC Burner Group, Engineering, or Service Departments.
10. Account for all your personnel, on the jobsite, before plant startup.
11. Avoid wearing loose clothing, long hair, necklaces, neckties, or anything that could become entangled
in rotating machinery.
12. Never leave the control house unattended, while the plant is in operation.
13. To avoid engulfment by loose aggregate, never walk on the material stockpiles, or on the material in
the cold feed bins.
14. Never enter a potentially hazardous enclosed space, without an OSHA enclosed space permit
program in effect. (Contact ASTEC Parts Department for an outline of these requirements.)
15. Relieve internal pressure before working on any equipment containing high pressure.
16. Carefully vent any flammable gas using safety measures that will prevent ignition.
17. Thoroughly tighten all fittings before reapplying pressure.