manuals.online logo
Brands
  1. Home
  2. •
  3. Brands
  4. •
  5. Asus
  6. •
  7. Motherboard
  8. •
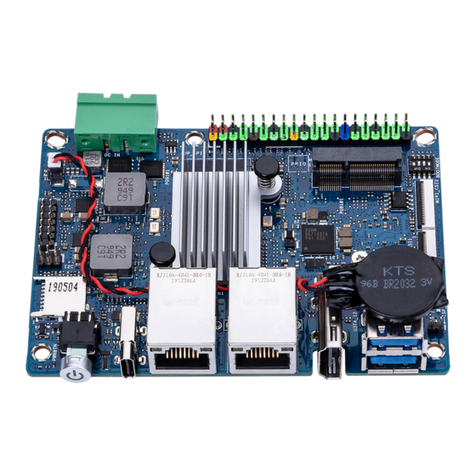
  9. Asus AAEON PICO-APL3-SEMI User manual

Asus AAEON PICO-APL3-SEMI User manual

Other Asus Motherboard manuals
Asus F2A55-M/CSM User manual

Asus

Asus F2A55-M/CSM User manual

Asus TUF GAMING B650M-PLUS WIFI User manual

Asus

Asus TUF GAMING B650M-PLUS WIFI User manual

Asus M5A78L USB3 User manual

Asus

Asus M5A78L USB3 User manual

Asus B85M-K User manual

Asus

Asus B85M-K User manual

Asus PRIME H510M-R User manual

Asus

Asus PRIME H510M-R User manual

Asus Z97-PRO GAMER User manual

Asus

Asus Z97-PRO GAMER User manual

Asus A55M-E User manual

Asus

Asus A55M-E User manual

Asus PRIME H770-PLUS D4 User manual

Asus

Asus PRIME H770-PLUS D4 User manual

Asus TUF Z390-PRO GAMING User manual

Asus

Asus TUF Z390-PRO GAMING User manual

Asus A7N266-VM AA User manual

Asus

Asus A7N266-VM AA User manual

Asus N3150I-C User manual

Asus

Asus N3150I-C User manual

Asus P8Z68-V LX User manual

Asus

Asus P8Z68-V LX User manual

Asus ROG RAMPAGE VI EXTREME User manual

Asus

Asus ROG RAMPAGE VI EXTREME User manual

Asus H170I-PLUS D3 User manual

Asus

Asus H170I-PLUS D3 User manual

Asus EX-H310M-V3 R2.0 User manual

Asus

Asus EX-H310M-V3 R2.0 User manual

Asus Z170I PRO GAMING User manual

Asus

Asus Z170I PRO GAMING User manual

Asus P5KPL-VM 1394 SI User manual

Asus

Asus P5KPL-VM 1394 SI User manual

Asus Motherboard A7V8X User manual

Asus

Asus Motherboard A7V8X User manual

Asus ROG STRIX X370-I User manual

Asus

Asus ROG STRIX X370-I User manual

Asus PRIME B650M-A WIFI User manual

Asus

Asus PRIME B650M-A WIFI User manual

Asus PRIME A320M-R User manual

Asus

Asus PRIME A320M-R User manual

Asus P7H55-M LX USB3 User manual

Asus

Asus P7H55-M LX USB3 User manual

Asus P5G-TVM User manual

Asus

Asus P5G-TVM User manual

Asus P8H61-M LE/USB3 User manual

Asus

Asus P8H61-M LE/USB3 User manual

Popular Motherboard manuals by other brands

Gigabyte MNJ190I-FH user manual

Gigabyte

Gigabyte MNJ190I-FH user manual

Biostar HI-FI-Z87X-3D Setup manual

Biostar

Biostar HI-FI-Z87X-3D Setup manual

Atmel SAM9753PIA-DK user guide

Atmel

Atmel SAM9753PIA-DK user guide

Coapt GEN2 Handbook

Coapt

Coapt GEN2 Handbook

Supero SUPER P4DL6 user manual

Supero

Supero SUPER P4DL6 user manual

Cypress CY3210-PSoCEVAL1 quick start guide

Cypress

Cypress CY3210-PSoCEVAL1 quick start guide

ASROCK B660M-HDV manual

ASROCK

ASROCK B660M-HDV manual

Fujitsu D2831 Short description

Fujitsu

Fujitsu D2831 Short description

Industrial Computers ADE-6050 user manual

Industrial Computers

Industrial Computers ADE-6050 user manual

DFI NB71-BC user manual

DFI

DFI NB71-BC user manual

ASROCK H61 Pro BTC user manual

ASROCK

ASROCK H61 Pro BTC user manual

Norco POS-7893 user manual

Norco

Norco POS-7893 user manual

Intel DG965MS specification

Intel

Intel DG965MS specification

Gigabyte GA-K8VT800-RH user manual

Gigabyte

Gigabyte GA-K8VT800-RH user manual

Gigabyte Z790M AORUS ELITE user manual

Gigabyte

Gigabyte Z790M AORUS ELITE user manual

Semtech SC120 user guide

Semtech

Semtech SC120 user guide

Meridian Innovation MI0801 user manual

Meridian Innovation

Meridian Innovation MI0801 user manual

EPOX LX370Y user manual

EPOX

EPOX LX370Y user manual

manuals.online logo
manuals.online logoBrands
  • About & Mission
  • Contact us
  • Privacy Policy
  • Terms and Conditions

Copyright 2025 Manuals.Online. All Rights Reserved.

Quick Installation Guide
PICO-APL3-SEMI
This document will guide you through
the basic installation process for your
new PICO-APL3-SEMI.
PICO-APL3-SEMI
Item Description Remark/PN
1
PICO
-APL3 board MB
2
Top Chassis
M1APL30010
3
Bottom
Chassis M1APL30020
4
Heatsink
M16SEMI020
5
Accessory kits
Power Button Cable x1
1709080102
Screw.M3. Black x8pcs
S1D3004031
Screw.M3
Nickel x4pcs S1D5106010
Parts
2 3 41 5
PICO-KBU4-SEMI Quick Installation Guide
Install Guide Steps
Step 1: On the heatsink, remove the three plastic coverings as shown.
Step 2: Place the top chassis onto the heatsink. Note the orientation of the chassis with the heatsink. Secure with
four black screws.
Step 3: On the PICO-APL3 board, remove the nut and washer from the power input port.
1
Step 4: Insert the PICO-APL3 board into the
chassis assembly with the processor side toward
the heatsink. DO NOT place the CMOS battery
between the board and heatsink.
Step 6: Thread the power button cable through the hole for the power button. Plug the cable into the front panel
header (CN53 in user manual). NOTE: The white dot indicates PIN 1 connector, make sure the connector is
properly aligned. Next, gently push the power button in until it is secure (you will hear a ‘snap’). Be careful not to
tangle the power button cable with the CMOS battery cable.
Step 5: Check that the I/O ports are properly
aligned. Secure board with four nickel screws.
Step 7: Peel the backing off of the tape on the CMOS battery. Gently press the battery onto the PICO-
APL3 board to secure it.
Step 8: Attach the bottom chassis by first lining up the right side, then swivel the chassis into place.
NOTE: the bottom chassis does not slide directly on, it must swivel into place as shown in the figure.
Step 9: Ensure the bottom chassis is properly lined up and attached. Use black screws to secure, two
screws on the bottom and one screw on the left and right sides of the chassis.
Step 10: Replace the washer and nut for the power input port.